|
Arado Ar 234 B-2/S3
Fly Model, 1/32 scale
S u m m a r y : |
Catalogue Number: |
Fly Model Kit No. 32025 - Arado Ar 234 B-2/S3 |
Scale: |
1/32 |
Contents & Media: |
Plastic and mutimedia parts. See body text for full details. |
Price: |
Available from Fly Model for around £70.90 |
Review Type: |
First Look |
Advantages: |
Excellent moulding; high level of detail; accurate; great subject. |
Disadvantages: |
None noted. |
Conclusion: |
Highly Recommended. |
Reviewed by
James Hatch

Kitty Hawk's 1/32 scale OS2U Kingfisher
will be available online from Squadron.com
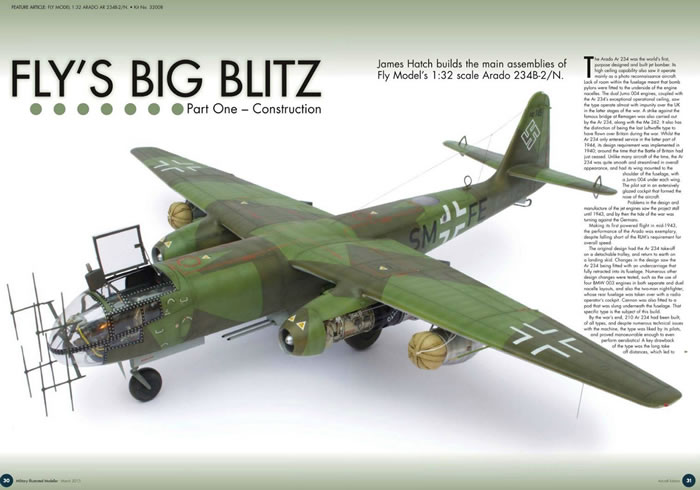
The Arado Ar 234 was the world's first, purpose designed and built jet bomber. Its high ceiling capability also saw it operate mainly as a photo reconnaissance aircraft. Lack of room within the fuselage saw bomb pylons being fitted to the underside of the engine nacelles. The dual Jumo 004 engines and operational ceiling saw the type operate with almost total impunity over the UK in the latter stages of the war. It has the distinction of being the last Luftwaffe type to have flown over Britain during the war. Whilst the Ar 234 only entered service in the latter part of 1944, its design requirement was implemented in 1940; around the time that the Battle of Britain had ceased. Unlike many aircraft of the time, the Ar 234 was quite smooth and streamlined in overall appearance, and had its wing mounted to the shoulder of the fuselage, with a Jumo 004 under each wing. The pilot sat in an extensively glazed cockpit which formed the nose of the aircraft.
https://www.youtube.com/watch?v=9O_jcI4fQVw
Problems in the design and manufacture of the jet engines saw the project stall until 1943, and by now, the tide of the war was turning against the Germans. Making its first powered flight in mid-1943, the performance of the Arado was exemplary, despite falling short of the RLM's requirement for overall speed. The original design saw the Ar 234 take off on a detachable trolley and return to earth on a landing skid. Changes in the design saw the Ar 234 being fitted with an undercarriage which fully retracted into its fuselage. Numerous other design changes were tested, such as the use of four BMW 003 engines in both separate and duel nacelle layouts, and also the two-man night-fighter, which saw the rear fuselage being taken over with a radio operator's cockpit. Cannon was also fitted to a pod which was slung underneath the fuselage. That specific type is the subject of this review. By the war's end, 210 Ar 234 had been built, of all types, and despite numerous technical issues with the machine, the type was liked by its pilots, and proved manoeuvrable enough to even perform aerobatics! A key drawback of the type was the long take off distances, which led to accidents. To counter this, RATO (Rocket Assisted Take Off) units were suspended under each wing. When jettisoned, these fell back to earth on a parachute which was fitted to their nose.
The Kit
Has it really been four years since we first say the initial Ar 234 kits from Fly? I built one of the initial releases for Military Illustrated Modeller, and I have to say that it was one of the most pleasurable projects that I’d tackled in a while.
It was therefore very pleasing to see that Fly has slightly altered these kits in terms of parts and/or decals and given us two new releases with some really nice and unusual schemes. At the moment, if you want to build an Ar 234 in injection plastic, Fly’s kits are the only game in town. There is a superb and accurate resin kit in 1:32, from MDC and mastered by Radu Brinzan. If whole resin kits frighten you, or you just don't like the medium, then Fly Model's latest releases will positively delight you. In this review, we’ll take a look at the Arado Ar 234B-2/S3.
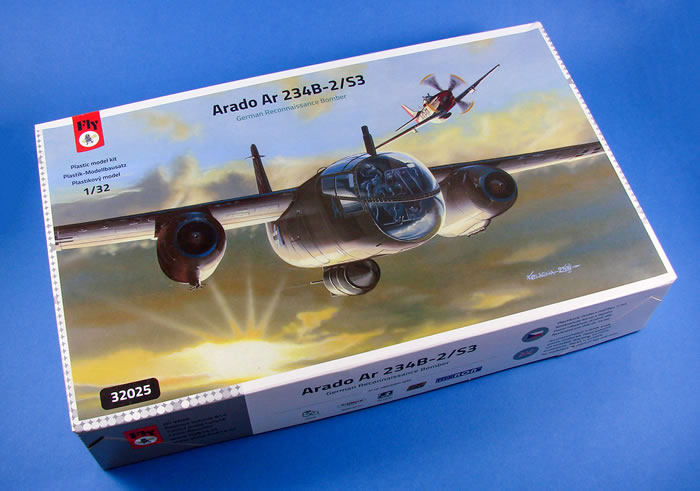
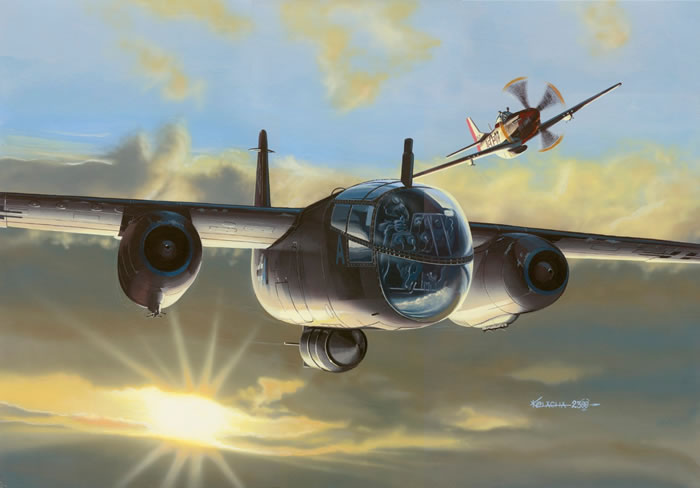
The first thing that might surprise you is how small the boxes are for these multimedia releases. Fly Model produce low pressure, injection moulded kits which incorporate resin and photo etch parts. I'm no stranger to their releases, and I have built their Bachem Ba 348V 'Natter', Hurricane, Westland Wessex and original Arado kit, two of which have featured on the cover of Military Illustrated Modeller. Fly's packaging and artwork is very attractive, even if the box itself isn't a super-glossy production as we see from the likes of Hasegawa etc. A rather nice image of a an Ar 234 being tailed at duck by a P-51D, adorns the lid, and the under-belly bombload is clearly seen, as are the engine-mounted bomb racks.
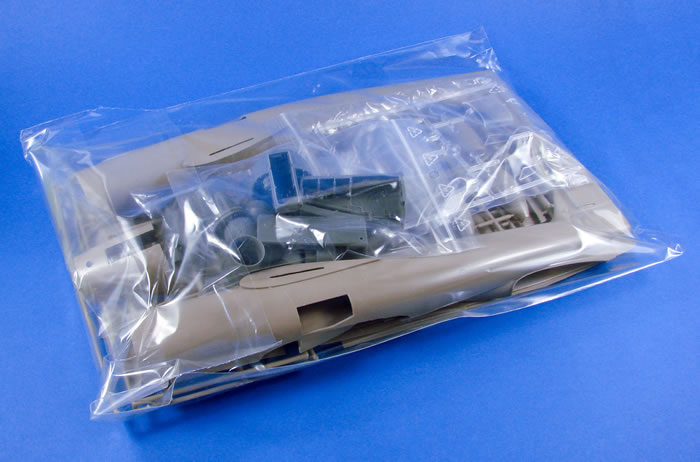
Inside the box, there are four tan/fawn coloured styrene sprues which have been packaged into a single re-sealable sleeve, including three bags of resin parts too, and an individually sleeved clear sprue. Unlike the other Ar 234 releases, this has a separately packed part which extends the length of the forward fuselage. Plastic in low-pressure injection kits does tend to be a little softer, of course, and my sample has some very minor scuffing that will need to be buffed out.
Also included is a comprehensive sheet of decals, a photo etch fret, some wire and cord, and an A5 instruction booklet. The sprues themselves don't have ID letters, with the part numbers starting with the fuselage sprue, and running in sequence to the last sprue. For the sake of this review, we'll still call them 'A' and 'B' etc. There has been discussion on the release of the original Fly kits with regards to accuracy, and what some perceive as issues, but if you want to read those, feel free to Google it. For me personally, I don't know enough about the Arado to comment on some details. Having already built the original release, all I can say is it looks just like the Ar 234 I know and was great fun to build. I'll leave any accuracy issues for another man on another day.
Sprue A
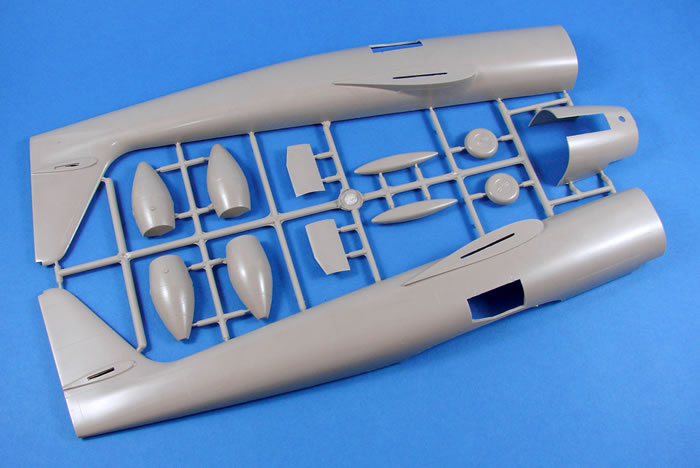
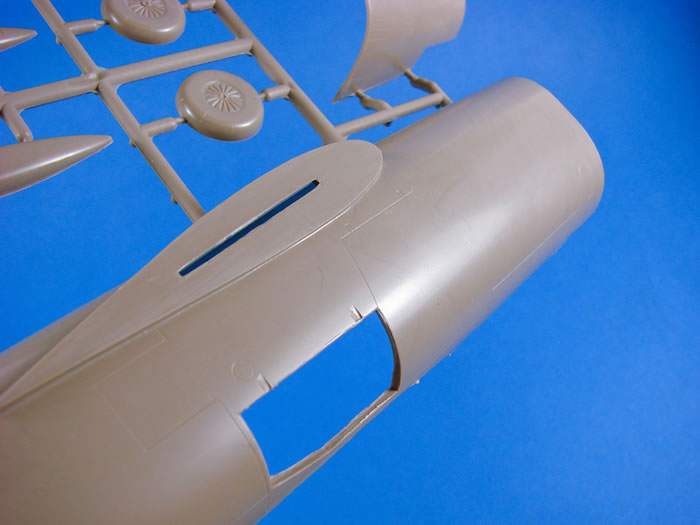
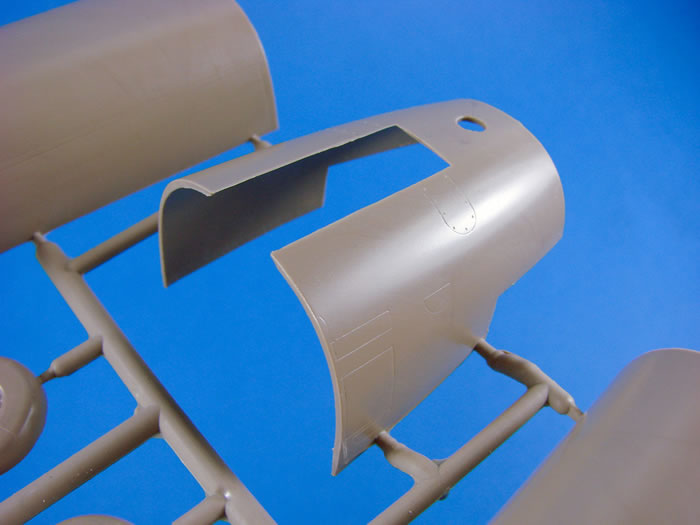
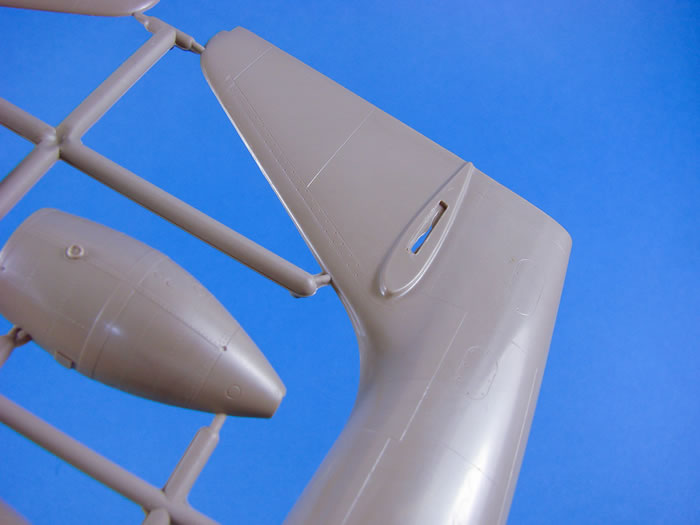
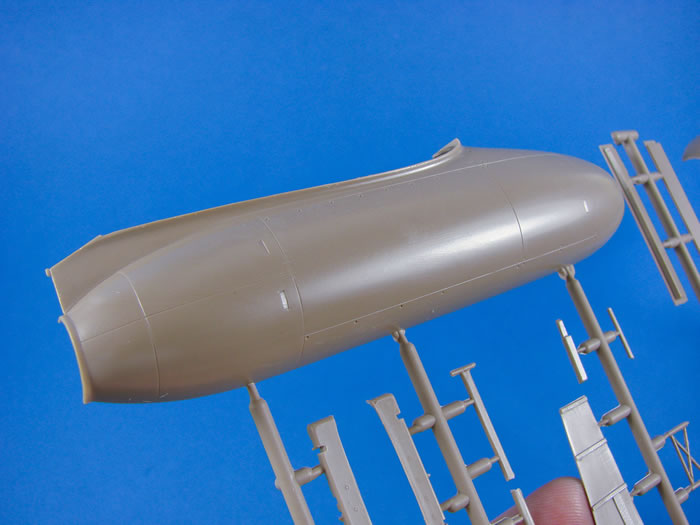
For the first time, we seen the unmistakable lines of the Ar 234. Whilst the fuselage is conventionally split into halves, the forward nose section is a single, separate piece. This will allow the cockpit to be built and installed before the nose is married to the fuselage. I give Fly real credit for just refined the surface detail is on this. Panel lines are extremely subtle. You feel that they will only just hold a wash. They are also evenly scribed, with perhaps the slightest loss of detail around the underside seam. This is no issue as I'd only have to replace the detail once I've sanded back the joints. As is correct, the forward main gear door is moulded closed, with only the strut door of course being an open area. A little flash will need to be removed, but nothing major. External surface detail is quite sparse, which is probably correct for the type, but there are a number of neatly engraved access ports, and some fastener detail. The rudder is also separately moulded, and the wing slots into a quite thin slot on the fuselage shoulder. As with the rest of this kit, there are no locating pins between parts. This is very common for short-run kits.
The RATO units are included here, moulded as halves, and with some pretty neat filler port and strap detail. These parts are for the actual RATO unit, and not the accompanying parachute. The latter are included as resin parts.
Other parts on this sprue include the two-part nose-wheel, main gear doors, and also the bomb pylon mounting units which fit to the underside of the engine nacelles. I do think the wheel looks rather simplistic and will need a little work to bring it to scratch. The inside of the gear doors are also devoid of any real detail, and could use a little work.
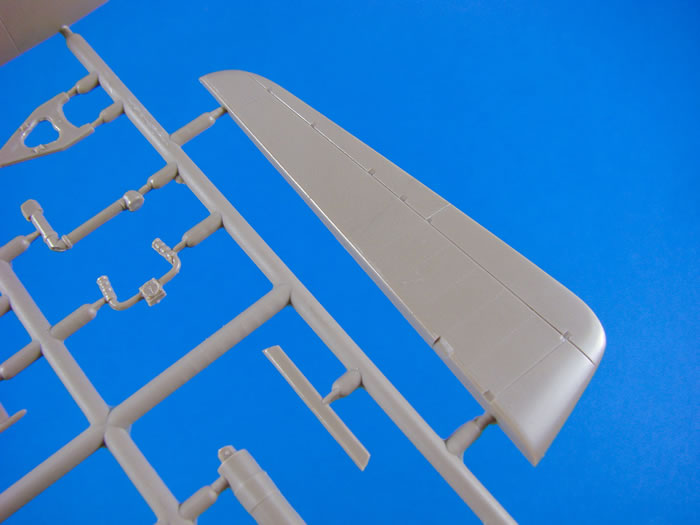
Sprue B
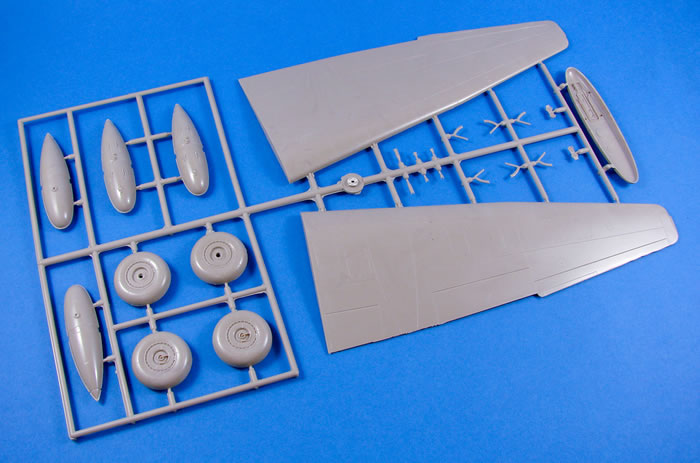
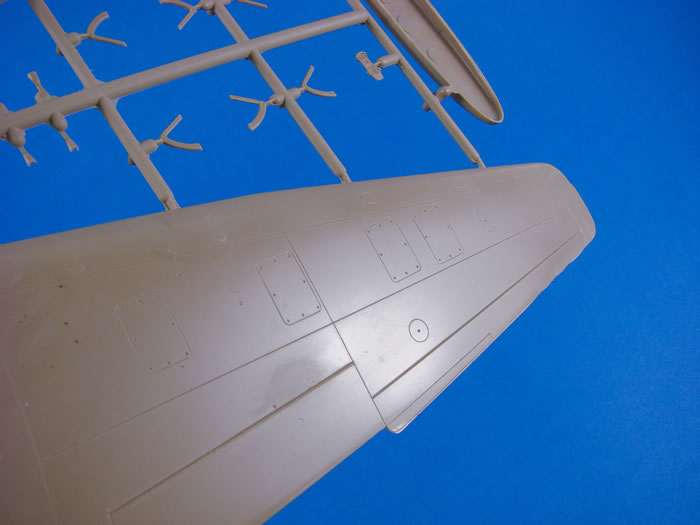
Both of the wing undersides are moulded here, with integral ailerons and landing flaps. I would quite like to have at least the landing flaps as separate parts, but again, this is usually the approach with short-run kits, and it's only a minor criticism. Surface detail really is excellent, with numerous, fine panel lines and access ports. Also scribed are the external lines which indicate where the Jumo 004 nacelles will be fitted, minimising guesswork.
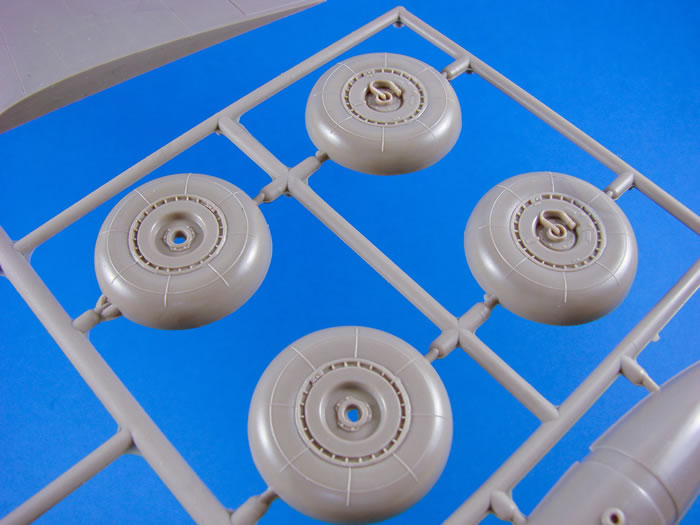
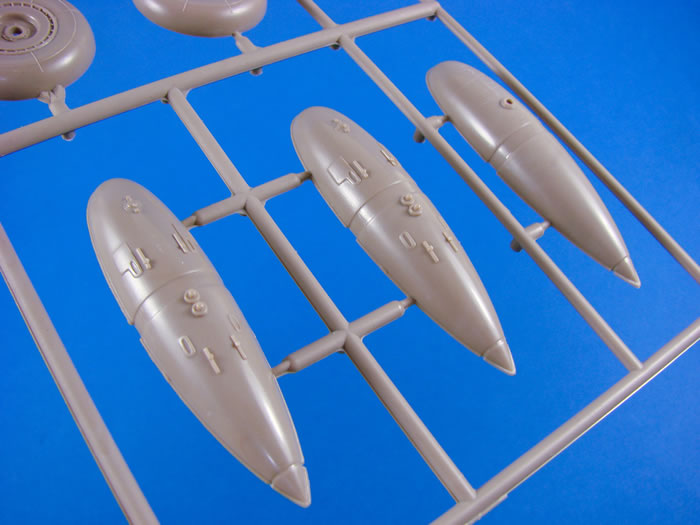
This aircraft, whilst capable of carrying a bomb, doesn’t have one supplied. That is available separately, and I’ll post info on that as soon as I have one here. However, the pylons are occupied with fuel drop tanks, should you wish to fit them. The tanks are moulded as halves and look every bit as good as those you'll see in conventional, contemporary kits. Detail includes hard mounting points and fillers. The main wheels are also far prettier than the nose wheel, with excellent internal and external hub detail which looks very convincing. Fine raised lines radiate from the centre of the tyre, outwards. Again, this looks very good. Wheels, however, aren't weighted, so you'll need to solve that issue yourselves.
Other parts on this sprue include the recessed, belly weapons mount which is superbly detailed, engine nacelle breather inlets, and also the rudder and elevator counter-masses.
Sprue C

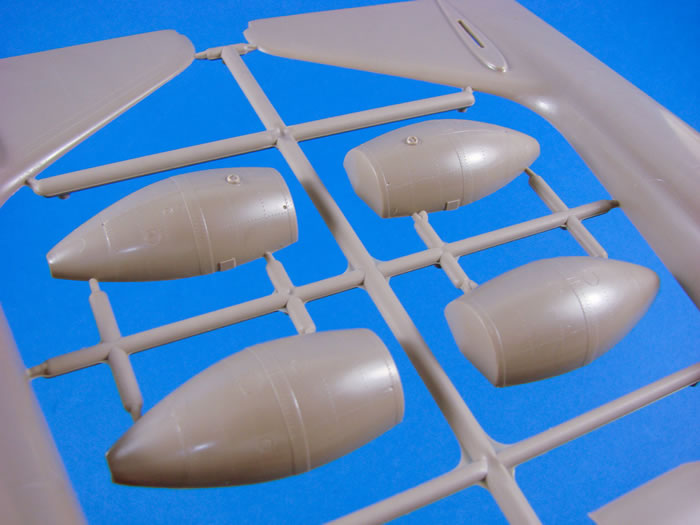
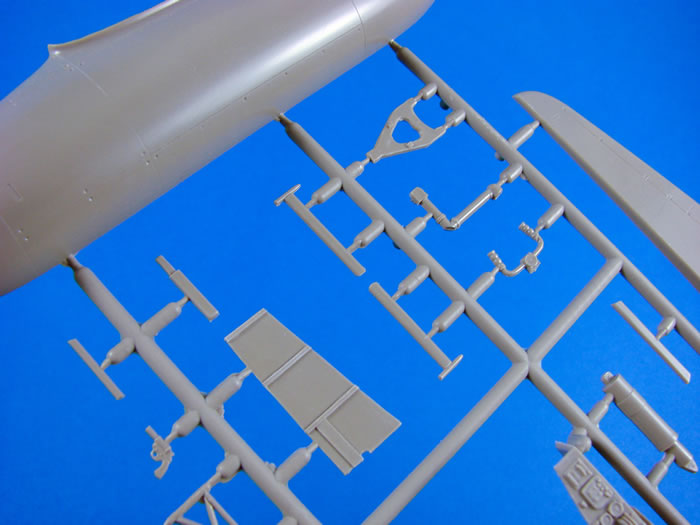
Engine nacelles are supplied in halves, and into these will go a resin intake, and a resin exhaust which will be supplemented by the variable position 'onion' that controls thrust. Fine panel lines and fasteners adorn the exterior of the nacelles, and internally, a small raised step helps to locate the internal resin parts.
A two-piece rudder is included, which is the only real part of the exterior to exhibit any rivet lines.
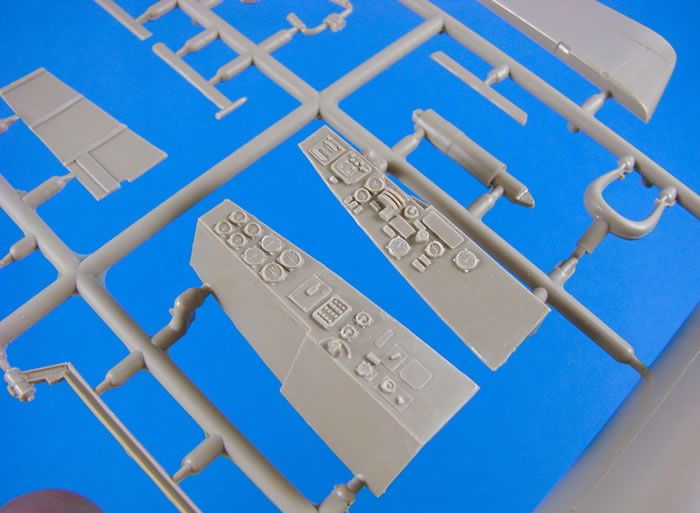
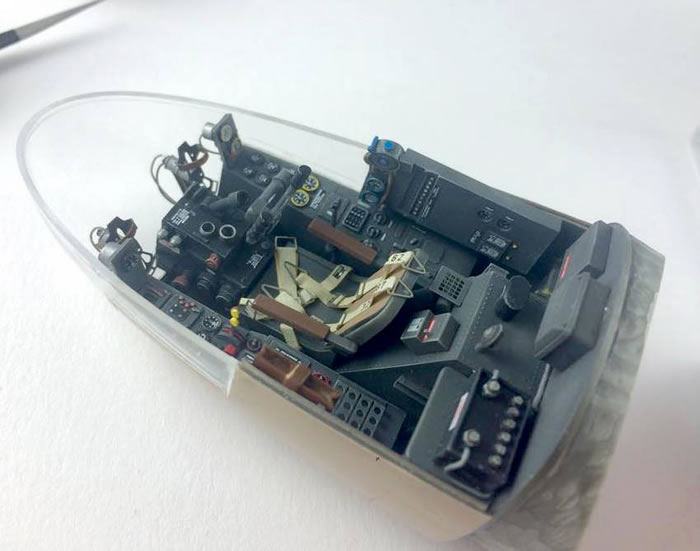
Until now, we haven't seen any cockpit parts, but that is because the main parts are produced in resin. However, there are still a number of injection moulded parts on this sprue. One of these is the instrument panel. My only qualm with this is that it has moulded instrument face detail. In actuality, that detail is very good, if not better than many contemporary kits, but decals are also supplied for the faces, and raised detail makes them a little tricky to successfully attach. I do think the panel itself is good enough not to use the decals, but should you wish to, you could easily scratch-build a new panel. Having a glazed nose, the rear of this panel is very visible, and Fly include a series of resin instrument bodies that will be seen here. Just wire them up!
For me, the cockpit is one of the really attractive areas of the Arado and would be either a deal maker or breaker. Fortunately, Fly have done an amazing job of this key area, and the side consoles are testimony to that. Detail is excellent, and there is plenty of it too. This will also be enhanced further with photo-etch levers etc. These are very busy areas of the pit! Numerous other cockpit details can be found here, including the rudder pedal slide mount rods, highly detailed control stick, and other ancillary instrumentation panels. Two internal side wall parts are also included.
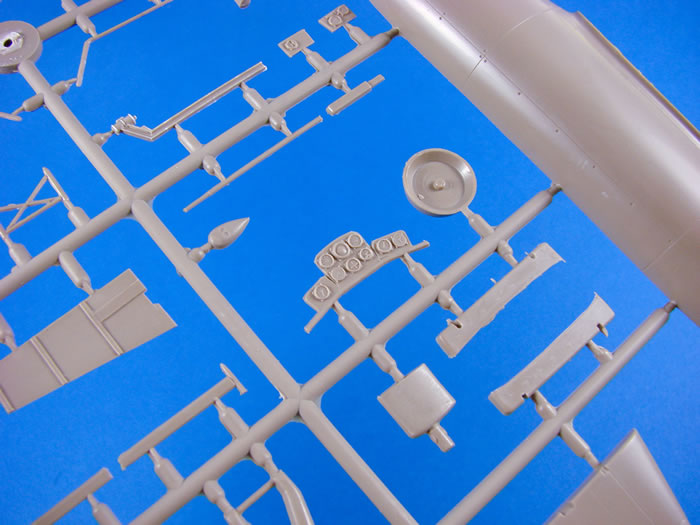
The undercarriage parts are to be found here. Main strut gear detail is quite simple, but certainly sharp, and the various struts and forks are certainly more than passable. Other parts include the fuel tank/bomb pylons, Funkgerat loop base, and nose gear doors. Again, I'd suggest a little extra detail work within the doors.
Sprue D
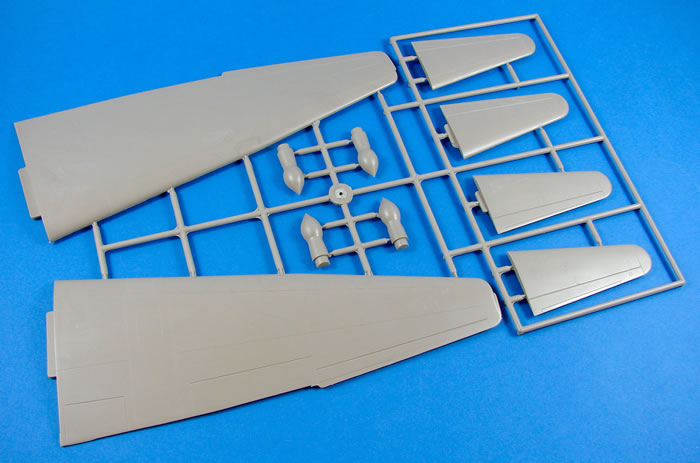
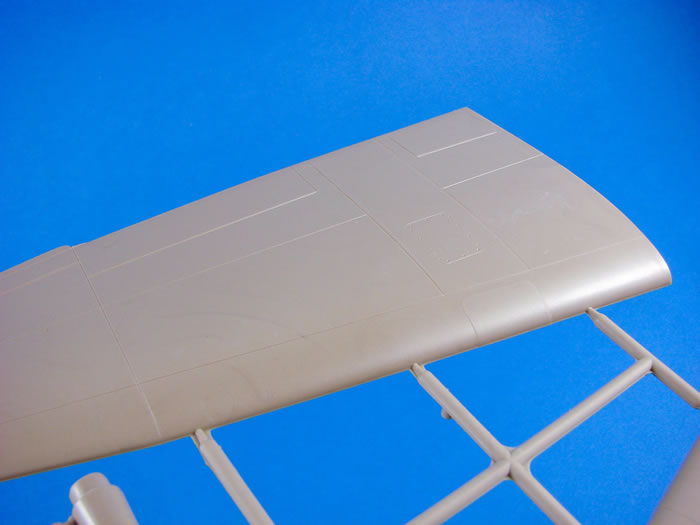
Here we have the upper wing panels, exhibiting the same refined levels of detail as the rest of the airframe. When I built my original Arado, I used the MDC flush rivet tool on the airframe, and I think the result really did transform things, especially in the bare wing panel areas.
Those Jumo 004 'onion' parts are found here, moulded as halves. These are simple looking by design. I can tell you that if you have a spare Jumo sprue from a Trump Me 262, the engine will fit nicely in the nacelles.
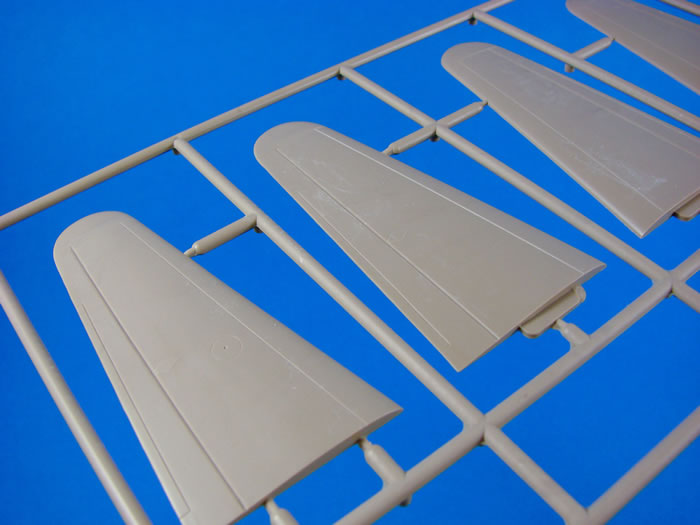
Stabilisers are moulded with integral elevators. This is a bit of a shame if you wished to pose them. I may do that for my own build. Detail is supplied by means of finely engraved panel lines.
Sprue E
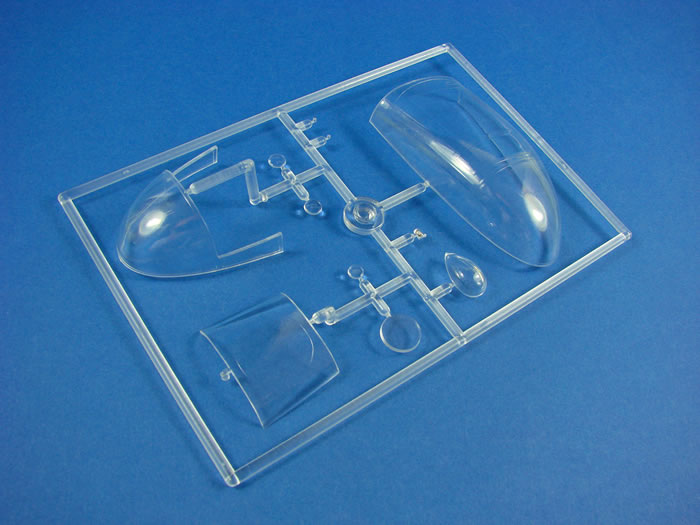
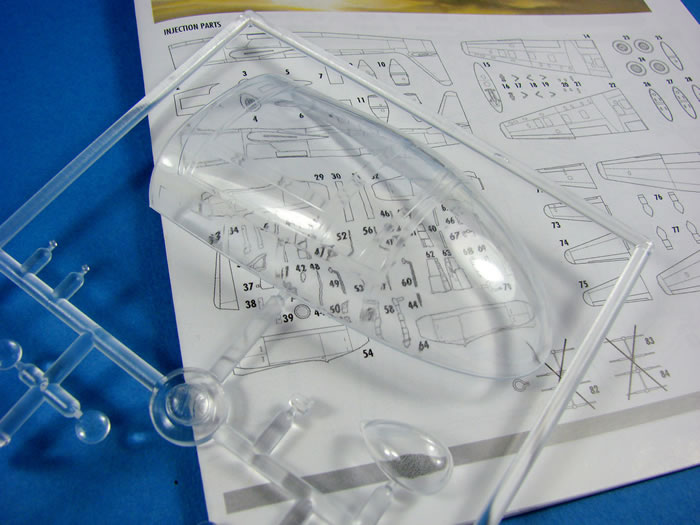
Again, clear parts are another area where low-pressure injection manufacturers can, and often do, fall flat with. I have always found the clear parts in Fly kits to be very good, and these are no exception. This clear sprue contains ELEVEN parts, but only eight will be used. The forward canopy comprises two of these. Framing is very good, and so is clarity. I used to recommend dipping canopies in Klear to help enhance clarity, and level any imperfections. With this canopy, Klear (or similar) could be doubly important because the black framing with the bolts is supplied as a series of decal strips, in the same manner as the MDC kit. You may want to paint the frames and then attach the decals, but that would be pointless. You can simply apply them directly to the Klear'ed part.
Ok, I do have another criticism here. With such a detailed cockpit, it would have made sense to mould the entrance hatch as a separate part, allowing it to be posed in an open position. Fly haven't done this, so when I built mine, I drilled this out and make a new door so that I could pose it open, allowing for a cockpit view.
Plastic Summary
I don't really have any complaints about the styrene in this kit. There is a little flash and a few seams to remove, but there are no visible sink marks or other production defects. There is a lack of locating pin presence, but as I have said, this is very typical of kits of this type.
Resin
There are three bags of resin parts here, providing the real detail in this kit. All resin parts are produced by Artillery and are cast in medium grey resin. Artillery do some great work, and these parts are no exception. Casting is flawless, and mastering is very detailed. Let's take a closer look, bag per bag.
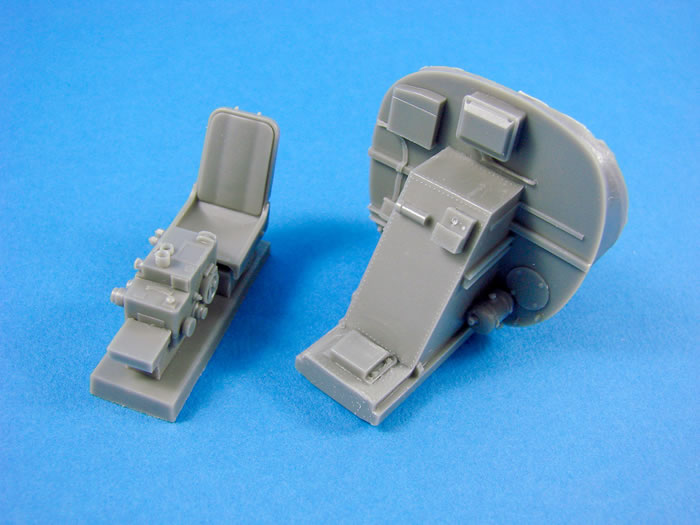
The first zip-lock wallet contains a good few chunks of resin. I say chunks because there are some quite hefty parts here. One of the largest parts forms the rear cockpit bulkhead with its associated detail (wiring looms, tanks, and junction boxes), including an integral nose wheel bay which internally forms the section to which the pilot's seat fits. The wheel bay is chock full of pipework too, and I'm sure will present more than just a little difficulty in access for painting. A large casting block exists to the rear, but this should be kept in place due to it housing the wheel bay.
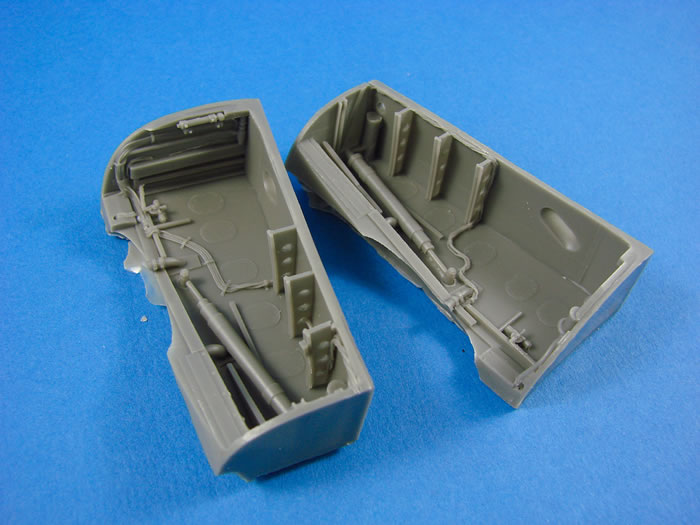
Port and starboard main gear bays are excellent. The box structures feature the various frames and constructional elements, as well as the row of access plates, numerous wiring looms and gear actuator jacks. Test fitting these within the fuselage shows that there's nothing to worry about. The location of them is pretty obvious. A little thin CA to initially fit, followed by a bead of epoxy, should do the trick nicely.
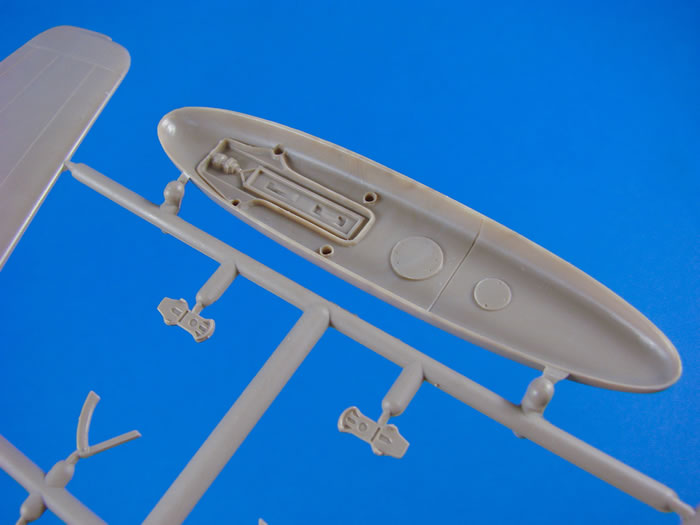
A single casting block contains the bomb sight and pilot seat. Fantastic detail throughout, as you can see from my photo.
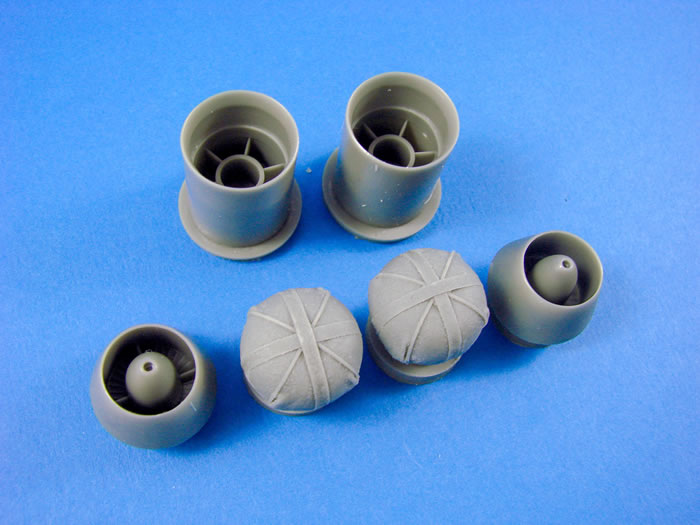
The other parts in this bag are the front and rear Jumo engine faces, with superbly sharp fan faces, and also the parachute packs for the RATO pods. These have been made to look like folded fabric, and really are very good. You'll need to employ some craft shading and highlights to compliment the detail. A casting block will need to be removed from the rear.
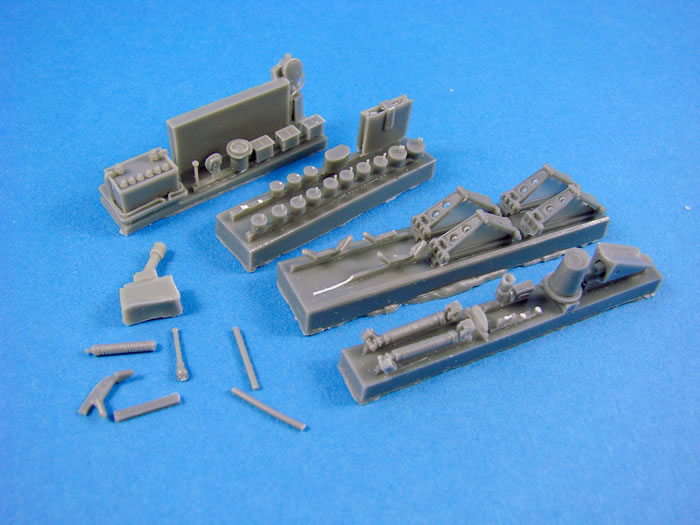
The second resin bag contains more casting blocks which contain around another FIFTY parts. These include the numerous instrument bodies for the rear of the IP, oleo scissors, various cockpit parts (battery, map case, fuse board and oxygen regulator etc.), undercarriage parts etc. Some parts here have broken from the casting blocks, but the parts themselves are thankfully intact.
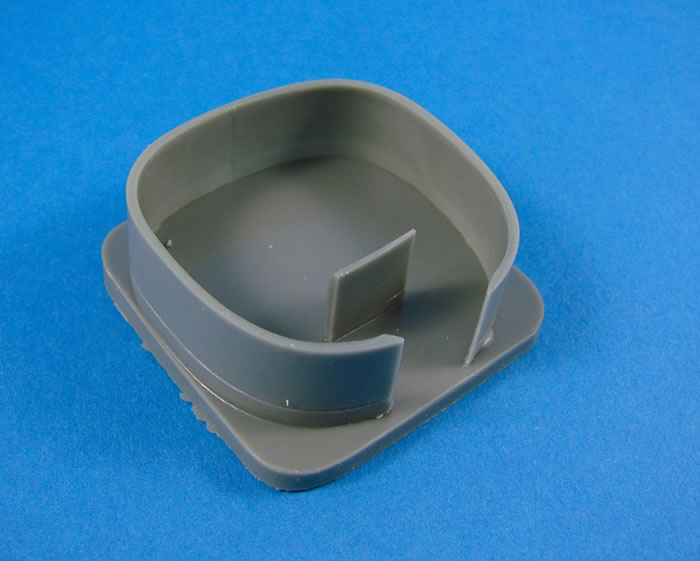
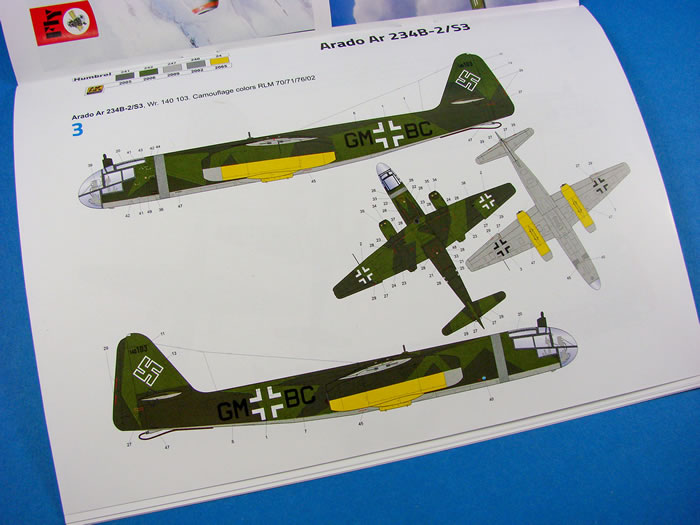
One more bag contains a single part. This is to extend the length of the fuselage slightly, just to the rear of the cockpit. I’m thinking that the one scheme that uses this part, was perhaps assigned to an experimental unit, as the nacelle undersides are painted in RLM04 Yellow.
Photo-Etch
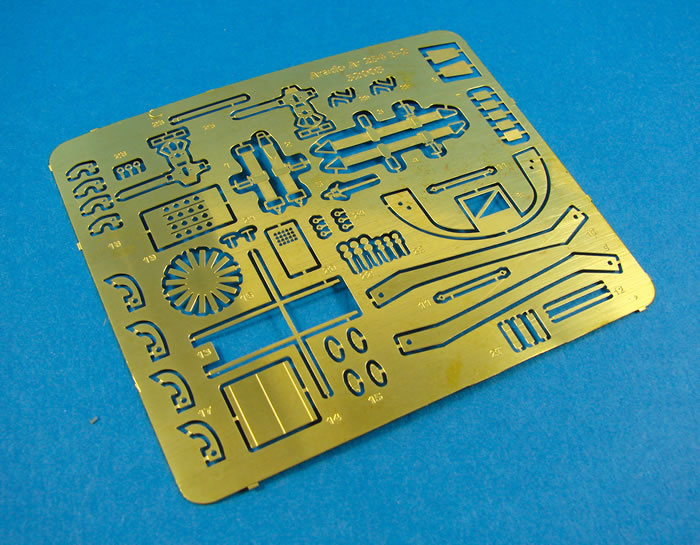
This etch fret contains one full sets of seatbelts, and whilst I admit that these will be very useable, I think I would opt for the more photo-realistic HGW option. This fret also contains the forward edging for the cockpit consoles, console levers, rudder pedals etc. Other parts include control surface actuators and the dipole array for the fuselage spine. The PE is superbly made, with small tags holding all parts in place.
Errata
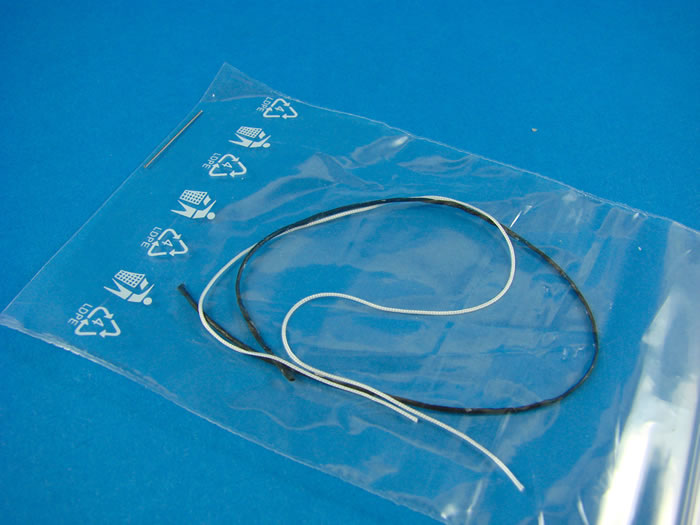
A small bag contains two pieces of cord of different diameters, and also a short length of rigid wire. I'm sure the cord is partly for the cockpit, with a length being used for the drag chute cable. I'm unsure what the wire is actually for, but it can be used to pin some key parts of resin/plastic to other main components, giving a little extra rigidity.
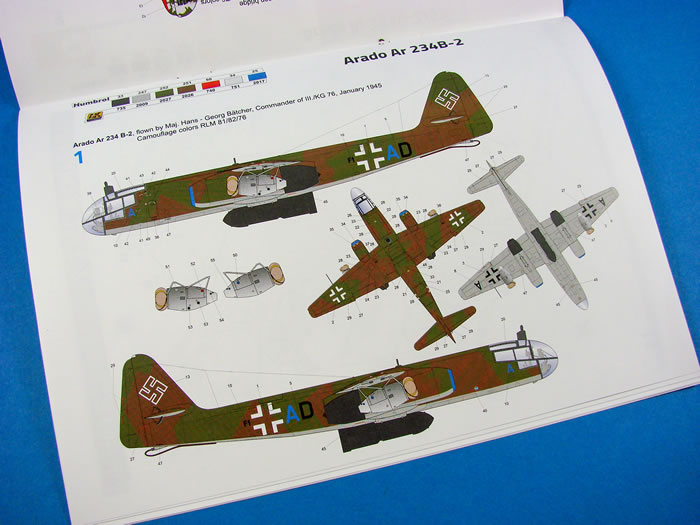
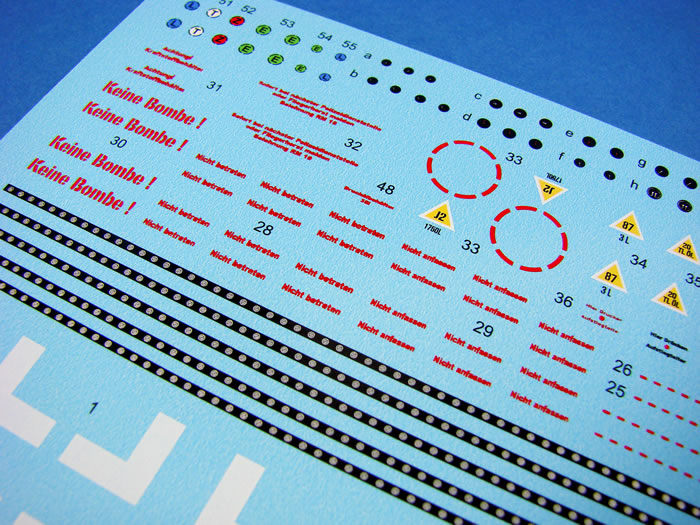
Marking Options
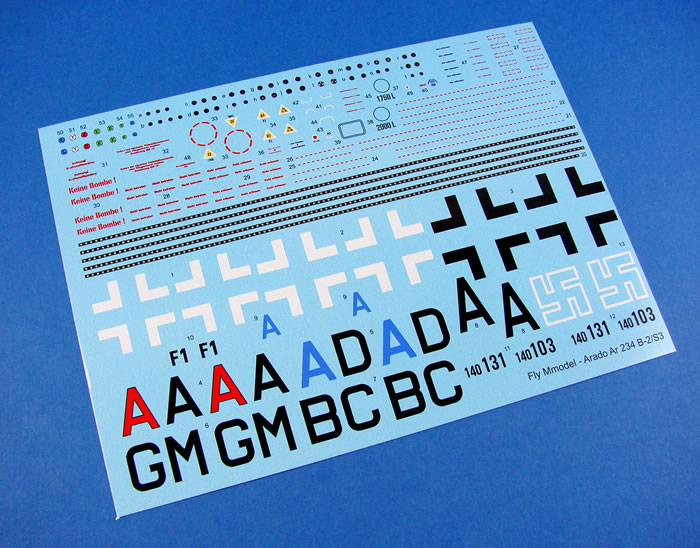
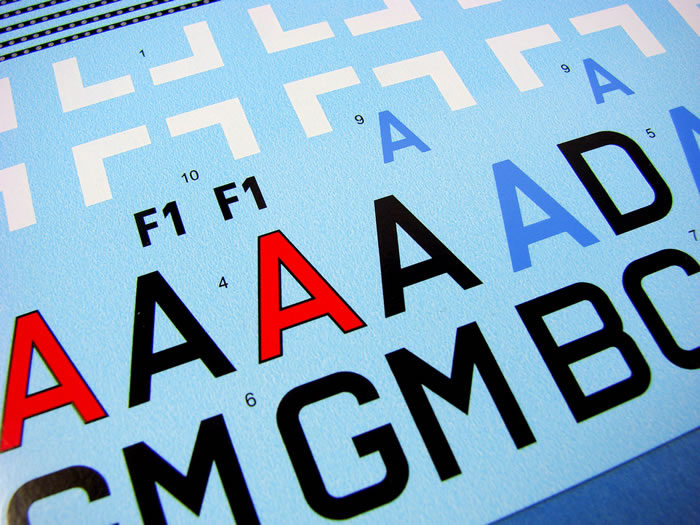
A single decal sheet is included, which contains both national markings, codes and serials and also a full suite of stencils and dashed walkway lines. As I have mentioned, the canopy framing lines are supplied as strips which you'll need to cut to length. Cockpit instrument decals are also supplied, but I used the superior Airscale decals on my previous build. Whereas the original release had awkward multipart swastikas, this new kit has the complete symbol printed, so it’ll be far easier to apply.
Decals are thinly printed and contain minimal carrier film. The colours are solid and authentic, and registration is perfect. You could wish for no more.
A glossy A4 sheet depicts the three schemes, and these are:
-
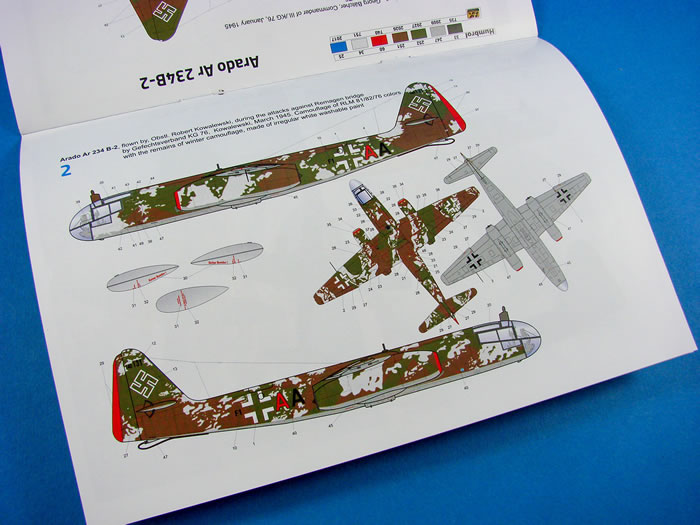
Arado Ar 234B-2, flown by Major Hans-Georg Bätcher, Commander of III./KG 76, January 1945
-
Arado Ar 234B-2, flown by Obstl. Robert Kowalewski during attackon Remagen Bridge by Gefechtsverband KG 76, March 1945
-
Arado Ar 234B-2/S3, W.Nr.140103
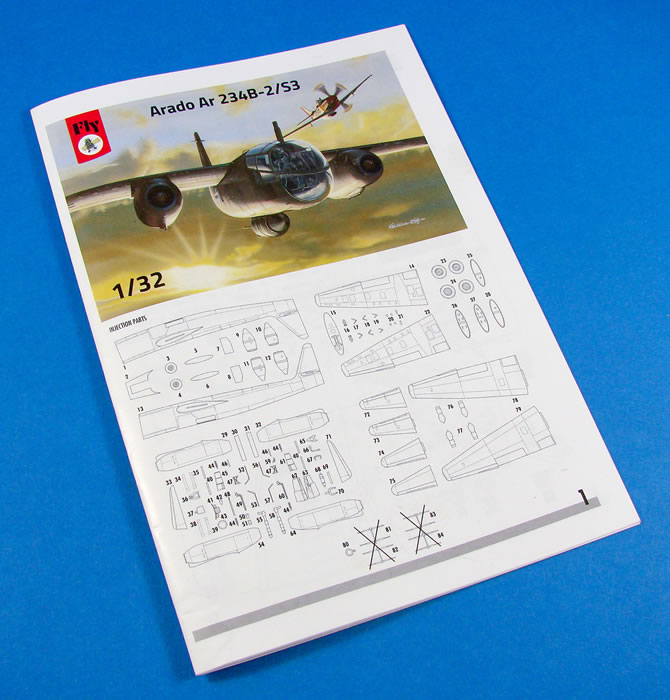
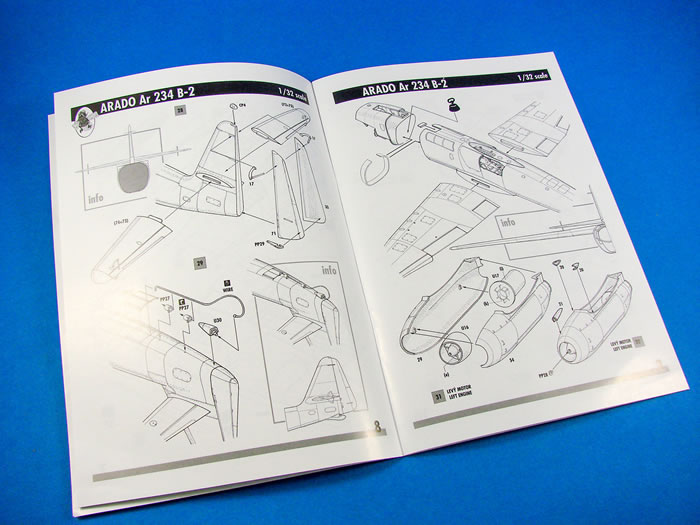
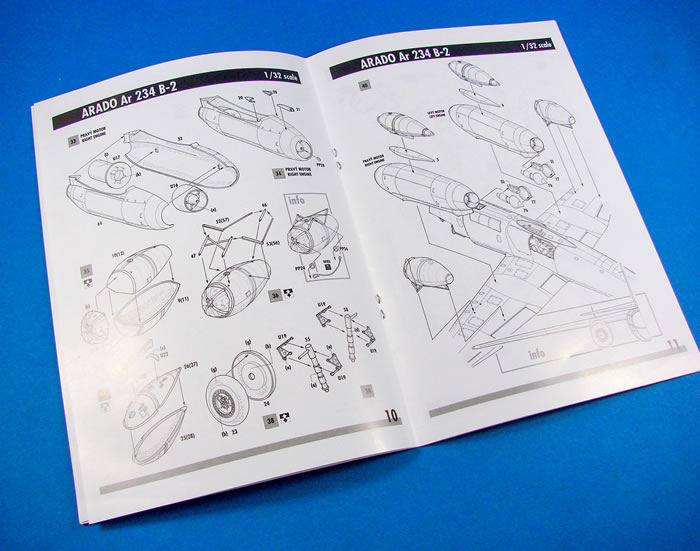
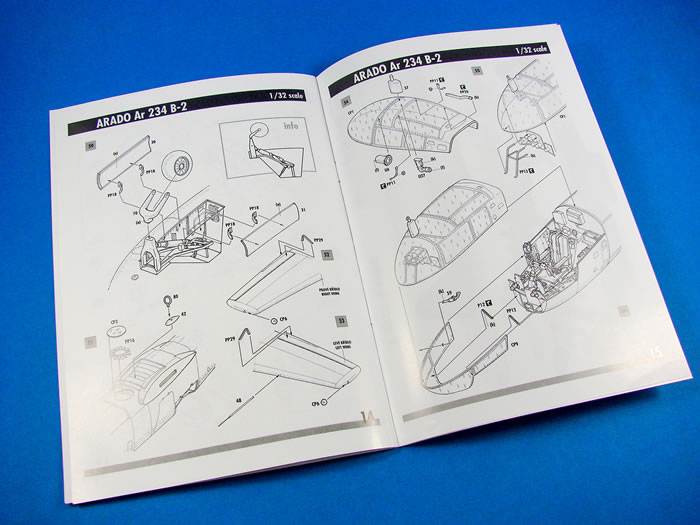
Instructions
This is a 20-page A5 manual, printed in black and white, with shaded line drawings for stage illustration. All looks very easy to follow, and very comprehensive. You will need to study things closely to decipher what is plastic, etch or resin. Colour information is basic, so please check your references. I still think the manual is pretty clear about construction, and you should find no problem with it.
It’s great to see this model released back to the market in this incarnation, with the subtle change and new schemes. I can only speak from personal experience when I say that it builds up beautifully into a quite a large and convincing replica of this dedicated jet-bomber. This is one where you can really go to town with extra details, such as riveting etc. but the resin parts really do help to create a great kit, straight from the box, with a gorgeous cockpit area too. Go treat yourself. I guarantee you’ll enjoy this project!
Thanks to Fly Model for the sample.
Review Text Copyright © 2018 by James Hatch
Page Created 25 September, 2018
Last updated
25 September, 2018
Back to HyperScale Main Page
Back to Reviews Page

|
 Home
| What's New |
Features |
Gallery |
Reviews |
Reference |
Forum |
Home
| What's New |
Features |
Gallery |
Reviews |
Reference |
Forum |