|
Tempest Mk.V
Engine Cover Panels
for Special Hobby kit
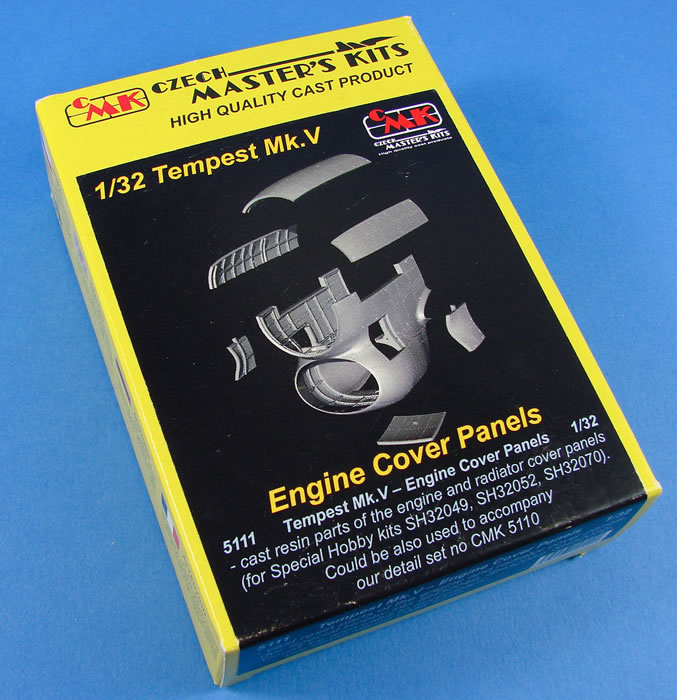
CMK, 1/32
Reviewed by
James Hatch

Special Hobby's 1/48 scale Model 339-23 Buffalo will be available
online from Squadron
If you’ve not already taken a look at our review of the Tempest V Engine Set, designed for Special Hobby’s rather sweet kit, then click HERE to get an idea of what this set should accompany.
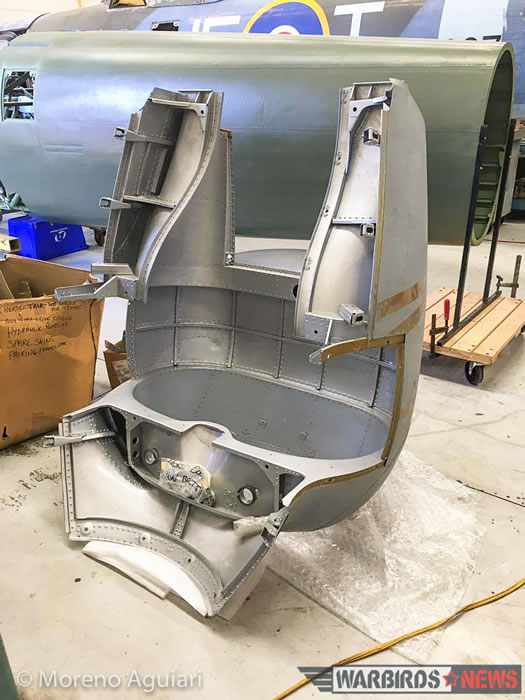
Whilst it’s entirely feasible to build the engine and Tempest without the cowl parts, you will of course need the engine if you plan to buy this product. As far as I know, Special Hobby has no plans (as yet) to release the two sets together, but maybe watch out and keep your eye on their schedules.
Cowl photo courtesy of Warbirds News
This new release (still showing as ‘coming soon’ on their website on 26-2-18) comes in one of CMK’s familiar yellow, flap-opener boxes that are typically used for their more parts-numerous detail sets and carrying a label which shows the contents in their CAD form.
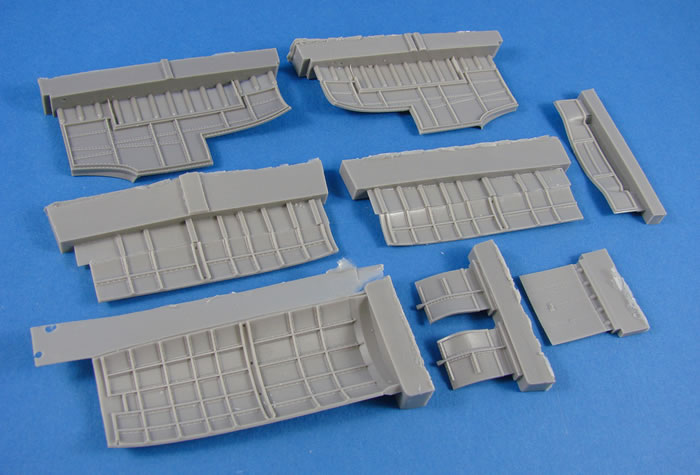
Inside this box there are two bags of light grey resin, and a folded A5 instruction sheet. One of these re-sealable bags contains a single resin piece; namely the large, lower chin cowl that also forms the lower circumference of the spinner area. This part is connected to its casting block at the front, with thin resin webs and the fill veins attaching themselves to the spinner and radiator opening part. This was the best way that such a complex part could be cast and there really shouldn’t be any problem with its removal.
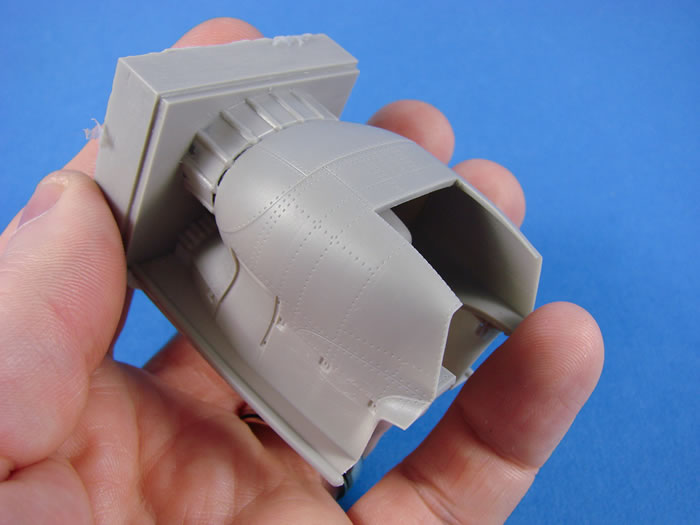
A deep tongue extends from the casting block, into the void within the main radiator housing. This simply appears to be a mechanism to give some rigidity to the mould when casting. The detail on this part is incredible, with all constructional elements within being minutely captured. It does appear that this isn’t at all designed to be fitted to the host model unless you seriously modify the engine set.
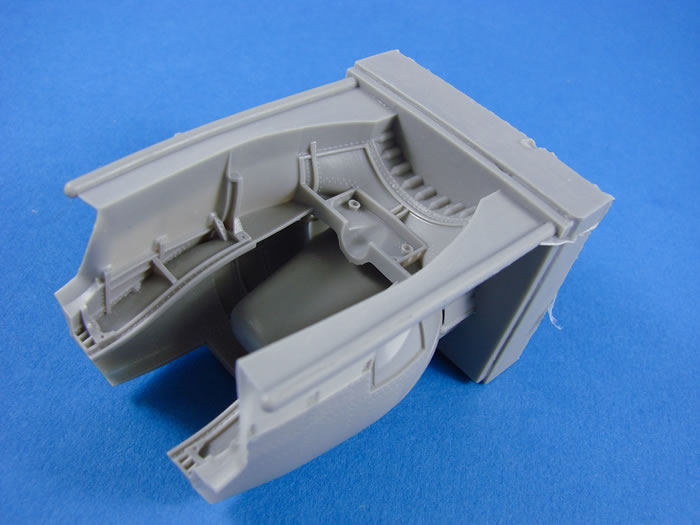
I get the impression that this is designed to be used to display alongside the main model in a form of maintenance diorama, or simply to show the cowls on the model’s base. Externally, the detail is representative of the host kit, with fine panel lines and riveting. You will need to be super-careful when it comes to the protruding cowl fastener locations, as these look fairly fragile.
Our second bag of resin contains nine further pieces which comprise the upper, side upper and side cowl panels, as well as the small panels for the glycol tank access, the radiator shutter and the lower rear panel which meets up with the bully of the Tempest. As with the other part, the interior details are faithfully recreated, including the strengthening strip rivets, which nicely align with the external rivet details, which are of course tiny divots as per the host airframe. Casting blocks are connected with those thin webs and pour veins and will be easy to remove.
There’s not really much to say about the instruction sheet, save for the fact it identifies the various panels. Curiously, it shows the various panels being assembled into a hollow sheel, which of course isn’t how you’d pose these. Some text does say, however, that these would just be scattered around whilst the Tempest is in maintenance.
Resin casting quality is as good as it gets, with no flaws or distortion in these thin panels.
Accompanying the engine set, this is a set that is most worthy of your inclusion when your Special Hobby Tempest V hits the workbench. I’m not too good at dioramas, so would simply opt to place these adjacent to the completed model. The interior structures are interesting and worthy of the not insignificant investment that both this and the engine wold cost.
Thanks to MPM / Special Hobby for the
review sample.
MPM
kits are available worldwide through hobby retailers
worldwide
and at
Squadron.com
Review and Images Copyright © 2018 by
James Hatch
Page Created 19 March, 2018
Last updated
19 March, 2018
Back to
HyperScale Main Page
Back to
Reviews Page |
