|
Heinkel He 111P
Interior Set
for Revell kit

CMK, 1/32
Reviewed by
James Hatch

Special Hobby's 1/48 scale Model 339-23 Buffalo will be available
online from Squadron
I struggle to believe that it’s been a whole seven years since I first saw the new-tool Heinkel He 111P kit from Revell. Remember, these were the days before we saw the truly large injection-moulded giants, such as the B-17 from Hong Kong Models, or even their B-25 Mitchell. Revell really were breaking new ground with this and their Ju 88 kit from three years earlier (2008). Revell’s Heinkel He 111 release was quite something, and I remember seeing the parts for the first time, and wondering just how I’d display something of this size! How times change…
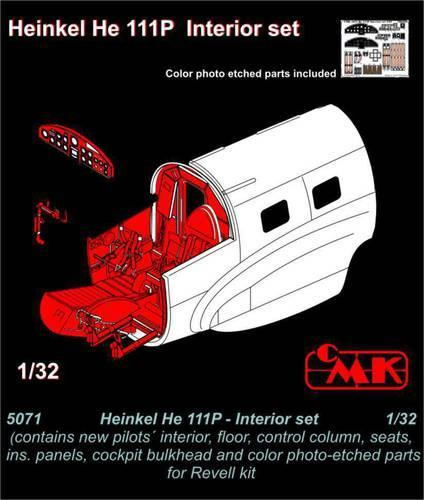
Inside CMK’s familiar yellow and black box, adorned with a sticker with a graphical image of the detail set, are two bags of resin, one fret of colour-printed PE, and an instruction sheet. Unlike Revell’s Ju 88, whose cockpit is excellent out-of-box, the He 111 was always a little lacking, in my opinion, and certainly would benefit from some resin goodies. And here we are!

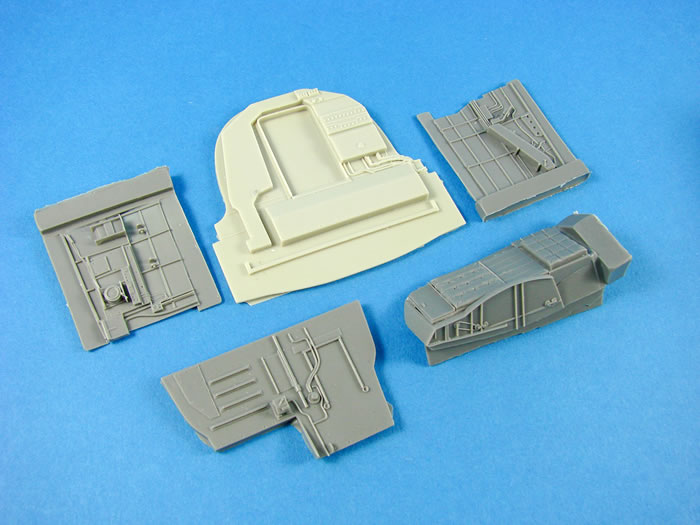
Opening the first zip-lock bag, we are presented with the largest components in this detail set. All of the resin parts are cast in a medium-grey resin, apart from one, and this is the back wall of the cockpit (the largest part in the set). This pale grey part contains the doorway to the bomb bay (blanked off or closed), various trunking/conduit unites and a couple of avionics panels with wiring looms. Lower down is a recess into which the floor slots. As this is a replacement for the kit part, it will need to be thinned a little from the rear, and I think opening up the door would be a nice touch, especially if you have fitted Eduard’s bomb bay set. This cockpit is most definitely enhanced with the door opened.
The floor is cast as two parts; the main rear floor, and the starboard projection which includes the bomb aimers cushions for when he lies prone. Some thinning of these parts and casting block removal will be required, but the details are superb, including various conduits and plate details. The prone position has side details, such as a drive chain mechanism.

CMK has cast the sidewalls suitably thin, and because of this, you will have to remove not only the casting block, but also some part stiffeners that run along the bottom and top of the sidewalls. Details here include the constructional elements of the fuselage, as well as side consoles, wiring, and more avionics/electrical panels. One of my parts has a very slight warp, but that will easily come out with a quick dip in some hot water for a few seconds. These sidewalls seem to have to be installed once the floor and rear wall is in place, but some careful dry fitting will ascertain the correct and best way to approach this.
The last part in this bag is the pilot’s seat. When the casting block is removed, the seat will be fitted to the cockpit using Revell’s kit part.
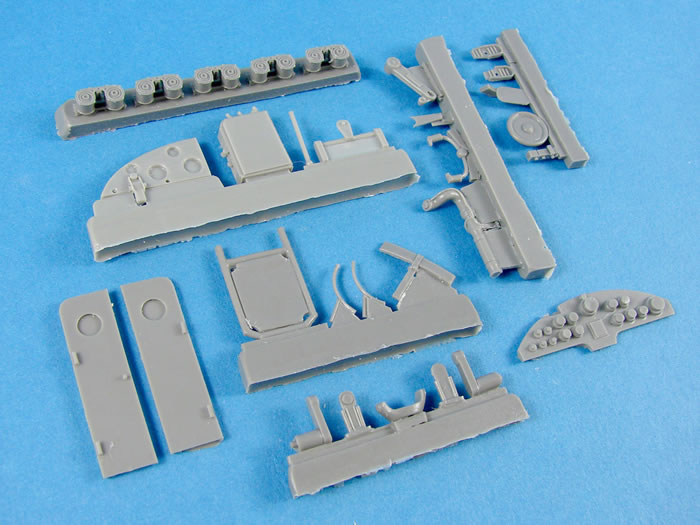
There are seven casting blocks in the second zip-lock bag, as well as three standalone components. One of these is the instrument panel which has a blank face but has the instrument bodies cast on the reverse. Some wiring should be added here as this will clearly be seen in the finished model. For the front, CMK has supplied colour PE parts, courtesy of Eduard. The other standalone parts are……yes, the split door for the cockpit! So glad to see these added, and with the ability to be posed. Now you’ve zero excuse not to fit the Eduard bomb bay.
The other components cast on the various blocks include a raft of ammunition saddles, multipart control column and linkages, bomb aimer seat, control panels, constructional elements, central instrument console, rudder pedals, trim wheels etc. It is pretty clear to me that you will need to look at the given kit parts in order to better ascertain the orientation and fitting of the resin upgrades. Other elements of the actual kit are missing in the upgrade illustrations too, such as the extinguisher that fits to the back wall. It’s evident that you need to follow both the kit and resin upgrade drawings with a view to knowing what should and shouldn’t be fitted. Some kit parts that are integral to the resin upgrade, are indeed shown in the CMK instructions, such as the pilot seat mount and rudder pedal assembly (sans plastic pedals).
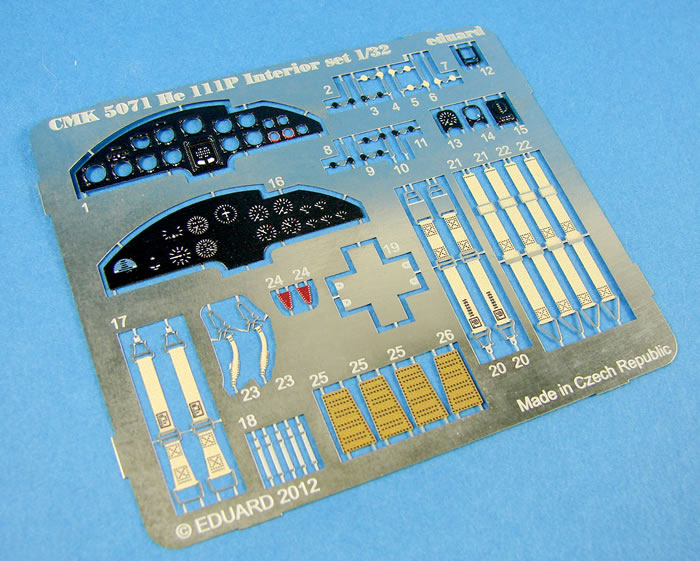
A single PE fret contains a colour-printed multipart instrument panel and various levers for the consoles, plus a set of seatbelts for both cockpit occupants. Quality is everything you expect it to be from Eduard.

I find the instructions a little bewildering at times, with some parts not drawn exactly to the shape of the component, or with a level of ambiguity over where things actually fit. I’m afraid you’ll need to do some detective work in areas, but hey, isn’t that supposed to be the fun part for us armchair historians?!
A great little set with excellent casting and details that far excels what Revell offer in their kit, and at a very reasonable price. Just expect to have to do a little Google Imaging for some things!
Thanks to MPM / Special Hobby for the
review sample.
MPM
kits are available worldwide through hobby retailers
worldwide
and at
Squadron.com
Review and Images Copyright © 2018 by
James Hatch
Page Created 19 April, 2018
Last updated
21 April, 2018
Back to
HyperScale Main Page
Back to
Reviews Page |
