Myasishchev M-17 “Mystic-A”
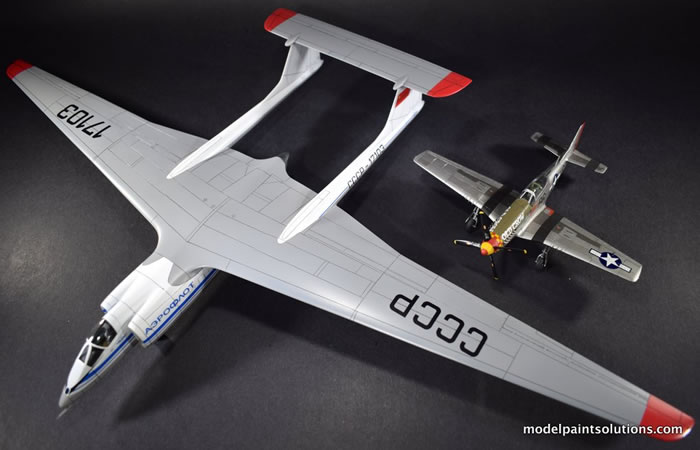
Modelsvit, 1/72 scale
S
u m m a r y : |
Description and Item No.: |
Modelsvit Kit No. 72024 - Myasishchev M-17 “Mystic-A” |
Contents and Media: |
85 parts in light grey plastic, four parts in clear plastic, one decal sheet with markings for two aircraft, and canopy masks. |
Price: |
£45.99 (£38.33 Export Price) plus shipping available online from Hannants
USD$67.25 plus shipping at Roll Models
|
Scale: |
1/72 |
Review Type: |
Build |
Advantages: |
This is a large, distinctive model with a pleasing scheme. It features good detail throughout including an amazing, multi-part ejection seat and high quality decals. |
Disadvantages: |
Overall fit is poor with major components needing adjustment prior to committing with glue. A pronounced step at the wing-fuselage join requires filling and blending. Additional structural modifications are required to stop droops and sags in the wing, wing box area, and main landing gear. |
Recommendation: |
Although impressive when completed, this kit is a lot of work. I can recommend it to anyone with patience and some experience with limited-run kits. A sincere desire to have an M-17 on their display shelve is helpful too. |
Reviewed and Built by John Miller

Hobby Boss' 1/72 P-61A Black Widow is available online from Squadron.com
In the 1950s and 60s the U.S. instituted several intelligence programs that utilized high-altitude reconnaissance balloons. Released from friendly territory, the balloons would ascend into the jet stream and thence over the Soviet Union and the People’s Republic of China. To combat the balloons Myasishchev proposed Subject 34, a single seat, turbojet-powered, twin-boom, high-aspect-ratio aircraft nicknamed “Chaika”: Russian for Seagull due to the pronounced anhedral of it’s wings. Before Subject 34 could be developed into operational hardware, the balloon programs were terminated due to the success of the Keyhole reconnaissance satellites of the Corona program and the emergence of the Lockheed A-12.
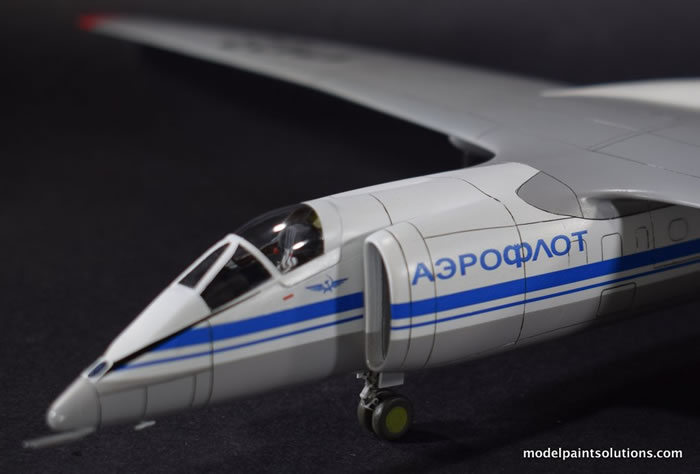
Development of the Chaika continued with the prototype being completed in 1978. The aircraft was lost the same year in an unfortunate incident wherein the pilot pulled the aircraft into the air during a fast taxi in order to avoid a snow bank. The aircraft then struck a hillside and was destroyed.
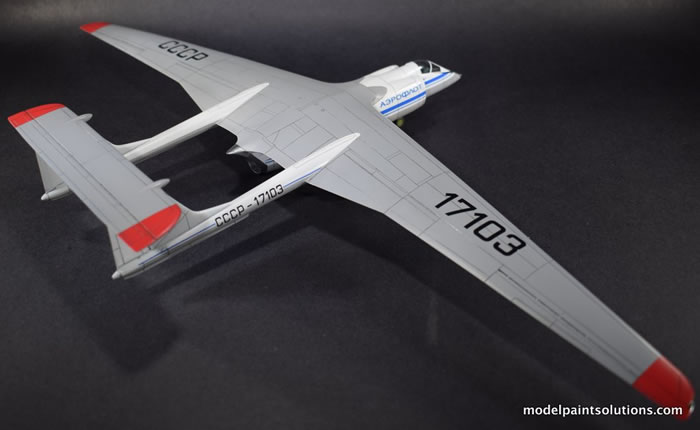
A reconnaissance version of the Chaika was developed as the M-17 Stratosphera (NATO reporting name Mystic-A). The M-17 featured a revised airframe that included straight tapered wings, a shortened fuselage pod, and an un-reheated Kolesov RD-36-51 turbojet engine. The prototype M-17, serial number 17401, flew for the first time on May 26th, 1982. Eight years later 17401 with Vladimir V. Arkhipenko at the controls set an altitude record of 21,830 m (71,620 ft) for class C-1i aircraft (landplanes with a take-off weight 16 to 20 tons). Luckily, this historic, record setting aircraft is one of the decal options provided in the kit.
Before it’s retirement in 1987, the M-17 Mystic-A set a total of 12 FAI world records, 5 of which still stand. The final development of the M-17 design, the M-55 Geophysica, first flew in 1988 and reportedly continued in service as a research platform into the late 1990’s.
(Edited from Wikipedia)
The kit is of conventional design and the proposed building sequence is straightforward. Tamiya Liquid Cement was used for most of the major assemblies. In addition to the steps detailed in the instructions, the following additions/modifications were required during construction.
-
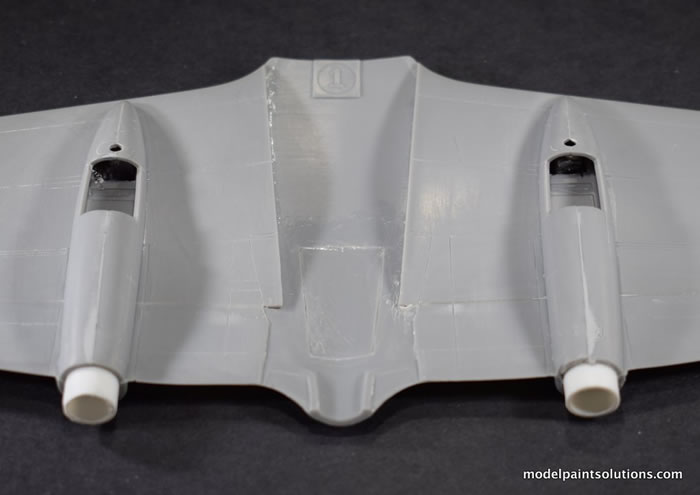
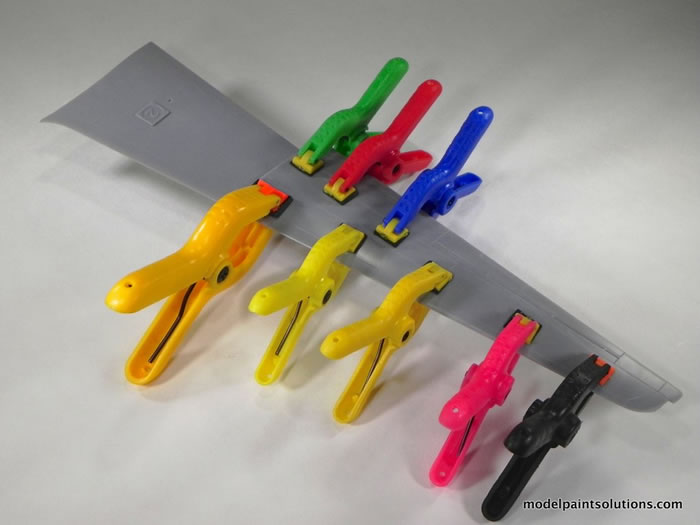
The instructions provide templates for two internal stiffeners to shore up the weak wing-box area. In addition to these stiffeners, strips of Evergreen styrene rod were required to stop sag and deformation of the wing-box when exposed to the weight load of the wing.
-
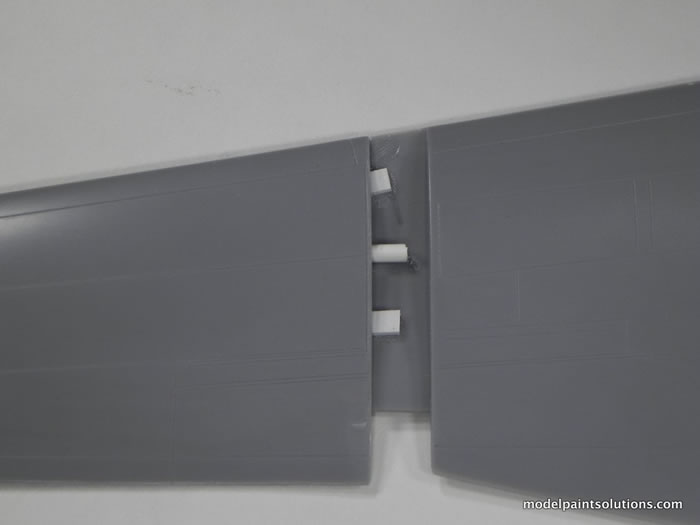
Internal couplers were added to each tail boom assembly to strengthen the flat butt-join provided by the kit. Considering the weight of the tail, this is essential for structural integrity.
-
The very thin braces on the main gear legs are insufficient to support the weight of the model (more on that below). Following failure of these braces on my model, the main gear legs had to be stabilized with thin brass tubing held in place with CA glue. Had I been aware of this issue, new braces would have been fashioned during the build: be forewarned.
-
There is a pronounced (1.5mm) step where the dorsal leading edge of the wing center section meets the fuselage. This rather large area had to be filled, re-contoured, and re-scribed. This was done with a mixture of talcum powder and CA glue followed by sealing with Mr. Surfacer.
-
This kit is a tail sitter. There’s an awful lot of plastic on the wrong side of the CG on this model as continued testing during assembly indicated. I found myself cramming lead into every nook and cranny I could find that was ahead of the CG and finally got it to sit appropriately—barely.
I have to confess that time was a huge issue during the construction of this model as it was scheduled to part of a display in the Museum of Flight (Seattle, Washington) being coordinated by the Northwest Scale Modelers Club.
With just days before the installation of the new display there was insufficient time for both primer and paint. That being the case, I took advantage of the simple scheme of the M-17 (light grey and white) and “painted” the entire model using mixtures of Mission Models White, Black, and Grey Primers.
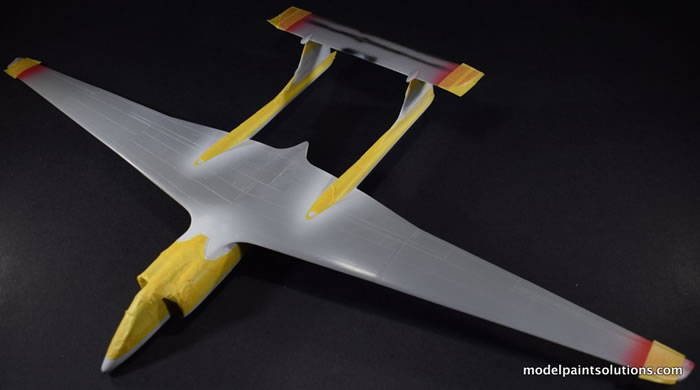
After sealing the model with Mission Gloss, the kit decals were applied using conventional techniques and a small amount of Micro-Set: that’s it. The kit decals are some of the best I’ve used: comparable to top-notch aftermarket decals in color density and quality.
Despite being a bit challenging, this was an enjoyable build and the result is quite stunning (and large) for a 1/72 single-seater.
Would I build another? Maybe, but I would use a different approach to building some of the sub-assemblies. It’s one of the most distinctive planes (and models) I’ve seen so I can recommend it to any die-hard wing nut that has to have a Stratosphera on the shelf.
Be warned, there’ll be a lot of plastic dust on your bench before this beastie is assembled.
For more information on the build visit ModelPaintSolutions.com
Kit purchased by the reviewer
Review Text and Images Copyright © 2018 by John Miller
Page Created 9 Febuary, 2018
Last updated
12 February, 2018
Back to HyperScale Main Page
Back to Reviews Page

|
Home
| What's New |
Features |
Gallery |
Reviews |
Reference |
Forum |
Search