Hasegawa's 1/48 scale
Grumman F6F-5 Hellcat
by Jon Bryon
|
GrummanF6F-5 Hellcat
US Navy, Seattle Naval Reserve, USA
|

Eduard's 1/48 scale F6F-5N Hellcat Weekend Edition
is available online from Squadron.com for just USD$19.19!
Summary
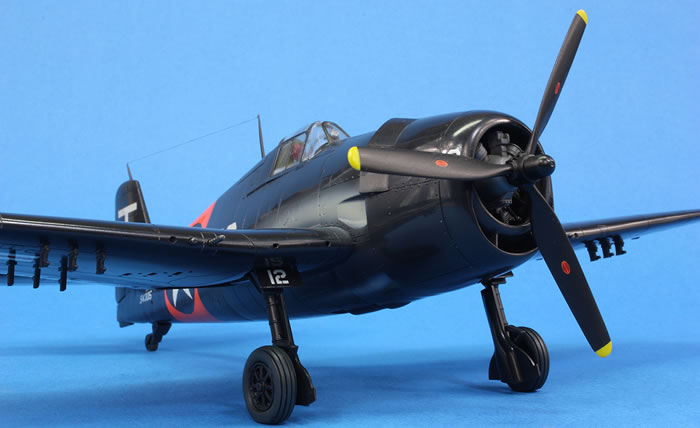
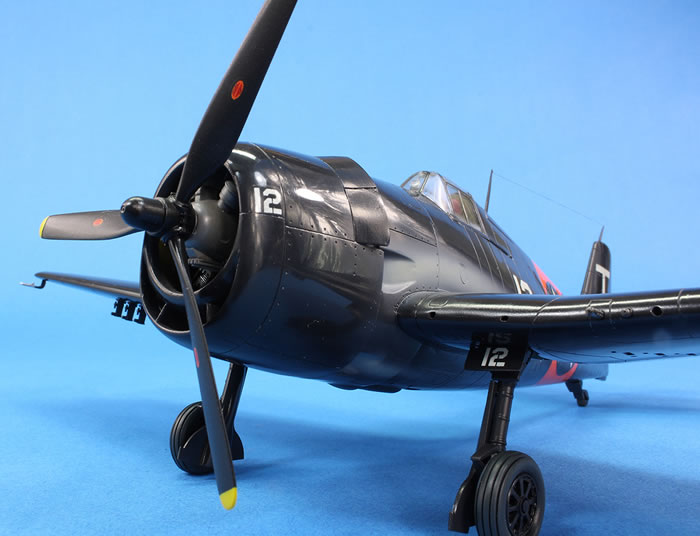
Hasegawa 1/48 Grumman F6F-5 Hellcat
with DMold resin cowling and True Details resin wheels
US Navy, Seattle Naval Reserve, USA
Background
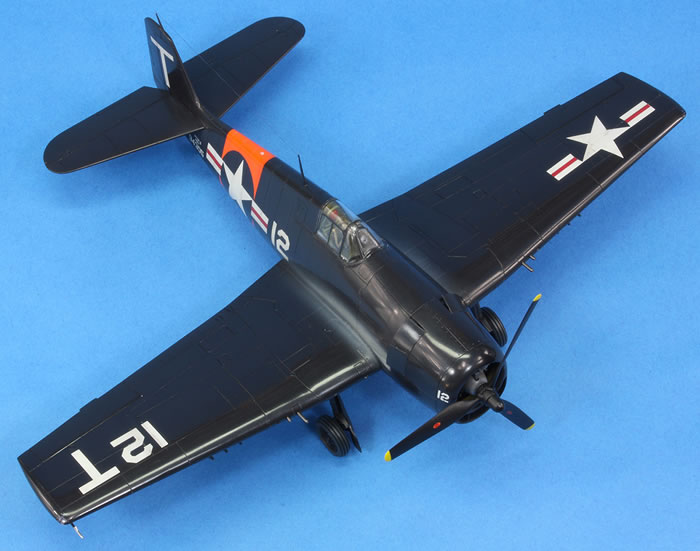
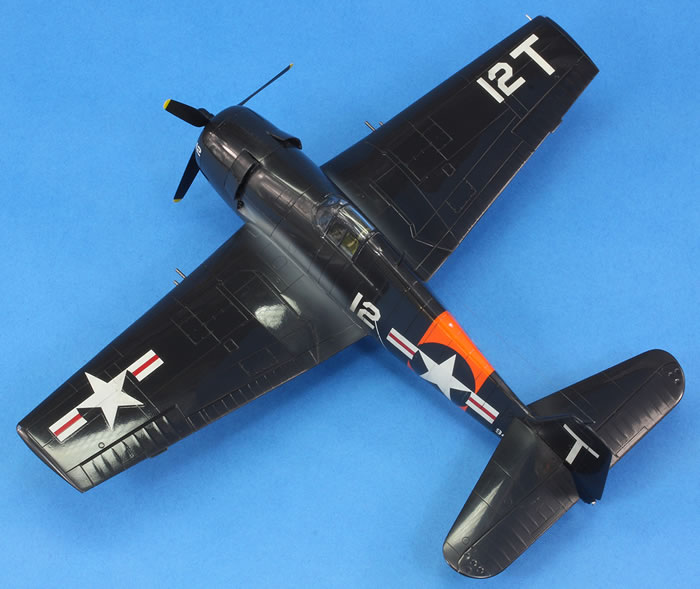
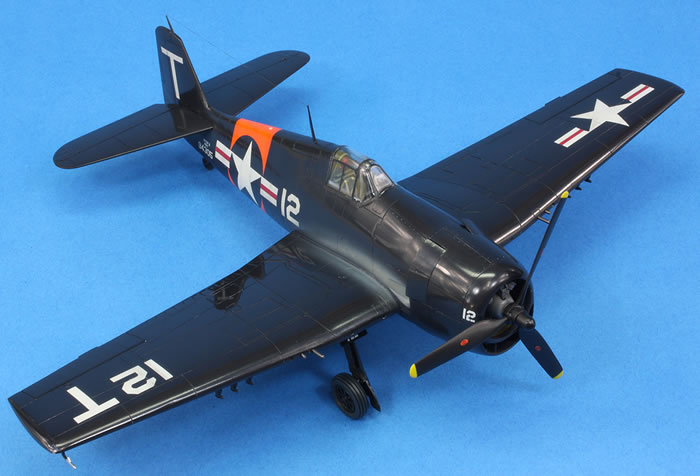
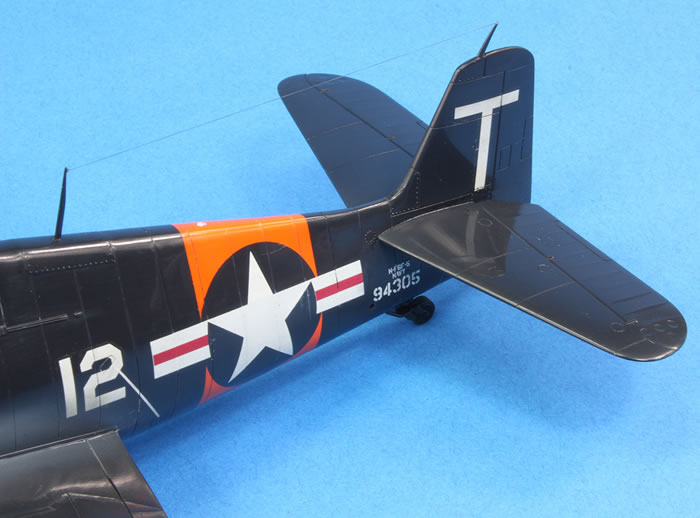
I’m always on the lookout for WWII aircraft in post-war markings, and so when Hasegawa released this in 2006, I snapped it up pretty quick. I’ve never been a particular fan of the Hellcat – in my opinion it’s aesthetically a rather humdrum design with nothing to make it stand out from a crowd – but I do like the Gloss Sea Blue finish, especially with the orange Reserve band on the fuselage.
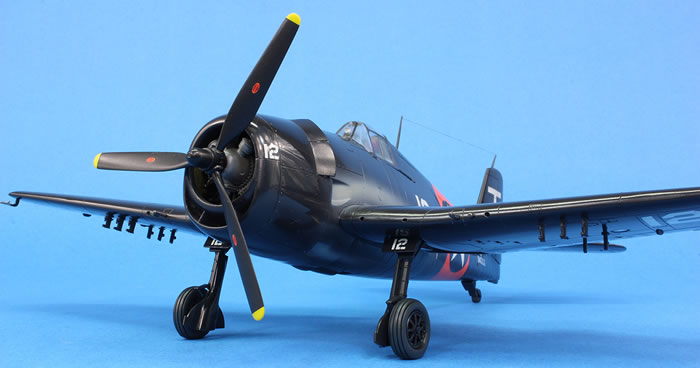
Since I bought this kit, Hobby Boss and Eduard have also released 1/48 versions of the Hellcat. Going by the number of correction sets available, no one seems to be able to get the front cowling right. I’ve seen all kinds of comparison photos, and I can’t tell where the manufacturers get it wrong. What I can see is that all the aftermarket correction sets are markedly different. Since I was buying a number of DMold resin sets for other kits, I noted they did one for the -5 Hellcat and decided to plump for that one.
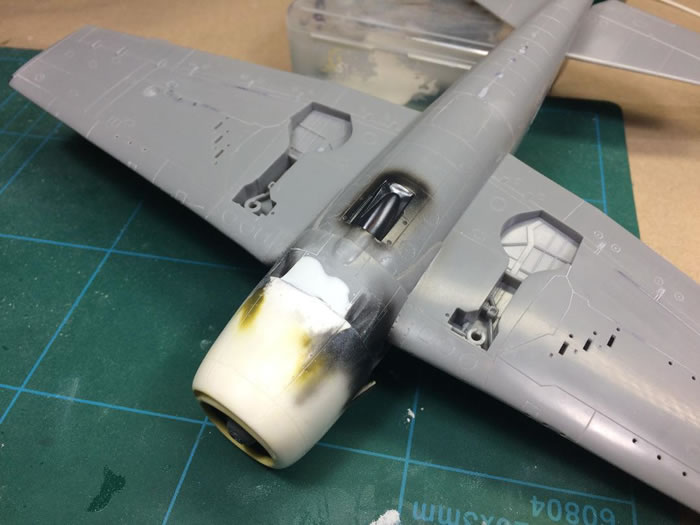
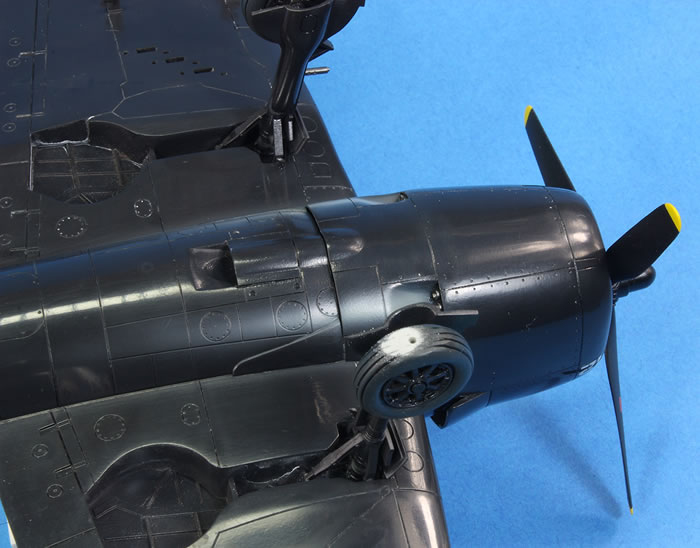
Fairing in the cowling on the lower side with Milliput.
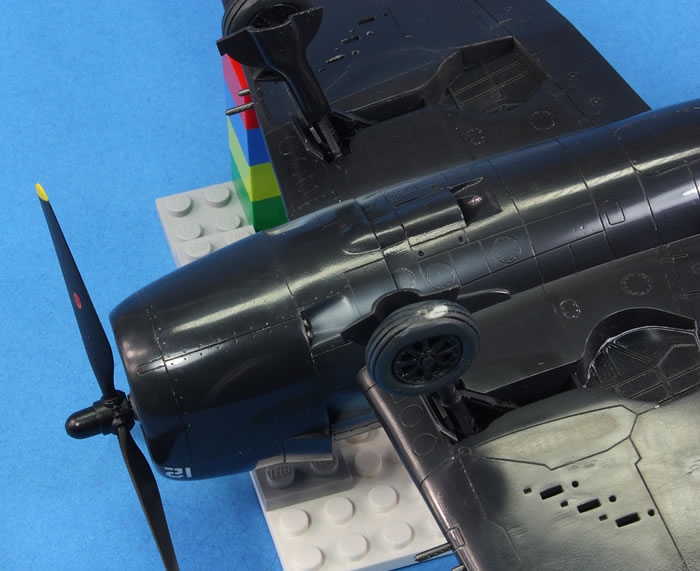
DMold resin parts are not nice to use. The resin is white, which makes it difficult to see what you’re doing. The castings are quite rough and a ghost seam from the master was clearly visible in the casting around the lower lips of the cowling. This took time to fill. Pinholes were also in abundance near where the part mates with the fuselage, which, given the amount of filling and sanding required to make the cowling fit, is the worst place to find them. On the plus side, the part gives me open cooling flaps, whereas they are moulded closed on the kit. I lined the cowling up so the fit was best on the top, and then glued it on using two-part epoxy and a lot of clamps. At least the resin appears to be fairly strong. I used a good amount of Milliput to fair in the lower lip and after it had been sanded, tried using Tamiya’s PE saws to rescribe in the panel lines. This went surprisingly well.
The basic Hasegawa plastic is fine. The fit is good and the recessed detail very nice. I’ve no idea as to general accuracy and did not inquire – ignorance is bliss…and leads to more models finished more quickly. One thing I did do was cut out the wingtip lights and replace them with clear plastic.
Painting, Weathering and Finishing Touches |
Before too long I had a finished airframe. I built this kit alongside two F4U Corsairs as I wanted to capitalise on the similar finishes to make things more efficient.
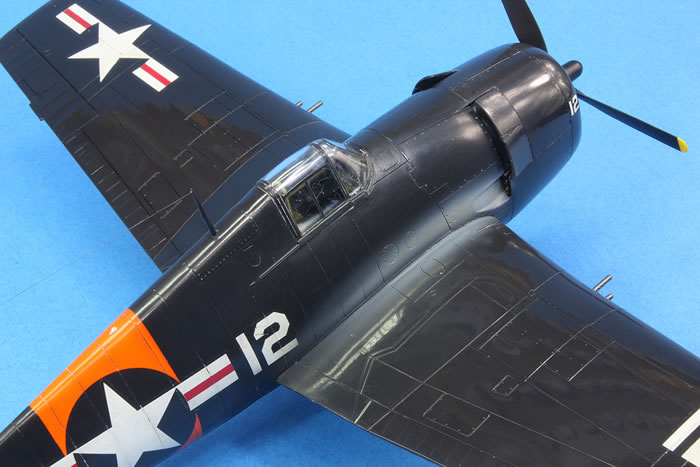
My first task when painting was to ensure a vivid orange for the fuselage band. I undercoated with Mr Basic White 2000 and used Mr Color 59 for the orange. I masked this off using Tamiya’s white vinyl tape and then gave everything a coat of Mr Finishing Surfacer Black 1500 shot through an Iwata RG-3. This was followed by Mr Color 71. I have shared my opinions on this shade in my F4U-7 article.
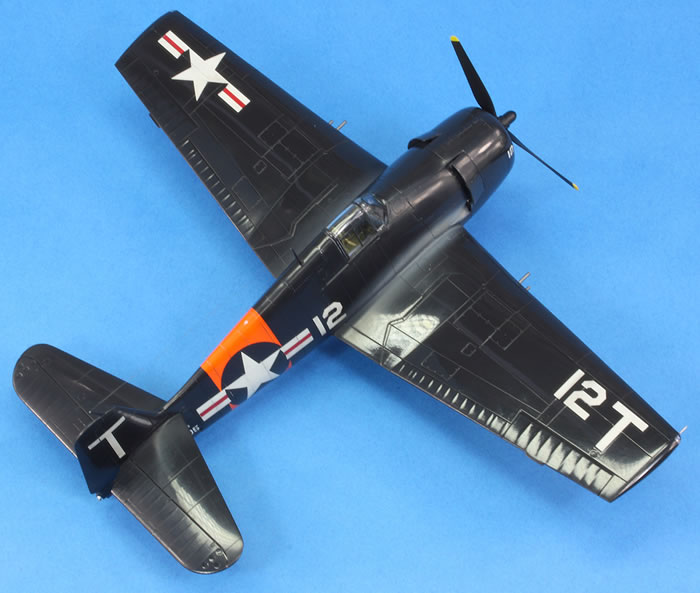
I then had to create the Gloss Sea Blue disc on the orange band for the fuselage national insignia. For this I used my newly acquired DSPIAE circle cutter, possibly the lowest bang-for-buck tool I’ve ever purchased. Never mind, it does what it does really well. The instructions are hopeless, but with some experimentation, really good circles can be cut! I masked the fuselage circle and filled it in with Mr Color 71.
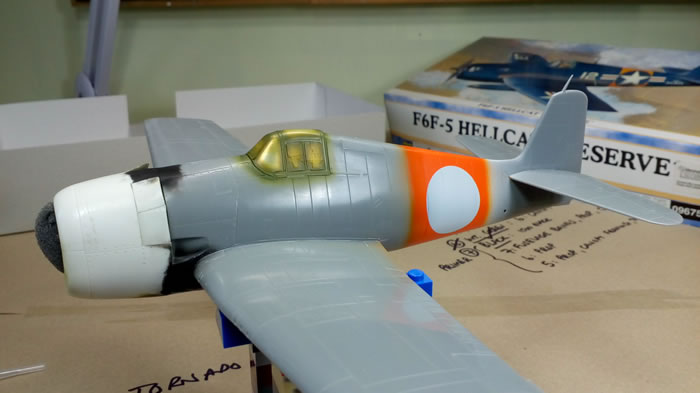
Getting lovely circles using the DSPIAE circle cutter.
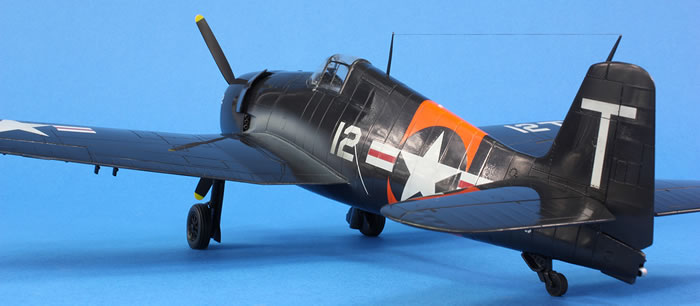
I then applied a quick coat of Gunze GX100 Clear and applied the decals. In keeping with Hasegawa tradition, they were very thick, very translucent and generally nasty to use. A black oil wash was applied to the recessed detail.
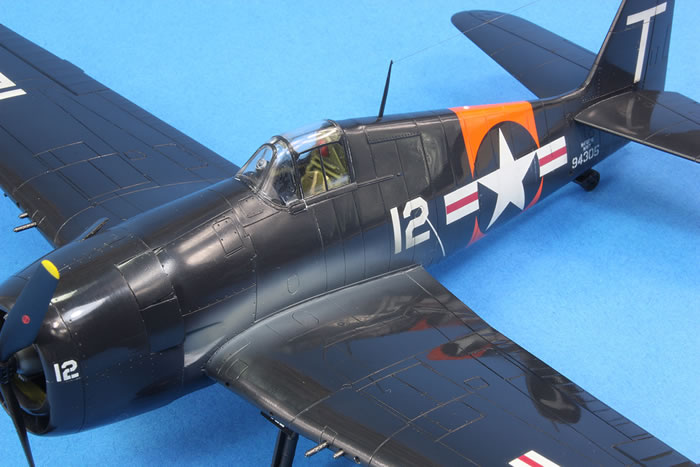
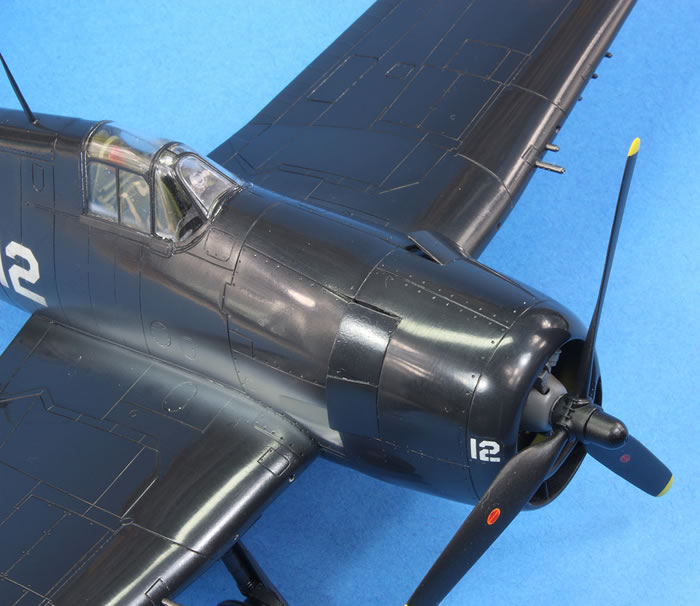
At this point my vision for the model changed. Usually I would have been happy with a semi-gloss finish, but I decided that since I’d never really tried a proper gloss finish, this would be the time. I applied a couple more coats of GX100 and left it to dry for a few more days.
As is my wont, I did not experiment on an expendable old kit, but went straight to the underside of the wing. My first try was to apply Tamiya Coarse polishing compound with a felt polishing wheel in a minitool. This did not go well: the paint melted slightly and I burned right through to the plastic. It turns out I had not got a soft enough polishing wheel. In any case, I decided to go the manual route. This involved using Micromesh 2400 grit polishing cloths to even out the surface, followed by using a 3200 grit pad. Since I had left the decision to go gloss to this late stage, and various bits and pieces like the rocket stub pylons were already attached, I could not polish out every part of the airframe. I was also terrified on polishing through to the decals. Since I was not after a high-gloss finish, I settled for using the Tamiya Coarse and Fine compounds applied using a cotton pad over most of the large areas of the airframe. What I therefore ended up with is a relatively glossy finish over most of the aircraft, and I was happy with that.
What I was not happy with was the white-coloured compound sticking in all the recessed detail. I used a pin and a sharpened toothpick to clear some of it, and tried washing the model under running water. For the rest I tried shooting water through the RG-3 at 60PSI. This helped, but there are still a few areas where it stuck. I also lost one of the pylon stubs during this process and never found it again.
This was turning into a bit of a disaster. Things got worse when I removed the canopy masking. There was some clouding for some reason and lots of bits of rubbish stuck to the inside of the canopy. I think this was from the washing. Oh well.
I sprayed some exhaust stains using Mr Color 137 and then some 321 mixed with 137. It’s not quite brown enough and could have done with some more variation, but I was losing patience and simply wanted to finish the model.
The undercarriage fitted very nicely, but I had decided to use True Details resin wheels. Unfortunately, I pushed one onto the leg and then it would not budge. The flat was not on the ground. I tried twisting it as much as I dared, but feared shearing the plastic off at the axle. I did a slightly better job with the other wheel. If there’s one thing I hate, it’s tyres where the flat is not properly on the ground.
I think the rocket pylon stubs should have rails attached to them, but I couldn’t find any good photos of these. In the end I left it as provided in the kit.
The aerial wire is Uschi van der Rosten’s ‘Fine’ rigging thread and was surprisingly easy to attach using super glue gel. I really like this material.
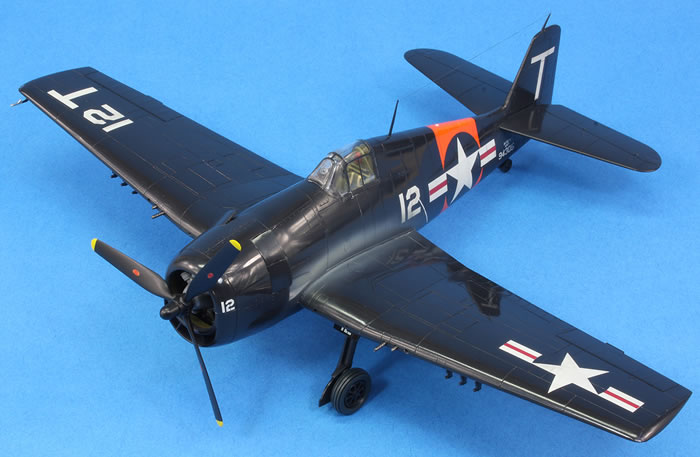
I then counted the model finished. It’s missing a pylon stub, and the finish is somewhat variable. The tyres don’t sit on the ground properly and the canopy is a mess. Nevertheless, it’s a really great scheme and I can see through the many faults to what is quite a striking finish.
For more articles like this, please visit my website www.jonbryon.com
Text and Images Copyright ©
2018 by Jon Bryon
Page Created 12 March, 2018
Last Updated
20 March, 2018
Back to
HyperScale Main Page

|
 Home
| What's New |
Features |
Gallery |
Reviews |
Reference |
Forum |
Search
Home
| What's New |
Features |
Gallery |
Reviews |
Reference |
Forum |
Search