Tamiya's 1/48 scale
A6M5/5a Zero
by Ron Petrosky
|
Mitsubishi A6M5/5a Zero fighter (Zeke), Kit #10
|

Hobby Boss's 1/48 F4U-7 Corsair is available online from Squadron.com
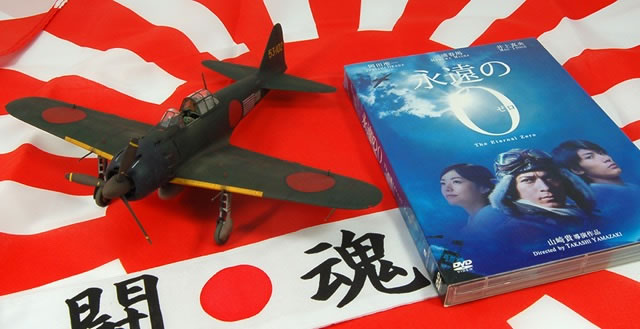
If you are interested in the Pacific War and the Zero and would enjoy a great movie see “The Eternal Zero”. Tamiya has a credit in the end. Don’t know what they added. Fantastic Computer Graphics and some real zeros!
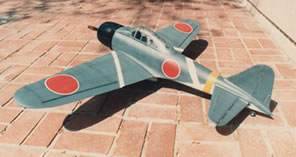 In addition to building plastic model airplanes I started building and flying R/C scale models back in the ‘80s and was fond of the plywood and balsa scale R/C kits made by a Japanese company called “Pilot” and sold by now defunct HobbyShack here in California. They offered kits of the ME109E, Spitfire I, Hurricane I, FW190A and the Zero model 22. These were great kits and I built and flew the Spitfire, Me109 and the Zero. Out of the three the Zero was the best flying model. Easy to take off and land, ‘flew any maneuver, ‘could recover from a snap roll just by neutralizing the controls. It was a good flying model at any speed, never tip-stalled and spun in when slowed down like the other two. The full-sized Zero had the same great flying qualities built into it by its designer Horikoshi Jiro*. Its pilots loved it too and in the first part of the Pacific war, up to about 1943, it ruled the skies, especially if you got into a turning fight with it (Big mistake and most likely your last!). In addition to building plastic model airplanes I started building and flying R/C scale models back in the ‘80s and was fond of the plywood and balsa scale R/C kits made by a Japanese company called “Pilot” and sold by now defunct HobbyShack here in California. They offered kits of the ME109E, Spitfire I, Hurricane I, FW190A and the Zero model 22. These were great kits and I built and flew the Spitfire, Me109 and the Zero. Out of the three the Zero was the best flying model. Easy to take off and land, ‘flew any maneuver, ‘could recover from a snap roll just by neutralizing the controls. It was a good flying model at any speed, never tip-stalled and spun in when slowed down like the other two. The full-sized Zero had the same great flying qualities built into it by its designer Horikoshi Jiro*. Its pilots loved it too and in the first part of the Pacific war, up to about 1943, it ruled the skies, especially if you got into a turning fight with it (Big mistake and most likely your last!).
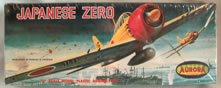
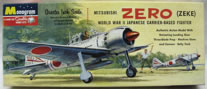
My introduction and ensuing affection for Zero occurred much earlier with the plastic Aurora and Lindberg 1/48th (?) scale Zeros. Aurora’s Zero was pretty horrible and I could never figure out how the illustrations on Aurora’s box tops could capture the aircraft so well and how the kit itself could differ so much and so terribly! When Monogram’s 1/48th Zero was released it was a revelation. If you looked at photos of the actual aircraft and compared it to the built kit it looked pretty close, rivets aside, and that scene on the box top of Pilots seated in Zeros, canopy pulled back, getting ready to take off, ground crew standing by, from some palm bedecked Pacific Island base…. Wow! I didn’t know that the paint scheme or markings were spurious at the time and as I recall, ‘didn’t care.
In my Zero repertoire, the Revell and Hasegawa 1/32nd iterations and the older 1/48th Tamiya kits followed. Much more recently Hasegawa released what I thought would be the last word in 1/48th Zeros. Indeed, they are still very good kits and span the Zero A6M2 right up to the A6M7 including a two-seat trainer.
When I learned that Tamiya Had released a new 1/48th A6M5 and read the rave reviews and saw Brett’s wonderful build (of the kit!… not going to give you comedians the opportunity to comment about any fascination on my part with Brett’s physical appearance! LOL) here I didn’t get very excited. I was kind of “Zeroed out”. I had a lot of Hasegawa Zeros in the stash and Tamiya’s magnificent 1/32nd scale kit and thought, “that’s just what I need, another Zero”. Then…. I saw some pictures somewhere of the completed stock kit cockpit and realized what a fantastic job Tamiya had done designing this kit of Japan’s most famous aircraft design. All that “Zero love” was rekindled I knew I had to build the new Tamiya kit. It only took ten years!
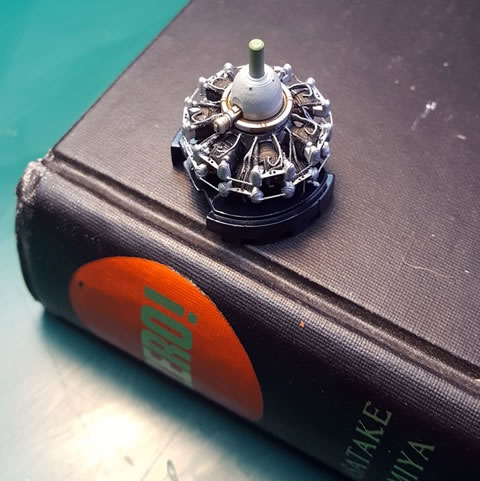
I collected some upgrades for the build before starting. First there was the Photo-etch set from Eduard #49425. Added to that was Tamiya’s Detail Up Parts set #12624 and Quick Boost’s Exhausts #48230. I only used the metal gun barrels and pitot tube from the Tamiya set as the colored seatbelts were better provided for in the Eduard set and didn’t want to use the chocks supplied with the Tamiya stuff (chocks? … I don’t need no stinking chocks!).
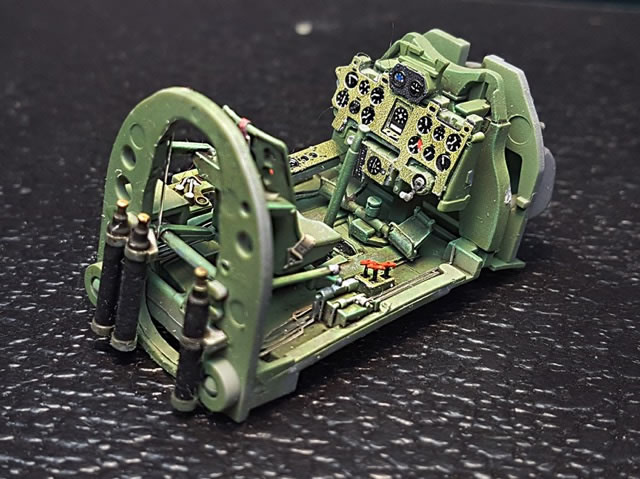

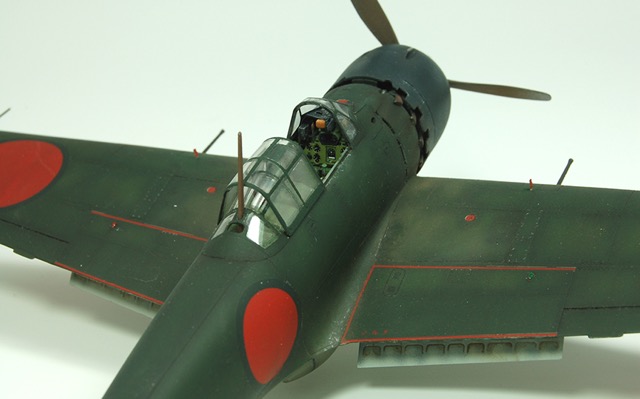
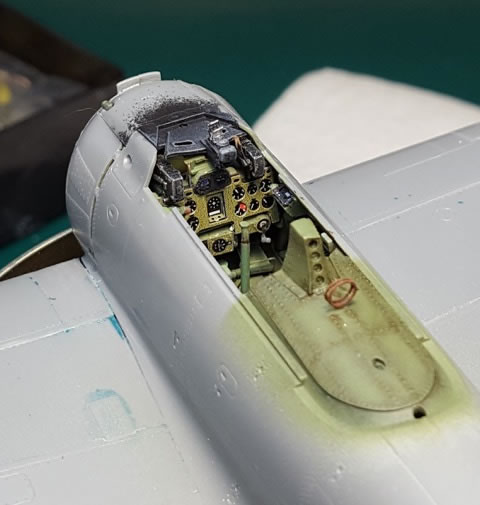
As usual, construction started with the cockpit. The addition of the Eduard PE set dresses this up comprehensively and really is the “icing on the cake” when added to a very, very nicely appointed stock cockpit. I did not use the photo etched seat support structure and used the kit parts as it looked very fragile and difficult to align and couldn’t be seen very well in the final analysis anyway (Sometimes I think there’s this conversation at Eduard between the photo-etch designers, “Pavel, let’s do the seat supports in 15 tiny little parts. ‘make them really difficult to attach, lots of butt joins, hard to align, really blow their minds, drive ‘em crazy! hee hee”). Just kidding Eduard, love your stuff! Get those Optivisors on as some of this etched stuff is practically microscopic! I lost a couple of tiny levers and one wire harness when they sprang out of my tweezers and buried themselves in the carpet or entered a hole to another dimension below my worktable. Eduard does supply extras on some of the really small stuff but not all.
On this build I decided to use the landing gear covers included with the Eduard set.

I usually leave these on the PE frames and use the kit parts but this time I wanted to take the challenge as the details on the Eduard parts are much better than the Tamiya kit parts so I gave it a try and I think they worked out pretty well.
The Gunsight with Eduard enhancements. Back in 2009 Cameron Forester suggested using Woodland Scenics’ “Realistic Water” as an adhesive for clear-to-clear parts on my ME110 build. I just came across his message recently during a search here and his advice is great. Much better than white glue and dries crystal clear and adhesion is good. Used on reflector sight clear parts and attaching the ring sight here.
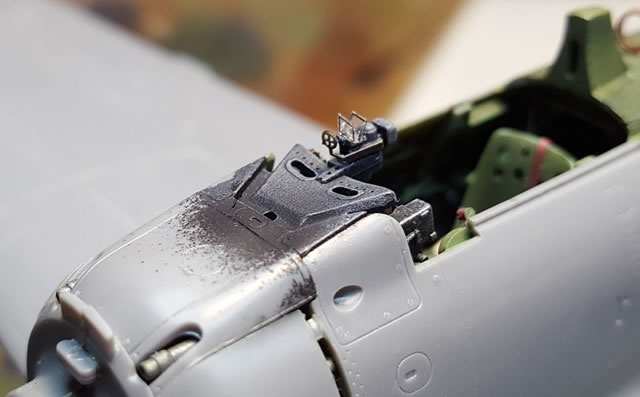
The Eduard set includes a new one-piece rear deck and direction finding aerial in addition to better headrest detail. Hey Mom, Look at that, No seams! Rear canopy section fits fine over it.
Problems
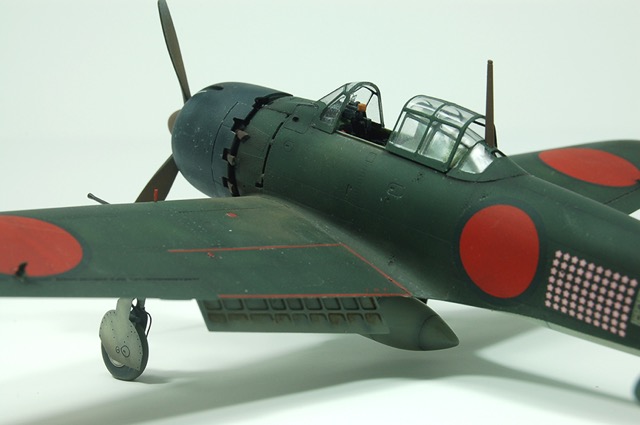
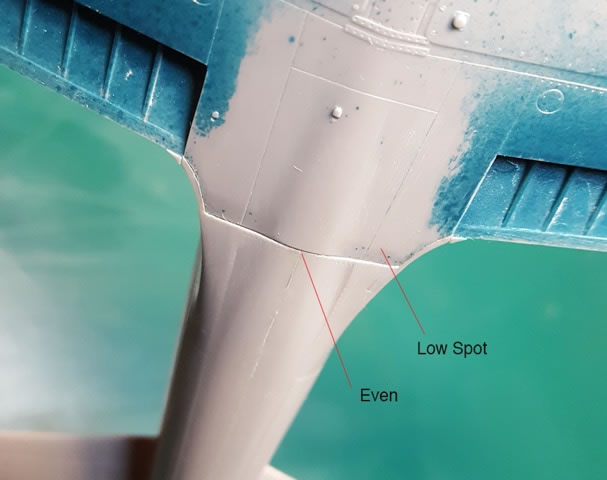
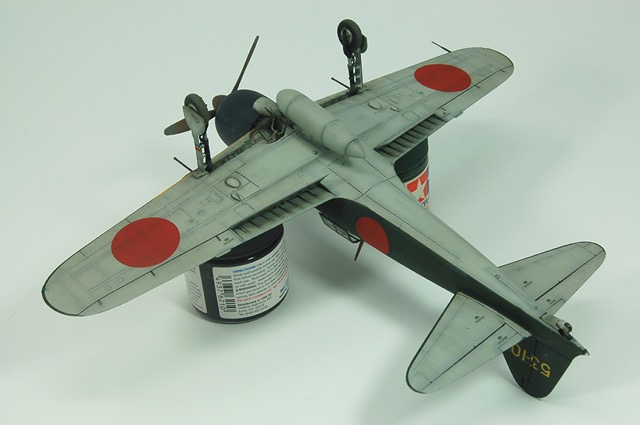
OK, wonderful kit, most of the kit falls together like the typical Tamiya model and the surface detail is very fine, best 1/48th Zero, no doubts. However. there are some negatives to kit engineering this time that I found a bit surprising in a “newer” Tamiya kit. First there is the miss-matched join between the lower fuselage and the wing. I tried everything to get these to align with no luck and pretty sure this is intrinsic to the kit and not a result of something I did during assembly (I have read on the web that others have dealt with the same problem). If the hump of the lower wing fairing is aligned the flat sections don’t align. As filling would be difficult and still require sanding, I aligned and superglued the highest sections and sanded down the protruding flat section with sandpaper wrapped around a dowel, and afterward, re-scribed the panel lines lost to the process.
I also had some minor difficulty with the canopy parts. Even with careful fitting and sanding slightly, I had to use filler to fill small gaps on the sides of the front canopy portion. The mid-sliding part of the canopy does not fit easily over the fixed rear section. It may be too small or thick to cover the underlying rear canopy and sit on the indented rails properly. I applied some white glue to the bottom of the mid-canopy and pressed it down until it dried. It was only after looking at the instructions again that I realized there are no notes shown in the instructions for positioning the three sections to depict an open canopy! I assume this was the purpose of having three sections included however….?
Tamiya’s canopy masks continue to be a source of frustration for me. After very carefully cutting out the individual shapes and using only sharp tweezers to handle the shapes and apply them to the canopy, like my experience with Tamiya’s Ki-61, they lifted on the curved sections. Every time I spayed a layer of paint, future, or Dullcote I had to press on the masks and hope they stayed put long enough to finish spraying. As on the Ki-61, next time, I would opt for purchasing the Eduard masks (EX318) as they are pre-cut, fit exactly and don’t lift.
One last problem was the fit of part D5 between the lower cowl flaps. I chose the closed cowl flap option and when it came to attaching part D5 (lower oil cooler and side fairings) it seemed like its curve or diameter was larger than the cowl flaps curvature. This caused the outer edges of D5 to stand proud of the cowl flaps. These outer edges had to be filed and sanded to a smaller curve to match the cowl. I had to do this after everything was painted so a repaint was necessary (see the “decal disaster” section for details of the fun that ensued!).
Other than those minor issues the kit is a typical example of Tamiya’s superb engineering with no filler required on the other major joins and everything lining up automatically.
I recently finished reading a new book (for me) on my Kindle while building this model. entitled “Islands of Destiny” by John Prados (ISBN 13: 978-0451414823). The book is about the Solomons campaign during WWII and in the book, Rabaul and Simpson harbor on the Island of New Britain are featured as the hub of Japanese operations in that campaign. The end game of the Japanese strategy in that campaign was to isolate or invade Australia. The Japanese got far enough down the chain of Islands that they were able to bomb north Australia. Brett sent me this about the bombing raids, and memories his Mother related to him: “Yes, Darwin was bombed regularly in 1942, and other targets in northern Australia. Even as far south as Sydney we had midget submarines enter the harbour and sink a troop-carrying ferry. My mother recalled the night, with the sirens and searchlights”. Very scary!
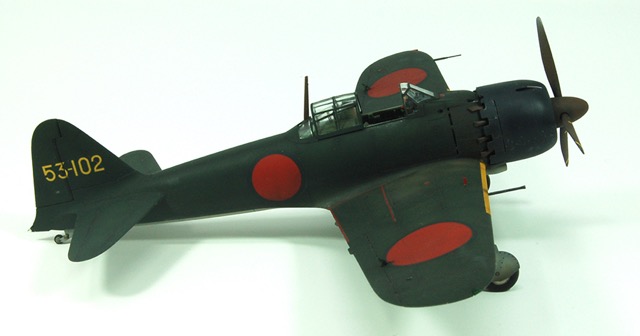
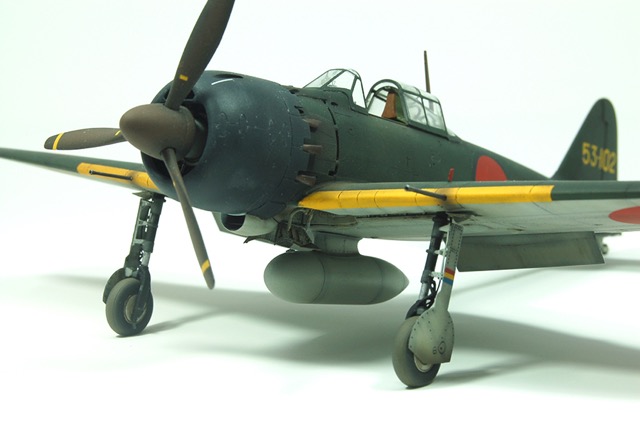
Zero #53-102 is the subject included as bonus decals in the special early edition of the Tamiya A6M5 model 52 and was the mount of Iwamoto Tetsuzo. Iwamoto was the commander of the Zeros stationed at Rabaul and was a 142-victory ace (there is some debate about this total). More historical titles about the struggle over Rabaul, known as longest battle of WWII, are listed in the bibliography at the end of this article. Ironically, Iwamoto survived the war only to die of septicemia (blood poisoning) after an operation on his back in 1955.
Another book that I have and highly recommend is the Mushroom Model Publication’s “big yellow, Mitsubishi A6M Zero”. I have a few books on the Zero but If there was only one book I could have on the Zero it would be this one. The book is a great resource on zero colors and the differences in finish between Mitsubishi and Nakajima built Zeros which the Tamiya instructions and decals reflect. There are very good drawings of all the Zero variants, detailed photos of surviving Zeros, and excellent color profiles as well.
Iwamoto’s Zero 52 was a Mitsubishi built A/C and Tamiya’s decals and painting drawings depict this. I also read in the Mushroom book that Mitsubishi wheel wells, inside LG doors and flaps were normally painted the exterior color as opposed to Nakajima’s Zeros which were painted with the familiar green/blue Aotake. I first painted all this with Aotake then repainted everything, after reading the Mushroom book, with Gunze IJN Grey which I used for the underside color.
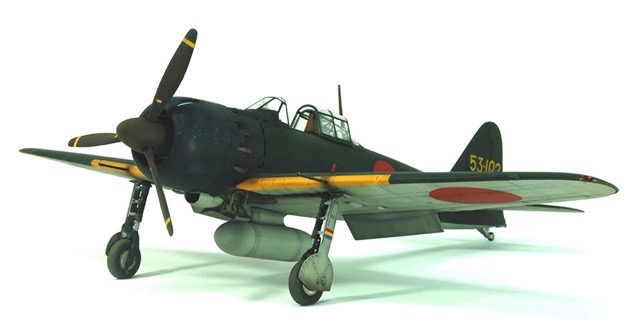
I used Tamiya’s XF71 Cockpit Green and a lightened or darkened shade of this color for the interior of the cockpit. Upper surfaces were finished in Tamiya XF11 J.N. Green. I sprayed a base coat of XF11 then sprayed some panels of the wing and horizontal stabilizer/elevators with cockpit green in irregular cloud patterns and finished up with a pre-shade along panel lines in a black/brown mix. After that I sprayed a glaze coat (very thinned, translucent mix of XF11) of XF11 over the top surfaces which darkened, and made greener, the lighter interior green patches and unified everything. The result hopefully looks like fading and lightening from wear by ground service crews. Lower surfaces Painted in Gunze IJN grey had the same pre-shade technique used.
It should be noted the greens and greys used to paint Zeros’ exterior surfaces were slightly different between Nakajima and Mitsubishi. The old Aeromaster and contemporary Gunze paints had/have these different colors as part of their paint line. The subtle differences after simulated fading, washes, pastels are not worth worrying about. Just me.
Decal Disaster!
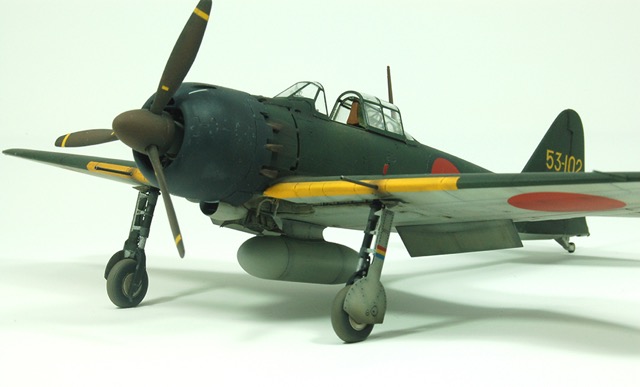
I sprayed Future (now known as Pledge Floor Care Multi Surface Finish) over the entire model to give the model a gloss base in preparation for decaling. I applied the Hinomarus first and disaster struck! I used coldish distilled water to release the decals from their backing and it took an inordinately long time for the decals come off the backing sheet. After they came off they seemed rigid and inflexible and one on the top of the wing cracked in two pieces. I fit the two pieces together as best I could and touched it up with Tamiya red with a touch of Tamiya flat yellow added. I discovered that this decal problem disappeared when I used warm water and Tamiya’s decals behaved very well. I also applied the yellow leading edge ID panels appropriate for a Mitsubishi built aircraft (thinner than Nakajima’s on the top surface) and these worked really well, very opaque. All decals were treated with Microscale’s decal solvent and settled into engraved lines and over raised detail very well.
Ok, so decals on but in attaching the D5 part I mentioned previously I found this had to be sanded and filed to blend into the lower cowl flaps. This I did successfully but it had to be repainted. I applied masking tape around the area to be painted the cowl color and light grey but forgot I hadn’t applied future over the decals to protect them. The tape overlapped the leading-edge decals and one upper wing Hinomaru and when I removed the tape parts of the decals lifted off! “Ahhhhh ______ he screamed!”. As I had no spares of the kit Hinomarus for the Iwamoto machine II cut out a curved portion of another with a thin black/green border and placed that section over the missing section, a little mismatch but not horrible. The lost leading-edge ID panels had to be painted on.
Weathering
Rabaul was isolated and bypassed by the allies, very little in the way of supplies got in and the garrison was subject to constant bombing and naval shelling by 1943. Zeros flew a lot of interceptor and escort missions and there were never enough maintenance troops for the aircraft so I think the Zeros based there were likely very weathered. However, I have an aversion to depicting flying wrecks in my modelling, accurate or not. Just an aesthetic judgement by me so I have depicted moderate weathering on my Zero. I added sprayed exhaust and gun stains, Prisma color silver pencil chipping and wear, pastel dirt as well as the painting technique for the wear/fading of the upper surfaces mentioned previously.
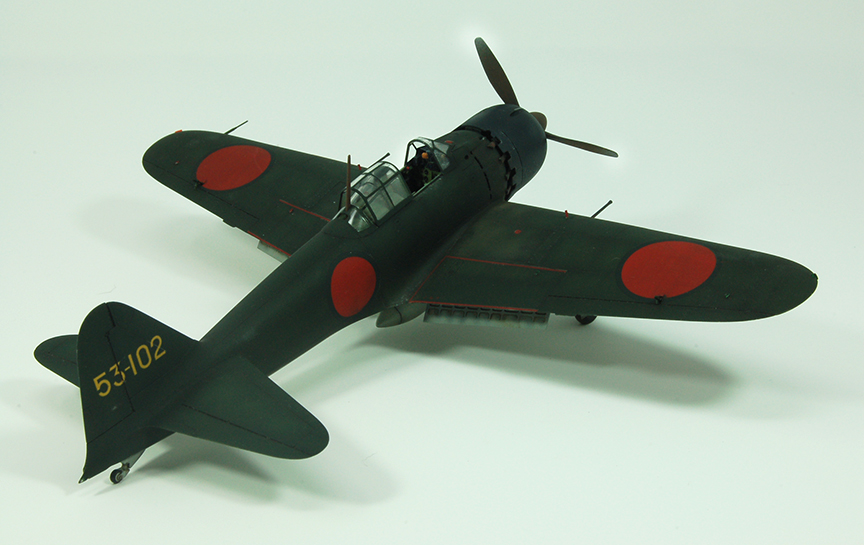
Looking at the completed model, Tamyia has really captured the aggressive, refined and clean look of the Zero for me and much better than the older Tamiya Zeros or any other 1/48th kit. The level of detail and finesse of surface is wonderful. However, the kit’s parts’ fit in the areas mentioned and open canopy difficulties, although minor, really puts this kit as a lesser effort by Tamiya than their recent Ki61 and probably the new 109G. I rate it at 4.5 stars.
* I have used the Japanese convention of last name first and given name second throughout this article.
References
Arthur Juszczak, “Mitsubishi A6M Zero”, Mushroom Model Publications, © 2015, ISBN 978-83-63678-29-6
Shigeru Nohara, “Mitsubishi A6M Zero Fighter, Aero Detail #7”, Dai Nippon Kaga Co., ltd, © 1993, ISBN 499-22608-2
Some other Zero and Solomons campaign historical stuff I have read, or are reading, where the Zero features prominently and that you might find interesting:
Jiro Horikoshi, “Eagles of Mitsubishi. The story of the Zero Fighter”, Washington University Press, © 1981, ISBN 0-295-95826-X (Words from the Zero’s designer direct to your eyes!)
Bruce Gamble, “Invasion Rabaul”, “Fortress Rabaul”, “Target Rabaul”, a three-volume history of WWII’s Longest Battle”, Zenith Press, ©2006, 2013, ISBN-13:978-0-7603-4591-7, 13:978-0-7603-4559-7, 13:978-0-7603-4407-1
Henry Sakaida, “The siege of Rabaul”, Phalanx Publishing Co., Ltd, ©1996, ISBN 1-883809-09-6 - An excellent and concise work on the battle and the personalities on both sides. Many Japanese and Allied photos of the pilots involved and their personal recollections.
Text and Images Copyright ©
2018 by Suresh Nathan
Page Created 11 September, 2018
Last Updated
11 September, 2018
Back to
HyperScale Main Page

|
 Home
| What's New |
Features |
Gallery |
Reviews |
Reference |
Forum |
Search
Home
| What's New |
Features |
Gallery |
Reviews |
Reference |
Forum |
Search