McDonnell-Douglas F-4S Phantom II
Zoukei-Mura Super Wing Series
1/48 scale
S
u m m a r y |
| Catalogue Number: |
Zoukei-Mura Super Wing Series No.48-05 - McDonnell-Douglas F-4S Phantom II |
| Scale: |
1/48 |
| Contents and Media: |
See details below. |
| Price: |
£69.95 plus shipping available online from BlackMike Models |
| Review Type: |
FirstLook |
| Advantages: |
Excellent detail, approach and buildability. |
| Disadvantages: |
Single decal option. |
| Recommendation: |
Zoukei-mura’s new range of Phantoms really does usher in the next generation of this aircraft in quarter scale. |
Reviewed by
James Hatch

Revell's 1/72 Do 17 Z-10 will be available online from Squadron.com
The McDonnell Douglas F-4 Phantom II is a tandem two-seat, twin-engine, all-weather, long-range supersonic jet interceptor and fighter-bomber originally developed for the United States Navy by McDonnell Aircraft. It first entered service in 1960 with the U.S. Navy. Proving highly adaptable, it was also adopted by the U.S. Marine Corps and the U.S. Air Force, and by the mid-1960s had become a major part of their air wings. The Phantom is a large fighter with a top speed of over Mach 2.2. It can carry more than 18,000 pounds (8,400 kg) of weapons on nine external hard-points, including air-to-air missiles, air-to-ground missiles, and various bombs. The F-4 was used extensively during the Vietnam War. It served as the principal air superiority fighter for both the Navy and Air Force, and became important in the ground-attack and aerial reconnaissance roles late in the war. The F-4 continued to form a major part of U.S. military air power throughout the 1970s and 1980s, being gradually replaced by more modern aircraft such as the F-15 Eagle and F-16 in the U.S. Air Force, the Grumman F-14 Tomcat in the U.S. Navy, and the F/A-18 Hornet in the U.S. Navy and U.S. Marine Corps.
The F-4 Phantom II remained in use by the U.S. in the reconnaissance and Wild Weasel (Suppression of Enemy Air Defences) roles in the 1991 Gulf War, finally leaving service in 1996. It was also the only aircraft used by both U.S. flight demonstration teams: the USAF Thunderbirds (F-4E) and the US Navy Blue Angels (F-4J). The F-4 was also operated by the armed forces of 11 other nations. Israeli Phantoms saw extensive combat in several Arab–Israeli conflicts, while Iran used its large fleet of Phantoms in the Iran–Iraq War. Phantoms remain in front line service with five countries. Phantom production ran from 1958 to 1981, with a total of 5,195 built, making it the most numerous American supersonic military aircraft. The F-4 remains in service with Iran, Japan, South Korea, and Turkey. It has been used in combat against the Islamic State.
The Kit
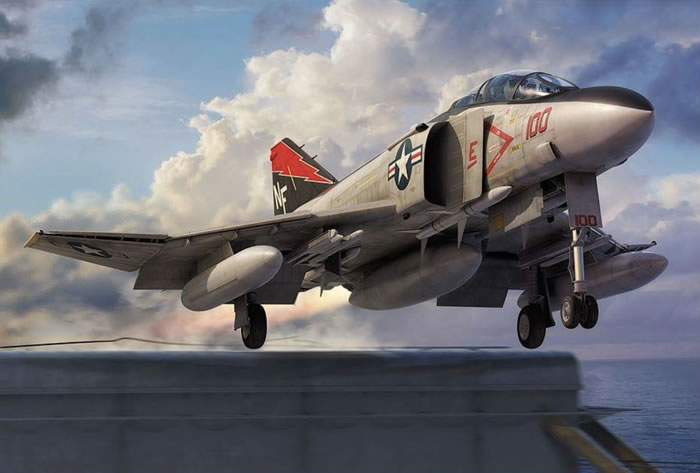
Zoukei-mura’s F-4S Phantom II kit comes in a sizeable and weighty box with the box-art depicting Bu.No.153808, VF161, USS Midway, 1981, taking off from the deck of the carrier. This is actually the only scheme available in this release, so if you wanted variation, you will need to look at aftermarket decals. Inside the box, there are TEN runners of medium grey plastic, and a single runner of clear plastic. All of these are individually wrapped so as not to risk any breaking or scuffing of parts. A single decal sheet and an instruction manual complete the contents inventory. Note that ZM don’t include photo-etch parts, as they deem the kit contents to be sufficient for the average customer. If you do want to adorn your model with extras, you can purchase photo-etch and resin parts separately.
As I write this, Zoukei-mura has just released the F-4C version of this kit, and I’ll bring you that as soon as I can get my hands on it.
Sprue A
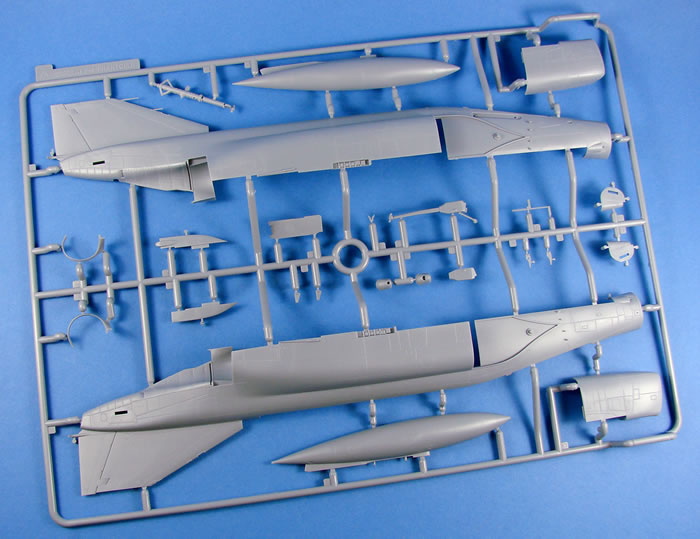
Unlike the Academy releases, with their single-part fuselages, Zoukei-mura has chosen the traditional method of moulding these as halves. The jury was sort of out for me until I saw the first builds of this, and the approach works very well.
ZM has produced the whole spine as a separate piece which fits along panel lines, and when assembled, you really can’t tell that it’s an insert. Another insert is supplied for the point at which the spine and base of fin meet, plus the small panel to the rear of the cockpit. The only seams to remove are the narrow fin seam, a small length in front of the canopy, and the area on the rear underside.
A nose cone is supplied as a separate part, so no seams there. External detail looks just perfect, with subtle and even panel lines, port access details, and fasteners/rivets where appropriate. I’m quite taken with the representation of the plating at the tail end, forming the exhaust tunnels. Note that the rudder is integrally moulded to the fuselage, and the intake sections are separate parts, also included here with slide-moulding technology.
Internally, the cockpit is moulded with vertical ribs which just seem to be supportive for the cockpit tub sidewalls. If you want to pose the tail planes where they angle downwards towards the front, you will need to drill out the panel that is moulded on the fuselage, and insert two new parts from this sprue. This seems odd. Why didn’t ZM make inserts for both positions?
Other parts on this sprue include the tail pipe seals, arrestor hook, extended nose-gear for catapult take-off position, centre drop tank, forward cockpit ladder fin top section, etc.
Sprue C
This is pretty much a cockpit sprue, with parts here for the seats (6 parts each, but no belt representation), lower consoles, bulkheads, rudder pedals, ejector seat guide rails, upper coaming, etc. No instruments or console apparatus are moulded here.
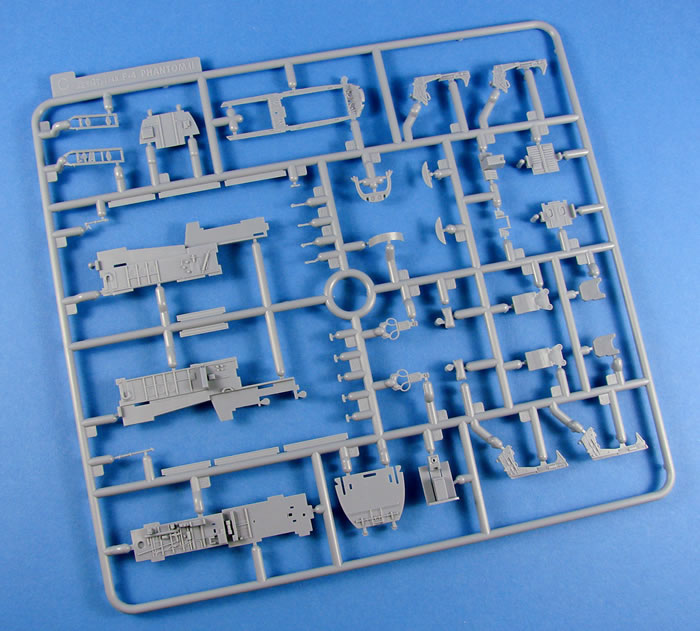
Detail is first rate, with plenty of scope for detail painting without the need to add anything further. The ZM kit certainly excels in this respect, as the Academy cockpit is fairly basic and in need of Eduard’s goodies to make it shine.
Sprue D
The most obvious part here is the single-piece nose cone, thankfully held in place by three gate points so that it doesn’t twist and cause damage to those areas. You’ll also notice the intake vanes for both sides (2 parts each), pitot tube, undercarriage doors and actuators, part of the undercarriage bay liner, RAM air intake, blade antenna, air brakes, air brake actuators, auxiliary air door, rear facing lens, etc.
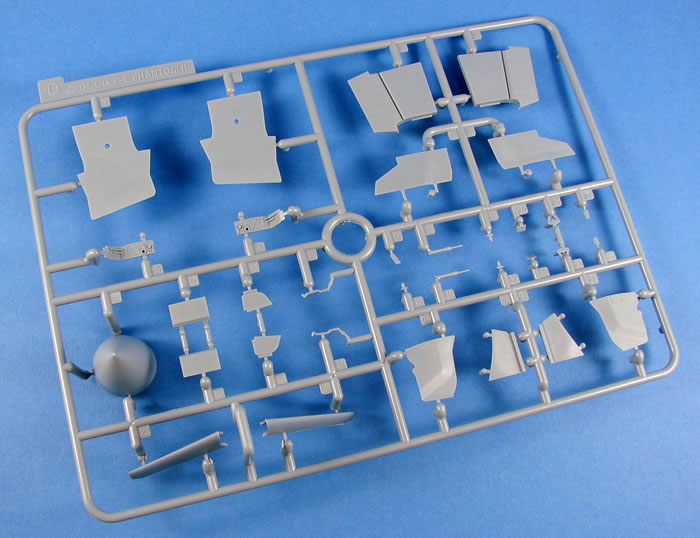
Both external and internal detail for the gear doors is exemplary, as are the textures applied to the intake vane forward sections. You will note that dotted around the various parts are little nodules that will need snipping off. You’ll see these on more or less every sprue. These are mentioned clearly in the instructions, and they should be snipped off. These are ejector pin points, instead of having your parts festooned with marks you’d need to fill and sand away.
Sprue E
This almost certainly stands for engine, as the main parts for both of the General Electric J79 axial flow turbojets, are to be found here. These are typically moulded as halves, with all of the external details being moulded in situ. You will of course need to remove seams across some awkward detail, so patience and care will need to be exercised in large amounts. Intake vanes, and the turbine frame/afterburner ring are separate parts that fit within the engine tube. If you want to display one of these engines by itself, then as with their Ho 229 kit, parts of the sprue can be made up into a nifty little engine stand. For later in construction, you can also see the engine nozzles. These look a little clunky to me, with the various petals looking thick and ill-defined, so maybe you can swap these out with Eduard’s resin parts, designed for the Academy kit. At this point, I don’t know how displaying an engine outside of the model will work in terms of leaving a large internal gap within that could be seen from within the nozzles etc. Still, I’m sure that the creative modeller could fathom that.
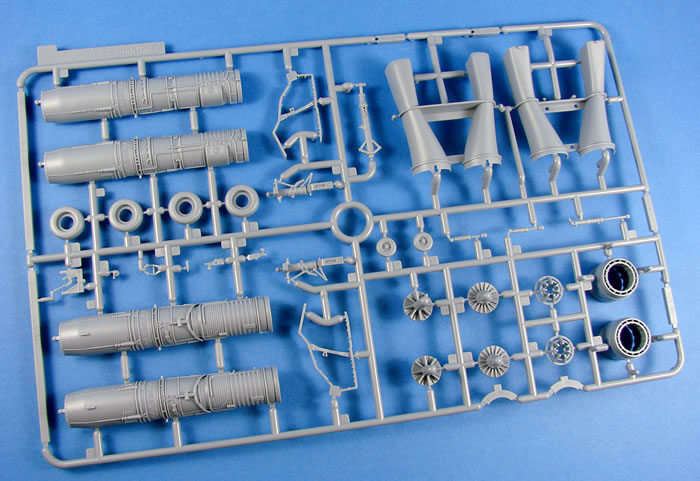
Another obvious pair of parts are the main intake channels, moulded as upper and lower halves. I don’t think the intakes are suitable wide enough to see any seams in there, but you can easily remove at least a portion of it from the forward area.
A good number of parts for the wheel bays and undercarriage are to be found here. Note that the main gear bays are moulded from a single detailed part that just needs to be supplemented by the liner part I mentioned just before. Again, detail really is very good, with this being added to with the nicely detailed main bay ceilings that are moulded on the underside of the top wing panels. Further gear well parts are included here, as well as the wheels themselves, moulded without hubs, but also without any weighted effect. Sorry, but you’ll need to sort that yourself, or buy an aftermarket solution.
Sprues F & N
(x2 each)
These are weapons, tanks sprues, and contain parts for the various load-outs.
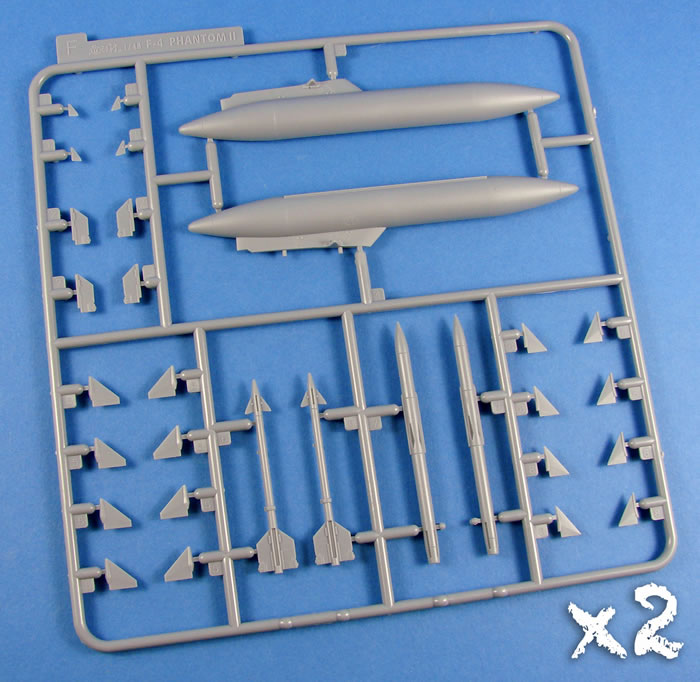
Available are parts for:
-
AIM-7 Sparrow
-
AIM-9 Sidewinder
-
Under-wing drop tanks
The AIM-7 and AIM-9 have their bodies moulded with separate fins, and sprue gate attachments are thankfully unobtrusive.
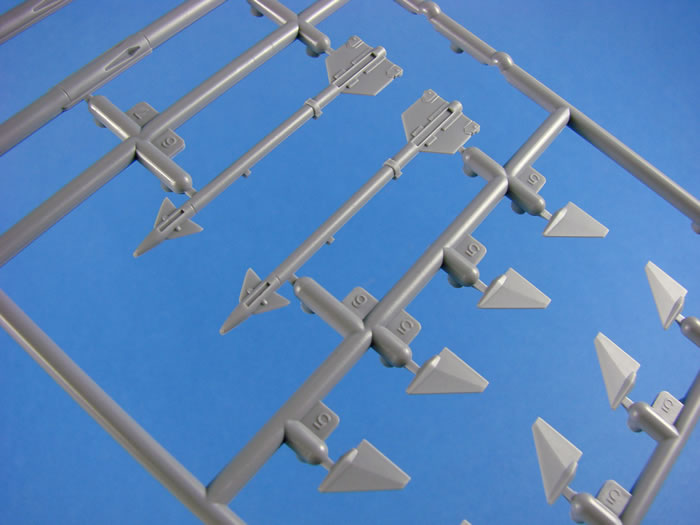
Detail is as everywhere on this kit, beautifully rendered.
Sprue G
This is the clear sprue. What I really like here is that ZM has provided separate options for both open and closed canopy, with the latter being provided as a single-piece glazing. Of course, the open option provides each section separately.
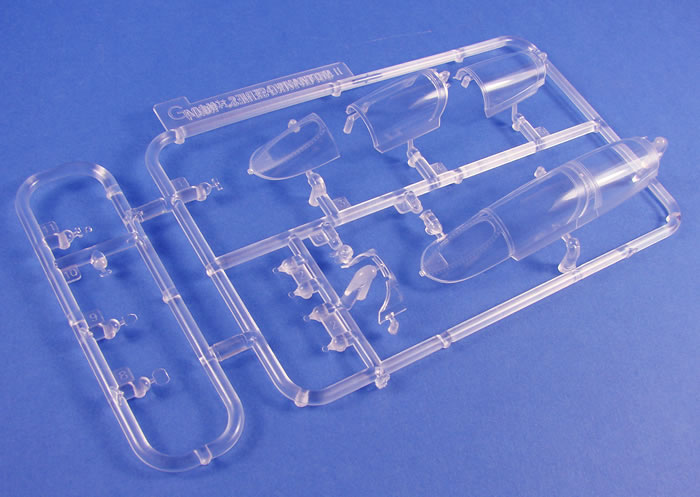
Canopy clarity is excellent, with the parts being suitable thin, and with small sprue attachment gates. Other parts on this sprue are for the position light, landing lights, etc.
Sprue H
This one is a mixed bag of parts from numerous construction areas, but the long centre part that you see is for the spine of the Phantom, covering up the seam line. In a similar vein, you also find the panel for the area to the rear of the cockpit. Other parts here include the DECM Antenna, electrical box for landing lights, front gear door, under-fuse antenna (3 options), catapult hooks, refuelling probe/door/actuator, pylons, launchers, sway braces, radar antenna controller, etc.
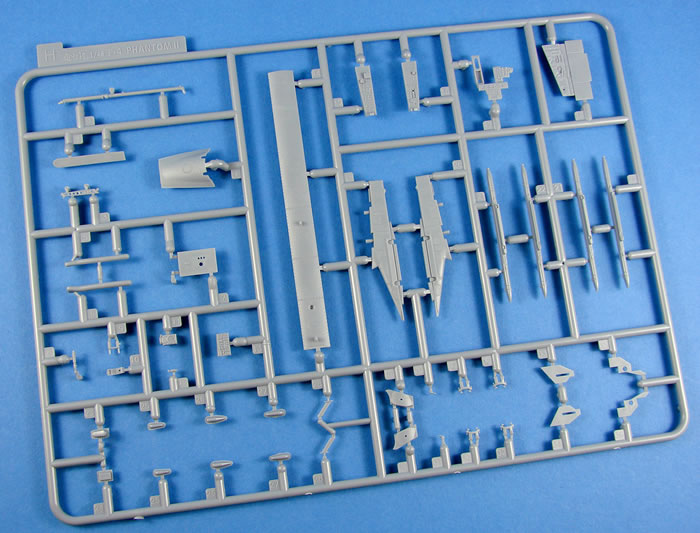
We can also see the detail expended on the instrument consoles, but be careful as it appears that a number of parts on this and other sprues, aren’t for use with this particular version. I would’ve liked to have seen these greyed out on the parts plans.
Sprue I
More cockpit parts are found here, such as the instrument panels, control stick, radar scope, rear cockpit sidewall, etc. Detail is king in the cockpit, and these look superb, with details being pronounced enough to be able to tackle them with a fine paintbrush. Decals are supplied for the consoles and instrument panels, but these are as an alternative to painting as they cover the whole part. I would also ignore these decals as they look poor in detail. You are best to punch out some instruments from the Airscale range of cockpit decals, and take it from there.
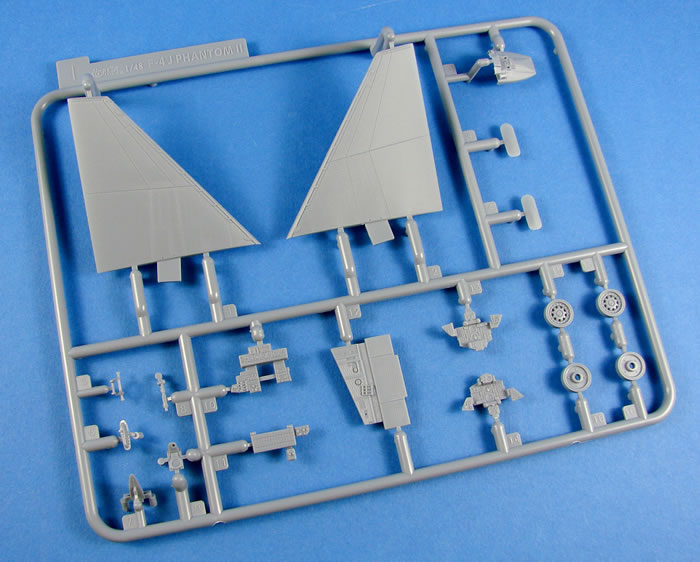
The stabilisers are also moulded here, with minimalist panel lines and only specific rows of rivets on the forward, inboard panel. These are moulded as single parts, so no clumsy upper and lower halves.
Sprue M
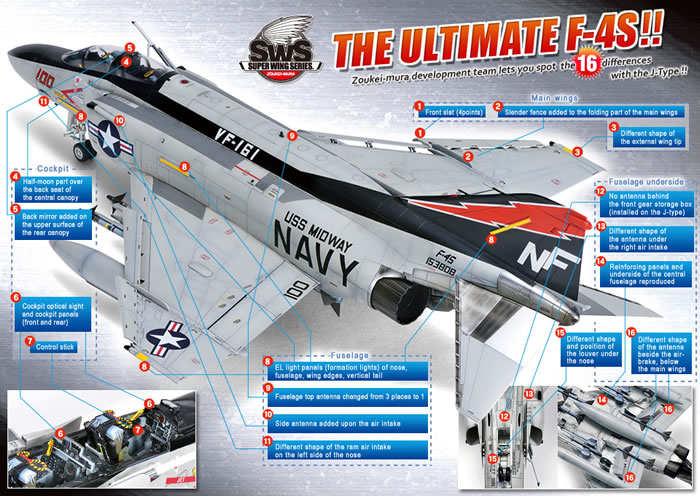
As tends to be the case with Phantom models, ZM has moulded the lower wing panel to include the fuselage centre section, but in this case, the outboard angled wing panels are moulded separately. The modeller will need to open specific holes in this part, so suit the pylon arrangement being fitted to their model. This sprue also contains the upper wing panels and the outboard, angled wing panels. The slats are also included here, as are the various actuators for them, and the flaps and ailerons. Of course, it was the slats that were specific to the F-4S.
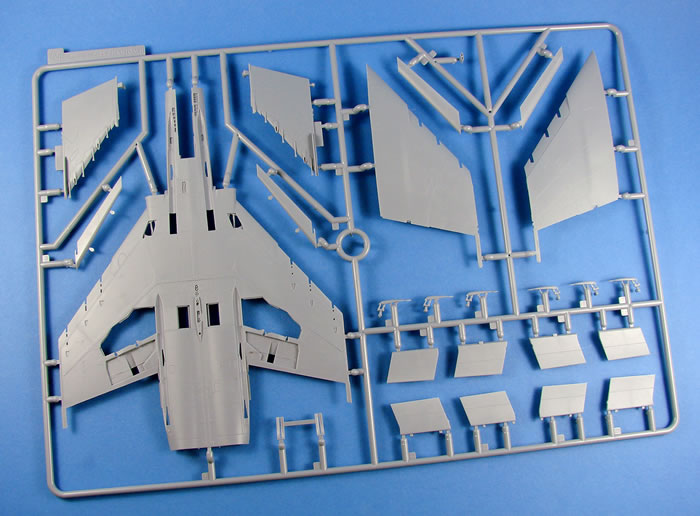
External detail consists of many fine panel lines and appropriate rivet/fastener lines, plus some raised detail too. Note the riveted, recessed area to the rear of the gear bay area. This is where the auxiliary air flaps will fit. I have to say that the detail on these really does beat the Academy kit, hands down. Absolutely stunning!
Decals
A single decal sheet is included, printed by Cartograf. I really am thankful for them using this company to make their decals, as their own tend to be thick, with poor definition. No problem here though! Remember…this is a large sheet, and only for the one scheme too, so everything you see here, more or less, will have to be added to your model. Factor in some serious bench time for your decaling. Printing is thin, in register, and with minimal carrier film. Colours are solid and authentic. The only decals I don’t like are the instrument and console ones, as I have already mentioned. As you can see, a full suite of stencils is included. I hope you have good eyesight and lots of patience.
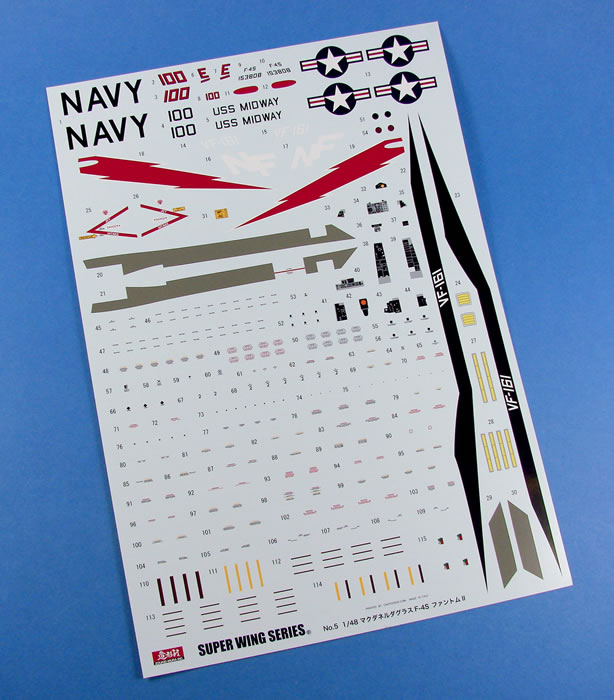
The single scheme is:
- F-4S, Bu.No. 153808, VF-161, USS Midway, 1981
A colour chart is included to help you with paint reference and as a guide for decaling.
Instruction Manual
This is the second 1/48 SWS kit I’ve had, and I note that in this scale, all printing is black/white/greyscale, with no colour as per used in the 1/32 kits. Apart from that, everything remains the same, with excellent CAD-generated constructional sequences that are chock full of not only tips for building, but notes on the real aircraft too. The instructions do look rather busy, with them being an assault on the senses in parts with so much annotation, but this is very much their style, and I’d rather have too much information than not enough.
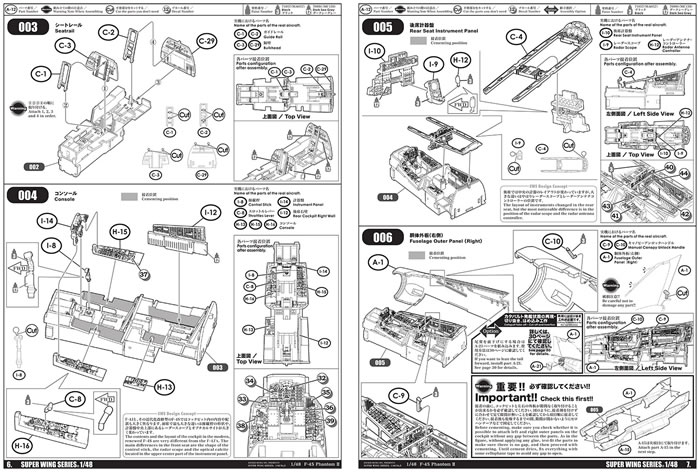
Paint references are given throughout in Vallejo and Mr. Color codes.
Zoukei-mura’s new range of Phantoms really does usher in the next generation of this aircraft in quarter scale, having an entirely different constructional approach to the Academy kits that were the best on the market, until now.
Of course, you can opt for one of the Eduard re-boxings, complete with resin and photo-etch accessories, and whilst these are still highly desirable kits to build, I think it’s fair to say that the ZM kit pips them in many ways, in terms of detail, approach and buildability.
My only negative is the single decal option, whereas with an Eduard release, you are spoilt for choice. At least the decals are Cartograf this time though!
My sincere thanks to Duncan at BlackMike Models for getting this out to me so quickly. To purchase, head over to their website.
Review Text and Images Copyright © 2017 by James Hatch
Page Created 3 October, 2017
Last updated
3 October, 2017
Back to HyperScale Main Page
Back to Reviews Page |
