Supermarine Spitfire Mk.IXc
Revell, 1/32 scale
S
u m m a r y |
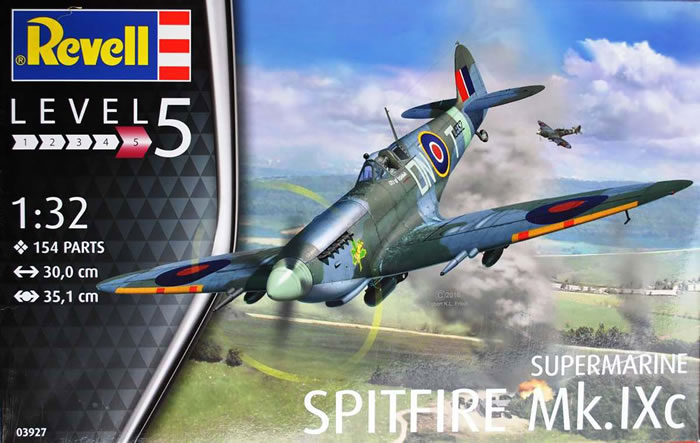
| Catalogue Number: |
Revell Kit No. 03927 - Supermarine Spitfire Mk.IXc |
| Scale: |
1/32 |
| Contents and Media: |
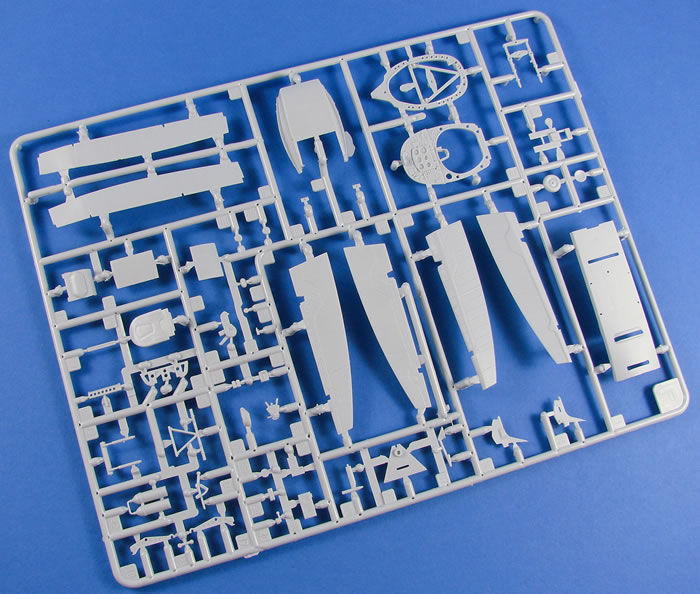
144 grey coloured plastic parts; 10 clear parts. Single decal sheet with markings for two aircraft. |
| Price: |
£29.99 EU price (£24.99 Export Price) plus shipping available from Hannants |
| Review Type: |
FirstLook |
| Advantages: |
Decent detail; accurate outline; great value for money. |
| Disadvantages: |
Heavy surface textures, short-shot canopy; poor main wheels; a number of accuracy issues; flimsy box. |
| Recommendation: |
It’s a juggling act, but if you are happy to do some of the extra work yourself, or you simply want a nice looking Mk.IX out of the box, then this kit will more that suffice whilst providing some nice detail and what appears to be a model with accurate lines. |
Reviewed by
James Hatch

Revell's 1/72 Do 17 Z-10 will be available online from Squadron.com
The Supermarine Spitfire is a British single-seat fighter aircraft that was used by the Royal Air Force and many other Allied countries before, during and after World War II. The Spitfire was built in many variants, using several wing configurations, and was produced in greater numbers than any other British aircraft. It was also the only British fighter to be in continuous production throughout the war. The Spitfire was designed as a short-range, high-performance interceptor aircraft by R. J. Mitchell, chief designer at Supermarine Aviation Works. Mitchell pushed the Spitfire's distinctive elliptical wing to have the thinnest possible cross-section, helping give the aircraft a higher top speed than several contemporary fighters. Mitchell continued to refine the design until his death in 1937, whereupon his colleague Joseph Smith took over as chief designer, overseeing the development of the Spitfire through its multitude of variants.
The Spitfire saw action in the European, Mediterranean, Pacific, and South-East Asian theatres. Much loved by its pilots, the Spitfire served in several roles, including interceptor, photo-reconnaissance, fighter-bomber and trainer, and it continued to serve in these roles until the 1950s. Although the original airframe was designed to be powered by a Rolls-Royce Merlin engine producing 1,030hp (768 kW), it was strong enough and adaptable enough to use increasingly powerful Merlins and, in later marks, Rolls-Royce Griffon engines producing up to 2,340hp (1,745 kW). As a consequence of this, the Spitfire's performance and capabilities improved over the course of its service life.*
* Courtesy of Wikipedia
It’s been around three years now since Revell released their new-tool Spitfire Mk.IIa, and I’m quite surprised that they’ve left it this long to bring subsequent versions to market. That surprise is even more manifest when you take a close look at the new sprues in this release. All of them carry the year ‘2014’ on them, so this model has been in gestation for quite a while now. In fact, the Mk.IIa itself, released in 2014, also carries that date.
Between these kits, there are only three common sprues, with the main components etc. obviously being new to this specific Mk.IXc kit. Styling of the new parts is the same as the earlier kit, such as riveting etc, so I imagine both kits were in development in tandem. Revell’s website gives the kits specifics as:
-
Detailed Mk.IXc wings with guns
-
Detailed cockpit and instrument panel
-
Detailed radiator
-
Rotating 4 blade propeller
-
Alternative bomb load
-
Detailed undercarriage
Revell’s new-look box is used here, but to the same flimsy design we’ve all come to know and love, and the sprues within are packaged as multiples within clear bags. This isn’t something I like, as it risks the damage of parts.
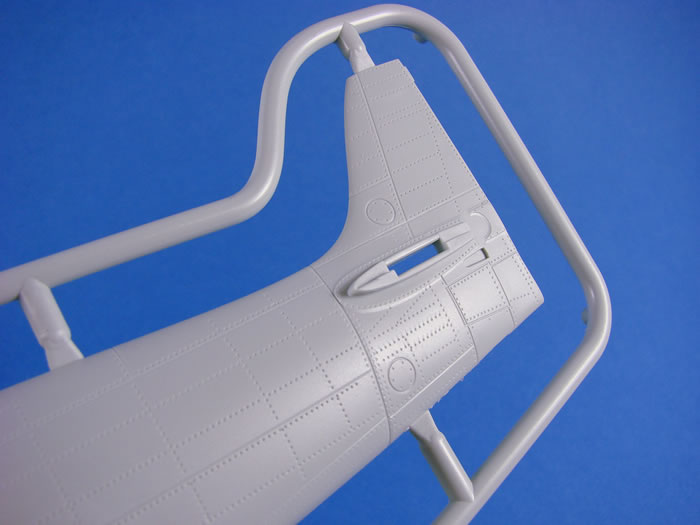
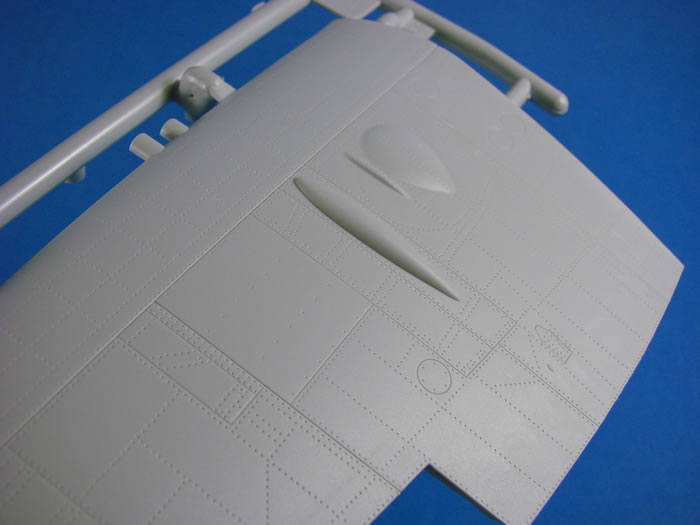
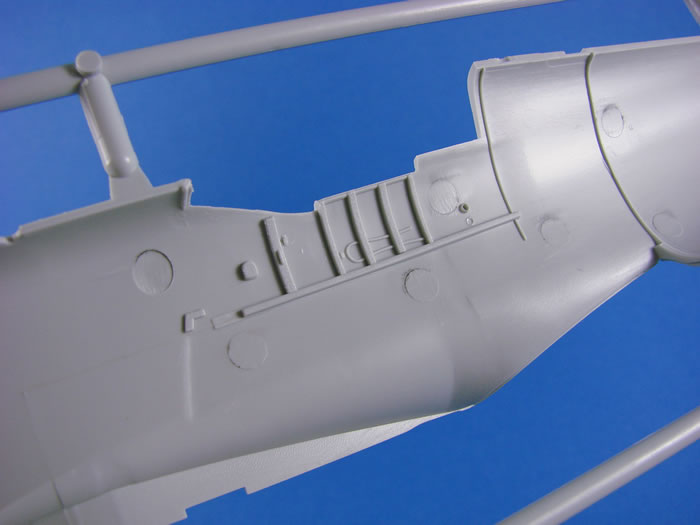
Looking around the fuselage exterior, Revell’s maniacal riveter has pretty much done the same job he/she did on the earlier Mk.IIa release, albeit this time, the Mk.IX did mainly have flushed rivets, dependent on where the machine was built. If domed rivets were used, this was generally on the aft fuselage, towards the rear of the cockpit area. You will of course need to check your references, as the old caveat goes. Either way, I do feel that what is given does need to be dialled back a little, perhaps with an airbrushing of Mr Surfacer and then the exterior being sanded back to plastic. Your mileage may vary and you may not be too bothered.

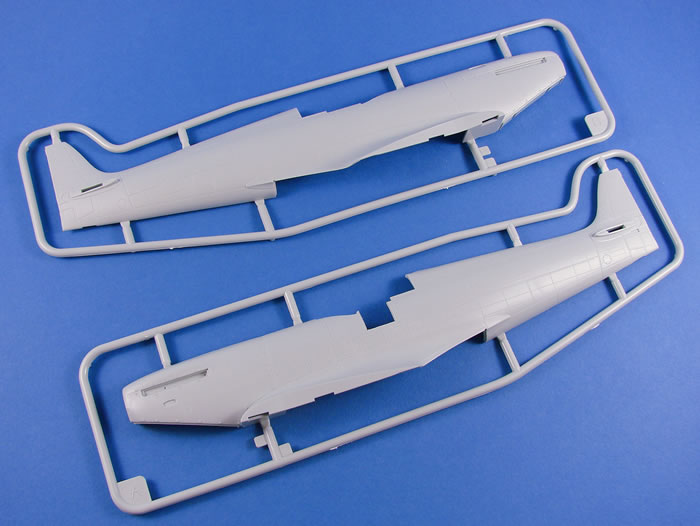
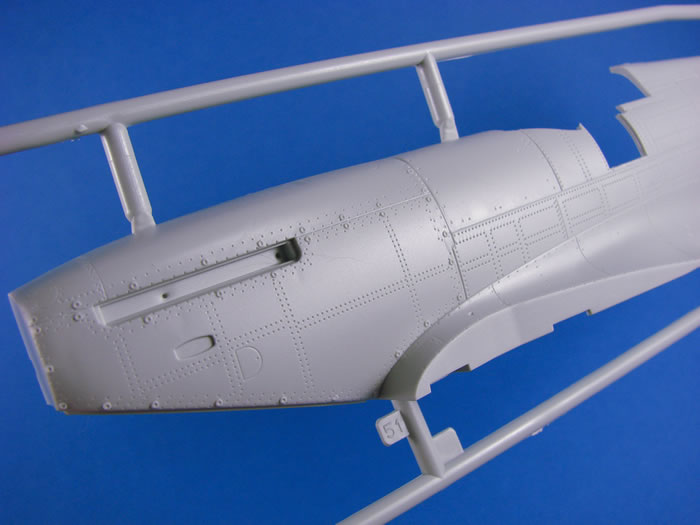
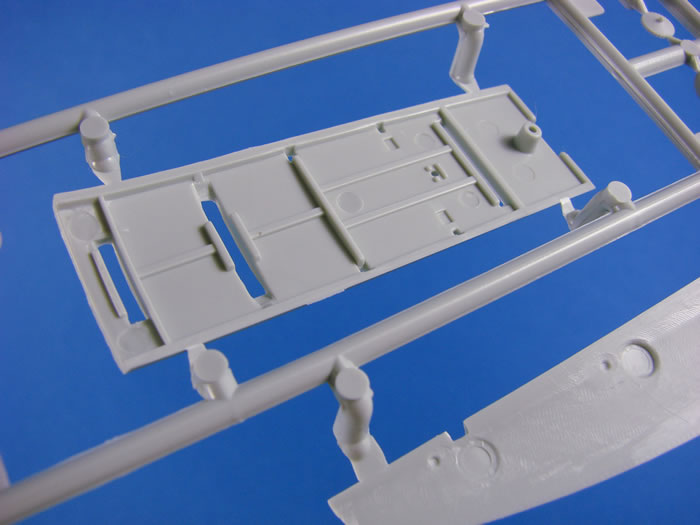
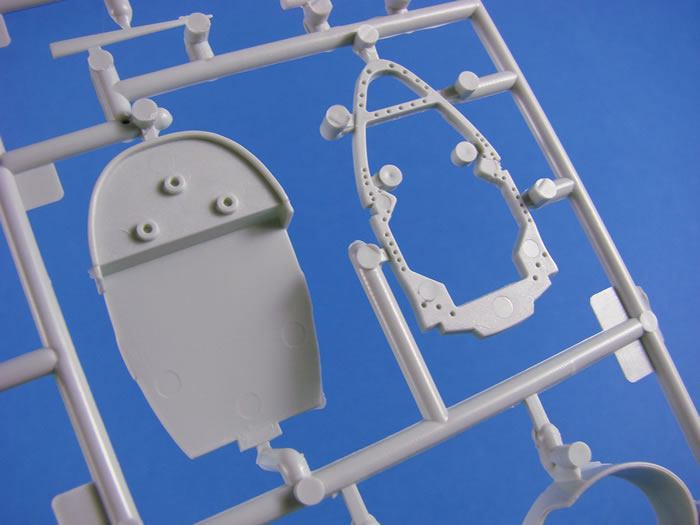
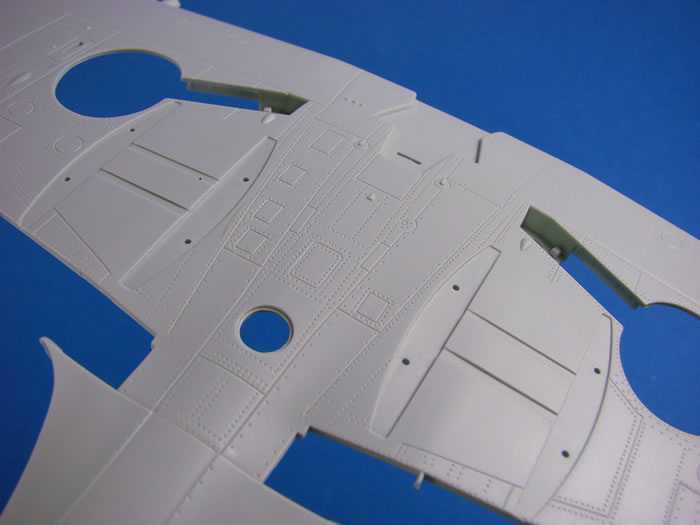
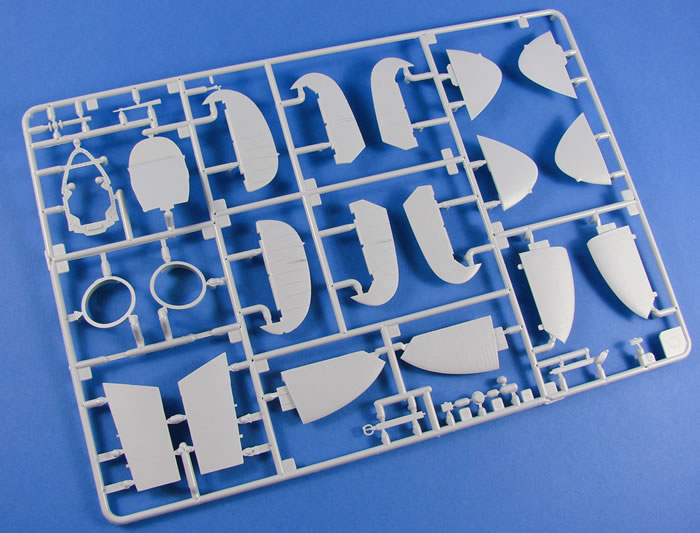
I don’t have the Mk.IIa kit to hand any longer, but I think this aspect of the model may not be quite as extreme as the earlier release. If you want to add raised rivets, then this is very easy with a product such as Archer raised rivet decals. This is the same course of action I took for my Mk.IIa when I wrote the ADH/Doolittle title on building that kit. Of course, the fuselage halves are newly tooled as you would expect for a Mk.IX, and the rest of the exterior looks very nice indeed, with delicate panel lines, cowling fasteners and general outline. I have to say that it does look like a Mk.IX. Where I think things fall down a little is around the wingroot, where it doesn’t really have that deep, scalloped shape that I associate with this area, and against the light, it looks a little bumpy when looking from the rear, towards the front. I also note a few sink marks here and there, but they should be easy to fettle. Internal fuselage wall detail is simple, with most detail being separate parts. A couple of ejector pin marks reside in the rear cockpit area, and you will need to eradicate these.
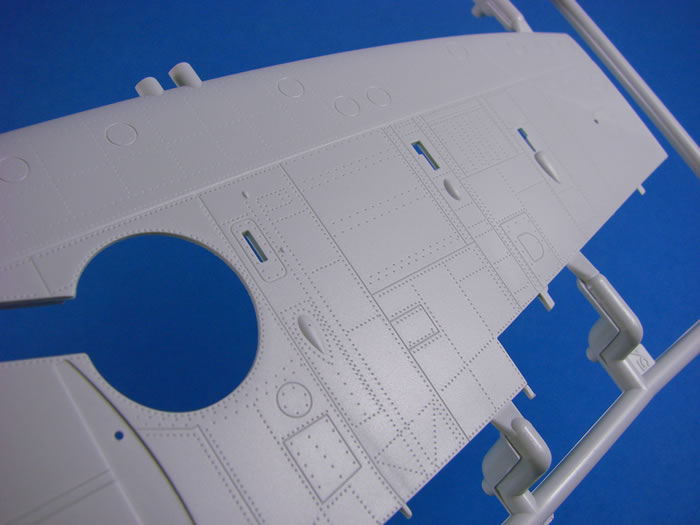
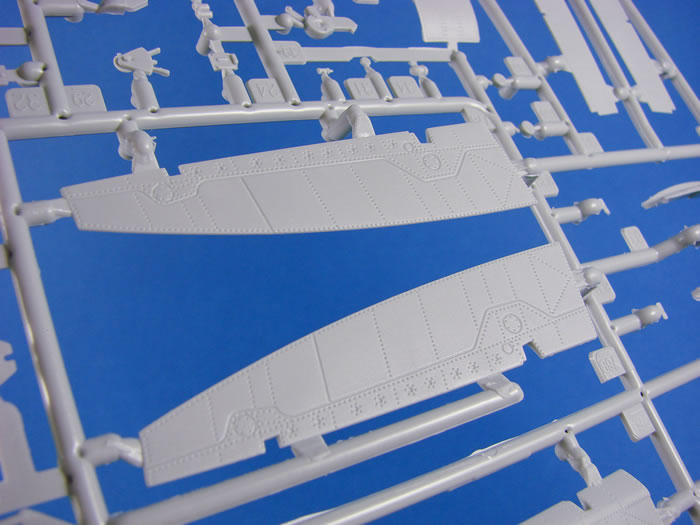
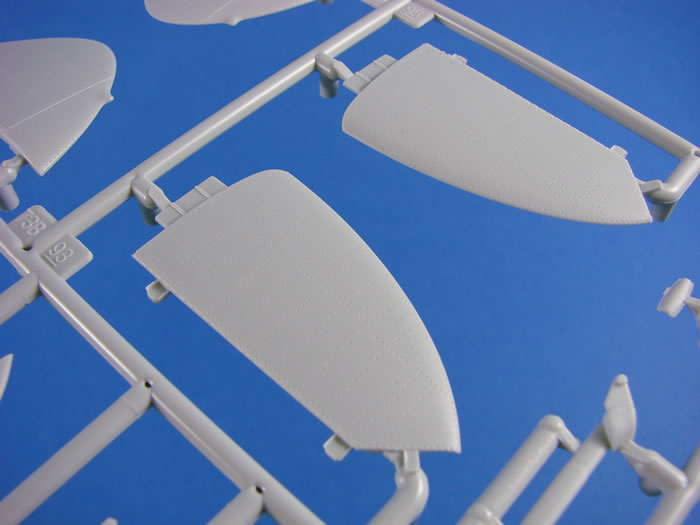
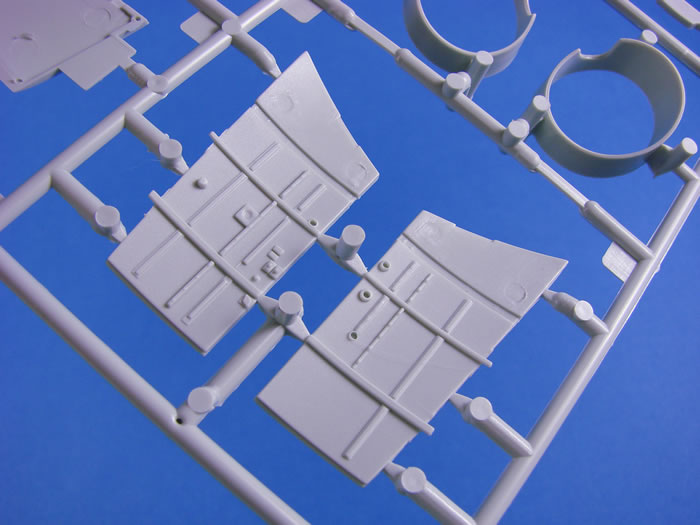
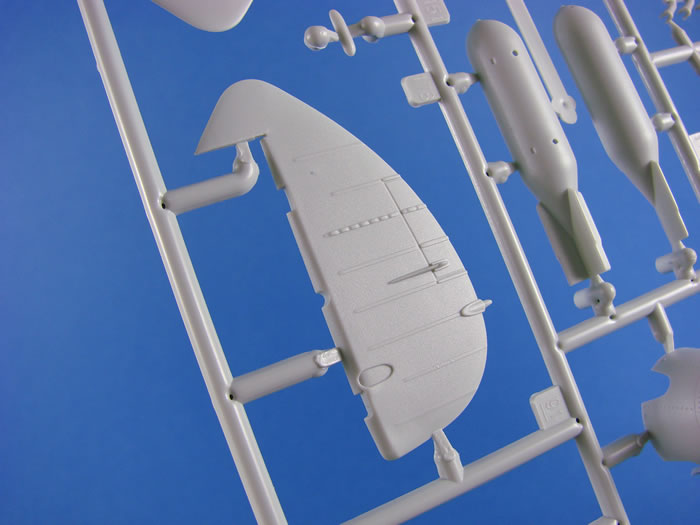
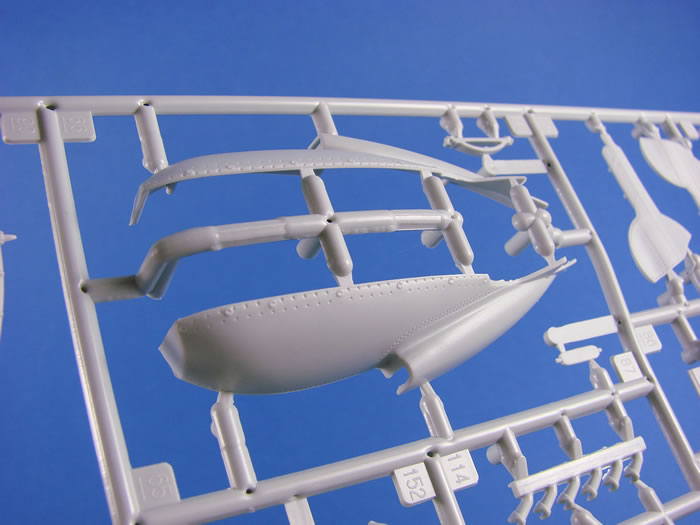
Again, the wings are newly-tooled as befits the changes to this later variant. Externally, detail really is very nice, with more fine panel lining, access ports etc. and the various bumps associated with the weapons bays and undercarriage seem to be on the mark. Rivet detail does seem to be finer than that of the fuselage, and I am more than happy with this. I can’t see any moulding defects here, although there is a little light flash that will need to be removed. I would have liked to have seen the small undercarriage position indicator panels as separates as these should be open when in the down position.
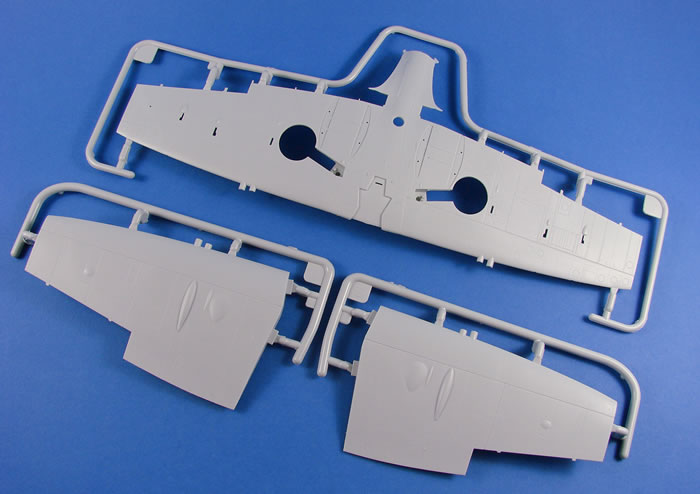
Also, the moulded detail in the ceiling of the wheel wells is a little simplistic. The same can be said for the liners, as these are devoid of detail. Eduard released a nice fix for this in their earlier Mk.IIa sets, and I expect they’ll do the same here. Flap detail is moulded here (cue the many who say they weren’t dropped on the ground, and the £5 fine etc. etc.), but it is simplistic. The same is to be said of the flap parts themselves.
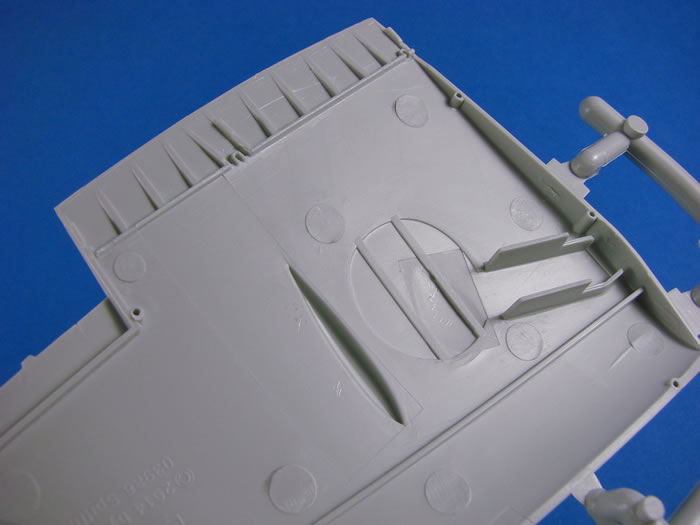
In common with the Mk.II, the radiator bases on the bottom of the wing are flat whereas they should be recessed with a ramp at the front and rear.
Cockpit detail is very good, especially for a kit of this price point, and the instrument panel, whilst the same as for the Mk.IIa kit, does seem to generally hold very close to that of the Mk.IX. I’m sure there were differences somewhere, but I’m certainly not educated enough to notice what they are. Revell did miss out some interior detail on the original kit, and I’m sure there should be more internal sidewall detail than is supplied, such as various boxes and panels that sit in between formers, with those raised, elongated details etc. I can’t be any more descriptive than that. The missing details from the original kit were soon picked up by Eduard, who released some rather nice sets for that kit, and I have no reason to presume they won’t do the same for this, although it would’ve been nice to have had a properly appointed office to start with.
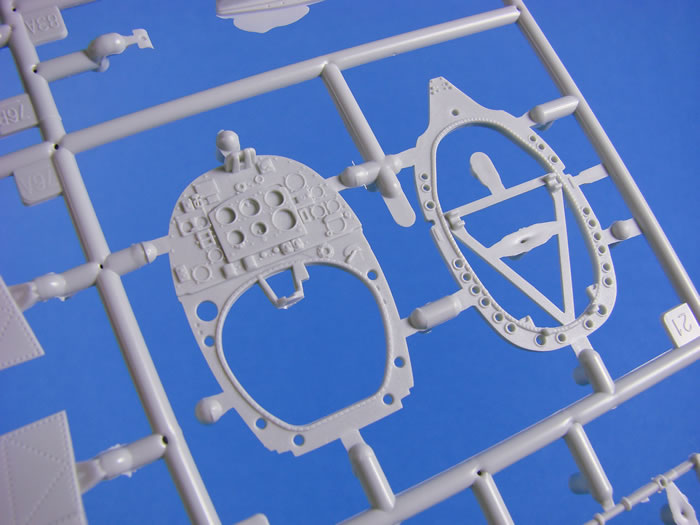
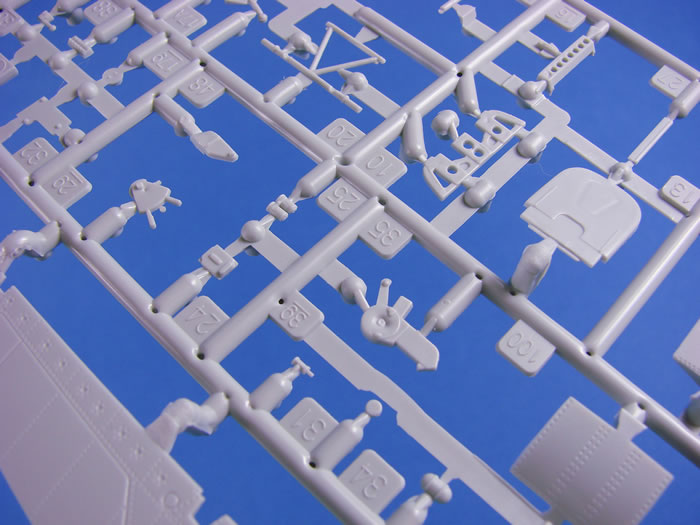
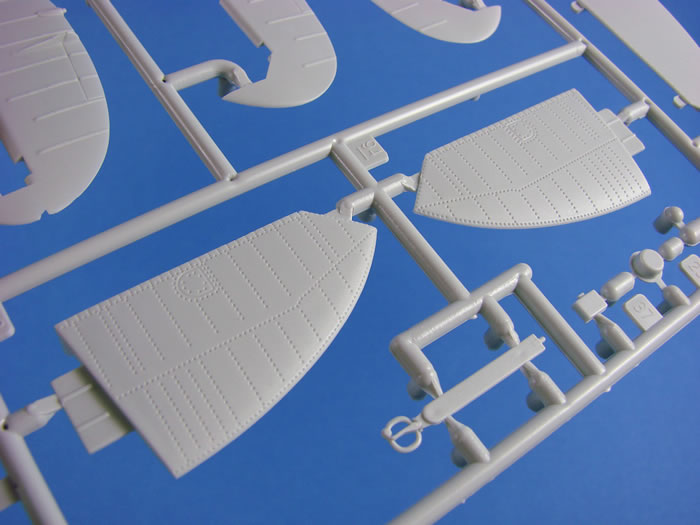
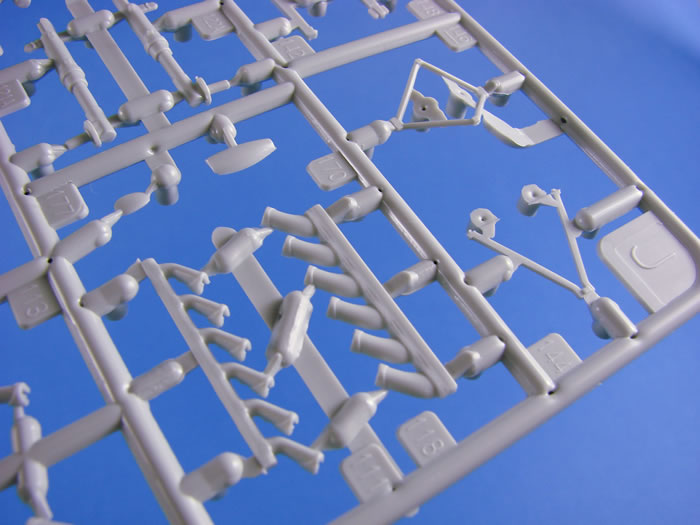
Unlike the earlier kit, at least with this one you can guarantee that the metal ailerons are suited to the Mk.IX, and these are moulded onto one of the sprues that are common to both kits. Here is included a good amount of detail for the cockpit, as well as one of the underwing radiators, instrument panel and rear pilot main former, complete with lightening holes that don’t need to be drilled out. A little flash can be seen here and there on some small parts, and on the radiator, but this is easy to remove. Another common sprue contains the wingtips, stabilisers, elevators, cockpit sidewalls and a former and bulkhead. The stabs and elevators are designed to be applicable to all Spitfire releases, meaning that on this kit, you will need to cut away a little of the stabilisers to allow the correct elevator setup to be used. In this case, as they are supplied, with the outer edge running front to back, and not angled as per the Mk.IIa kit. Surface detail of flying/control surface parts is excellent, with subtle riveting on the upper sides of the stabs, but strangely enough, more pronounced on the underside.
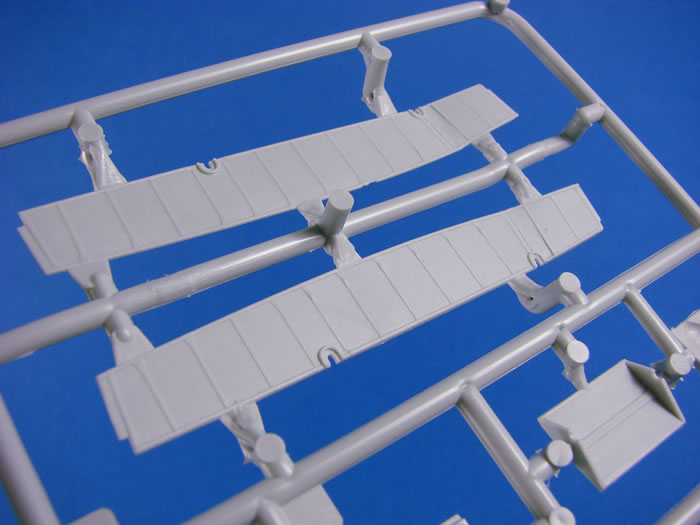
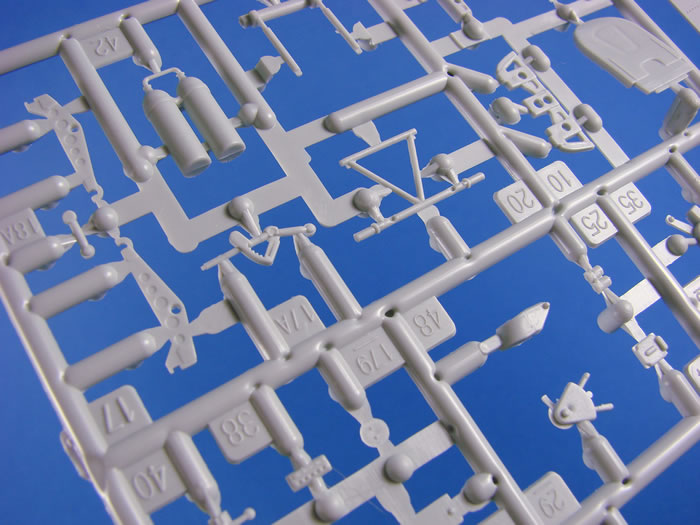
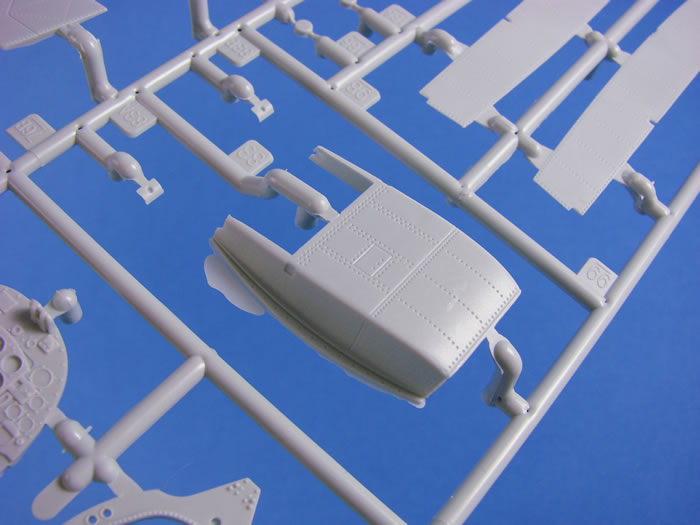
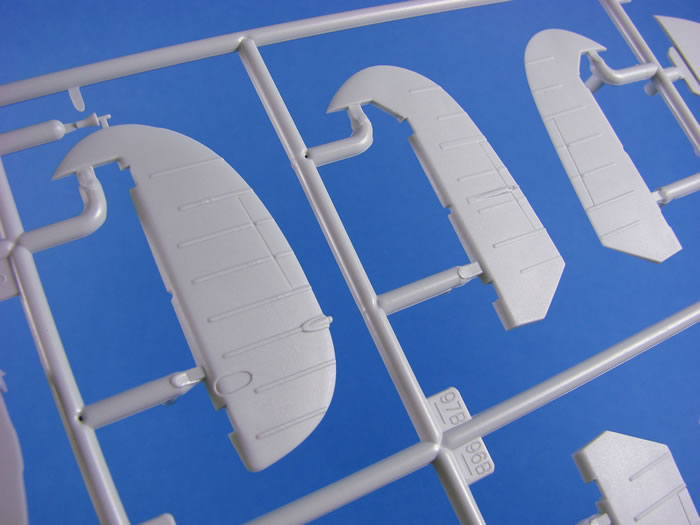
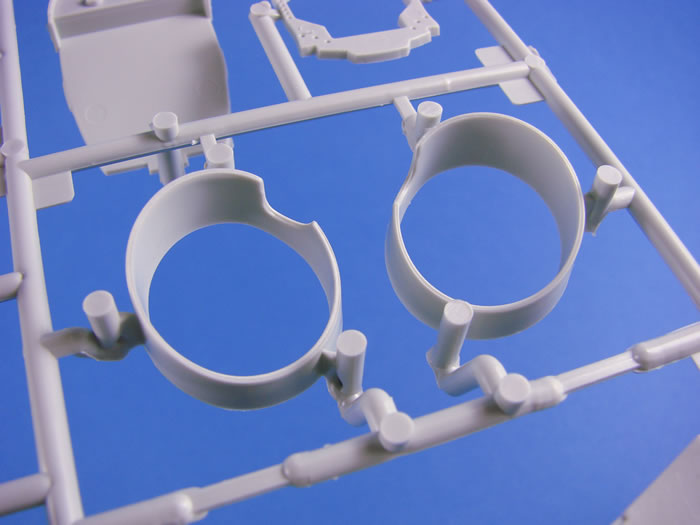
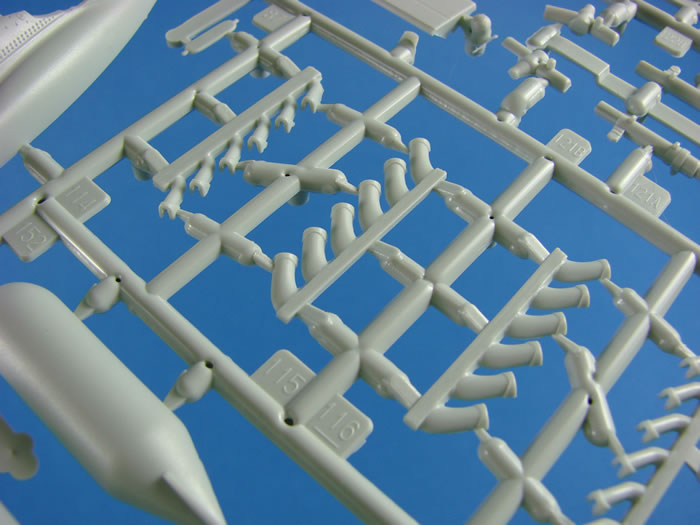
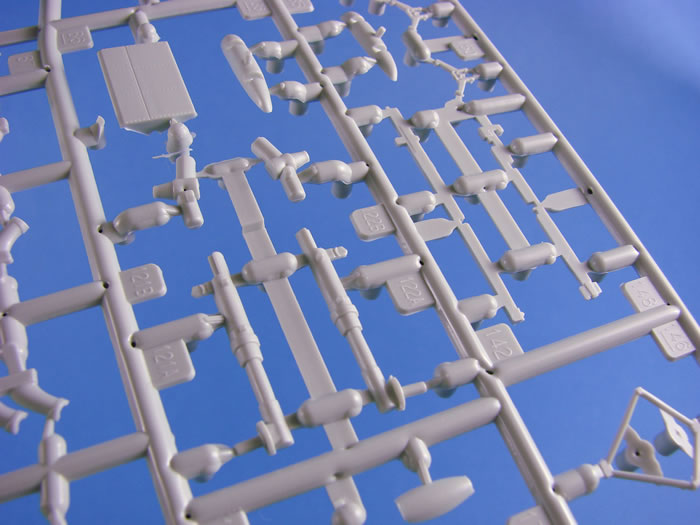
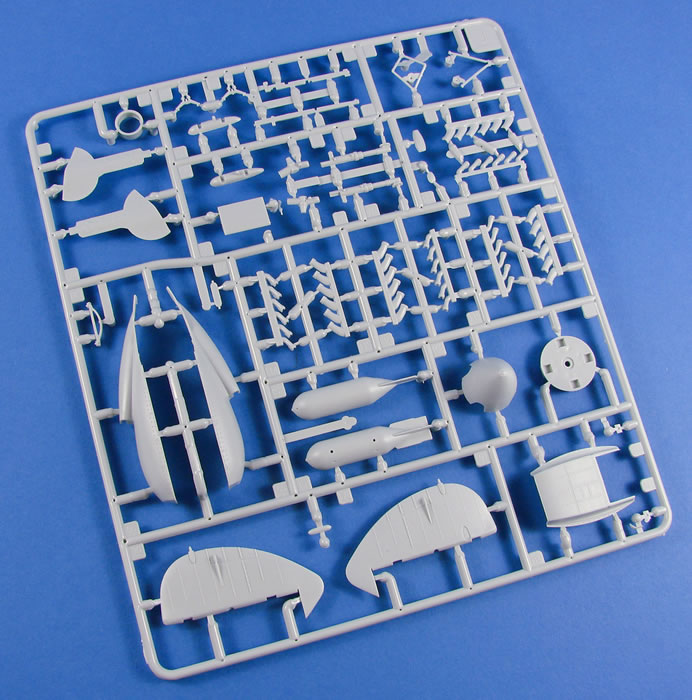
A lot of the new Mk.IX-specific parts are to be found on another new-tool sprue. Revell has included options for both early and late exhausts, a new spinner/back-plate ensemble, wide-chord rudder, second radiator to match the original part, two-piece lower engine cowl with integral intake, new undercarriage struts and gear doors, and parts for a centreline bomb and carrier. As with the earlier release, I do feel that the undercarriage struts are perhaps just a tad too simplistic, but certainly not a deal-breaker. Seams do exist on these parts, and they will need particular attention before assembly.
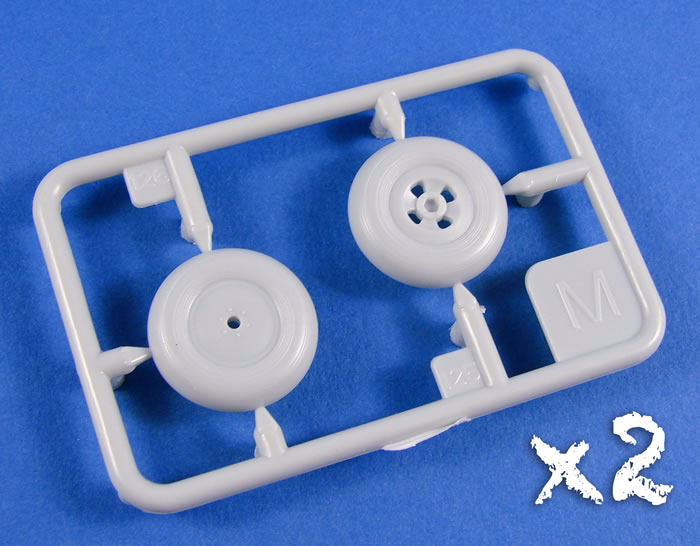
A small clear sleeve contains the last six small sprues. Two of these pertain to the wheels/tyres. These are moulded with integral four-spoke hubs, and for my, the hub detail doesn’t look right when I compare them with the photos in my Monforton Spitfire book. The tyres also don’t carry any Dunlop writing, or size etc. They also aren’t weighted. I’m none too impressed with these, and I would seem some aftermarket parts.
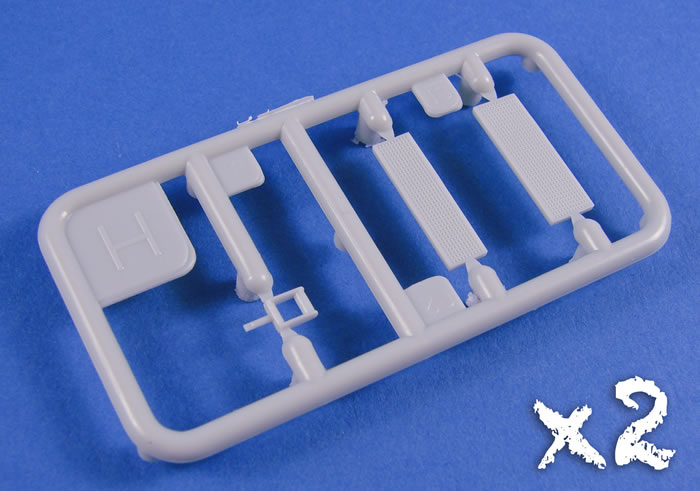
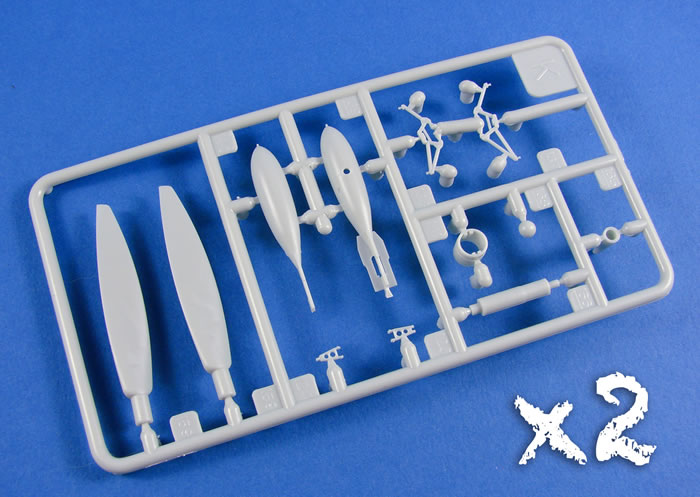
Two more sprues hold the parts for the underwing bombs and carriers, plus the new propeller blades for this release. Shape-wise, they do look ok, but the tips seem to be clipped. A couple of swipes with a sanding stick along the trailing edge should correct that though. The last grey sprues contain the radiator interior grilles and the rudder pedals.
Now, when we complain of multiple sprues being packed into a single bag, it’s said for a reason. All three clear sprues suffer this, and in mine, some parts had come adrift, including the main hood. Some very light scuff marks will need to be removed from this before assembly. Out of the three clear sprues, two of these are new to this release. These include a revised windscreen and hood, clear wingtips for the clipped-wing version, and two gunsights, of which only one is slated for use in this release.
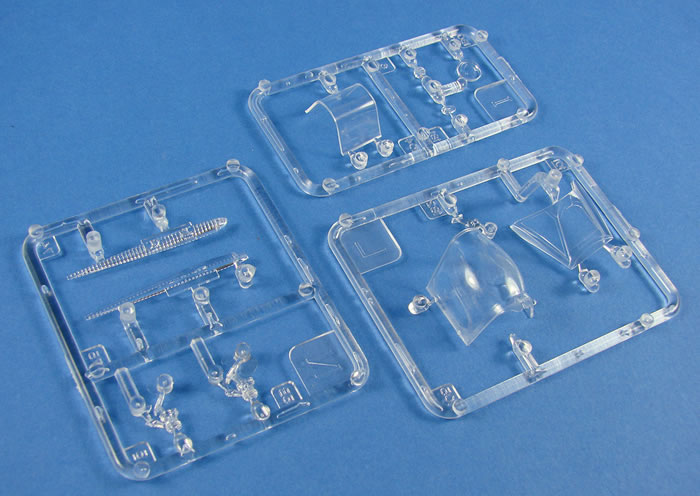
The clear parts themselves are superbly clear and also quite thin.
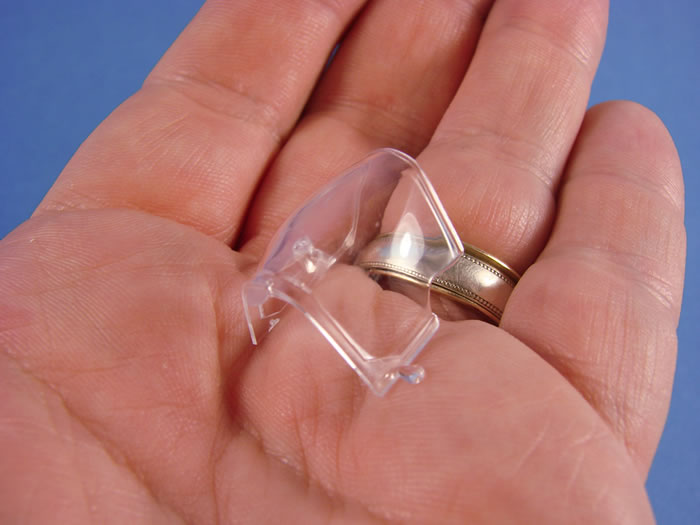
Unfortunately, the hood on my sample is a short-short and will need to be replaced.
Markings
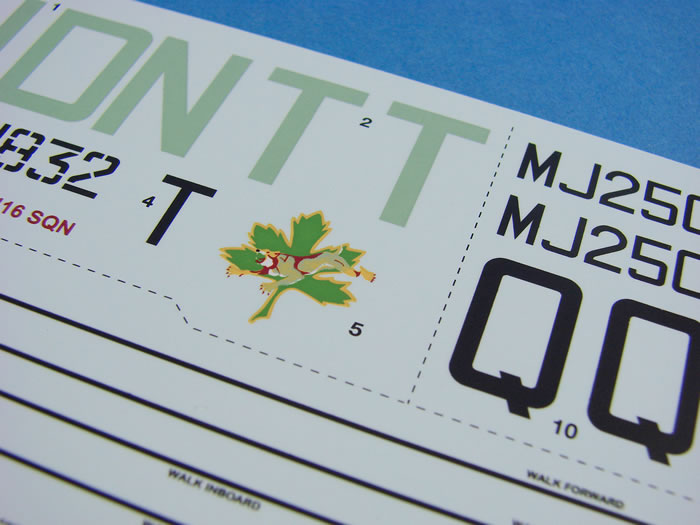
A single decal sheet, printed by Cartograf, is included here. Being Revell, their remit seems to be for the decals to have a matt finish. I admit to preferring glossy decals, but we can’t have it all ways. Printing is nice and solid, with authentic colour and minimal carrier film.
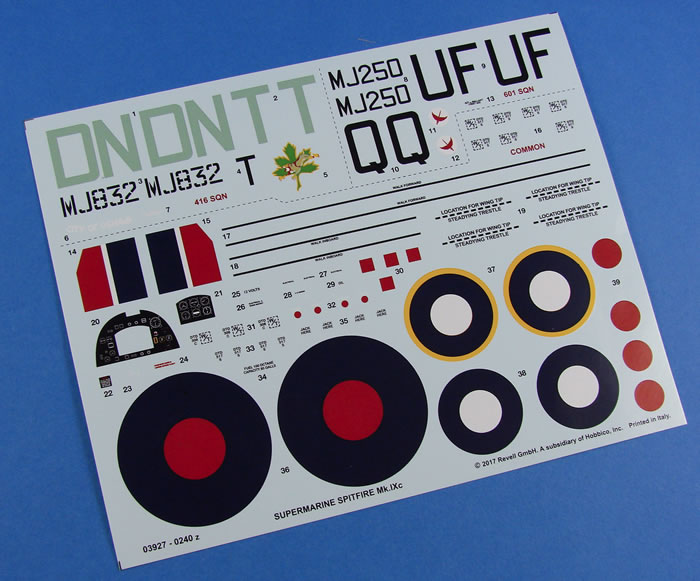
Registration is also perfect.
As well as the serials, codes and national markings, stencils are also included, as is a two-part instrument panel decal, but unless you have gallons of Solvaset or Mr Mark Setter, I would ignore this, or at the very least punch the instruments from the main decal, or use Airscale for the instrument panel.
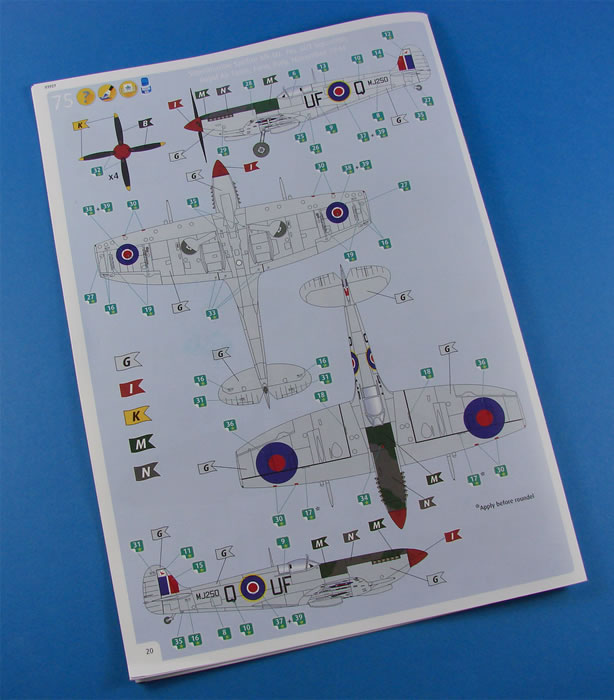
The two schemes included are:
-
Mk.IXc, DN-T, MJ832, No.416 Sqn, Royal Canadian Air Force, Tangmere, England, May 1944
-
Mk.IXc, UF-Q, MJ250, No.601 Sqn, Royal Air Force, Fano, Italy, November 1944
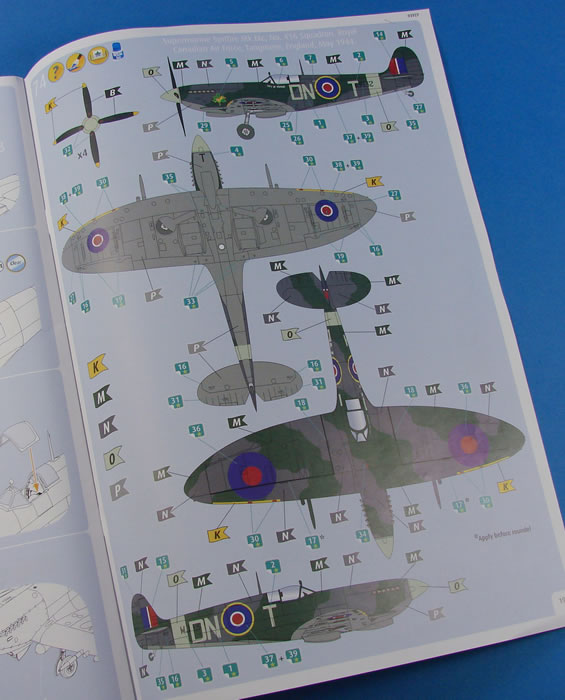
Instructions
An A4 colour manual shows assembly over 73 easy-to-understand stages, with clear annotation and references made to Revell paints. I much prefer this new format of instructions over the ones Revell used to supply. The last pages clearly show each scheme and the colours used, plus decal placement.
I could moan about this and that, and indeed I have listed the things I don’t particularly like, or those that could have been better.
I’ve also tempered the negative aspects with notes to say how these issues may be overcome. As a reviewer, I feel this it the best approach.
However, I must consider the price point of this release. It’s roughly a third that of Tamiya’s Mk.IX kit. Of course, costs increase if you start to add any subsequent detail sets. A minimum of new wheels, interior set and wheel bay set will add around another £35 to that cost.
It’s a juggling act, but if you are happy to do some of the extra work yourself, or you simply want a nice looking Mk.IX out of the box, then this kit will more that suffice whilst providing some nice detail and what appears to be a model with accurate lines.
If you’d like to see how I tackled the Mk.IIa with tips that are pertinent to this release, then check out the ‘How to Build’ book from Doolittle Media.
Revell model kits are available from all good toy and model retailers. For details visit www.revell.de/en, @RevellGermany or facebook.com/Revell
Review Text and Images Copyright © 2017 by James Hatch
Page Created 2 May, 2017
Last updated
2 May, 2017
Back to HyperScale Main Page
Back to Reviews Page |
 Home
| What's New |
Features |
Gallery |
Reviews |
Reference |
Forum |
Home
| What's New |
Features |
Gallery |
Reviews |
Reference |
Forum |