North American P-51D Mustang
Airfix, 1/48 scale
S
u m m a r y |
| Catalogue Number: |
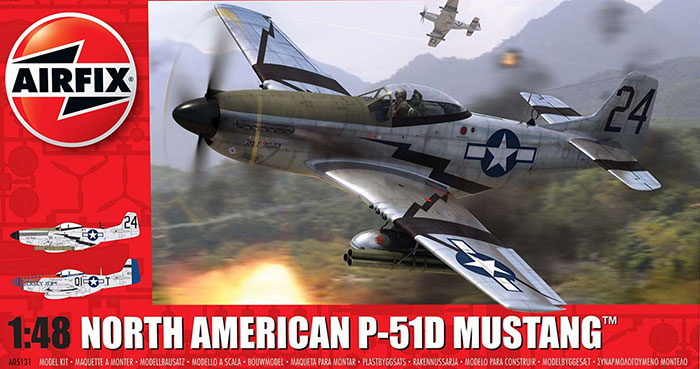
Airfix Kit No. A05131 - North American P-51D Mustang |
| Scale: |
1/48 |
| Contents and Media: |
See details below. |
| Price: |
£20.99 EU Price (£17.49 Export Price) plus shipping available online from Hannants
Also available from P&S Hobbies for £21 and model retailers worldwide and online |
| Review Type: |
FirstLook |
| Advantages: |
High level of detail, approach and buildability. |
| Disadvantages: |
Some soft detail here and there. |
| Recommendation: |
A very nice kit with plenty of detail and very well moulded. It’s not a perfect release with some softness here and there, but it’s most certainly worth £20 of anyone’s money! Give it a shot.. |
Reviewed by
James Hatch

Revell's 1/72 Do 17 Z-10 will be available online from Squadron.com
The North American Aviation P-51 Mustang is an American long-range, single-seat fighter and fighter-bomber used during World War II and the Korean War, among other conflicts. The Mustang was designed in 1940 by North American Aviation (NAA) in response to a requirement of the British Purchasing Commission. The Purchasing Commission approached North American Aviation to build Curtiss P-40 fighters under license for the Royal Air Force (RAF). Rather than build an old design from another company, North American Aviation proposed the design and production of a more modern fighter. The prototype NA-73X airframe was rolled out on 9 September 1940, 102 days after the contract was signed, and first flew on 26 October. The Mustang was originally designed to use the Allison V-1710 engine, which, in its earlier variants, had limited high-altitude performance. It was first flown operationally by the RAF as a tactical-reconnaissance aircraft and fighter-bomber (Mustang Mk I). The addition of the Rolls-Royce Merlin to the P-51B/C model transformed the Mustang's performance at altitudes above 15,000 ft, allowing the aircraft to compete with the Luftwaffe's fighters. The definitive version, the P-51D, was powered by the Packard V-1650-7, a license-built version of the Rolls-Royce Merlin 66 two-stage two-speed supercharged engine and was armed with six .50 calibre (12.7 mm) M2/AN Browning machine guns.
From late 1943, P-51Bs and Cs (supplemented by P-51Ds from mid-1944) were used by the USAAF's Eighth Air Force to escort bombers in raids over Germany, while the RAF's Second Tactical Air Force and the USAAF's Ninth Air Force used the Merlin-powered Mustangs as fighter-bombers, roles in which the Mustang helped ensure Allied air superiority in 1944.[10] The P-51 was also used by Allied air forces in the North African, Mediterranean, Italian and Pacific theatres. During World War II, Mustang pilots claimed to have destroyed 4,950 enemy aircraft. At the start of the Korean War, the Mustang was the main fighter of the United Nations until jet fighters, including the F-86, took over this role; the Mustang then became a specialized fighter-bomber. Despite the advent of jet fighters, the Mustang remained in service with some air forces until the early 1980s. After the Korean War, Mustangs became a popular civilian warbird and air racing aircraft. Except for the small numbers assembled or produced in Australia, all Mustangs were built by North American initially at Inglewood, California but then additionally in Dallas, Texas.
Historical extract courtesy of Wikipedia
The Kit
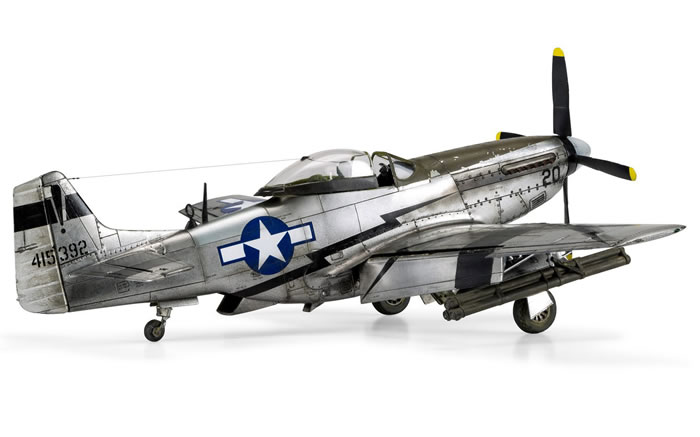
This is my third Airfix review in the last week or so. A few years ago, I wouldn’t have been interested in their output, but they seem to be pushing all of my buttons at the moment. I have to say that when I saw this in P&S Hobbies in York, I knew it was going to leave with me.
Whilst the artwork style of these new kits is very different to the Airfix kits of my youth, they still manage to draw the modeller to them with their gorgeous computer-generated imagery.
Again, this is another sturdy and glossy box with which incorporates a parts tray and separate lid, and one where you need to get your fingernails under the lid to prise it off. Inside, all of the six frames of light grey styrene are packed into a single heat-sealed polybag. Another bag within this contains the single clear sprue. I’m always very vocal about all parts frames being packed into a single bag, and with good reason.
My sample kit had a few parts that were skewed on the frames due to the packing. A reasonably large decal sheet is included, as is the instruction manual, printed in Airfix’s new format.
Airfix doesn’t include any photo-etch in their releases, but the detail within should be more than enough for the average consumer. If you want a further detail-fest, then Eduard has a full suite of resin and photo-etch for this particular release.
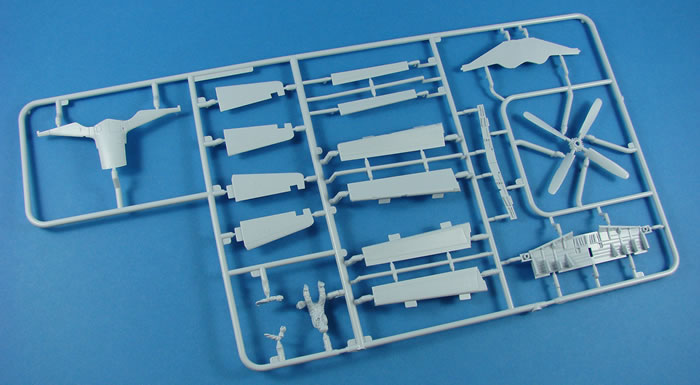
Sprue A
It’s interesting to see the part’s breakdown and engineering of this kit. Airfix seem to be offering some very nice options with their new kits….even single seat fighters such as this one. Note the fuselage is moulded without a tail section? If that’s a hint that we might see an early un-filleted tail in a future release, then that would only be an extra bonus to us, as this kit offers two styles of the later filleted tail. Yes, two styles. Modelling is certainly an education in itself.
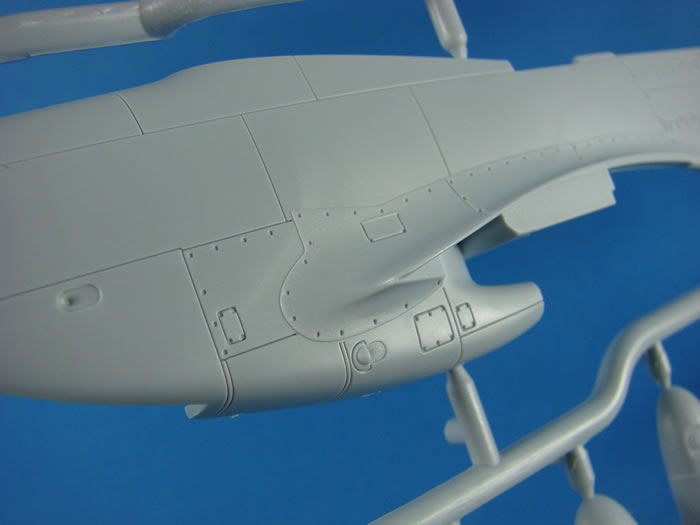
Looking at the exterior of the fuselage, you will see some very neat panel line depiction and fairing and fastener details. I think these panel lines are perhaps a tad heavier than they could be, but certainly not in the realms of a few of their kits of recent years. I also think my photography seems to emphasize it a little too. It’s certainly not a deal breaker for me, in the slightest.
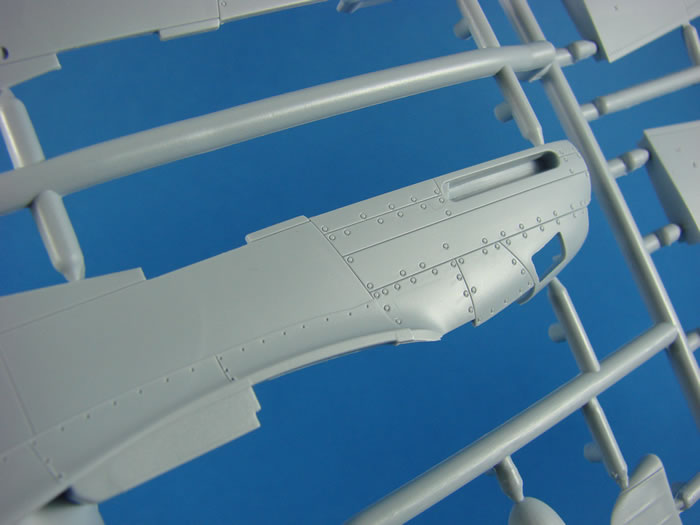
Note that the exhaust manifolds fit into a recessed slot from the outside of the fuselage, meaning you can add them after painting. The cowl also has a hole into which one of two options of breather plate can be added. Within the fuselage, there is no detail, but a recessed area indicates where the separate cockpit wall panels will sit.
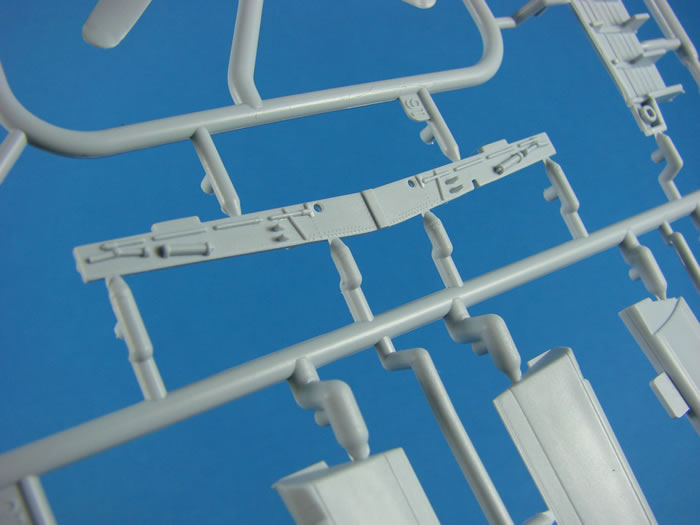
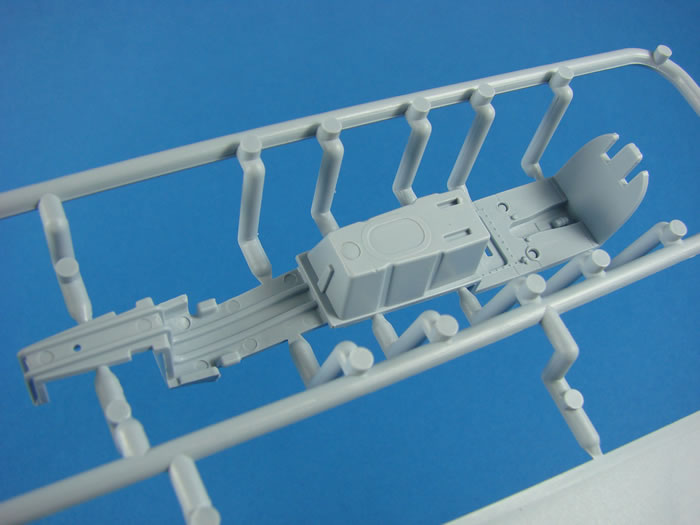
The most unusual part on this frame is the cockpit floor area and fuel tank section, which extends back to, and incorporates the tail wheel well. Coincidentally, this is pretty much the same method that Revell has employed with their new P-51D Early release in 1/32. Anyway, this part forms the base into which the various other parts will sit, including the battery and radio gear. There are some ejector pin marks, but these are in the area to the rear of the fuel tank, and don’t form part of anything that can be seen.
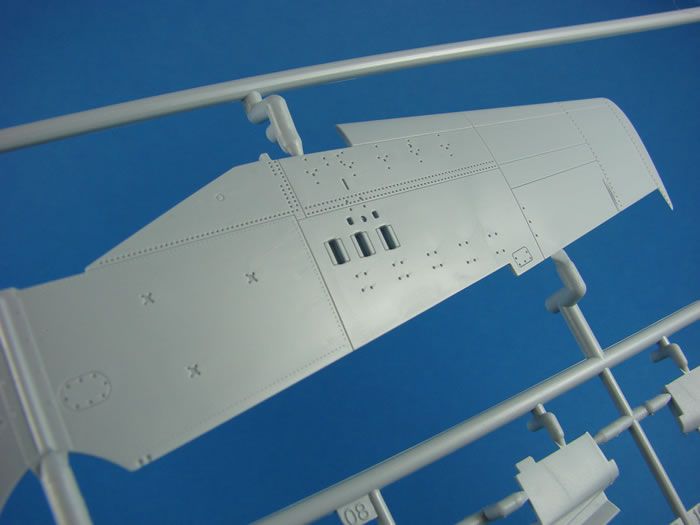
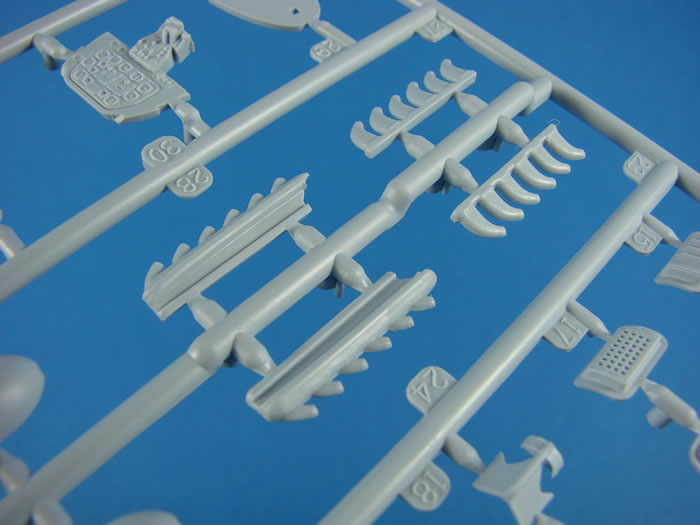
Mustang wings. This is always a subject that draws debate and argument, pretty much every time a P-51D kit hits the shelves. To putty, or not to putty, is undoubtedly the question at all times. Now, whilst this model isn’t riveted, per se, it does have key rows of rivets and fasteners that are recreated. This also includes the wings. We have to remember that Tamiya’s own Über-kit had riveted wings, albeit very faint. You can of course choose to fill this particular detail if it goes against your own personal taste. It can also be seen that the leading-edge MG section is a separate piece. Internally, there is no wheel well detail moulded as this will be separate too.
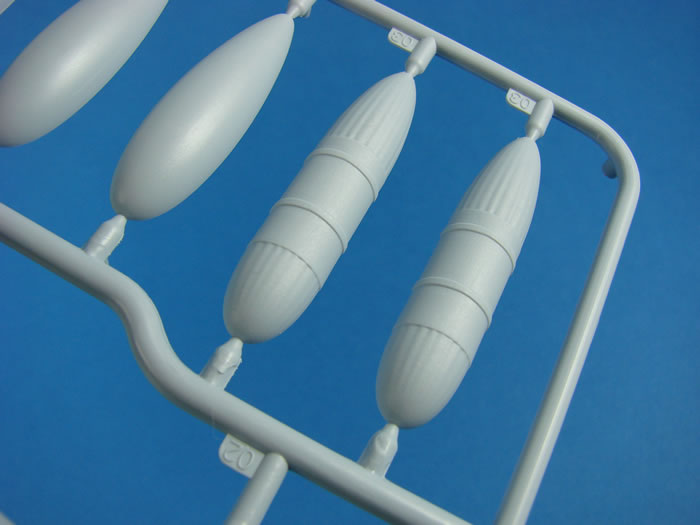
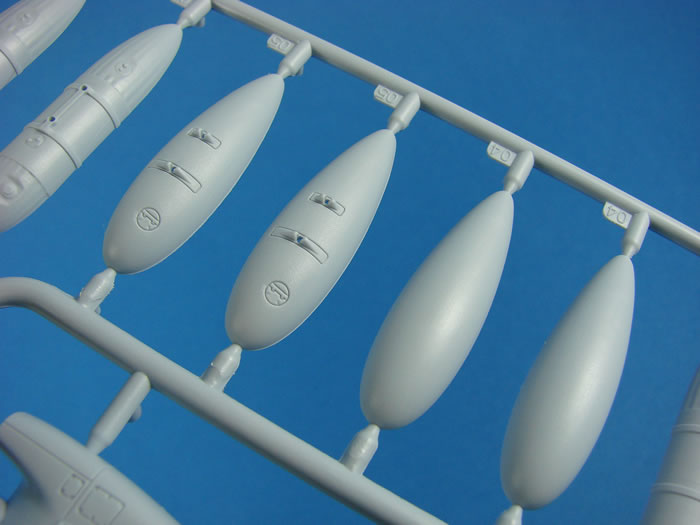
Both regular and paper drop tanks are included. The texture on the paper tanks is very nice. This will probably be the option I use. I also quite like the texture on the fabric rudder, although it could benefit from a few light strokes of a sanding sponge.
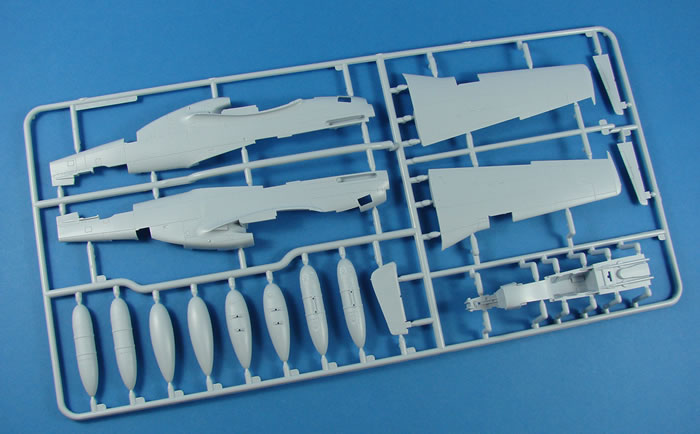
Sprue B
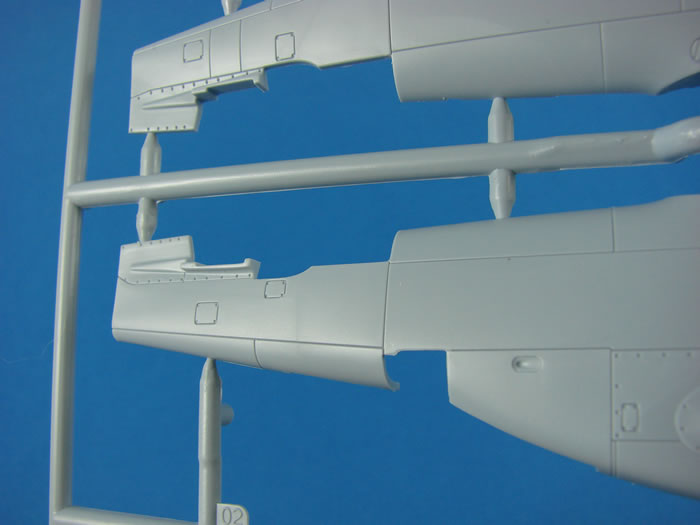
This larger frame shows that Airfix has designed the wings to have a full-span lower part, which is complete apart from the separate front wing to cowl fairing that forms the leading edge of the inboard wing area and main gear bay. I’m not absolutely sure of the reason why at this stage of an out-of-box review, but nothing leads me to think that this isn’t done with good reason. Again, wing surface textures are very nice, depicting key panel lines and rivets. There are positions here for what look like rockets, but with this release, you are asked to fill these and sand these flush. Should you wish to install the bazookas, bombs or drop tanks, then you will need to open up the locations from within the wing panel.
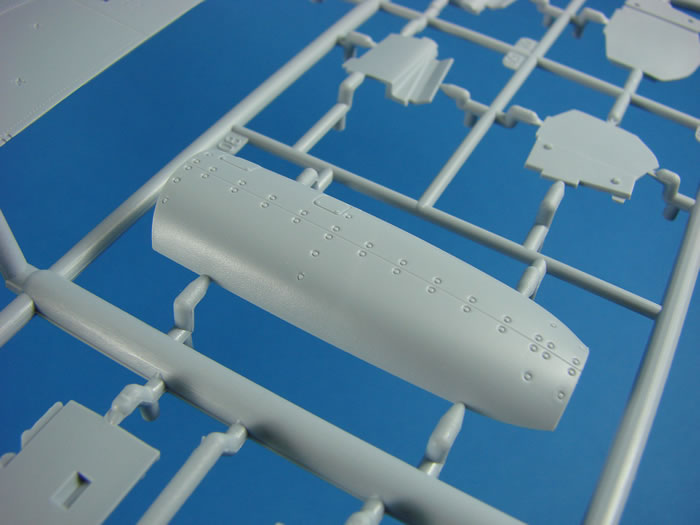
The upper engine cowl on this model is a separate part, meaning that it installs along a natural cowl panel line, and of course, you won’t need to remove any troublesome seams that would otherwise run right down the middle of this area.
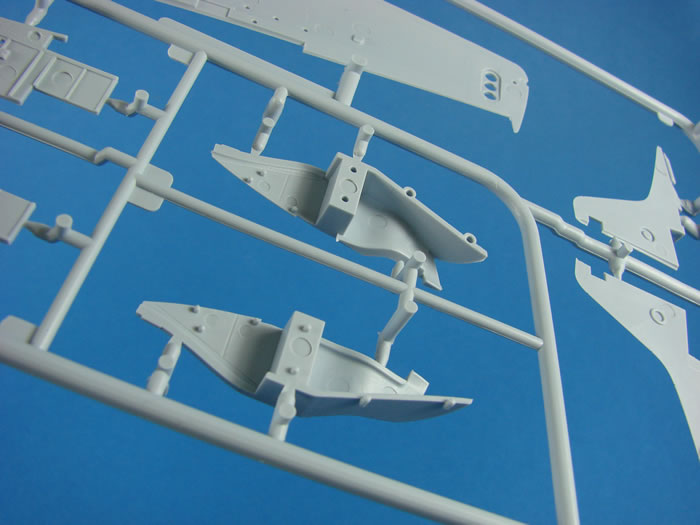
There is some nicely innovative engineering going on at Airfix, these days. Here you can see the tail wheel walls which fit into the rear of the aforementioned cockpit tub area. I’m still amazed that they did this in the same manner as the new 1/32 Revell kit. Great minds think alike! Detail is very good, despite you not really seeing too much in the way of anything once installed. Note the detail on the main gear bay doors too. These incorporate part of the main well wall details.
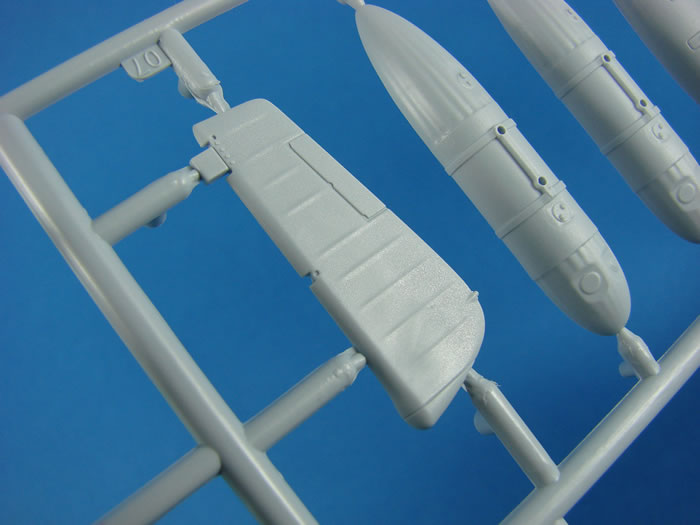
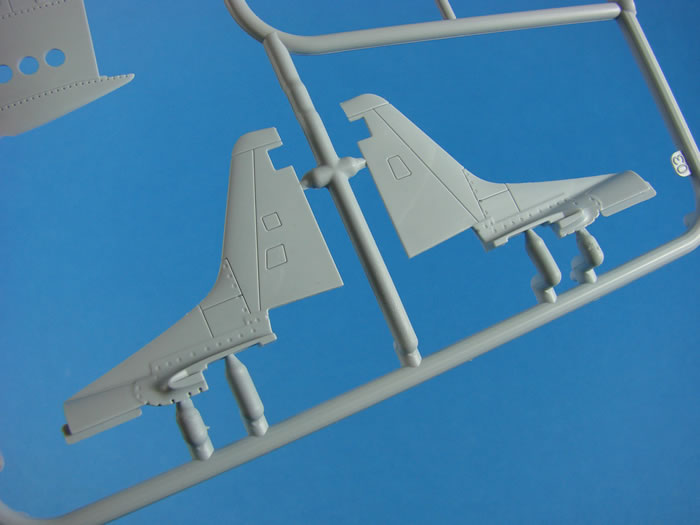
Earlier, I did say that there are two versions of the filleted tail, and here they are. The differences here are fillets themselves, and the stabiliser fairing area.
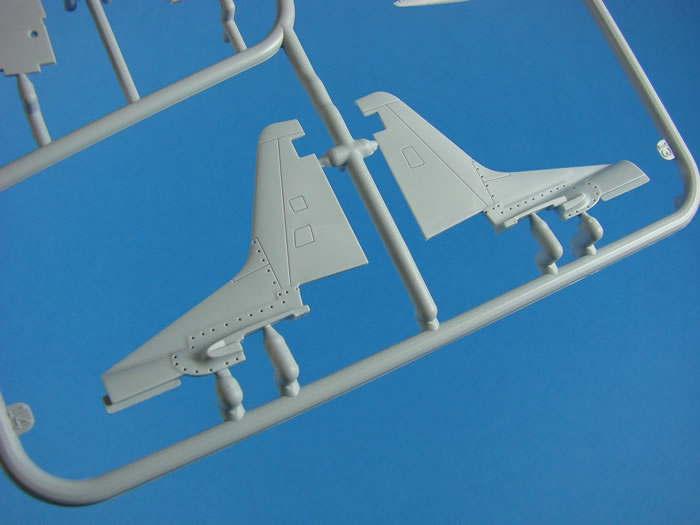
These parts will install along a natural panel line.
The cockpit walls are moulded here. I am more than happy with the detail which is depicted, plus the extra parts which enhance them, but there are a couple of what appear to be ejector pin marks in awkward places. Not all of these circular marks are pin marks. Some are actual details, but I fear not all. That is a little disappointing. If you want to take this model to another level, then Eduard’s replacement pit will not only remove this issue, but improve things yet further. This is a very reasonably-priced kit, so you might have a few coins left with which to invest.
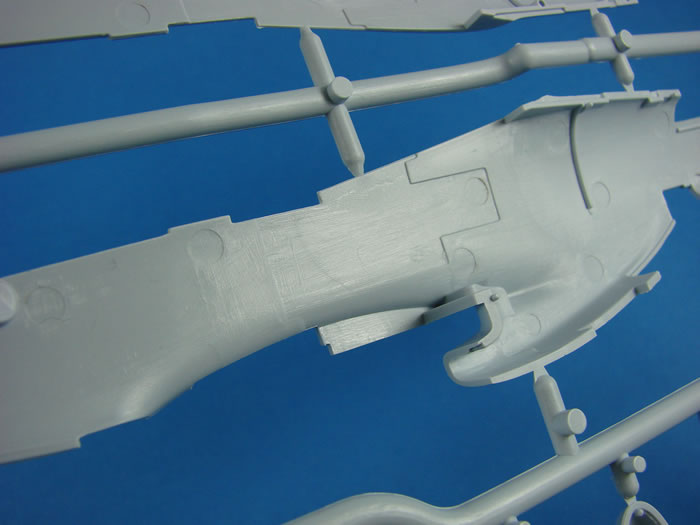
Lastly, the scoop intake is moulded as halves and simply installs within the belly of the model, before you bring the fuselage together.
Sprue C
Instead of moulding the gear bay detail on the ceiling of the upper wing, Airfix has chosen to engineer this as a separate part, as did Meng with their recent 1/48 release.
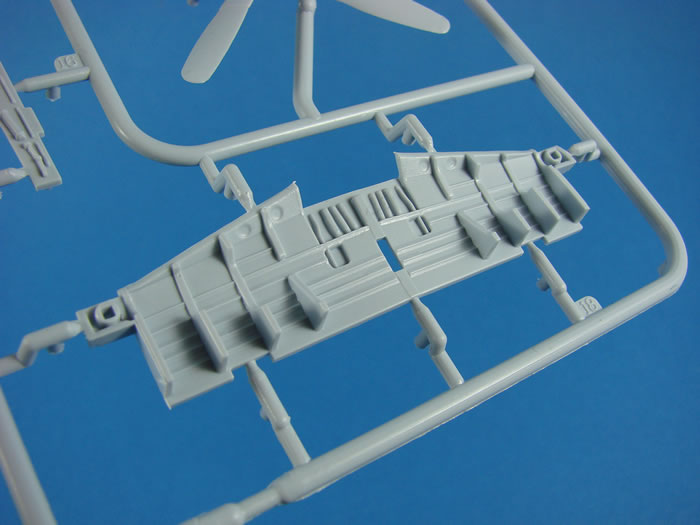
This is quite nice in depiction, but could perhaps do with a little extra detail added, such as plumbing etc. Squared sockets exist for the main gear struts to locate to.
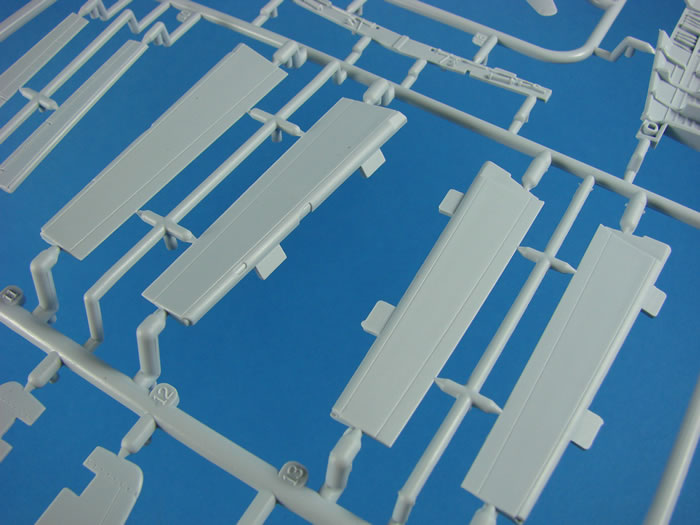
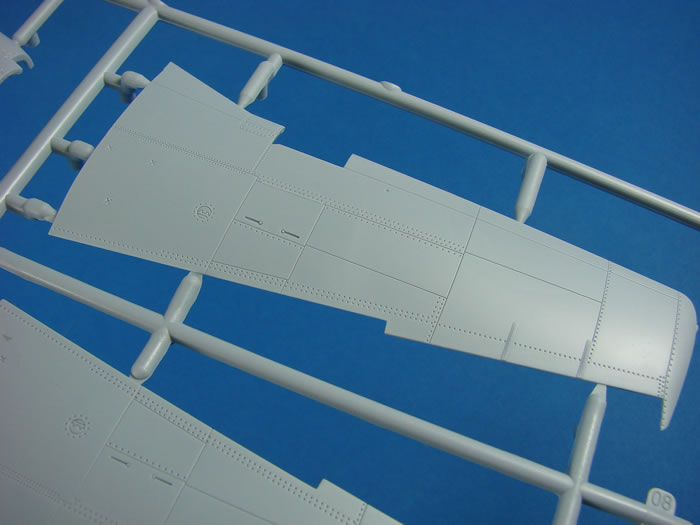
Two landing flap options have been provided for this kit. Of course, these are for the neutral and deployed positions. The flaps themselves are identical, bar the angle of the plug tab that fits into the socket on the trailing edge of the wing. There’s no doubt this provide a very solid approach to fitting these parts. A little panel line detail is moulded here, as well as some leading edge detail, but no rivets.
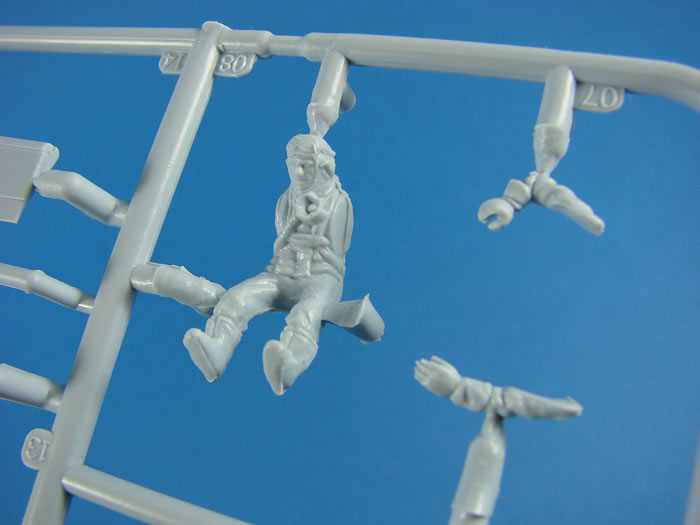
Another part on this frame is for the forward centre wing to engine cowl section with the same cowl fastener details as generally seen on both the fuselage sides and upper cowl. Lastly, Airfix has included a three-part pilot figure (quite average), a wing spar that incorporates gear bay detail for the rear face of this area, and also the four-blade, cuffed propeller.
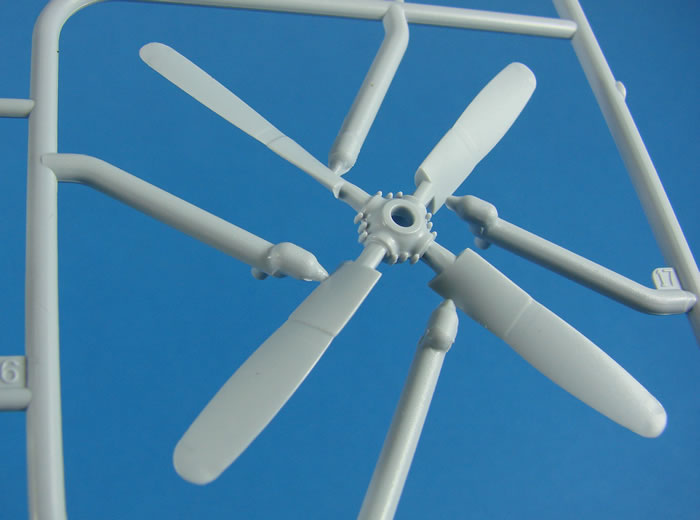
The blades on this are nice and thin too, but the connection gates are on the blade cuffs, so care will be needed when cleaning the part for use.
Sprue D
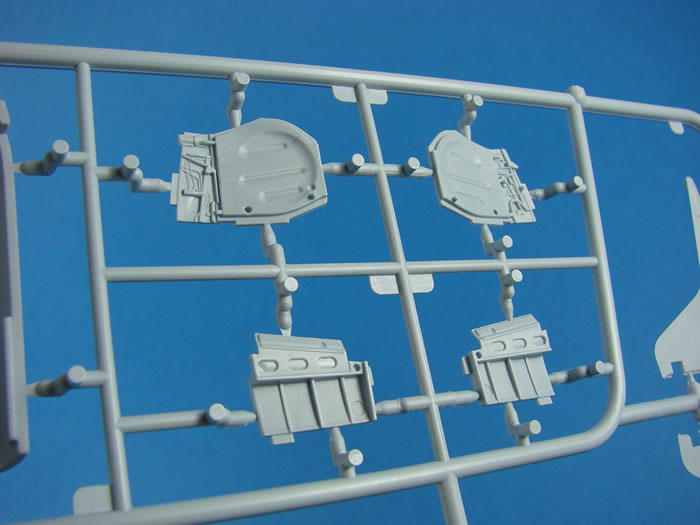
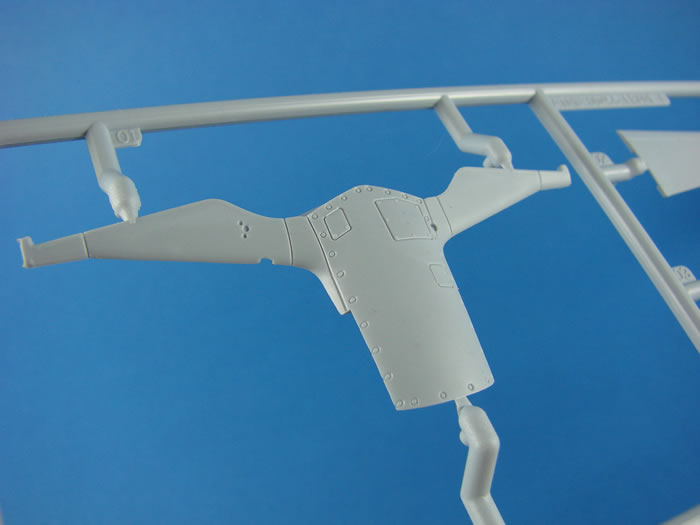
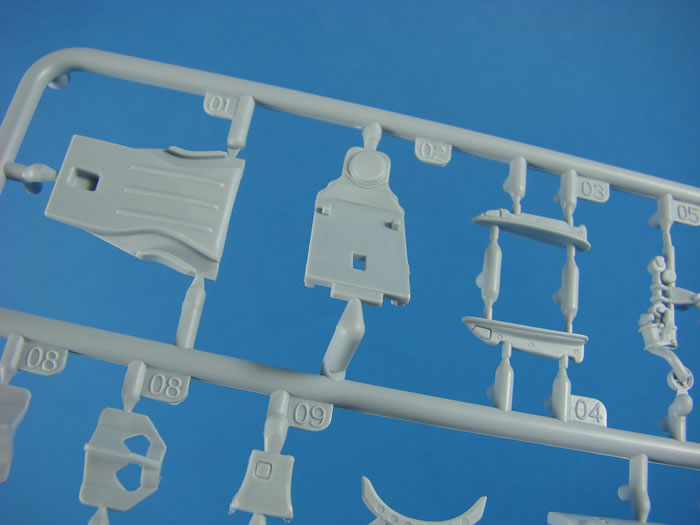
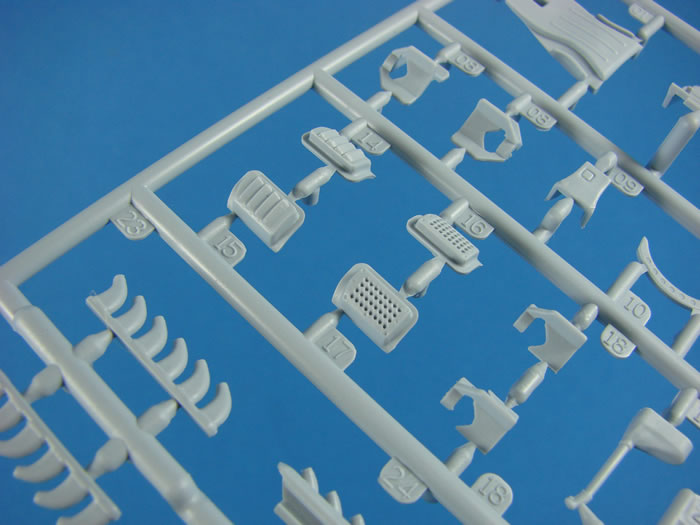
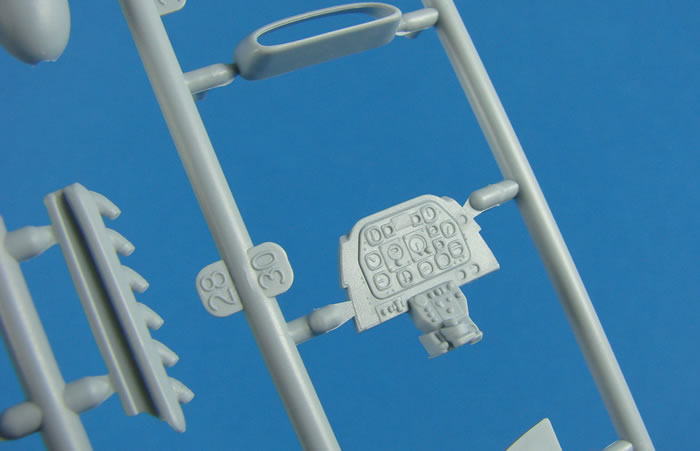
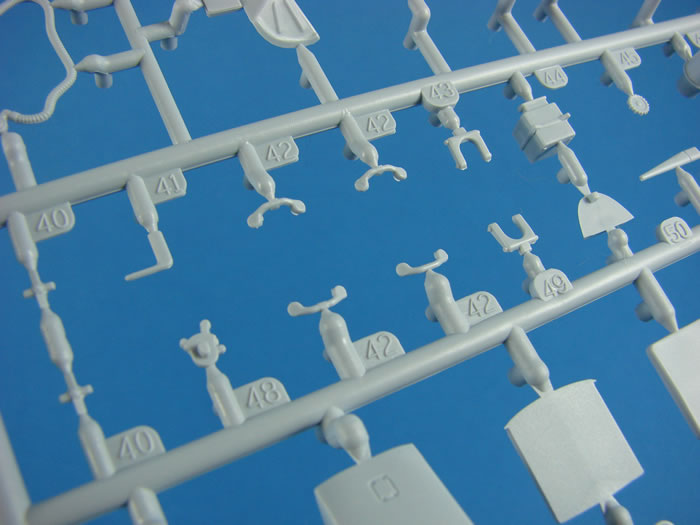
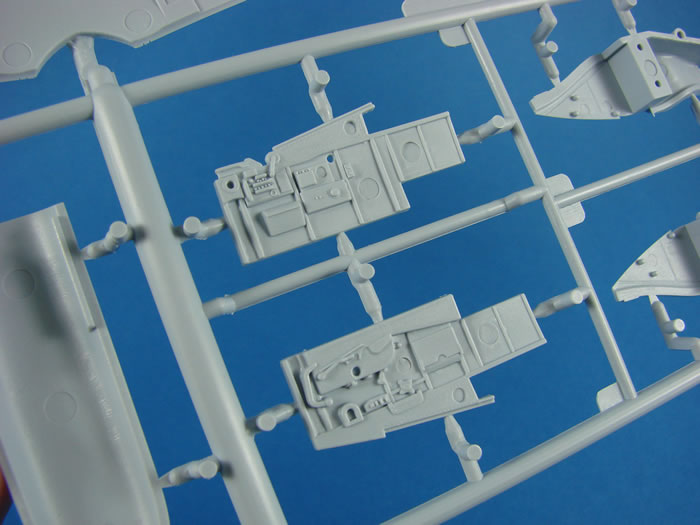
We have quite a large parts count with this frame, with most of the cockpit being found here, plus the undercarriage and other extraneous airframe parts. I did say earlier that Airfix’s rendition of the cockpit is certainly more than adequate. In fact, it should look very good built straight from the box, with its fairly high parts count and nice detail. The instrument panel itself should provide a good centrepiece to your work, the seat being provided with moulded belts. Note the quilted effect on the backrest, along with the draped harness. You will also find the battery and radio pack plus frame here.

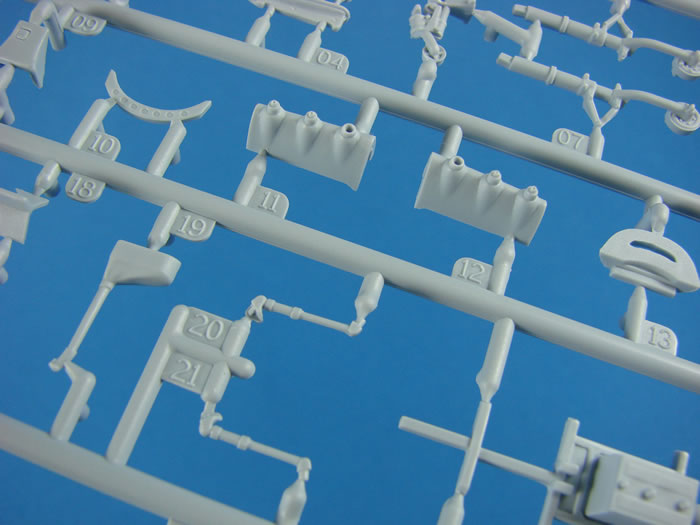
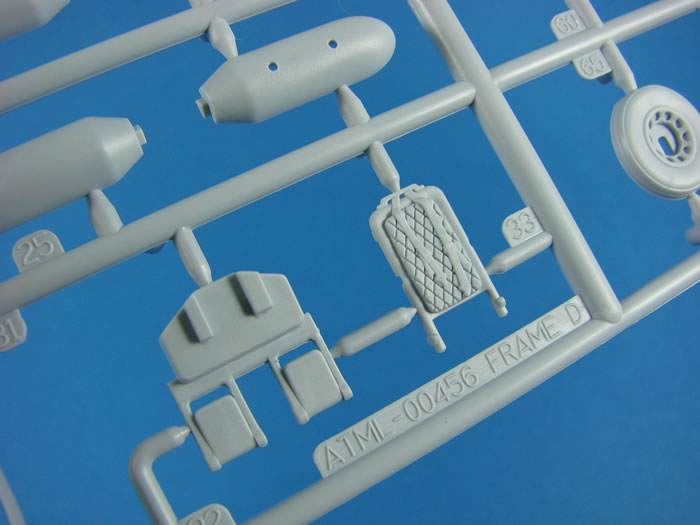
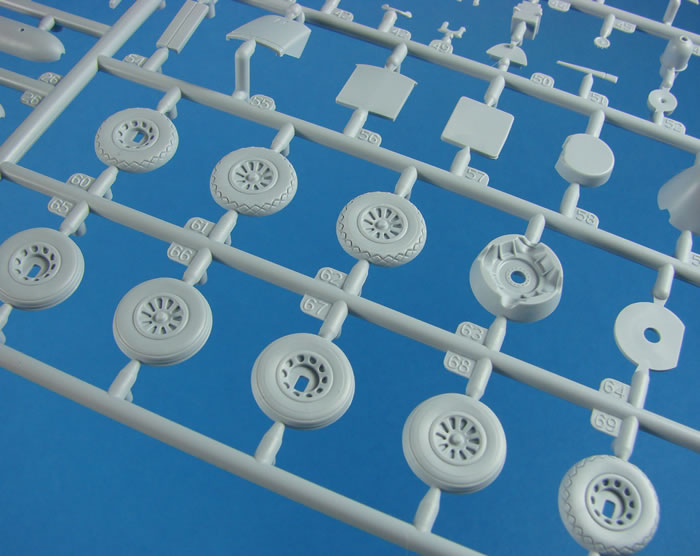
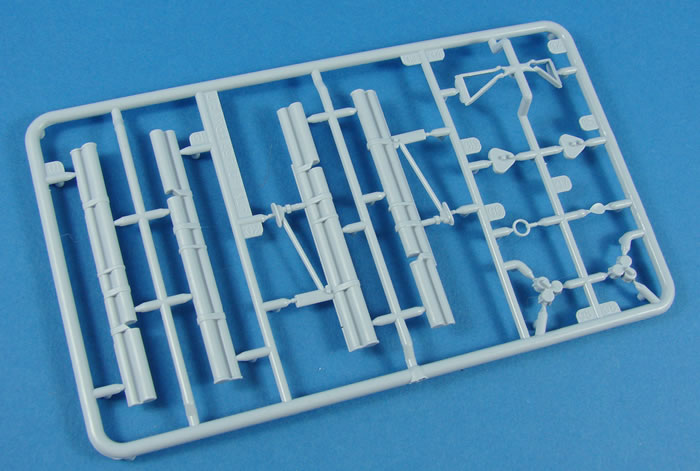
There are two exhaust options here; shrouded and unshrouded. Neither are moulded with hollow stubs, so you’ll need a micro drill bit and some patience. Two breather plate options are also provided. If you want more options, then there are also two types of wheel with different tread patterns. The hubs on these are integrally moulded and the wheels are weighted. I think the undercarriage legs are reasonable….not great, but reasonable. They have a mixture of both sharp and soft detail and the prominent seams will need to be removed. This is where I hope Eduard have plans for a bronze alternative. It could certainly benefit from such. The tail gear strut is very nicely detailed.

Other parts on this frame include bombs, belly scoop fairing, undercarriage trouser doors, two-part spinner, radiator shutter and numerous other cockpit parts.
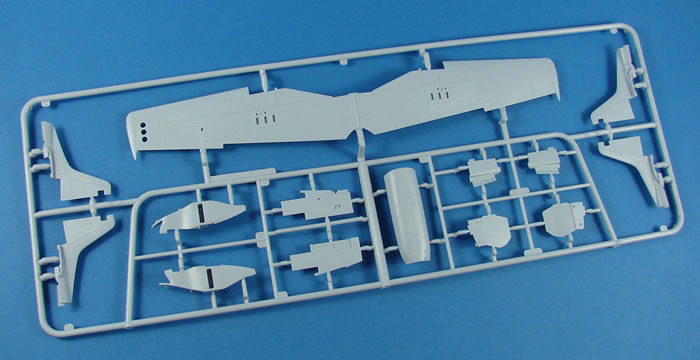
Sprues E
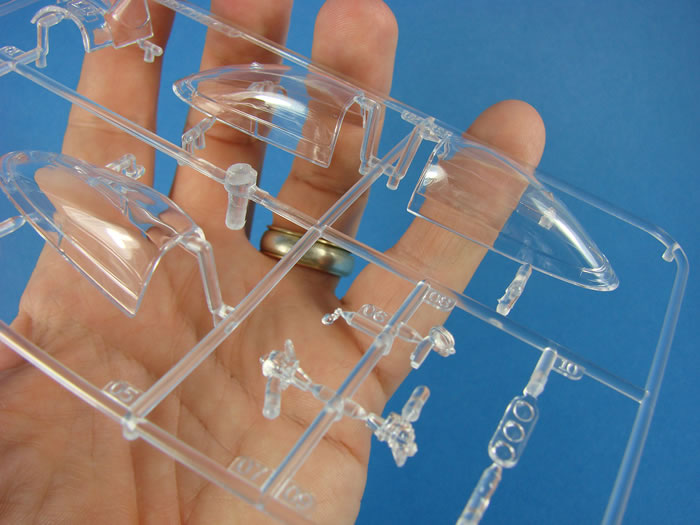
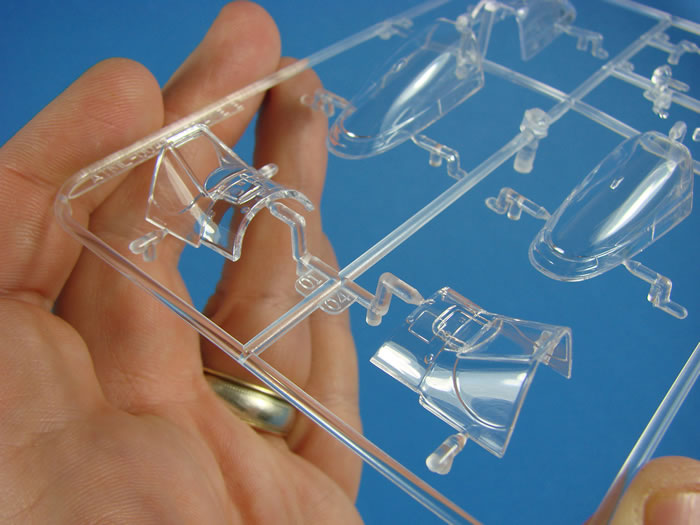
This frame is for the clear parts. Note that Airfix supply three hoods, all with slight variations in profile.
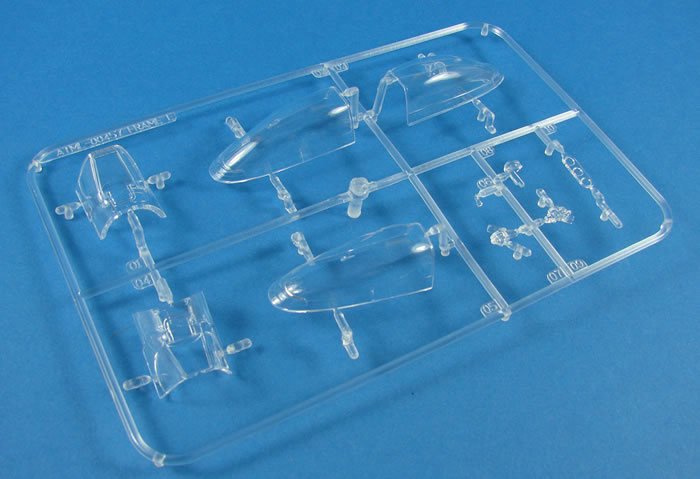
I can’t see the Dallas hood, unless I’m mistaken. There are also two forward windscreen options. Both of these incorporate a small section of fuselage skin, as per Tamiya’s 1/32 kit, providing a better way to fit these parts without gaps or glue smears being had.
Framing detail is sharp, and clarity is excellent. The parts are also nice and thin. You’ll notice this frame also contains wing underside lamps and gunsight options etc.
Sprue F
One of the kit options provides for underwing bazookas.
These are very reasonable, despite the seams you’ll need to remove, and there appears to be an indentation at the point where the connection gate is.
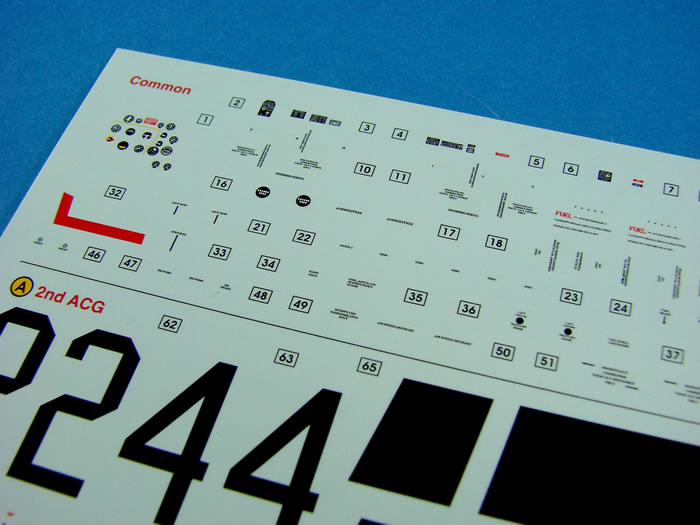
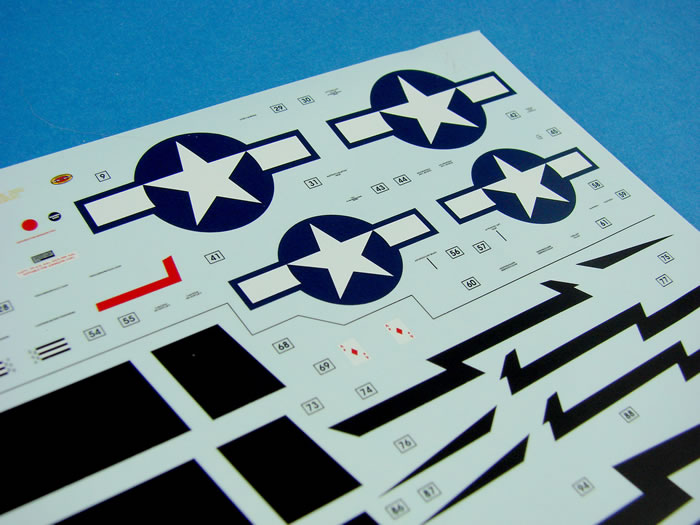
Decals
A reasonable-sized decal sheet is included with this release, and would appear to be printed by Cartograf (Italy). The sheet is split into common decals (national insignia and stencils), and the two schemes. The stencils themselves are numerous and will certainly take up a couple of bench sessions to apply. Included with the individual machine markings are the various black bars and stripes. I would probably mask these and airbrush them instead of using decals, but the option is there.
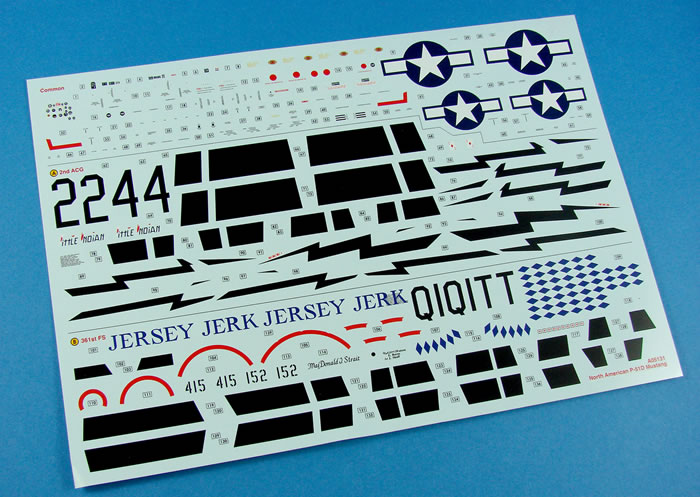
Printing has a satin finish, and the decals are thin, with solid colour reproduction and minimal carrier film. Everything is also in perfect register.
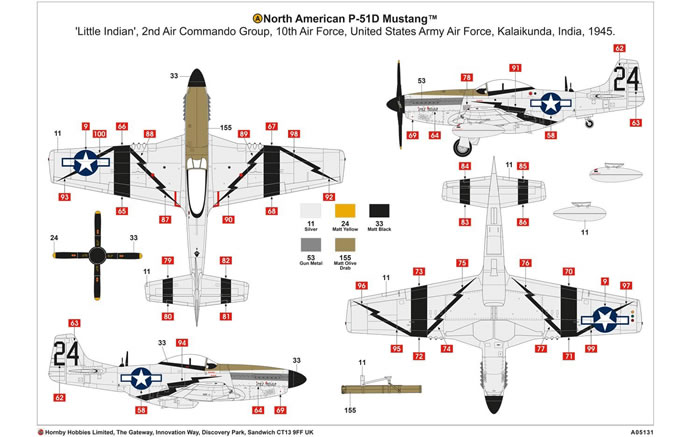
The two schemes are:
-
P-51D, ‘Little Indian’, 2nd Air Commando Group, 10th Air Force, United States Army Air Force, Kalaikunda, India, 1945
-
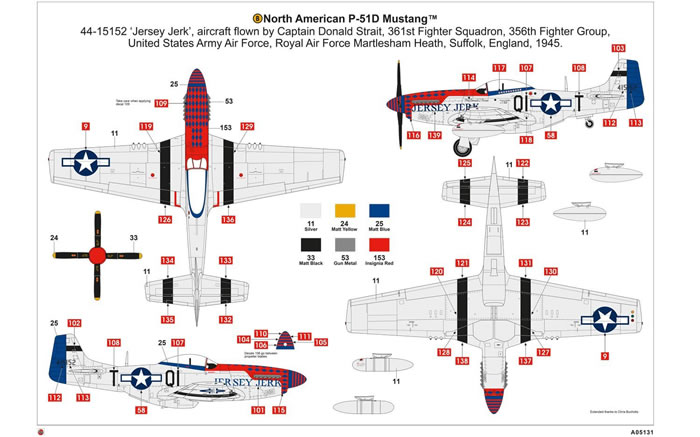
P-51D, 44-15152, ‘Jersey Jerk’, Captain Donald Strait, 361st Fighter Squadron, 356th Fighter Group, United States Army Air Force, RAF Martlesham Heath, Suffolk, England, 1945
Instructions
A sixteen page booklet is included, breaking down construction into seventy stages. All illustration is CAD-generated, grey-scale shaded, with good use of red ink to denote new part assembly. Colour references are given throughout for Humbrol paints, and two glossy sheets are supplied which show paint and decal application, plus a stencil guide.
It is nice to see Airfix revisit the subjects that I slavishly built as a kid when most of my money went on the old boxed and packet kits from this veteran manufacturer. They obviously know what should sell very well, and I imagine the Mustang is one such kit. What also sells this for me are the various options, such as the canopies and exhausts/breather plates too, plus some innovative engineering.
The schemes are quite nice, but not particularly varied, although the addition of the underwing bazookas certainly adds to the mix. A very nice kit with plenty of detail and very well moulded. It’s not a perfect release with some softness here and there, but it’s most certainly worth £20 of anyone’s money! Give it a shot.
My sincere thanks to P&S Hobbies for the review kit seen here. To purchase, contact them via their website, here, or visit them on Walmgate in York, or Castle Road, Scarborough, UK.
Review Text and Images Copyright © 2017 by James Hatch
Page Created 31 October, 2017
Last updated
31 October, 2017
Back to HyperScale Main Page
Back to Reviews Page |
 Home
| What's New |
Features |
Gallery |
Reviews |
Reference |
Forum |
Home
| What's New |
Features |
Gallery |
Reviews |
Reference |
Forum |