1/48 scale
Airfixing the Tamiya Spitfire
by Konrad Schreier
|
|
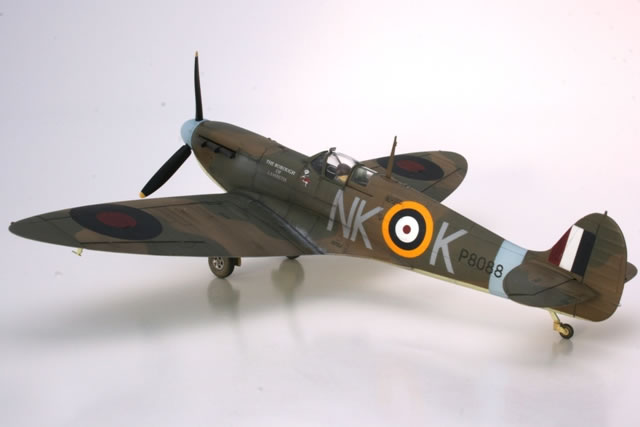
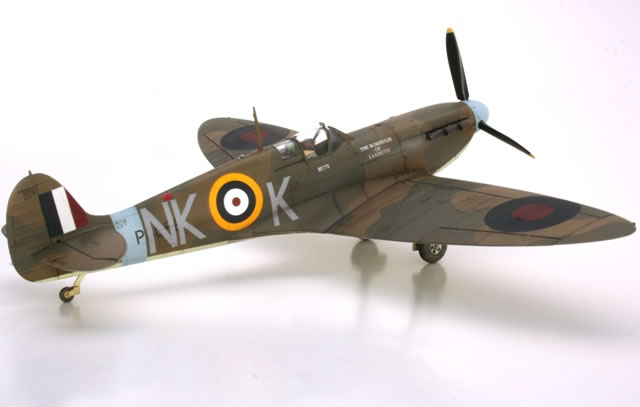
Supermarine Spitfire Mk.II
|

Trumpeter's 1/48 scale MiG-23M Flogger B
is available online from Squadron.com for only $44.99!
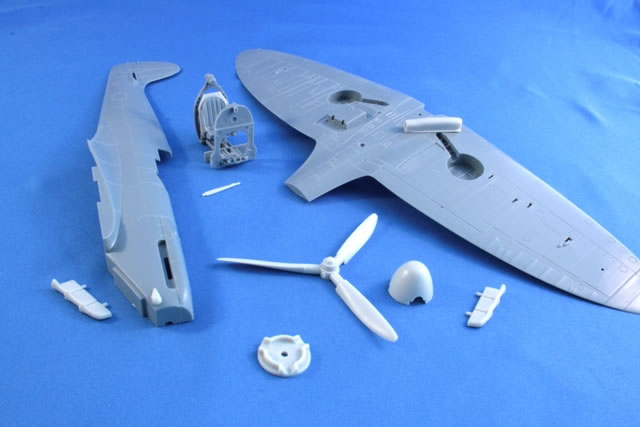
This project was inspired by Tony Bell's side-by-side build of the new Airfix and classic Tamiya 1/48 scale Spitfire Mk. VB kits. Having built an early Mk. I using the old 1/48 scale Airfix kit for the HS Airfix Group Build, I was left with a number of unused parts for the Mk. II, including a Coffman starter bulge, Rotol prop and a set of decals. Looking at the Tamiya Mk. I Spitfire kit, I thought it might be fun to convert it to a Mk. II using the Airfix parts and incorporating some of Tony's improvements.
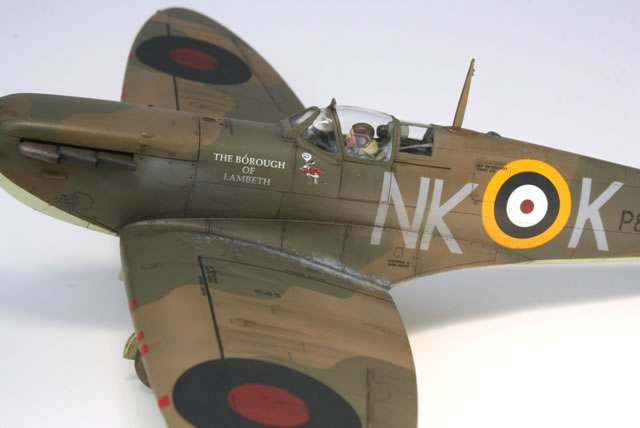
The cockpit was built out of the box and including a pilot, but I used the figure from the old Airfix 1970's Hurricane kit to be different. He is pulling back on the stick, so I slit and posed the elevators accordingly. Should have painted the seat red-brown, but caught that too late.
The Coffman bulge and a scratch built oxygen tank were added to the right side of the fuselage. On the left side the cowl oil filler hatch was replaced with a correctly sized and located panel made from a bit of Coors can aluminum and copper lamp cord wire, and connecting piping was added between the compressed air tanks, part A19, from some brass craft wire (no need to paint that).

To improve the fit at the wing root, small pads of plastic were added on the inside at the step to tighten the joint at the mid-span, along with a strip of plastic to support later work on the cowl seam. The Tamiya exhausts are a little odd looking to me. Initially, I planned to replace them with a pair of fish-tail exhausts from the early Airfix Mk. I, but ended up using the more accurate early style exhausts from the new Airfix Mk. V. To get these to fit together properly the center legs on the Airfix parts must be shortened and the locating holes in the Tamiya exhaust recesses revised.
Mindful of the notorious fit issues with the rear canopy segment Tony and others have commented on, I decided to widen the fuselage spine behind the cockpit slightly to match the width of the rear transparency, using some .020" plastic card, sanding it to a smooth taper after the glue dried. The adjustment had no adverse effect on the fit of the cockpit or the rear bulkhead arch, part A16. Arguably it improves the appearance of the model, making the spine look a little less pinched at the forward end.
After joining the fuselage halves, the first of Tony's corrections was applied. The engine cowling on the Tamiya kit is both too square shouldered and a bit flat on top. First, I added a good swipe of Tamiya white filler putty to the top of the engine cover without doing any work to clean up the as glued seam.
After letting the filler thoroughly dry out, I sanded the upper edges of the rocker cover bulges back to a smoother curve as Tony recommends, and the filler on top of the cowling to a gently rounded shape, correcting the flat look of the stock cowl. When done, several coats of Mr. Surfacer 1000 with sanding between evened everything out.
With the cowl sorted, the rear transparency was taped in place temporarily while installing the cockpit, to prevent the headrest from riding too high. Only the front bulkhead was glued to the fuselage halves. The rear was left floating to provide some self adjustment. After that the rear cockpit arch was fixed in place, Sutton harness was made up from some wire and pie-pan aluminum, and threaded in place before the rear transparency was permanently glued. The gunsight and windscreen were also added at this point. Gaps at the front and sides of the armored glass framing were faired in with a small flashing strips made from pie-pan aluminum to represent the attachment brackets on the actual aircraft.
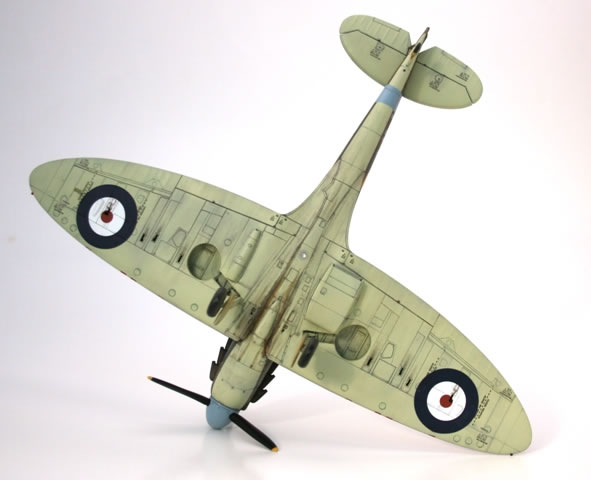
The second of Tony's corrections applied was the correction to the trailing edge of the wings, sanding back the flap area to remove the rearward bulge of the flap area and create a smooth curve to the wing root. When satisfied with the shape, the upper wing surface was sanded down to restore a thin trailing edge and more Mr. Surfacer 1000 used to smooth things out. Early on in the build I had thought the Mk. II used the later Mk. V style oil cooler, and modified an Airfix part to fit, but when further research revealed that this was a retrofit on surviving examples, I used the early style part from the kit.
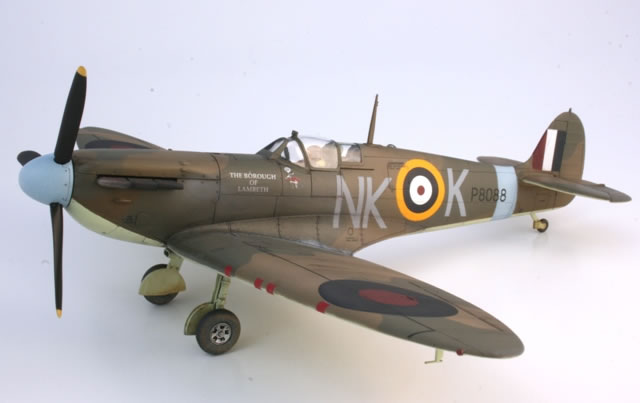
Once the wings were added to the fuselage and the joints cleaned up, the model was primed with Badger Stynylrez primer and painted in Sky, Dark Earth and Dark Green with Vallejo Model Air paints. Control surface and access panel lines were pre-shaded with black (predominantly on the Sky areas), and I added some lighter brown to the Dark Earth to increase the contrast to the Dark Green and achieve some panel fading for a more scale effect. Given the aircraft's short service life, weathering was kept subtle .
The first edition Airfix Mk. I/II kit decals used are for P8088, a Spitfire fund aircraft, call sign NK-K, named "Borough of Lambeth" for its donors, in service with 118 squadron at Ibsley, Hants in May 1941. The colored markings on the Airfix decals had been printed in half tones, so they were supplemented with Tamiya and AeroMaster roundels, the latter supplied by HyperScaler Ted Preston for the earlier Airfix Mk. I build. The Airfix fuselage codes and gun tape decals were masked with some Tamiya tape and lightly oversprayed with light coats of the appropriate shades of Vallejo Model Color paint before they were applied. This sounds odd, but Vallejo paints were developed for painting cartoon cells, and adhere well to decal film. The technique works well for any kind of custom marking, letting you create the art on a flat decal paper and apply it to the model afterward. All the decals were settled with Solvaset, and after a bath to remove decaling residue, the model got several light coats of Vallejo flat varnish.
With the decorations complete, final details were added.
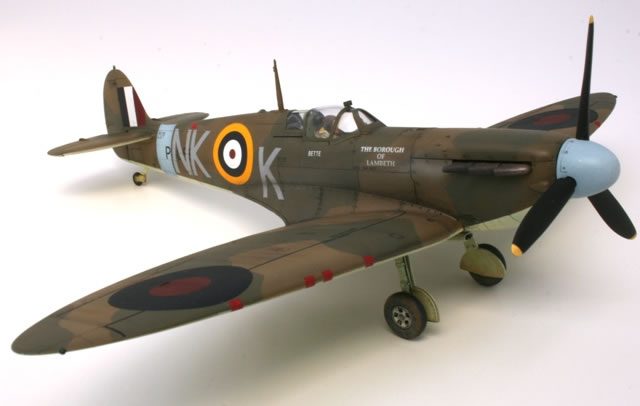
The Airfix prop was modified to fit with a turned aluminum prop shaft, and the mating edge of the spinner was turned down slightly to match the Tamiya kit and fastener detail added. It might have been a good idea to thin the propeller blades a bit then, but I didn't and had to go back and fix that later.
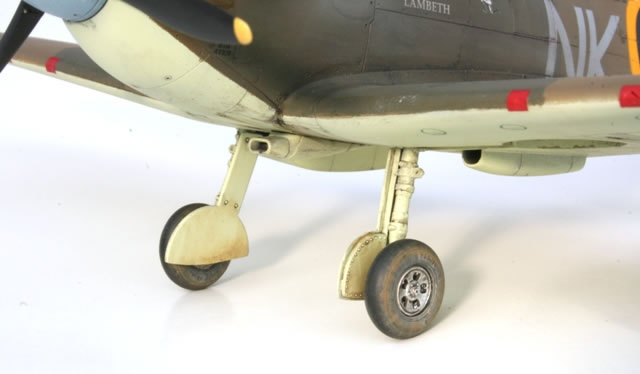
A more accurately sized antenna was sourced from the Airfix Mk. I kit, and the kit wheels replaced with Eduard Brassin parts, which are both better detailed and a better fit.
As a finishing touch, the gun heater vents that can be seen at the outboard end of each wing were created from bits of resin and beer can aluminum, painted to match their locations and added with a touch of Minwax acrylic varnish as an adhesive. I had neglected to add these during the build, but since these parts are located in the middle of the underside roundels and would have complicated the decaling no end, this was a happy accident.
Perhaps a lot of work for an old kit, but I like the result.
Text and Images Copyright ©
2017 by Konrad Schreier
Page Created 20 September, 2017
Last Updated
21 September, 2017
Back to
HyperScale Main Page

|
 Home
| What's New |
Features |
Gallery |
Reviews |
Reference |
Forum |
Search
Home
| What's New |
Features |
Gallery |
Reviews |
Reference |
Forum |
Search