A Model's 1/72 scale
D.H.60G Gypsy Moth
by Roger Hardy

Airfix's 1/72 Lancaster is available online from Squadron for only $33.99!
S u m m a r y |
Item No. |
A Model Kit No AMU72286 - De Havilland D.H.60G Gypsy Moth. |
Contents and Media: |
Limited run plastic kit. |
Scale |
1/72 |
Price: |
GBP £16.99 plus shipping available online from Hannants
and other hobby retailers worldwide |
Review Type: |
Summary build review |
Advantages: |
Adequate cockpit detail; struts and undercarriage look to be scale thickness; a delicate little kit that really looks the part. |
Disadvantages: |
A bit over-priced and the decals are tricky. |
Recommendation: |
It’s the best Moth in this scale…er, it’s really the only one. |
The Ukrainian company Amodel have issued a collection of kits covering pretty well the entire range of DH60 aircraft made by De Havilland in the 1920s and 30s.
The Moth was the epitome of the personal light aircraft in those years between the wars and resulted from Geoffrey De Havilland’s experience designing aircraft for Airco during World War I (the Moth was a scaled DH4) and the failure of the 1923 Lympne competition to produce any practical designs.
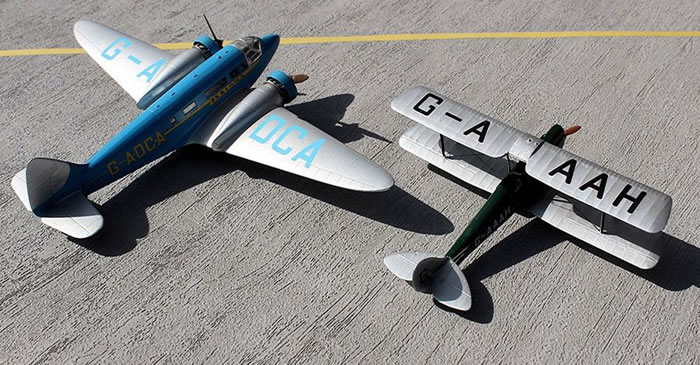
The Moth series revolutionized private flying and was the chosen mount of many aviation pioneers of the period including Miss Amy Johnson who became the darling of the Brits in 1930 when she flew solo to Australia… something we would find quite challenging even these days!
This kit is typical of the limited run kits that we see coming from Eastern Europe these days and they give us kits of aircraft that would otherwise be unavailable. In fact, this subject was first issued by Frog way back in 1965 in their Trailblazer series and this kit is still available in its Novo reincarnation. However, the Amodel kits trump this earlier effort.
As you might expect, the kit is moulded in soft plastic that is easy to work but there are no pins to help with alignment. Some cleaning up of parts is necessary, of course, as the moulding gates are large compared to some parts.
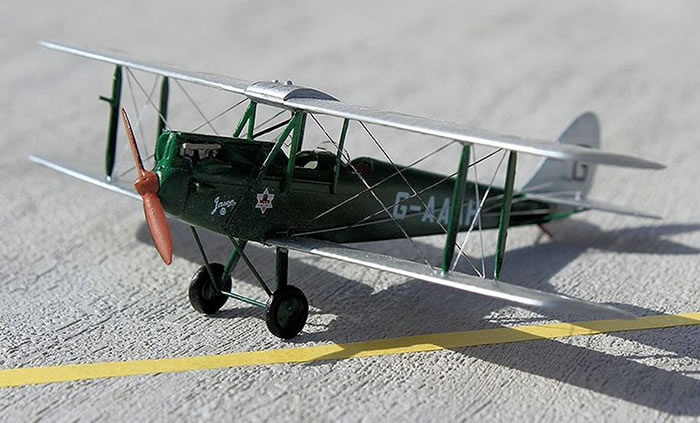
At first glance you get the impression that this kit will never result in a delicate little rendition of the Moth but persevere and it makes up into a really nice model.
Amodel kits have a tendency to be rather over-priced for what you get but they tend to tackle subjects that most other kit manufacturers would not touch. This model is almost three times the price of the Airfix Tiger Moth, for example.
The cockpit interior is a little basic, just like the real aircraft, but quite adequate. I used some spare instrument decals for the instrument panels and added some Eduard harnesses to the rear seat.
I found that the cockpit floor needed a bit of trimming to allow the fuselage sides to join. Other than that, the assembly was straight-forward except that the instructions forget to tell you to install the cylinders inside the cowling before putting the fuselage sides together.
The kit provides early and late lower wings and undercarriage to enable most of the DH60G variations to be built.
Windscreens are in celluloid.
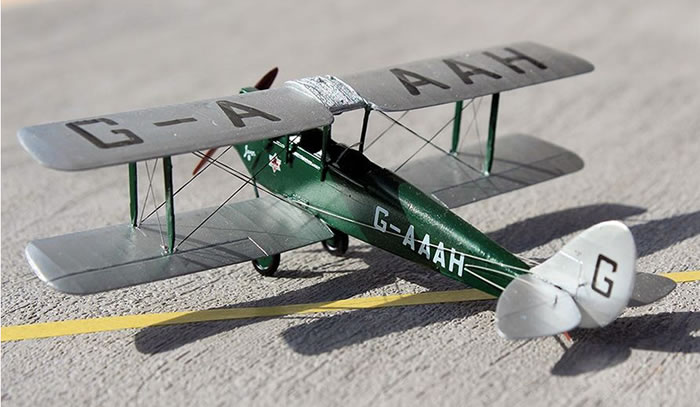
I assembled the lower wings to the fuselage, then the cabane struts. These then locate the upper wing but before I attached that I drilled the little holes (0.5mm) for the rigging wires, hoping that they would stay open! The problem with these tiny delicate models is masking and spraying without destroying the struts, etc. So, before adding the upper wing or empennage, I finished the undercarriage and sprayed the entire aircraft silver (Alclad white aluminium) then masked the lower wing and sprayed the fuselage, cabane struts and undercarriage, which are all one colour whichever scheme you choose.
I then attached the upper wing and found that I needed to shorten the aft cabane struts very slightly to get the two wings to sit at the same incidence.
The interplane struts then fitted nicely; paint these later, by hand.
You have to accept that you’re going to get some messing of the paint when assembling and rigging and I decided to ignore this and settle everything right at the end. Incidentally, I cut off the control horns to elevator, rudder and ailerons and added my own the correct length (stretched sprue) as I intended to add the control wires.
My 0.5mm holes are really a bit too large at his scale but make the job of rigging easier, plus I find that smaller drills break too easily. I use Tamiya’s drill that seems pretty robust. I used EZ-line fine elastic thread of around 0.15mm diameter. This is lovely to use, is dark, so easy to see, does not fray when cut and stretches if you poke your finger where it’s not supposed to be poked.
I rigged it through the holes and secured the ends with superglue; this is another nice thing about the haberdashers thread – just a suggestion of superglue and it’s fixed immediately and for life. I only needed two lengths for the entire wing assembly.

This rigging method requires that the holes be made good after the event and this was done with dabs of superglue, trimmed when dry with a new, very sharp scalpel, then the paintwork repaired with the spray gun set to a very narrow spray angle. It’s not perfect but good enough for me.
I then put on the decals then did the control cables to the rudder and elevator (from stretched sprue). The rudder cables should be doubled but I left them single.
Incidentally, the decals are very fragile and will break up given the slightest opportunity. They are also thin so make sure you position them accurately; you don’t get a second chance!
So, what’s the outcome? Well, it’s the best Moth in this scale…er, it’s really the only one. It’s a bit over-priced and the decals are tricky. The cockpit detail is adequate, the struts and undercarriage look to be scale thickness and overall, this is a delicate little kit that really looks the part. If you want a DH60, I’d recommend this to modellers with some experience of limited run kits.
Model, Images and Text
Copyright ©
2017 by Roger Hardy
Page Created 20 December, 2017
Last Updated
20 December, 2017
Back to HyperScale Main Page
|
 Home
| What's New | Features | Gallery | Reviews | Reference | Resource Guides | Forum |
Home
| What's New | Features | Gallery | Reviews | Reference | Resource Guides | Forum | 