Czech Master Resin's 1/72 scale
Blackburn Firebrand TF.V/5
by Chad Summers
|
Blackburn Firebrand TF.V/5 |

Revell's 1/72 Shackleton is available online from Squadron for only $35.99!
Thanks to Brent from Roll Models for forwarding this article:
Background
The Blackburn Firebrand grew out of Fleet Air Arm specifications for a two seat fighter a turret fighter. These were later modified and eventually resulted in the Fairey Firefly. Blackburn offered the Firebrand concept that included some noteworthy design features geared at improving low speed stall characteristics for naval ship-borne aircraft. Because of these features, Blackburn was awarded a small contract of twenty-five aircraft. While the FAA typically favored multi-seat aircraft, they recognized that in some cases, higher performance, single-seat types would be valuable. The Blackburn “experiment” resulted in a large and powerful single seat fighter powered by the Napier Sabre engine. While it suffered significant teething problems, it quickly demonstrated that it had the good range and speed. However, It suffered from a lack of maneuverability. For these and other reasons, the decision was made to turn it into a torpedo fighter/fighter bomber. Initial variants were produced with the Napier engine but just like the Hawker Tempest, and based on teething troubles with the Napier Sabre engine, the decision was made to install the more reliable Bristol Centaurus engine. It was in this configuration that the Firebrand reached its full development potential.
In the Box
CMR’s Firebrand is exquisitely cast in beige/grey resin with excellent surface detail. It includes two etch sheets with various details for the cockpit, weapons, and gear bays/doors, and other external areas. Two crystal clear vac canopies are included as is an excellent decal sheet with options for ten aircraft and associated stencils. On the plus side major components like fuse halves and wings are packaged in separate bags as are the two etched sheets, decals, and vac canopies. On the downside, most of the small resin parts are packaged together in various sealed bags and this results in some broken pieces here and there. The larger parts are free of their casting blocks but the smaller items are, in most cases, still attached to theirs. Care needs to be taken when cutting these away from their blocks to avoid damaging the delicate components. All parts are extremely well cast, easily equal to the best injection molded kits out there. And the immense amount of detail and options included ensure that no other aftermarket items are required.
CMR provides an excellent instruction sheet printed on multiple 8.5x11 sheets. Construction is completely conventional and things get rolling with cockpit assembly. The amount of detail provided in the cockpit is truly amazing. The cockpit tub, seat, control column, rudder pedals, and instrument panel are all provided as separate pieces that are build up with the inclusion of various photo-etch parts. Cockpit side-wall detail is cast into each fuselage half and is equally impressive. Careful construction and painting assures the modeler of a very convincing “office” when complete, it’s just a shame that the cockpit opening is so small that viewing all that detail is a bit difficult.
With the cockpit complete, the tail wheel bay can be installed in the fuse halve, and the fuselage halves can be joined. This is followed by the cowl ring. I opted to leave off the delicate gun sight and its support structure until the end to prevent damaging it.
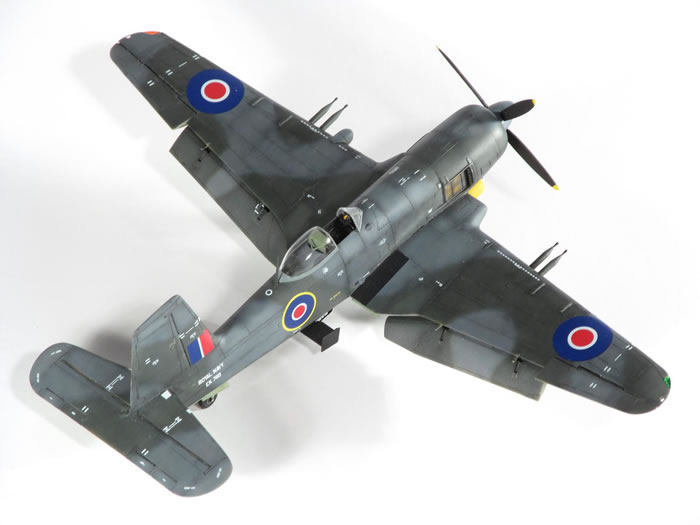
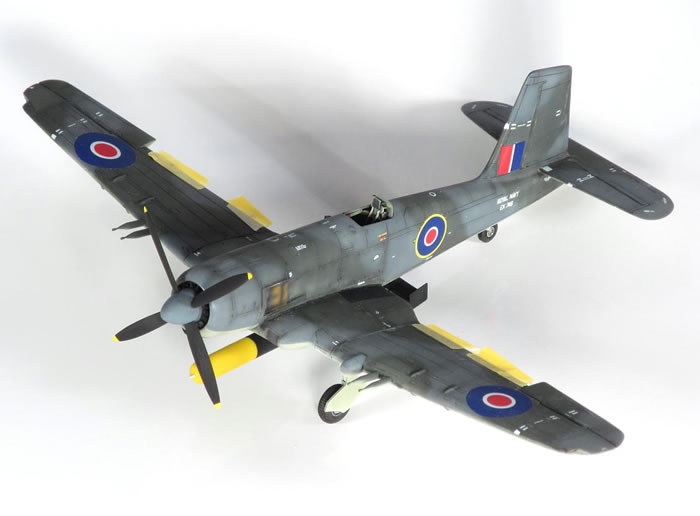
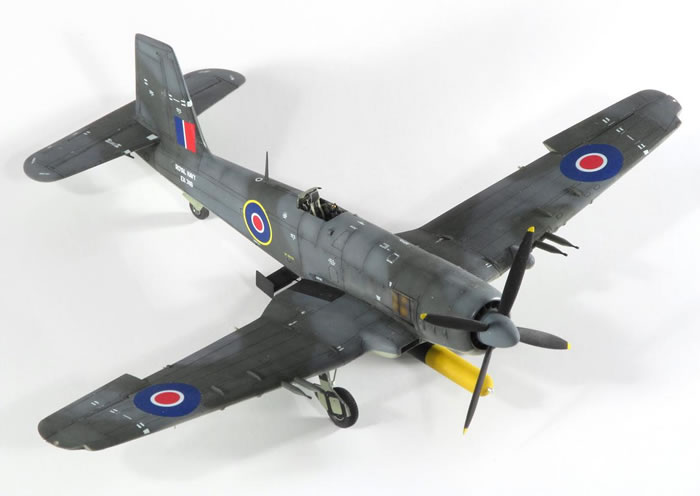
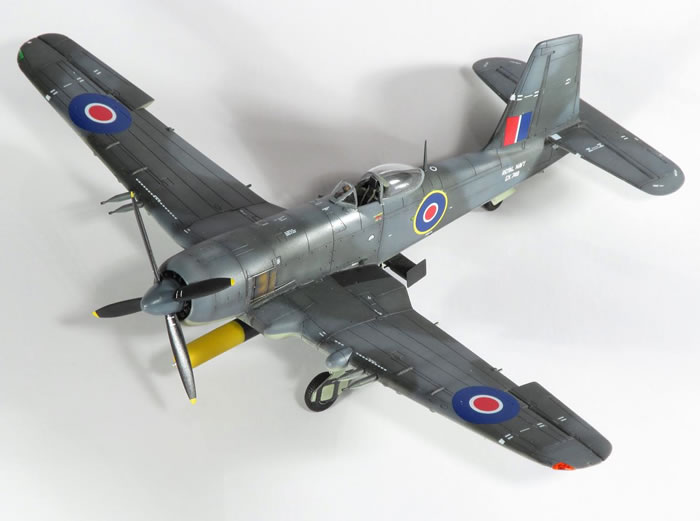
The wing is a one-piece assembly with outstanding wheel bay detail molded in. The Firebrand’s distinctively large flaps are provided as separate pieces that allows them to be displayed in the lowered position and this is what really sets the model apart. The flap actuators are very delicate so I covered them with tape during construction to prevent them from being knocked off. I also choose to leave the flaps themselves off until the end for the same reason. The wing to fuse joint was a little less than perfect as was the horizontal stabilizer to aft fuse joint. Small gaps that did exist were easily filled and sanded smooth. Panel line detail lost during the sanding of the various joints/seams was rescribed prior to painting the airframe.
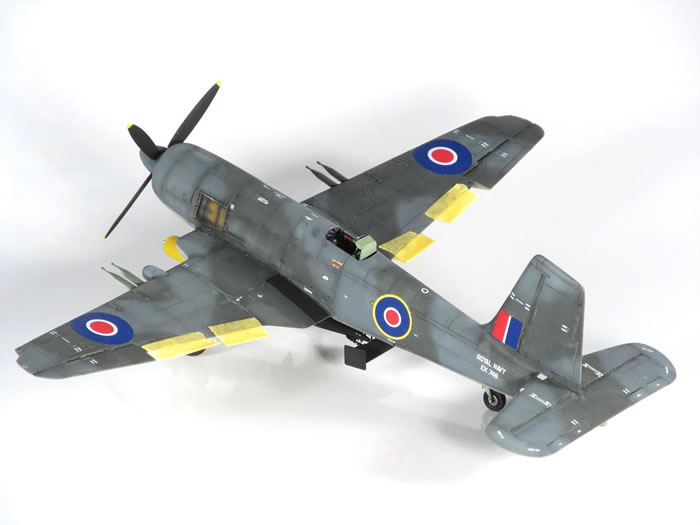
The prop blades are cast individually and each of the holes in the spinner needs to be drilled out to allow them to be attached. The prop/spinner is then attached to the cooling fan which is inserted into the cowling ring. On my sample, most of the cooling fins on the fan were damaged/missing so I created new ones from sheet styrene. The wheel, landing gear, and gear bay doors are well cast with the main gear being cast around small metal rod for added strength and durability. I assembled these as units but postponed attaching them until after painting and decaling was complete.
Painting
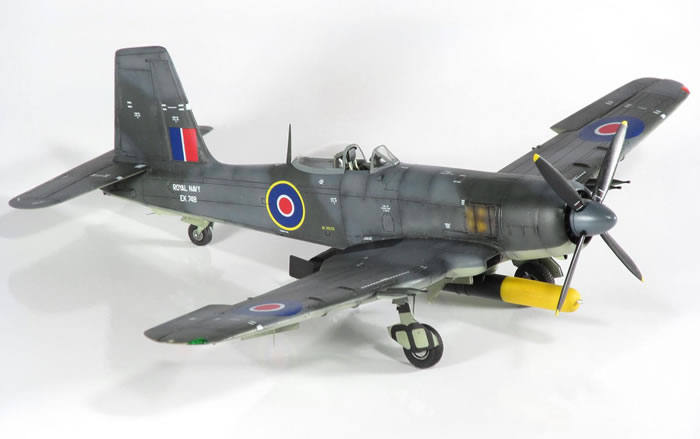
As mentioned earlier, CMR provides markings for ten aircraft including various slate grey/dark sea grey over sky and overall dark sea grey over sky schemes. I wanted the variation of the slate/sea grey scheme so I settled on the markings for EK748, a TF Mk.5 of No.703 Naval Air Squadron, Thorney Island. Since I spray primarily Tamiya acrylics, it requires custom mixing for the requisite colors. I preshaded the panel lines and some of the panels and then sprayed the upper and lower surfaces, freehanding the upper surface camo pattern. Each of the primary colors was weathered with a similar process. Each was darkened with a drop of flat black and then highly thinned so they could be sprayed along each panel line. This was followed by a highly thinned, lightened version of the base color inside of each panel. I sealed everything in with a coat of acrylic gloss. The decals are well printed and went down flawlessly. The only challenge is that the lower wing serials are printed as single decals. This requires them to be cut into various pieces to be installed on the wing and each set of gear doors. I used the markings guide included in the kit to measure and make each of the required cuts those serials. Where I didn’t get things quite right, I simply touched that area up with a little brush painted flat black. This was followed up with another coat of acrylic gloss and a panel line wash using AK Interactive’s panel liner. With the painting complete, I sealed and blended everything using a coat of AK Interactive Ultra Matte varnish followed by a light coat of Model Masters Semi-Gloss Sealer just to add a slight sheen.
Final Assembly
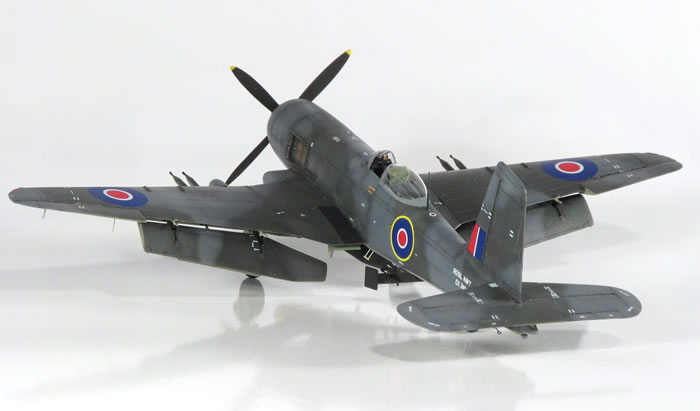
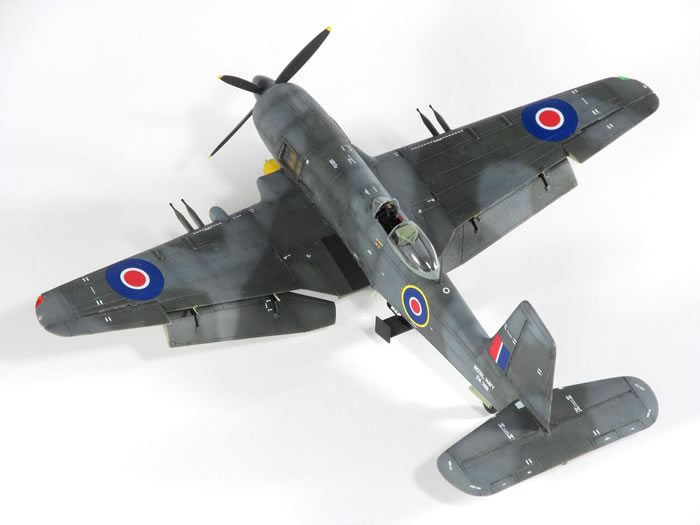
The various sub-assemblies/details that had been built and painted previous were now brought together to complete the build. The gear, actuators, and gear doors were installed. The canopy was split and painted and the gunsight was installed prior to installing the windscreen and canopy. CMR includes a very impressive weapons load out. These include mines, torpedo, rockets, and bombs. To me, the Firebrand is not complete without that torpedo slung underneath so I went with that option.
The assembly of the torpedo is quite complex, being made up of various small resin and photo-etch items. The torpedo blades, for example, are all provided as individual etch items. Once built and painted, it was installed on the centerline rack. The wing cannons are provided as separate items and these were painted and installed. The receiving ports on the wings will need to be drilled out a little to allow them to seat properly in the wing leading edge. To represent the landing and ID lights, I opted to use MV lenses. I also used a small amber lense from the same line as the reflector in the gun sight.
The CMR Firebrand is an amazing kit. It’s hard to believe that this much detail is packed into such a small scale model. At times, I found myself questioning the real benefit of some of the smaller detail items but this was due more to my frustration handling and installing them rather than an assessment of the final value to the build. LIke most high end resin kits, construction is actually a bit simpler than their injection plastic equivalents since the resin parts count is typically a bit lower. The kit is pricey, no doubt, but when you consider the medium as well as the immense amount of detail and options provided, I think that it is worth every penny. Due to the number of small resin and etch parts and the overall complexity of the model, I wouldn’t recommend this to the novice but if you have a few kits under your belt and are comfortable working with etch and vac parts, I can not recommend it enough. My sincere thanks to Roll Models for the review sample.
Thanks to Brent from Roll Models for forwarding this article
Model, Images and Text
Copyright ©
2017 by Chad Summers
Page Created 5 April, 2017
Last Updated
5 April, 2017
Back to HyperScale Main Page
|
 Home
| What's New | Features | Gallery | Reviews | Reference | Resource Guides | Forum |
Home
| What's New | Features | Gallery | Reviews | Reference | Resource Guides | Forum |