Hasegawa's 1/48 scale
Messerschmitt Bf 109 G-6
by Jon Bryon
|
|
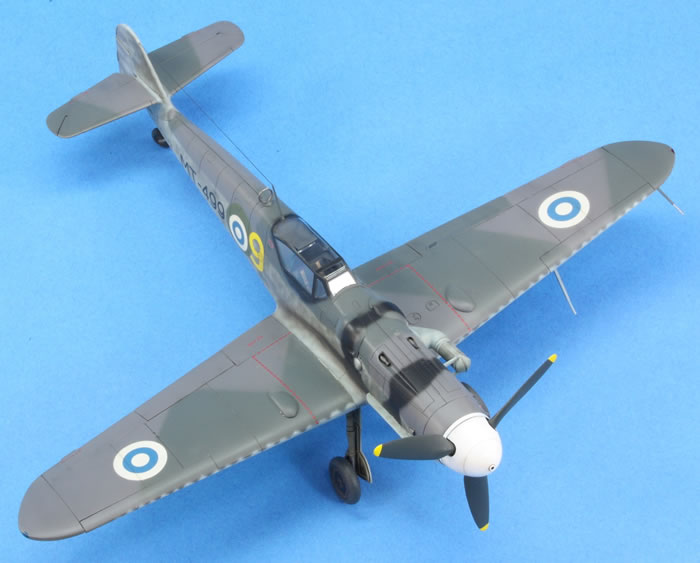
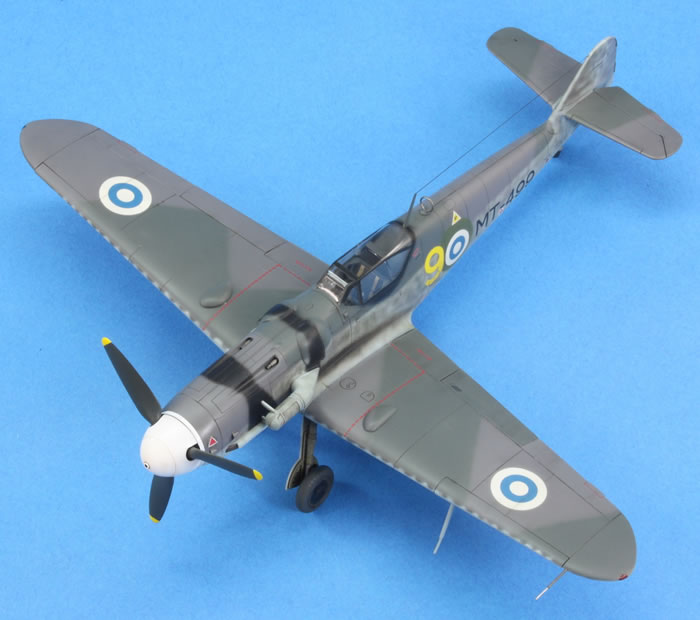
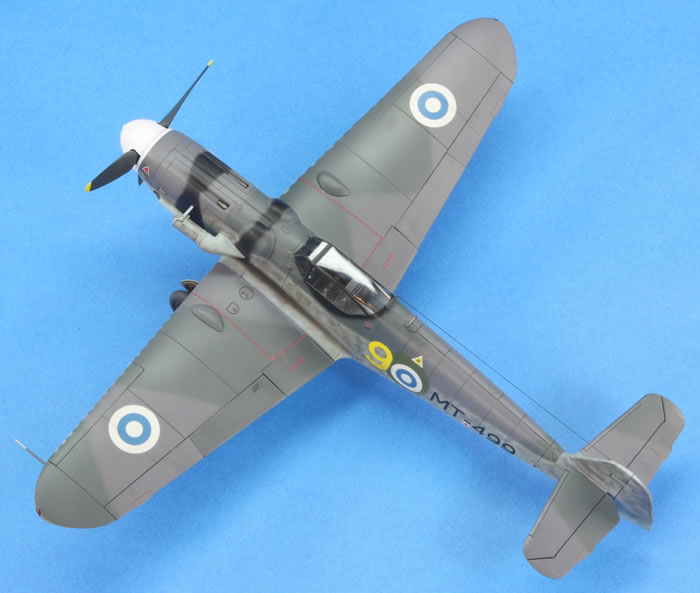
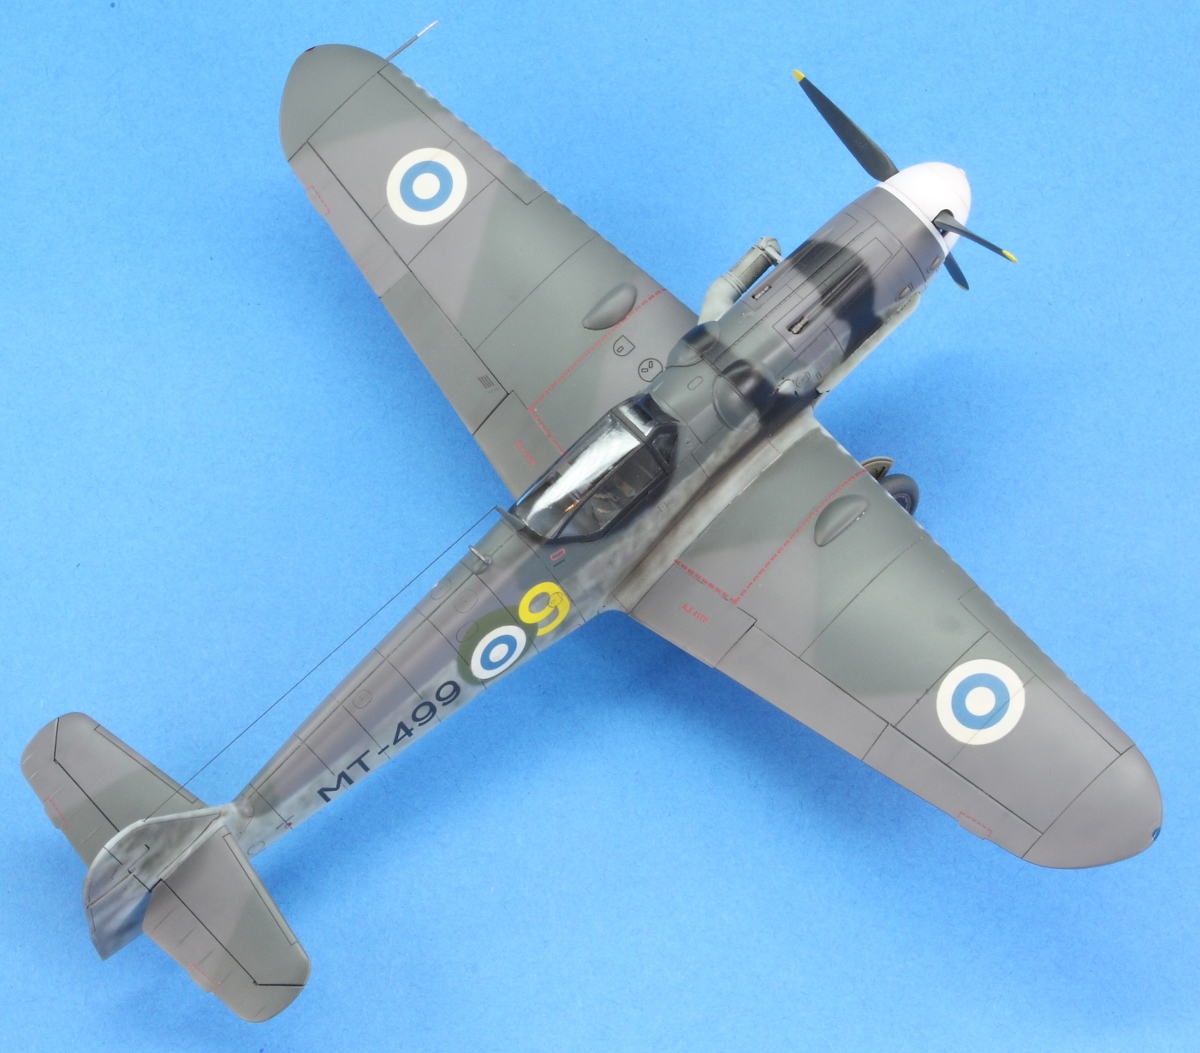
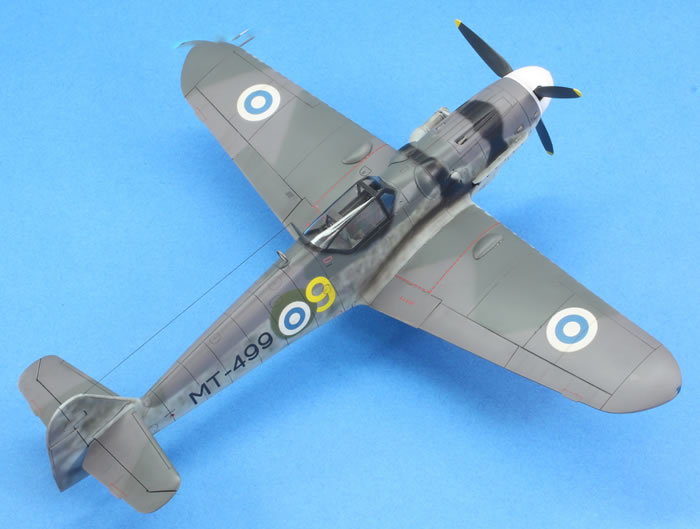
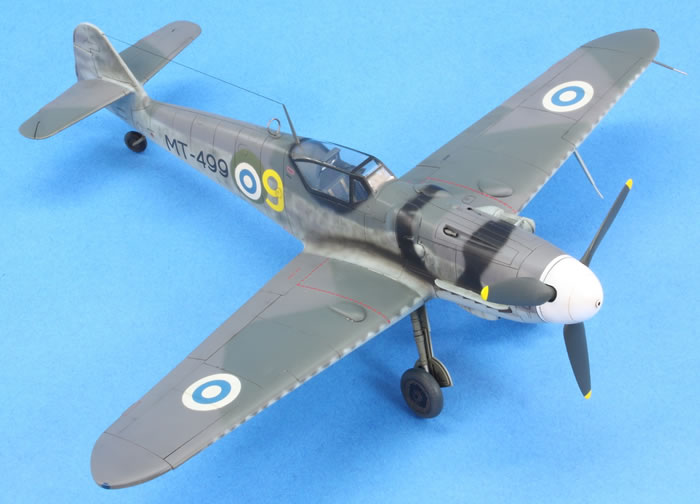
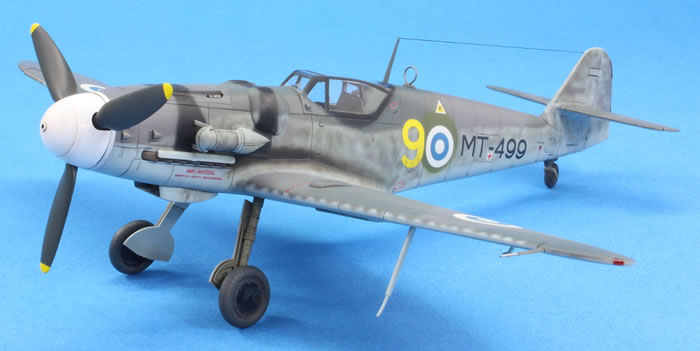
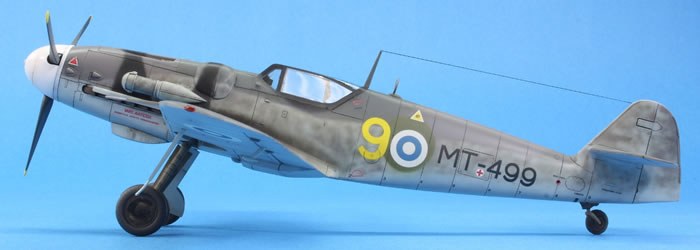
Messerschmitt Bf 109 G-6 Finnish Air Force, HLeLv 23, Finland 1946 |

Trumpeter's 1/48 scale MiG-23M Flogger B
is available online from Squadron.com for only $44.99!
This has interrupted my run of MiGs. The resin-heavy MiG-23 was a fairly involved project and the next one up would be the equally involved Academy MiG-29 with a lot of aftermarket, so I decided to quickly cleanse the palate with an easy single-engined prop build.
Glancing through my stash I came across this Hasegawa Bf 109 .
I bought this model back in 2003 when, on a day trip down to London from Cambridge, I dragged my girlfriend (now wife) for the first (and last) time all the way out to the old Hannants Colindale shop that used to be adjacent to the tube station. She was very willing and even put up with the replacement bus service we had to use as the Northern Line was not functioning north of Chalk Farm. I obviously couldn’t leave empty handed and bought this kit, which at the time was £16.99 and seemed outrageously expensive to a poor PhD student for such a small aircraft. Building this kit also reminded me of what a fantastic shop Hannants Colindale was back then and what a shame that it is now only a shadow of its former incarnation.
In the Box
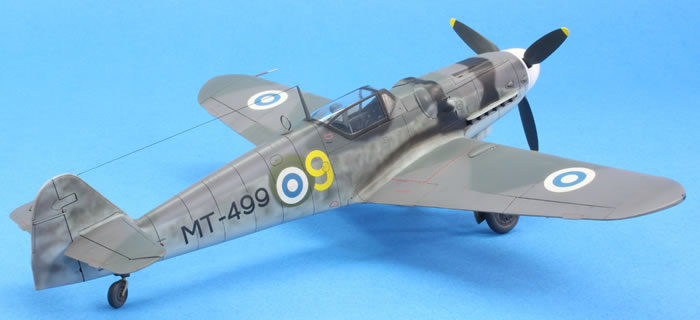
This kit is actually labelled as a G-14 by Hasegawa and comes with markings for two post-war Finnish Bf 109 s: the one you see built here and another much less interesting green/light blue example. I wanted this to be a quick build but also felt challenged by the prospect of the mottled finish. I’ve never attempted a Luftwaffe mottle before and with my acquisition last year of an Iwata Custom Micron, which has remained sadly under-used, I saw a chance to give something new a go. In fact, for the first time I can remember, I decided the entire aircraft would be painted freehand with no masking.
I know nothing about Bf 109s, and feel a great sense of trepidation putting this out in the public domain. If there’s one aircraft that seems to dominate modelling, I’d say it is the Bf 109 ; there are a lot of people out there who know a huge amount about it. I am not one of them and so, without doubt, this model is full of various errors. Having said that, the Hasegawa Bf 109 is one of the most enjoyable kits I have ever built. I’ve no idea how it stands up in terms of accuracy compared to newer moulds, but the fit is outstanding, the break down is beautifully simple, and the moulding is excellent – with the notable exception of the beefier tail wheel that needs to be used and has an enormous sink hole in the middle of it – more on that below.
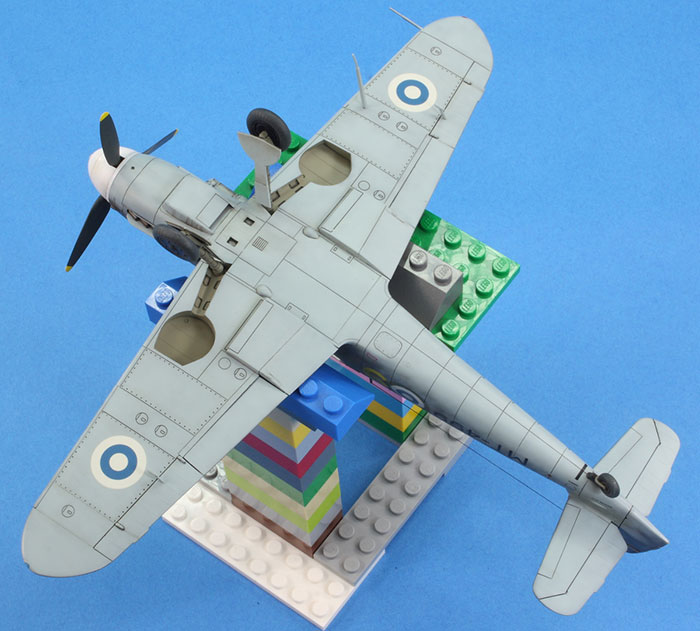
The cockpit is simple and, given that I was going to close the canopy, I made no additions except for seat belts. In fact, aside from seat belts and replacing the wing-mounted pitot with brass tubing from Albion Alloys, everything else is from the box. As I said above, this was intended to be a quick build. The fuselage can be put together before the cockpit is installed and fits extremely well. Time is saved by not having to eliminate the fuselage seams on the spine, although I unfortunately rather over-emphasised the upper panel line on my example.
I attached the upper wings to the fuselage first, and the fit was perfect. I then (after adding the cockpit) added the one-piece lower wing, which also fitted very well. The nose cowling is a little wide, but still pretty good, and the tail planes fitted seamlessly to the fin. There are a few modifications that Hasegawa indicate in the instructions are necessary to make this a late-model G-6 and I’m told by those who know far more than me that these are correct.
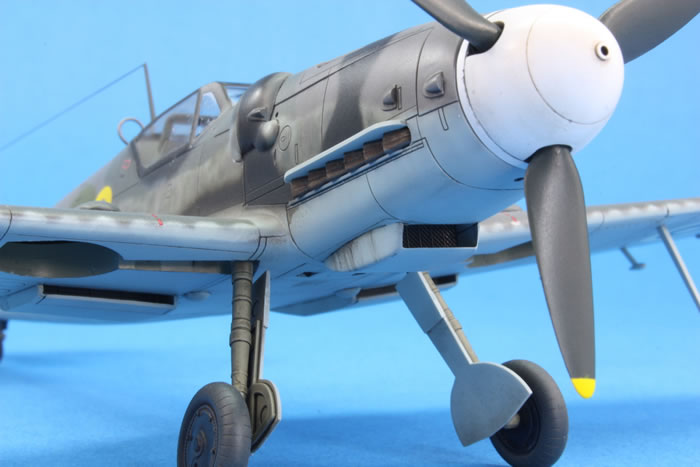
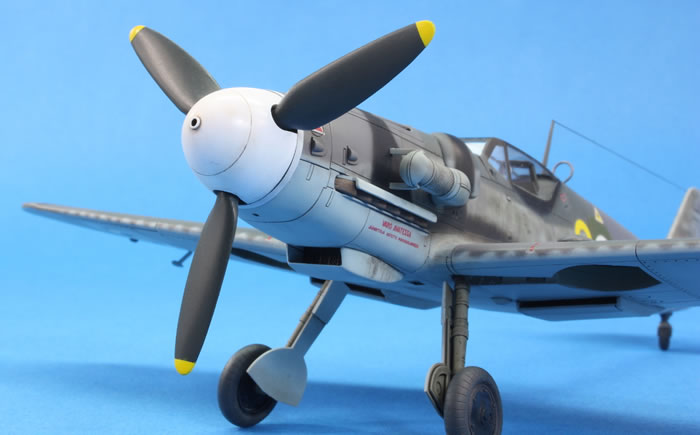
The prop goes together nicely enough, although the back plate is of slight wider diameter than the back of the spinner, which had I realised earlier, I would have tidied up. I hollowed the exhausts out but was careful not to eliminate the moulding seam as this nicely replicates detail on the real thing. Lastly, the canopy was attached in the closed position; again a superlative fit.
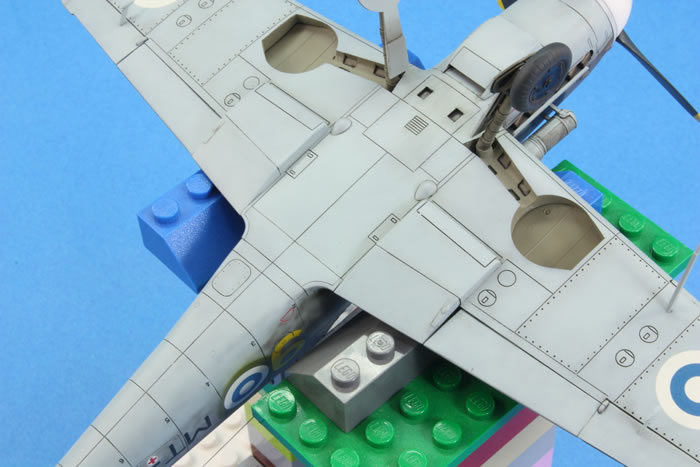
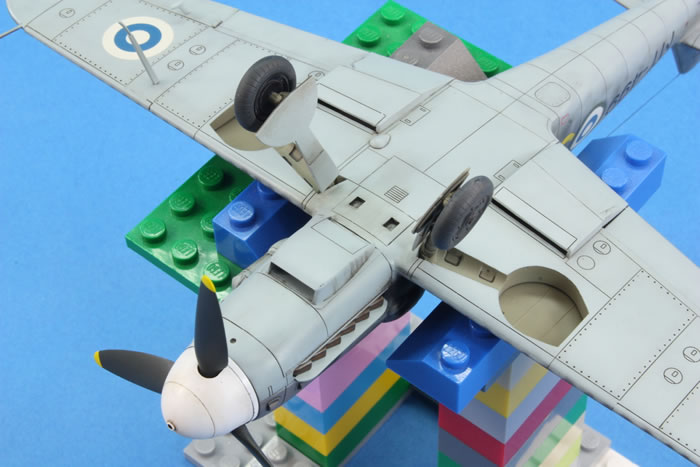
Because I prefer the aesthetic, I did attach the ailerons, flaps and slats in the closed/neutral positions. Photos showed that this was possible, but on reflection I did wish I’d extended the slats a little and opened the flaps a bit, as this seemed far more common. I made one mistake, which was forgetting to attach the radiator grilles before joining the wings together. Inserting them after the fact turned into a mini-nightmare, but I got them in there in the end. Photos showed I could avoid adding the external tank, which I was pleased to do, since it saves time.
There are some nasty seams under the oil cooler under the nose, which are hard to deal with. My solution was to cut extremely thin plastic card to the same shape as the oil-cooler recess and just glue it in: no visible seams.
The aforementioned tail wheel was unusable. In the end, I decided to use the other one in the kit and join it to the boot of the correct wheel. This requires a little careful surgery, as the parts are fragile, and makes the end result ever-so-slightly less accurate, but fixing the correct tail wheel was simply not an option for me.
Rapidly, then, the model was ready for painting. This is where it gets hard. I spent a long time looking at photos of Finnish Bf 109 s on the internet, and it all became a bit overwhelming. They sported a huge number of different finishes, with many different mottle styles amongst those that were mottled. A great selection of photos is available here.
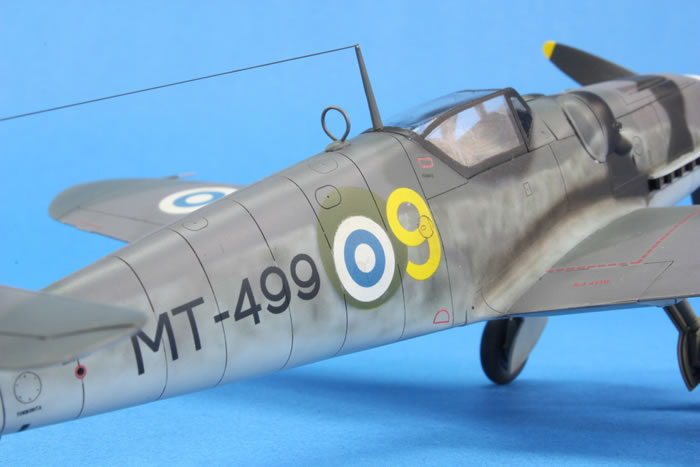
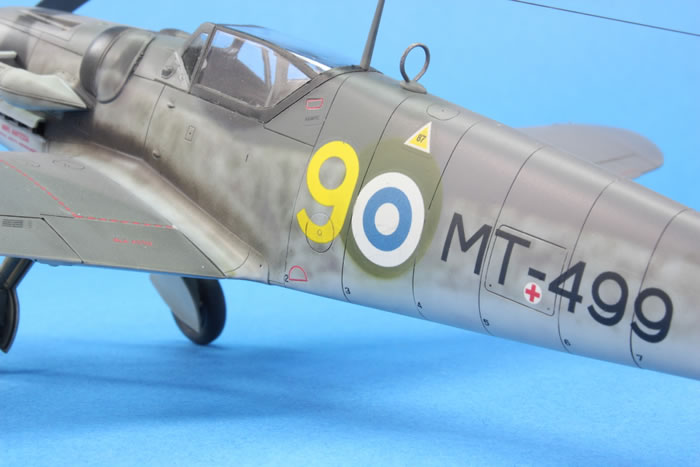
I spent ages trying to find photos of MT-499, the example Hasegawa provide decals for and the one I wanted to use. Unfortunately, I could only find two: one here: https://www.asisbiz.com/il2/Bf-109G/FAF/pages/Messerschmitt-Bf-109G6Trop-Erla-FAF-HLeLv33-MT-402-Stkz-RW+VQ-WNr-411520-Finland-01.html which shows it in what I presume is a later green scheme, and another photo here in the scheme Hasegawa provides.
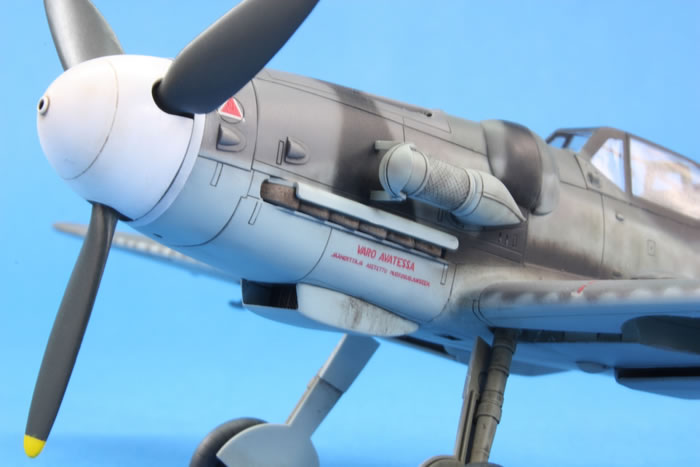
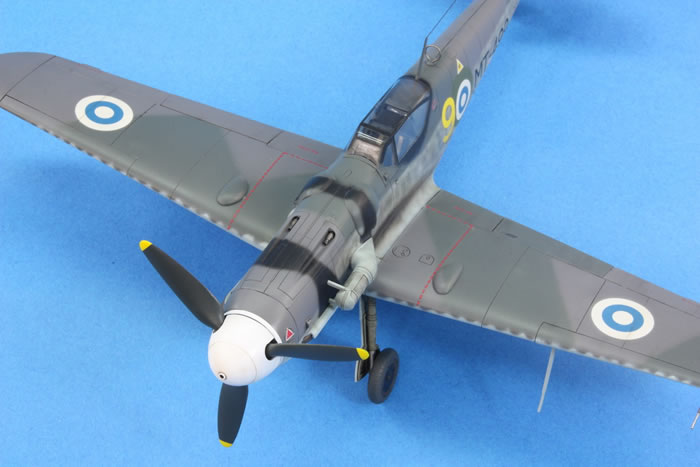
From this poor-quality, grainy, black-and-white photo I could not deduce much. The mottle seemed fairly tight and poorly-defined; the roundels sit in larger circles of some unknown colour; and, as Hasegawa correctly mark out, the front fuselage has some dark over-painted camouflage, indicated to have been black. The spinner appears to be entirely white, although it could also (just about) be two-thirds black, as most Finnish Bf 109 G-6s seem to have been. I also assume the prop tips would be in yellow, but this does not seem to have been uniformly applied to all Finnish Bf 109 s. I wish Hasegawa had provided decals for any of the other, far-better documented Bf 109 Gs with the mottled finish. Why they went for the obscure MT-499, I have no idea.
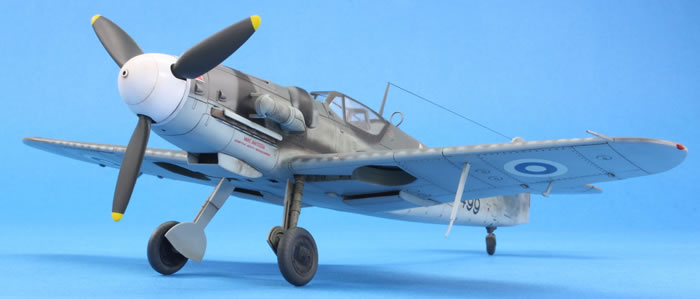
In addition to trying free-hand airbrushing for the first time, I also decided to abandon my usual practice of priming with grey Mr Surfacer and go for a darker undercoat. I settled on RLM 66 and airbrushed a very thin coat of Mr Color 116 over the entire airframe with my Iwata RG-3. On top of this, on the upper surfaces, I sprayed highly-thinned Mr Color 37 through the Custom Micron-B in a tight, mottled pattern, slowly building up the coverage. This was followed by Mr Color 36 to define the camouflage pattern on the wings, tail and upper fuselage, and then Mr Color 117 on the under surfaces and fuselage sides. The Mr Color paint had excellent opacity and I was extremely impressed with how the airbrush operated. I still feel that the pigment in Mr Color might be a little too coarse for truly fine work and I would like to give Mr Paint a go as I hear that sprays even better. However, by far and away the biggest limitation on my free-handing camouflage schemes in the future is the fact my hand wobbles and simply isn’t steady enough. I shall be returning to masking all schemes in future.
Mottling on the fuselage sides with Mr Color 36 and 37 then followed. In truth, I didn’t know what I was doing and just sprayed a random fairly dense mottle. I am happy with the result, but make no claim to accuracy. There simply isn’t a photo of MT-499 that I could find to provide a reliable guide, and there was so much variation in style amongst the other airframes I decided they were useless as indicators as to how this particular one may have been finished.
The basic colour scheme was then adorned with the extras. First, I sprayed the black around the nose freehand. The line is not as tight as it would have been had I masked using, say, Blu-Tack, but I was pleased with the attempt at seeing how fine I could get. This was sprayed with Tamiya X-18 Semi-Gloss Black. Visible on the photo of MT-499 is a circular shape where the previous swastika-style roundels had been overpainted and then smaller post-war roundels applied. Although in black-and-white, it seemed clear to me that these circles on the fuselage sides were not either RLM74 or 75. I therefore decided to paint them, in a fit of ignorant speculation, in Mr Color 303 as a rough match for the green used on Finnish aircraft, including the alternative scheme for MT-449 provided in the kit. I sprayed these through a circular template held lightly against the fuselage. I am sure this is inaccurate, but doubt it could be proved!
I added exhaust staining from a mix of Tamiya black and red-brown applied in the distinctive pattern I could see from photos. Many Finnish 109s have far more extensive staining than I have attempted; I prefer the tighter pattern which photos also show was pretty common.
The whole airframe was then covered in a generous coat of highly-thinned Mr Color GX100 clear gloss.
Partly because this was a quick build, I did not take as much care as I should have with paint preparation, and ended up with quite a few tiny fibres in the paint, which drive me round the bend. Some polishing with Tamiya compounds helped, but it did not end up as smooth as it should be. Nevertheless, it was adequate, and I pressed on with a pin wash of oil paint mixed from black, grey and brown.
Then we come to the decals. The decals. They were rubbish: thick, stiff and given to cracking or fragmenting. Over a generous puddle of Mr Setter they did mostly settle down, but were largely impervious to Mr Softer. I don’t know if it’s because of their age (thus far, this is the kit in my built collection that has spent the longest time in the stash), but they were far worse than regular Hasegawa decals…and they’re not great at the best of times! Having said that, the camera has been less kind to the decals silvering on the fuselage sides than can be perceived by the naked eye.
The kit was hurtling towards the finish line at this point, and completed in the small hours of 9th June listening to the astonishing results of the UK General Election. Some sporadic streaking was applied following a couple of photos I found. I note that many Bf 109 models have extensive rearward streaking from the oil cooler under the nose, but the (very few) wartime photos I could see of this area showed it to be pretty clean, so I saved time and did not add much in this area. I will fully admit that Finnish Bf 109 s often appeared far tattier than I have depicted here.
The undercarriage (previously painted in Mr Color 60 and washed with a mixture of Johnsons Klear, water and Tamiya X-18) fitted very positively and evenly. The exhausts likewise and the prop was stuck on the front. The whole aeroplane was given a coat of Mr Color Super Clear Flat Varnish decanted from a spray can and airbrushed with the RG-3. The masking was removed from the canopy and then the aerial wire attempted. I tried to get the aerial mast to seat properly but could not; whichever way round I tried, it still leaned backwards. Impatience got the better of me at 4.45am after a late shift and it is what it is. The aerial wire is stretched sprue, which is somewhat too thick for my liking. I have ordered some Uschi van der Rosten fine rigging wire so that I am better prepared next time!
So there is it. It took me exactly 30 days. I have not built a kit so quickly since 2008 before I had children. I thoroughly enjoyed it, loved adding no aftermarket, and loved throwing caution to the wind when it came to accuracy and just enjoying it for what it is.
It’s a great kit and I’ll now be keeping my eye out for a cheap Hasegawa Bf 109E-3 that I can finish in Swiss markings. This model could be far better than what it is, but it’s a distinctive addition to the collection and has set me up nicely for that MiG-29.
To see more model build articles like this, please visit my website: www.jonbryon.com/model_index.html
Text and Images Copyright ©
2017 by Jon Bryon
Page Created 3 August, 2017
Last Updated
4 August, 2017
Back to
HyperScale Main Page

|
 Home
| What's New |
Features |
Gallery |
Reviews |
Reference |
Forum |
Search
Home
| What's New |
Features |
Gallery |
Reviews |
Reference |
Forum |
Search