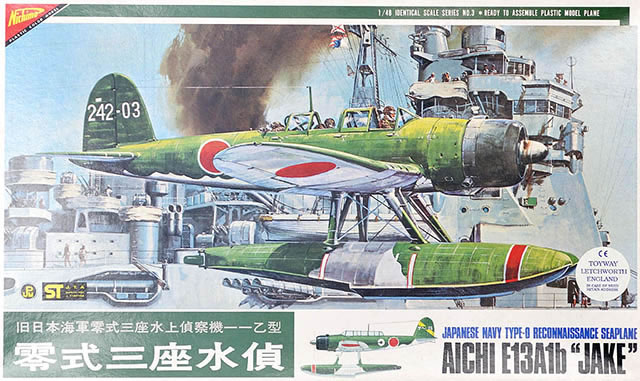
Nichimo 1/48 scale
Aichi E13A1b Type 0 Reconnaissance Seaplane (Jake)
by Bruce Salmon
|

|
Aichi E13A1b Type 0 Reconnaissance Seaplane (Jake) |

Tamiya's 1/32 scale Tamiya P-51D Mustang is available online from Squadron.com
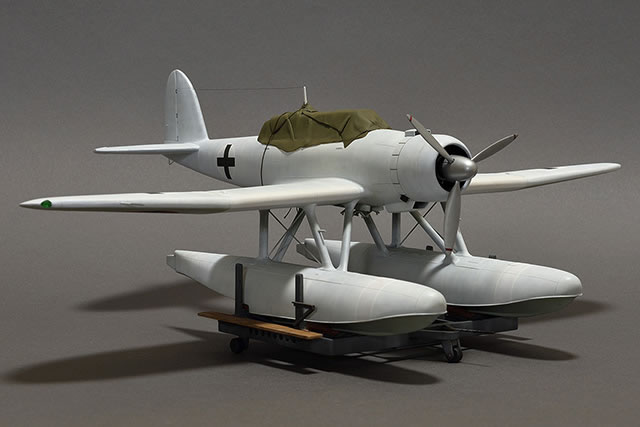
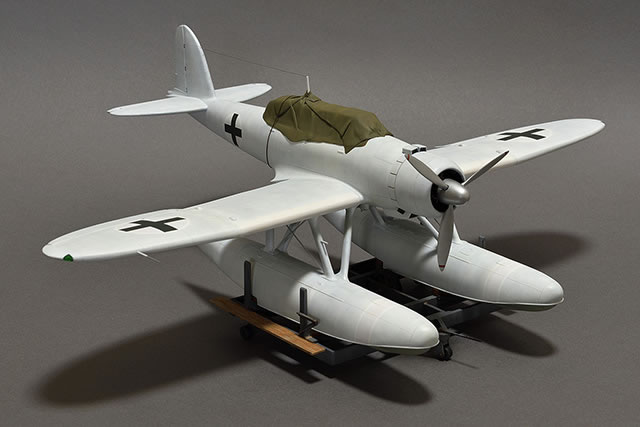
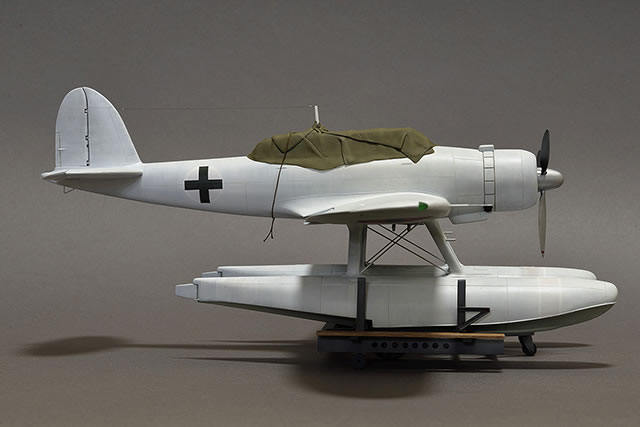
This model represents the Jake surrendered to the RNZAF by the Japanese soon after the end of WW2. At the time it was decreed that all enemy aircraft should be painted in surrender colours of white with green crosses over the national markings. This aircraft was subsequently flown to the RNZAF base at Jacquinot Bay, New Britain by S/L Bob Hickson (RNZAF) as pilot. It sank at its moorings overnight and apparently remains there to this day.
The Nichimo kit came out in the mid 1970s and is a very toy-like model. It has no engine nor proper cockpit as this was intended to house a battery and small electric motor to spin the propeller. Luckily a photo of the actual aircraft shows a tarp covering the cockpit so a whole raft of much needed scratchbuilding could be easily eliminated. The fit of the parts can be good or horrible and the moveable parts (folding wingtips, elevators, ailerons and rudder) are very gappy. At least the trailing edges are sharp!
The amount of correcting needed on this kit is extensive so I chose to render only what I considered most necessary. Considering many modellers who saw the final product thought it was an Arado I’m glad I didn’t go too overboard with it.
Due to all the reshaping and reconstruction needed the model was built almost in its entirety save the engine and cowling and then painted afterwards. All the raised rivets were removed as the actual aircraft was flush-riveted and the panel lines rescribed. The following are some of the updates I carried out.
Fuselage
The top deck of the cockpit (battery compartment) and fuselage halves were closed up and the radar aerial holes filled. I then reshaped the fuselage to get rid of all the extraneous lumps and angles. The rudder was also remodelled to look more like the real thing and glued in place.
At the front end I decided that an engine would be needed to add interest and for this I chose the Engines ‘n’ Things resin Mitsubishi Kinsei 14 cyl. Ha-112 1280hp radial engine. I originally bought this to go in the Hasegawa Val but it turned out to be much worse than the kit part. However, it would do the job nicely here as it is relatively hidden from view. To achieve this I had to saw off the curved front of the cowl and Dremel out the insides to fit the engine in from the front. Once the engine was painted and decorated I glued it inside the cowl and attached the front piece thus completing the surgery.
The propeller blades and spinner also needed reshaping and new exhaust pipes were made. The canopy required making actual attachment points to glue it to as it barely even sits on the cockpit opening. I was quite glad I wouldn’t have to build the whole interior although there is a resin replacement you can get if desired.
Wings
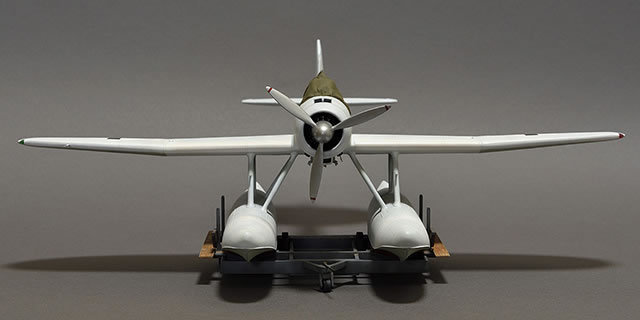
The angle of incidence of the inner wing section was addressed and the outer folding wing tips were also adjusted to a more realistic angle. The resulting big gaps were filled with Milliput. The flaps are undersized so their thickness was built up with plastic card and grey basic type Tamiya putty. The ailerons were also lengthened to better fit the wing. Nav lights were made from Perspex, super-glued in place and then sanded to match the wing profile. I even added bomb racks for extra interest though I didn’t have any references for them.
Floats
The float halves were joined after adding weights internally to prevent tail-sitting. I then attached the nose sections and re-profiled them for a more accurate streamlined look.
Attaching the struts to the floats and the wings was a bit of a nightmare as the struts were quite gappy at their attachment points and also the wrong length. Left as is the aircraft would point downwards at the front quite significantly as the rear struts are far too long.
I had to cut the struts to the correct length then glue them into proper position all in one go while the glue was drying to ensure I got the correct angles. They were also reinforced with brass wire. Once in place the gaps were filled with CA glue and then sanded using small pieces of sandpaper held with tweezers; a very tedious process!
The bracing wires were made from 20 thou brass wire inserted into pre-drilled holes.
Beaching Trolley
The beaching trolley is another small model in itself and required significant improvement.
There were big gaps that needed to be filled and the bunk boards had to be remade to fit the underside shape of the floats. While I was at it I added running boards down the sides and a steering handle for the front wheel.
Painting
All Acrylics:
Upper Surface: 8 – Tamiya XF11 JN Green / 1 – Tamiya X2 White
Lower Surface: 8 – Tamiya XF12 JN Grey / 1 – Tamiya X2 White
Hinomarus: 15 – Tamiya XF7 Flat Red / 1 – Tamiya XF9 Hull Red
Leading edge stripes: 9 – Tamiya XF3 Yellow / 1 – Mr Hobby H24 Orange Yellow
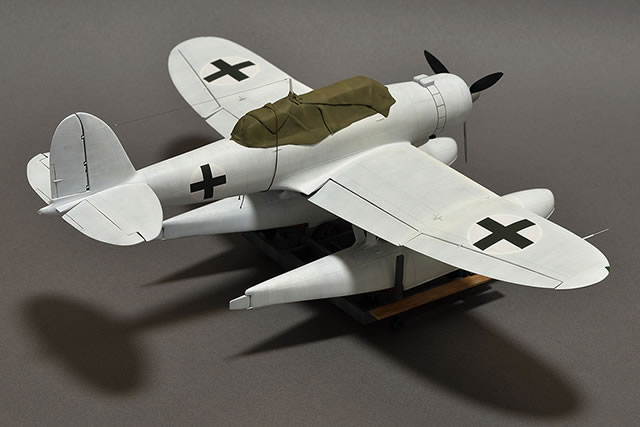
Surrender crosses: XF11 JN Green
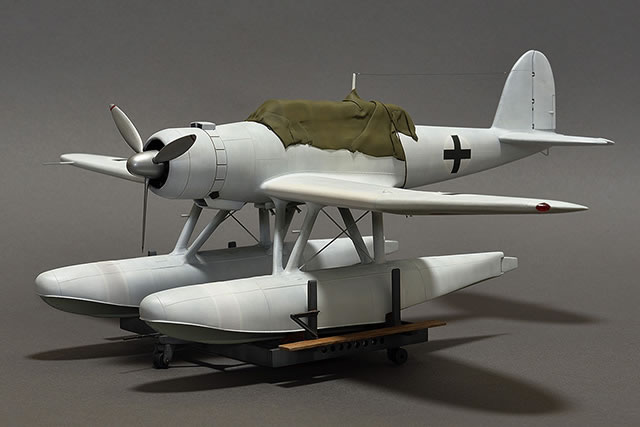
The model was first primed with Tamiya Fine White Primer then lightly painted in the standard Japanese green/light grey colour scheme. All the national markings were then masked and sprayed. Lastly I sprayed on the surrender colours using Tamiya X-2 acrylic white in a more or less cloudy pattern. Once dry I brushed over it with thinned enamel white for a distemper effect using a wide flat brush. The floats and adjacent underside of the aircraft proved quite difficult to paint as there is very little room to manoeuvre an airbrush. The model was given a coat or two of Tamiya X-22 Clear and then a very subtle weathering with a thin all-over filter using Windsor and Newton Raw Umber oil paint mixed in a generous quantity of turps.
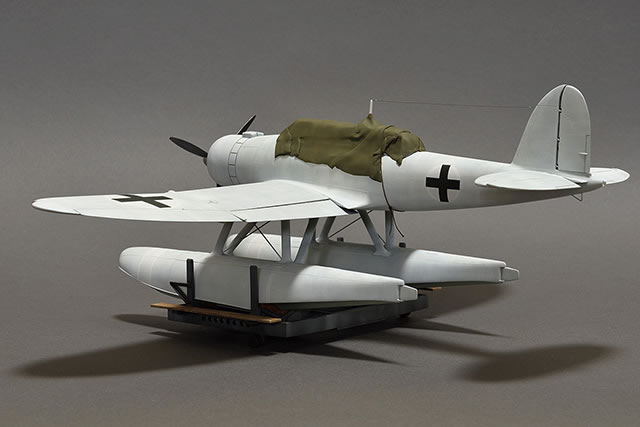
Tarp
Next a tarp was made to cover the canopy and hide what isn’t there using Superfine White Milliput. I applied it after the painting and weathering was complete so that I wouldn’t damage it. It is interesting just how dirty a white finish can get with a bit of handling. I had to use two pieces of Milliput as it is too flimsy and prone to tearing if you use large pieces. It is also very easy to get fingerprints in it while it is still soft and these were later filled with Mr. Surfacer and sanded out. You’ll need to wait a few days before sanding as the Milliput will only clog the sandpaper if it isn’t thoroughly dry. The tarp was masked out and painted Olive Drab then weathered with oils. Mr Colour H20 Flat Clear was sprayed over the whole model to complete the process.
Last to go on was a pitot tube made from brass tube and an aerial wire from stretched sprue.
So was it really worth all that bother? Sure thing! Nobody else makes a 1/48 scale Jake yet and the completed model looks dead sexy sitting in the cabinet next to my Rufe, Rex, and Pete.
Model and Text Copyright ©
2017 by Bruce Salmon
Page Created 8 June, 2017
Last Updated
8 June, 2017
Back to
HyperScale Main Page

|
 Home
| What's New |
Features |
Gallery |
Reviews |
Reference |
Forum |
Search
Home
| What's New |
Features |
Gallery |
Reviews |
Reference |
Forum |
Search