|
Hawker Hurricane Mk. IIc
Fly Model, 1/32 scale
S u m m a r y : |
Catalogue Number: |
Fly Model Kit No. 32012 - Hawker Hurricane Mk. IIc |
Scale: |
1/32 |
Contents & Media: |
Plastic and mutimedia parts. See body text for full details. |
Price: |
Available from Fly Model for around £30 |
Review Type: |
First Look |
Advantages: |
Excellent moulding; high level of detail; accurate; great subject. |
Disadvantages: |
None noted. |
Conclusion: |
Highly Recommended. |
Reviewed by
James Hatch

Kitty Hawk's 1/32 scale OS2U Kingfisher
will be available online from Squadron.com
The venerable Hawker Hurricane was the very last in a generation of fighter designs that could trace its roots back to the machines that fought in the skies during the Great War. Whilst countries such as Germany were taking advantage of newer, all metal, stressed skin designs, Hawker soldiered on with its hybrid of both old and new.
Designed by Sydney Camm, the prototype machine first flew in late 1935, before eventually seeing active service in late 1937. Originally designed to carry only four machine guns, this design was soon modified to carry the eight guns that were stipulated in an amended Air Ministry specification that was written around the new fighter design.
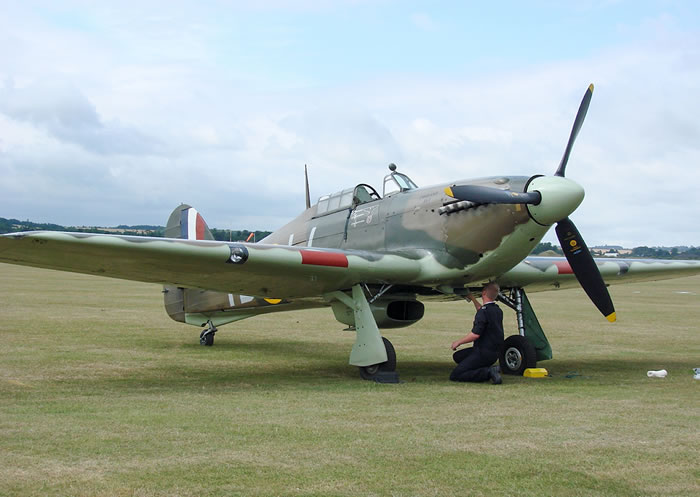
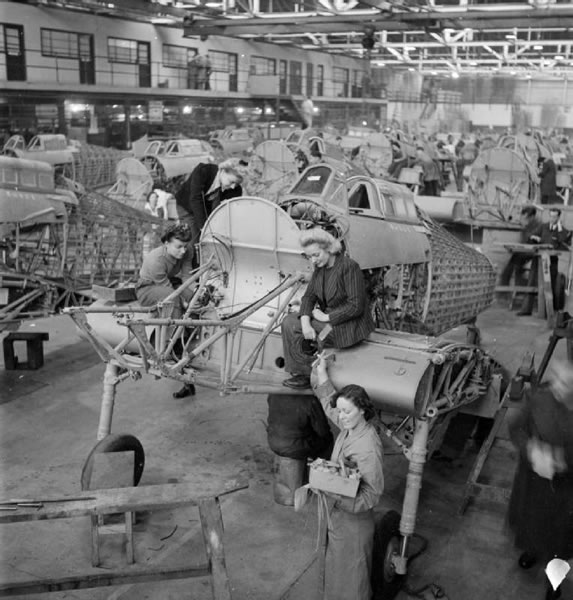
There is no doubt that the Hurricane was a robust machine with its tubular framed fuselage with wooden formers and doped linen covering. Initial machines also had fabric covered wings. With its wide track undercarriage, thick wing and forgiving flight characteristics, the Hurricane was a favourite amongst its pilots, despite being overshadowed by the more glamourous Spitfire. It was a solid gun platform, and gained a higher kill ratio than the Spitfire, having been assigned the bomber streams as their specific targets.
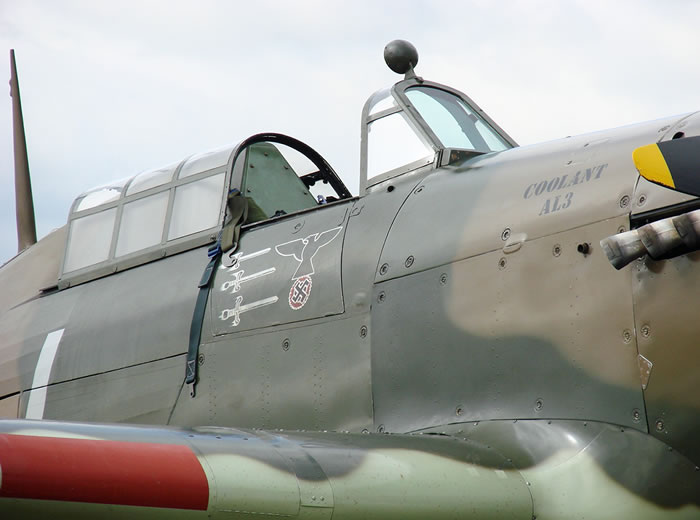
During its career, the Hurricane gained a metal sheathed wing, variable pitch 3-blade propeller to replace the fixed pitch, two blade Rotol, and numerous other changes were made to it for the purposes of low level bombing, tropical operations, and also for operation from aircraft carriers. A four-gun Hispano cannon installation also graced many machines.
By the end of production in 1944, over 14,000 machines had ben built. The era of the timber and metal fighter was now over, but the Hurricane left a legacy that still rings chimes with today’s generation of aircraft enthusiasts.
When it comes to 1:32 Hawker Hurricane kits, the modeller hasn’t had much in the way of real choice. There has been half a dozen or so boxings of the old Revell kit that was first released in the early 1970s, followed by three more releases from Pacific Coast, covering the Mk.I versions (including rag wing version). I have heard modellers say that they wish that Fly Model’s releases had covered the Mk.I also, but in light of the PCM kits, it would seem a pointless task for an initial foray. I don’t know if they plan that in future, but I can say that we will see more than one new Hurricane version being released, after these initial two kits. Jeroen Peters will review the Tropical Hurricane in the near future. For now though, let us take a first look at this brand new tool kit from Fly.
Fly Models are short run kits, so you must expect to do a little extra work. Whilst Fly’s finesse of detail improves with every release, you will need to clean up a little more flash here and there, and spend more time preparing parts.
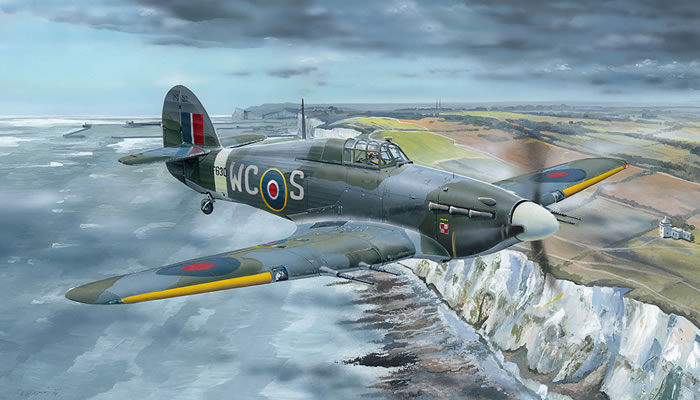
For me, that’s no big deal. I recently built their Wessex kit for Military Illustrated Modeller, and even with the clean up, it was probably one of the most enjoyable and engaging models I’ve built in many years. The kit itself comes in an attractive box that carries an evocative image of a Mk.IIc flying over the white cliffs of Dover, sporting a later grey/green camouflage scheme, and operating with a Polish RAF squadron.
On the side of the box, you’ll see no less than SIX schemes that are provided for this release. As this kit is a multimedia affair, the sprue count is quite modest, with just four sprues included, moulded in a tan-coloured styrene, and a single clear sprue. Whilst the latter is packed into a small ziplock wallet to protect it, the remainder are to be found in a single, clear bag. Whilst these parts are quite loosely packed, no parts have suffered damage. Also in this bag is another ziplock wallet, containing numerous resin parts, produced by Artillery, as with other Fly Model releases. Another sleeve contains a colour painting guide, stencil guide, three decal sheets, instruction manual, acetate instrument sheet, and two frets of photo-etch parts.
Sprue A
First of all, you need to know the moulded parts have no numbers on the sprues. You will need to refer to the numbered parts plan on the instruction manual. First World problems, eh? This sprue contains both fuselage halves, undercarriage struts and actuators, cockpit door and radiator flap. The fuselage is a full-length moulding, sans rudder, and the external is really very nice. I noticed a new finesse with the Wessex, and this continues with this release.
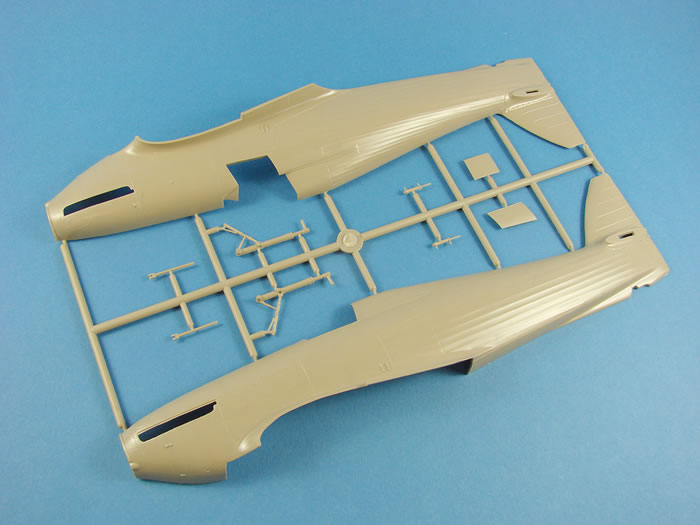
The forward fuselage consists of various panels, finely scribed, and containing Dzus fastener detail. Looking at my reference photos, a few extra rivets could be added in key areas, using Archer rivet decals, maintaining the raised rivet theme of the Hurricane. Two spots on the upper, forward cowl indicate where the cowl bulges will need to fit, so no ambiguity there. But what of the stringer and fabric detail? Well, I think it’s superbly represented, without any unrealistic hard edges. I think Fly tackled this very well. The same applies to the vertical fin, with its ribs and wooden covered leading edge. I quite like the access panels on the rear fuselage, with their fastener detail, and also the metal fairings that extend around the edge of the stabiliser position.
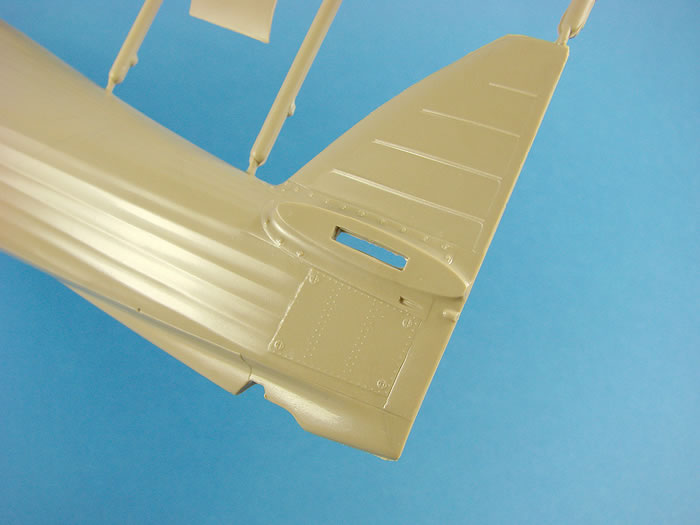
Internally, the Hurricane doesn’t have too much in the way of detail, with this being almost exclusively supplied by a multitude of plastic, resin and PE parts, with resin being perhaps the predominant media in this area. We’ll look at the resin parts in a short while. Note that the model has no locating pins anywhere. This is very typical of short-run kits, and I’ve never found a problem with a lack of these.
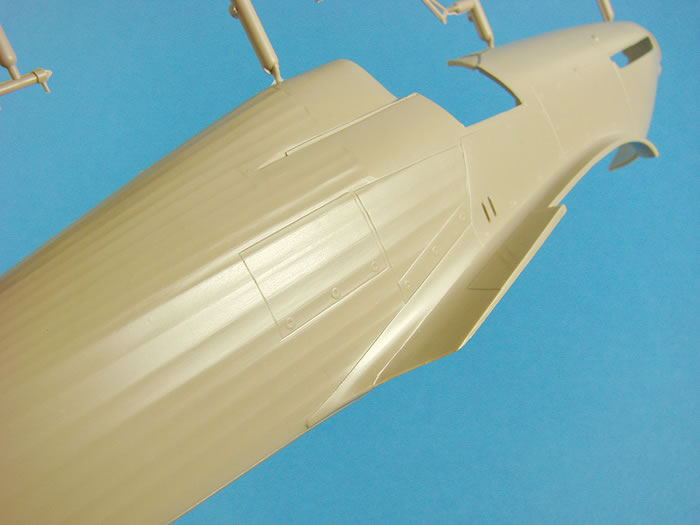
Here you can see the detail for the cockpit door and undercarriage parts. Whilst the undercarriage looks properly proportioned and has the key elements, I would perhaps enhance these further with tape strips and lead wire.
Sprue B
Wing panels. That is all you will find here, and these are moulded as traditional upper and lower panels, but the lower centre section is a separate part that we’ll look at soon.
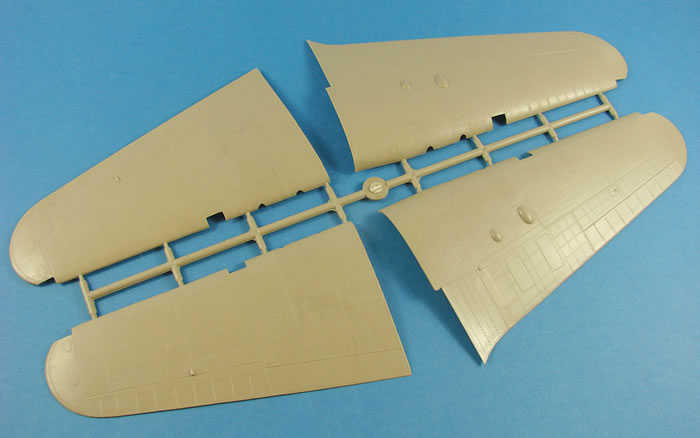
Now, you will notice something that you don’t usually see on models these days, and that is the numerous rows of raised, domed rivets, instead of the usual divot that tends to be cheaper to tool for mass moulding. It’s not all raised rivets though, as an effort has been made to replicate the countersunk style also, and again, I think Fly have done a great job here, and it certainly sets it apart from contemporary kits.
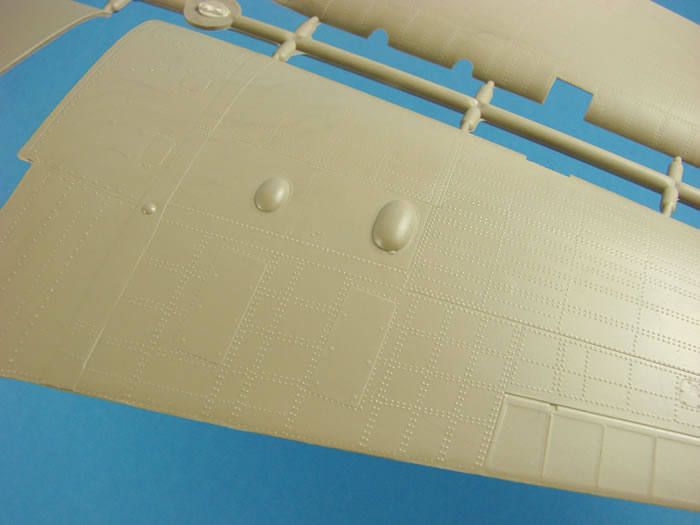
A number of other surface details exist, such as filler ports, fasteners, and other plating such as the stiffening plate on the upper wing. The wings look quite agricultural, as befits the design of the Hurricane. Note that the ailerons are integrally moulded to the wings, and to pose them dynamically would take extra work, and seem quite pointless. I would maybe run a very fine razor saw down each side of the aileron, to make it look a little more ‘separate’ to the wing.
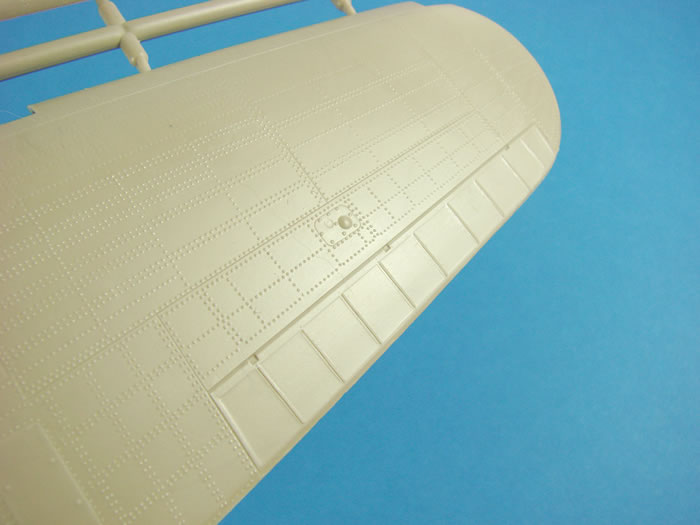
Underneath the wing, the same standard of detail can be seen, with only the cannon shell chute ports needing opening up before construction. Where these outer wing panels meet the centre panel, the joint will be obscured by the application of a PE reinforcement strip, mimicking the one that was fitted to the actual machine. Landing flaps are also integrally moulded, and if you want to pose these, you will have your work cut out, and the need of some scratch-building skills.
Sprue C
We have a real mish-mash here, with the underside wing centre section taking prominent position. This has easy to locate positions for the main radiator, scoop intake and also three indents for the underside lights. Two spinners are also included, a short sharp one, and a longer, blunted one. It is the latter that will be used here. Four identical prop blades are included, of which only three will be used. I’m quite impressed with the shape of these, and they look right, compared with period photos of the Hurricane.
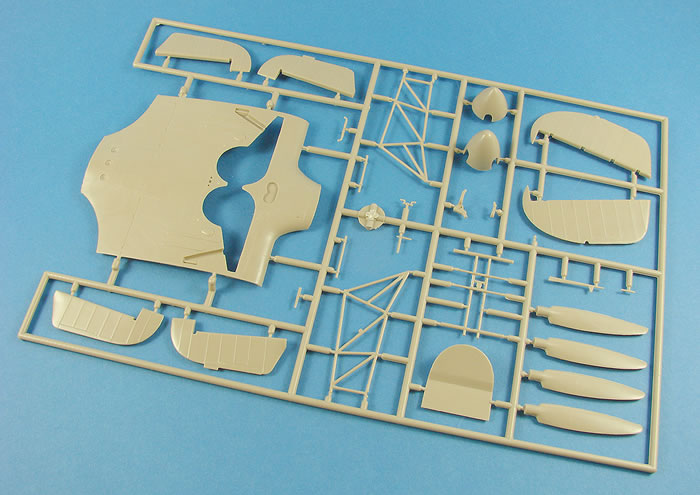
Despite the wings not having posable control surfaces, the rudder and elevators are moulded separately, allowing the modeller to incorporate some dynamic into their build. Again, these are superbly represented, with rib structure and delicately engraved trim tabs. Construction is typical for these, with the surfaces being supplied as halves.
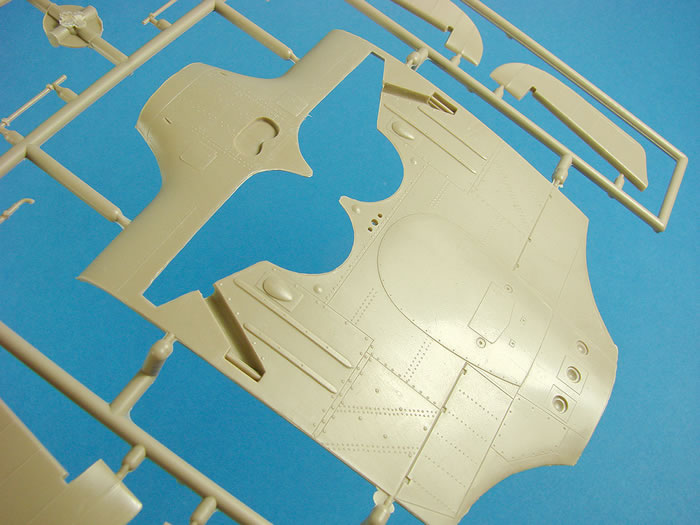
A few interior parts have crept onto this sprue, with both main sidewall frames being found here, as well as the tubular base. These will need a little clean-up before assembly, to add a little extra refinement. I actually consider, with short-run kits, that what you get is a starting point for your own additional details, but Fly seem to have the interior of the Hurricane looking excellent, built right out of box. A few other parts are moulded here, such as the tail wheel fork, aerial mast, forward cockpit bulkhead, pitot, seat mounting bars etc.
Sprue D
First up, the parts that you will not be using here, and these include an alternative spinner backplate and some thinner, needle-type prop blades. Fly obviously has other plans to release further versions of this kit, and I certainly welcome seeing those. Two versions of intake scoop are also supplied, so you will need to check your references before committing to attach either one. Both scoops will also need drilling out to open up the intake area, as these aren’t moulded with any recess due to the nature of the tooling of this kit. As with the Wessex, Fly have incorporated all the parts into this kit that are destined for the other versions. Here, that means that the tropical intake is also included. Useful if you wanted to build a tropical machine, but can only find this release. Of course, you would need to source your own decals, possibly aftermarket, if you went that route.
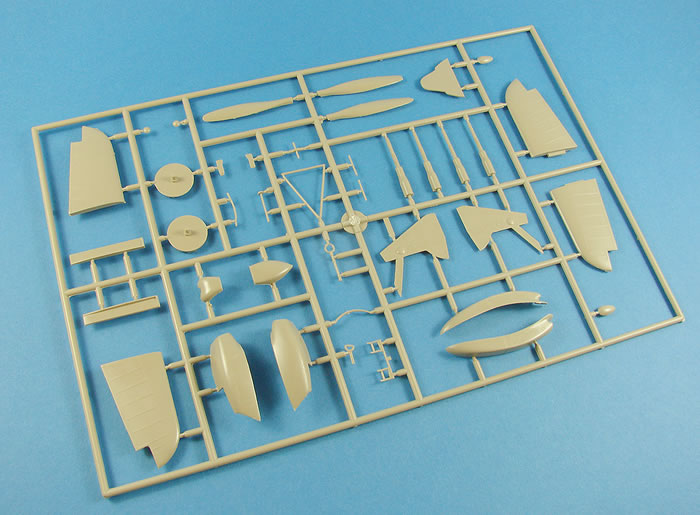
Rudder pedals and control stick are included here, and look a little basic. With some extra work, these could be made to look good, or perhaps see if you can source one of the parts from Grey Matter, depending on whether they are pertinent to a Mk.IIc, having been designed for a Mk.I. Fly have supplied the radiator unit as halves, with a separate cooler flap that can be posed. Internal grilles are a photo-etch composite, with several parts for each of the two grilles.
The main undercarriage doors can be found here, with lovely internal and external detail, such as raised rivets, plus the traditional style stabilisers that fit to the fuselage via a tab. For fitting the resin exhausts, there are some plastic plates that fit internally within the cowl, providing a mounting point for the exhausts. Also moulded here are the four Hispano cannon barrels, with their recoil springs. As Fly provide these as alternative resin parts, I think you’d be nuts to use the styrene ones, but if you aren’t comfortable with resin (in which case, why buy this kit?!), then the option is there to use those parts.
Clear Sprue
This contains thirteen parts, and I have to say that Fly are getting much better with their transparencies. The windscreen and sliding hood have excellent visibility with no annoying texture to be seen. However, the piece of armoured glass that fits within the windscreen, does have a slight texture to it. As this part is totally flat, it will be easy to remove that and polish the part to a good sheen with better transparency. This can then be fitted within the main windscreen with a drop of Klear, so as not to cause any distortion or fogging.
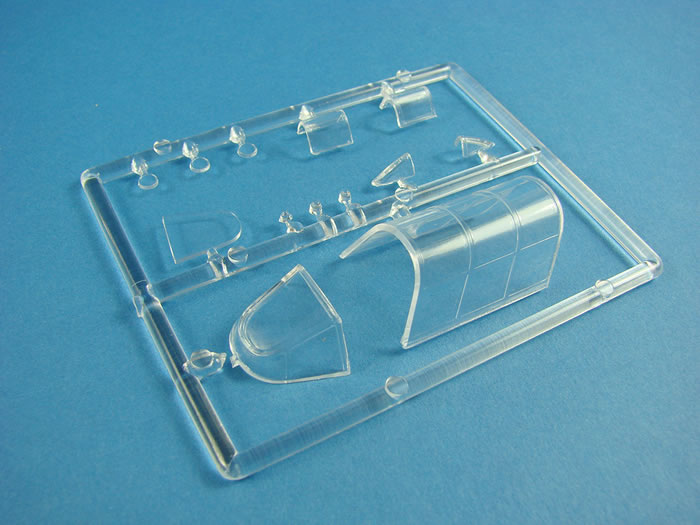
Other parts include wingtip and landing light lenses, and the covers for the wing leading edge lights.
Resin Parts
There are 21 parts here, cast in medium grey resin. The most obvious, and largest part is the main undercarriage bay. All that needs adding to this is a part from Sprue C (pipework), and you have a part ready to fit to the model. There is an area of casting block on top of the well, but I’m unsure whether you would need to grind this away. Just check to see if it fits before gluing it to the wing itself.
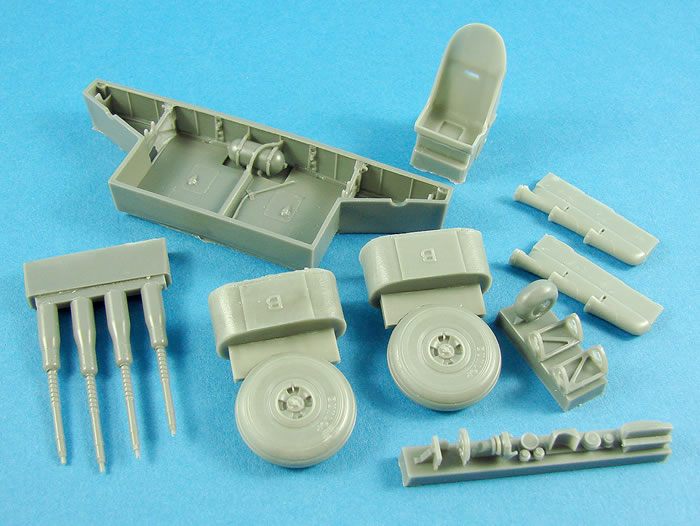
A set of four Hispano cannon barrels with recoil springs, are also included, and look far better than the styrene ones supplied on Sprue D. Two nice main Dunlop tyres are also included here, but I think some work would be needed to restore any tread detail when the casting blocks are removed. That remains to be seen. Of course, the tail wheel is also included, but none of the wheels are supplied as ‘weighted’.
Two rather nice sets of exhaust manifolds are supplied, as is a pilot seat that just requires the casting block and protective resin webs removing.
For the wing leading edge light areas, there are two resin internal frame/rib parts that look very fragile. Care should most definitely be taken here, and lastly, a casting block containing numerous parts, mainly for the cockpit, but also including a leading edge camera port and rear view mirror. Resin casting, by Artillery, is first rate, and certainly can’t be faulted.
Photo-Etch Parts and Acetate
Two frets are included with this kit, with numerous cockpit detail parts, such as the two-part instrument panel, armoured head rest, optional night-fighter exhaust anti-glare plates, radiator elements, pilot tread plates, and also the wing reinforcement plates that will fit along the joint between the lower, outer wing panels, and the centre section. A very nice touch indeed!
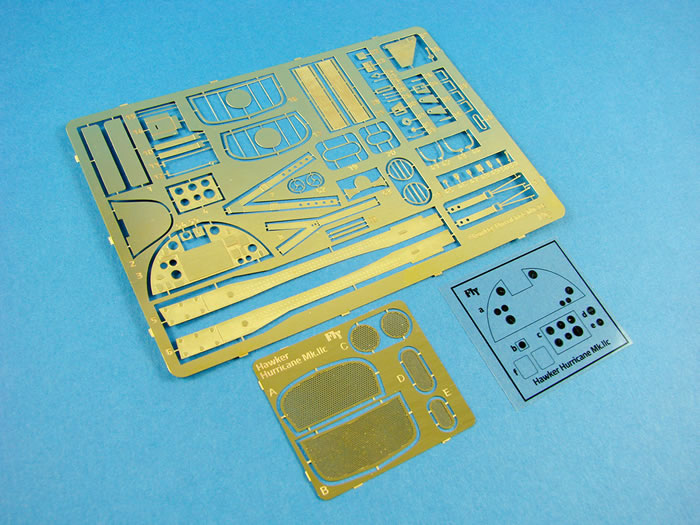
A single acetate sheet is printed with instruments, and is to be placed to the rear of the photo-etch panel. You will need to paint the reverse of this in white paint, prior to installation, so as to highlight the ink printing of the gauges.
Decals and Schemes
I do very much like Fly’s inclusion of a separate colour scheme sheet, clearly showing all six schemes in all the main plan formats. Decal placement is clearly marked out, and colours are indicated with reference to both Humbrol and AK-Interactive codes. A separate sheet is included, dealing solely with stencil position.
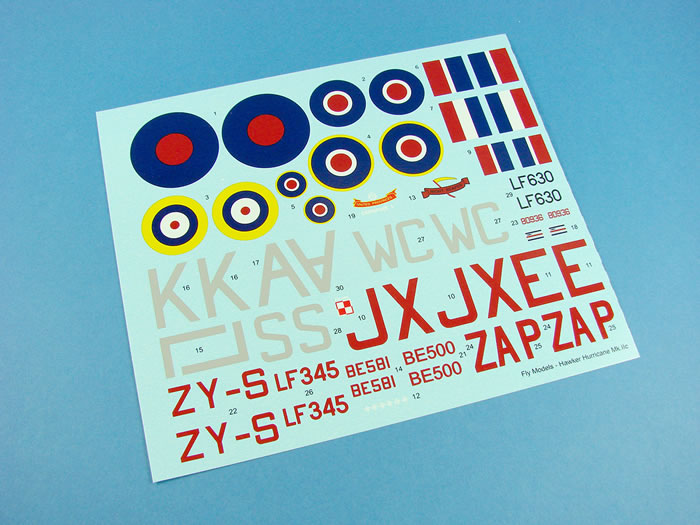
THREE decal sheets are included. The main one contains the individual scheme markings, along with common elements, such as fin flashes and roundels. Two smaller sheets are dedicated to stencils, and Fly have been pretty thorough here.
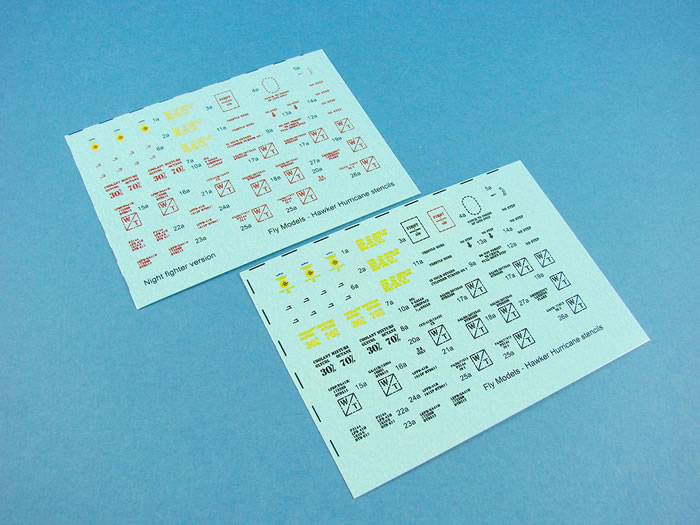
The reason for two stencil sheets is that one of them concerns the night-fighter machine. Printing appears to be excellent, with sharp, authentic colour, and importantly, everything looks to be in perfect register. The decals are thin, and have minimal carrier film.
The schemes are:
-
Hurricane Mk.IIc, BE581, JX-E, No.1 Sqdn, flown by F/Lt. Karel Kuttelwascher (early camo version)
-
Hurricane Mk.IIc, BE581, JX-E, No.1 Sqdn, flown by F/Lt. Karel Kuttelwascher (late camo version)
-
Hurricane Mk.IIc, BE500, LK-A, No.87 Sqdn, RAF Cawnpore, flown by Sqn/Ldr. Dennis Smallwood
-
Hurricane Mk.IIc, BD936, ZY-S, No.247 Sqdn. RAF
-
Hurricane Mk.IIc, LF345, ZA-P, Post war (1946)
-
Hurricane Mk.IIc, LF630, WC-S, No.309 Polish Fighter-Reconnaissance Squadron, RAF
Instruction Manual
This manual is common to both this and the Trop release (soon to be reviewed by Jeroen). It’s a glossy 20-page booklet that starts with that parts plan that you will need to refer too. When it comes to clear, resin and PE parts, each of these is assigned a colour that is easily identified during the constructional sequences. It only takes a few moments to get used to it.
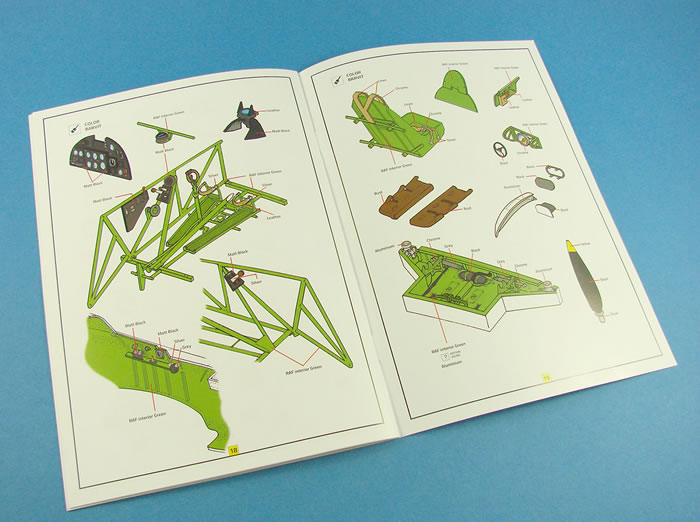
Construction drawings are clear and easy to follow, and I can’t really see any ambiguity during the build. Now, there are no colour references supplied for parts during the build, but if you flick to the last three pages of the manual, all colour reference you need, is to be found here, with colour drawings for the cockpit, gear bays, radiator, cannon, exhausts etc.
I have to admit a fondness for Fly model kits, having now built their Ba 349, Ar 234, and Wessex. I have also seen an improvement as time has gone by, and this kit is every bit as good as the recent Wessex release that has had such good press. Of course, you really don’t have any other option if you want to build a Mk.IIc machine, but that’s no problem when you have a release that is as good as this. Moulding is every bit as good as it should be for short-run releases, and the resin and photo-etch are excellent, as are the comprehensive decal sheets. Add to that the cost of this model, currently retailing at around £30, then you certainly have a kit that is cheaper to buy than the Mk.I from PCM, and certainly easier to find that those older releases. What are you waiting for? Get one now, as the Sea Hurricane will then be calling your name, and further Hurricane releases! A beautiful kit of one of the RAF’s most iconic machines.
Most highly recommended
My sincere thanks to Fly Model for the review sample seen here. To buy directly, click THIS link.
BUT WAIT!
1:32 Hurricane aftermarket sets
Fly Model
See article for code and price
As well as the two brand new Hurricane kits that LSM has received, Fly have also packed a few extras into the boxes for us to look at. It’s sure good to see Fly make a few extras, tailored of course to give us a little extra choice, but without the added, unnecessary cost of putting them in the kit box to start with. Here we go!
Version 2 guns
(suitable for Mk.IIc and Mk.IIc Trop)
Catalogue # arta 001
Price: around £1.50
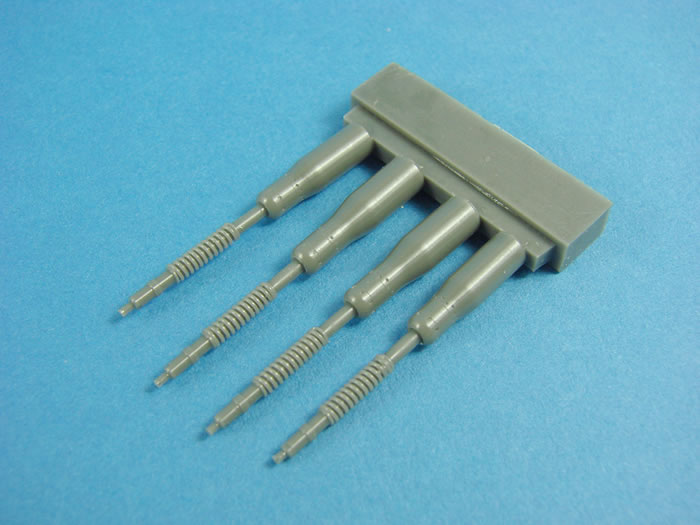
This block, on first inspection, looks to be identical to the resin guns that are supplied in the kit. Closer inspection shows that the recoil springs are located differently. There were two formats for the Hispano recoil springs, with presumably the most common being supplied in the kit, but this set allows you to build your model with these very specific barrels. You will need to check your references though. All four barrels are cast on a single, medium grey block, and as will all Artillery resin castings, the quality is superb. This set is supplied in a small re-sealable sleeve that is packed into a small and rigid box.
Hurricane Canopy Mk.I & Mk.II
(for all Fly kits)
Catalogue # arta 002
Price: around £2.00
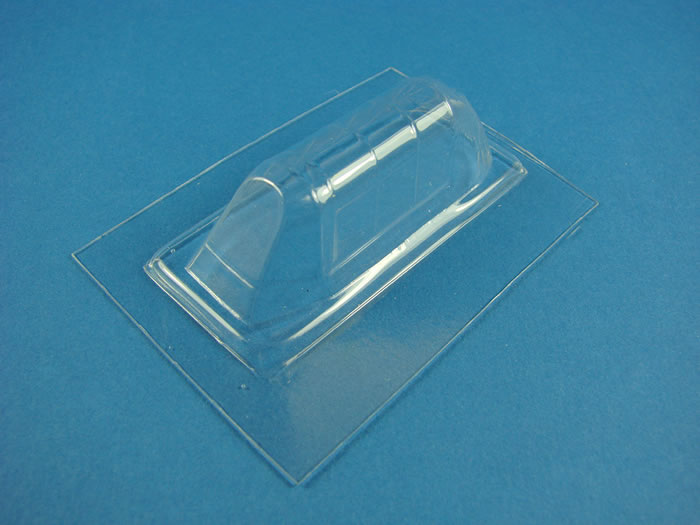
I suppose that a vac part does actually represent something that is more of a scale thickness when it comes to the glass panels. Quite how that is accounted for in the frames, especially when you pose it opened, is another question. However, this optional part is formed as a single piece, and would need to be sliced if you wanted to pose it in an open position. Production is excellent, with exceptional clarity for a vac, and sharp framing lines. Certainly an option to look at, that with a little extra internal frame work, would look really good. Again, this is packed into a re-sealable sleeve, and then popped into a small, rigid box.
Hurricane Mask Set, for Mk.IIc and Mk.IIc Trop
Catalogue # NWAM0027
Price: around £4.00
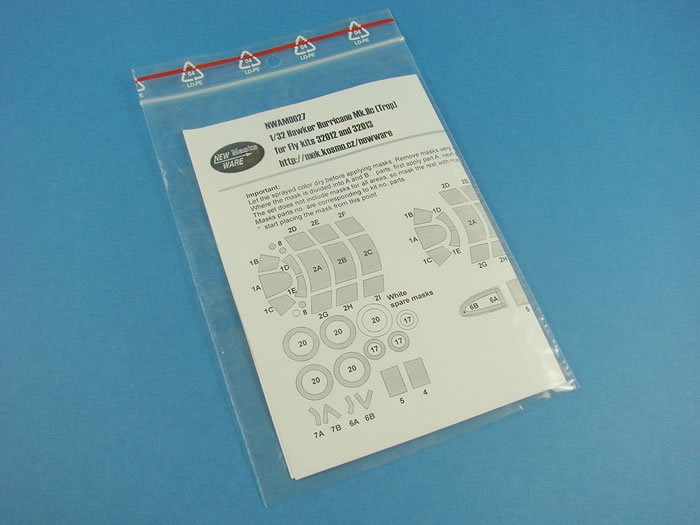
These masks, like Eduards’ sets, are sharply cut into a sheet of Kabuki masking material, and are produced by New Ware. Parts are included for the individual canopy panes, as well as the wheels/hubs, wing leading edge lights, wingtip lights, and underside lamp lenses. Production looks superb. These are packed into a ziplock wallet, with an instruction sheet that shows what each part is, and where it goes. For me, a real useful release!
Hurricane Markings Mask set, for kit #32012
Catalogue # artm 32001
Price: around £4.00
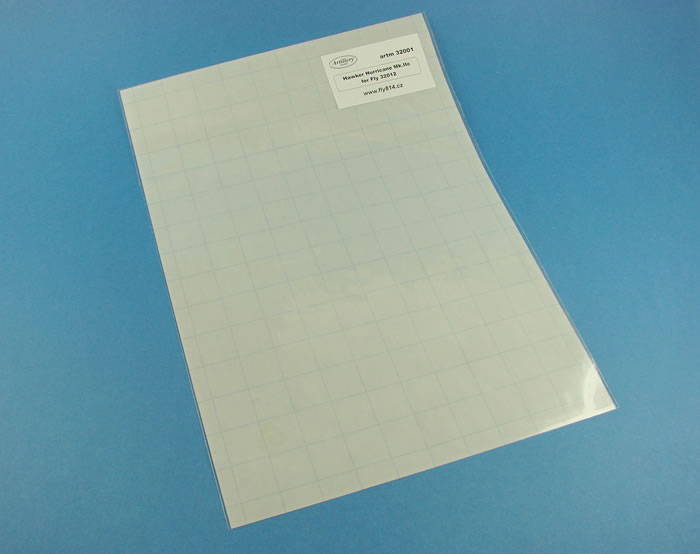
Masks are being increasingly more popular in our hobby, so if you want an alternative to decals for the main markings, you’d normally need to order a custom set of markings. For this, and the Trop version, Artillery have again teamed up with Fly, producing a complete set of vinyl masks as an alternative and direct replacement for the main kit decals. This is sharply cut onto a sheet of very thin, clear vinyl that peels from a paper backing sheet. What I can’t find though are any pieces of blank vinyl that you would use for transporting these masks to the model itself, although vinyl masking material can no doubt be bought in small quantities, maybe even from Artillery themselves. Providing these have a good level of adhesion, especially on the raised rivet surfaces, then these will indeed provide a very welcome alternative to decals. There really is nothing quite like looking at markings that have been airbrushed instead of using decals. It’s the ultimate in reality. Also, these masks are only £4.00, which is quite extraordinary, and again, if the material is good, then these represent superb value for money.
I’m very pleased to see some options now being released at the same time as the kit, allowing you to do some proper project planning. The items here represent great value for money, and you should really think about adding a few to your online shopping cart.
My sincere thanks to Fly Model for the samples seen here.
Review Text Copyright © 2016 by James Hatch
Page Created 21 March, 2016
Last updated
22 March, 2016
Back to HyperScale Main Page
Back to Reviews Page

|
