|
Fw 190 A-5
ProfiPACK
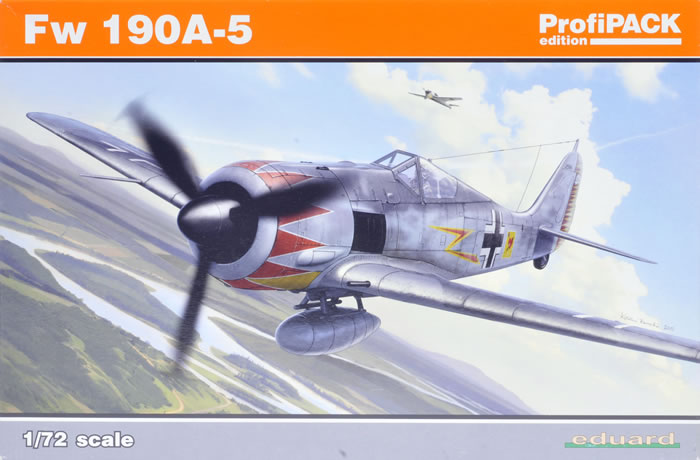
Eduard, 1/72 scale
S u m m a r y : |
Catalogue Number: |
Eduard Kit No. 70116 - Fw 190A-5 Profipack Edition |
Scale: |
1/72 |
Contents & Media |
66 grey and four clear styrene parts, one coloured PE fret with 27 parts, a pre-cut Kabuki tape canopy mask, and decals for five markings options. |
Price: |
Available on-line from these stockists:
Click for currency conversion. |
Review Type: |
First Look. |
Advantages: |
The best 1/72 Fw 190A-5; very accurate, great detail, and attractively priced. |
Disadvantages: |
None noted. |
Conclusions: |
Eduard’s Fw 190A-5 is the best in 1/72 scale by a long measure, and is a superb example of the 1/72 kit maker’s art. I think it represents great value and cannot recommend it highly enough. |
Reviewed by Mark Davies

Eduard’s 1/72 Fw 190A-5 Profipack Edition is available online from Squadron.com
No Introduction Necessary
The Fw 190 represented a watershed in fighter design. In particular it showed how a radial engine could be installed to rival in-line engine streamlining.
The design was rugged, fast, very manoeuvrable, and had a powerful armament; added to which were good pilot visibility and an ergonomic cockpit layout. It was unmatched as a fighter when first encountered by the RAF in 1941.

Readily adaptable to many roles, it had a wide range of weapon and equipment fits; whilst further development led to in-line engined versions and the Ta 152 series of fighters.
The A-8 was the most produced sub-type of this superlative design.
For those interested, a more detailed account can be found here at Wikipedia.
Previous 1/72 scale Fw 190A-8 Kits
There have been numerous Fw 190A & F series kits in ‘The One True Scale’ over the years, but surprisingly few Fw 190A-5 variants, with some laying a doubtful claim to represent an A-5 anyway. In my opinion, there is only one decent Fw 190A-5 kit, this being from Hasegawa. Other A-5 kits include those by Advent, MasterCraft, MPM (from 1994) and ZTS Platsyk; and even vac-forms by K&K and Mavi.
Hasegawa’s kits are accurate, have refined surface detail, and are problem free to build. Their weaknesses are basic cockpit and their usually a high retail price.
Excluding limited availability over-trees, Eduard has released just one Fw 190A-5 so far as a Profipack Edition; and it is this kit that is the subject of this ‘First Look’.
Contents
The parts come in a top-opening box and are enclosed in re-sealable cellophane bags, with the clear sprue, PE fret, canopy mask and decals each in their own separate bags.
The instruction booklet is printed in colour on glossy paper, with clear and easy to follow drawings. These can be viewed or downloaded from Eduard’s website by clicking here. Colour call-outs are cross referenced to Gunze Sangyo’s Aqueous and Mr. Color paint ranges, and include RLM codes for the camouflage colours. Quite a few parts are surplus to requirements, as the parts map indicates:
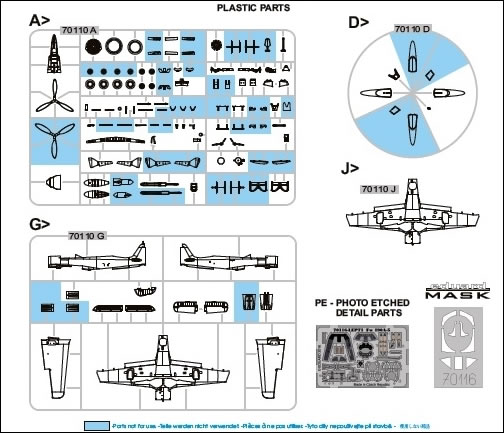
The moulding of the two main grey sprues is flawless, with super-crisp and delicate detail, narrow sprue gates, and thoughtfully positioned ejector pins. The clear parts are likewise flawless, thin and clear; whilst the PE fret and paint-mask are also produced to Eduard’s usual high standards.
The Kit
The first thing that struck me was the delectable surface detail this kit exhibits. It has ultra-fine and consistent recessed panel lines, and has some of the best rivet detail I have encountered in the scale. Rivets have come back into modelling fashion, but unlike many brands following this trend, Eduard has managed to keep theirs unobtrusive and in the right places.
They have also avoided the another flawed practice common to Fw 190 kits, that of moulding the control surfaces with a heavy representation of the underlying framed structure. Instead Eduard’s simulate drum-tight fabric with rib-tapes, as they should.
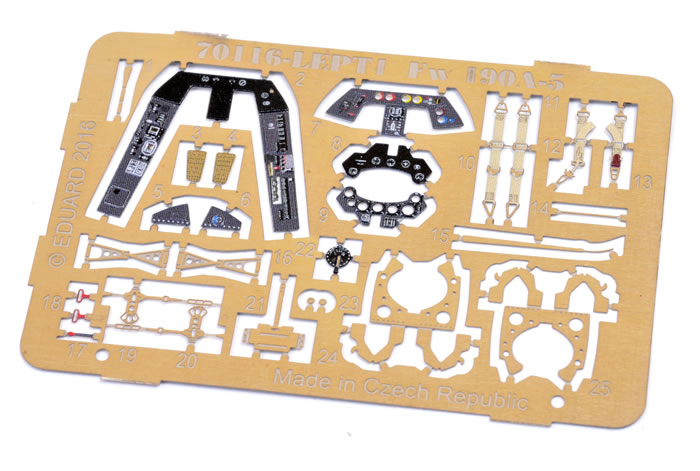
There is not a lot of room in an Fw 190’s cockpit in this scale, but Eduard has made a nice job of the tub, seat, and control column. Coloured PE garnishes the seat with a coloured PE harness, and also provides the intricate German rudder pedals. The side console faces with raised details are separate parts that fit to the tub. This allows for different versions, plus there is smooth option to mount coloured PE faces available in this Profipack Edition. All very thorough! The two-part instrument panel has raised detail and optional instrument decals, and again there are smooth equivalents to accept the very nice coloured PE option. Various other PE panels and a trim wheel all add to the high detail levels provided. There is a gun-sight molded in clear plastic and separate cockpit coaming.
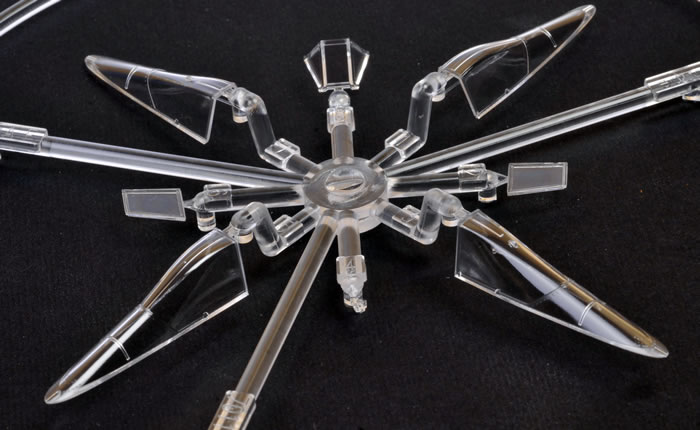
The canopies are nice and clear with separate windscreen enabling them to be modeled open if wished. It is here we see an example of Eduard’s thoroughness; because the sliding canopy varied in width as it slid open it caused the Perspex hood to flex and subtly change shape, so the kit has open and closed alternatives for each style! There is an armoured headrest and brace to mount inside the canopy, and a decaled stencil warning of the quick release explosive charge to add to the headrest.
The fuselage halves enclose the cockpit tub, firewall and the exhaust ejector stubs that project out of the fuselage side openings. The engine is a more than adequate relief molding with separate reduction gear housing.
The panel over the fuselage MG17’s which has the gun muzzles moulded integrally so they protrude into the upper cowl panel’s twin blast troughs. This and the cowl panel fit once the fuselage halves are joined together. The rudder is provided as a separate item.
The wings are split between their upper and lower surfaces as you would expect. Three of the five markings options represent aircraft fitted with outboard MG FF cannons; for these schemes it is necessary to open blind holes in the wing leading edges to accept the cannon barrels and fit the lower wing section featuring outboard bulges to clear the cannon breeches. The alternate lower wing section has blanking panels moulded just proud of the wing’s surface, as per the original when the MG FF were removed.
To the lower wing section is added a wing spar, some structural detail in a choice PE or styrene, some piping, the inboard MG151 cannons, and the wheel well roof. The underside exhausts stubs are provided as an insert in the bottom cowl panel molded with the lower wing, with a separate pipe run for cylinder #8 to fit and exit through its own hole in the panel. The separate ailerons can be attached once the upper wing surfaces are in place.
With the wings attached to the fuselage the combined oil-cooler/cowl lip and its armoured ring can be attached to complete the engine cowl. The prop, its spinner and cooling fan finish off the engine side of things.
The finely moulded tailplanes are two single moldings with integral elevators, the balance horns of which are unattached to the horizontal stabilizer for added realism (the gap is so fine it’s easy to miss without magnification).
There is an ETC-501 centerline pylon for which blind locating holes in the lower wing need to be opened earlier in construction. This could carry either the drop-tank or bomb, but the instructions only mention a drop-tank, and none of the supplied markings options are shown with this feature.
The undercarriage is very nicely represented with good levels of detail. The moulded torque-links can be replaced with the more refined PE items supplied. A choice of treaded or smooth tyres for the main wheel is also provided for. Brett Green’s build review of the similar Fw 190A-8 kit here on HyperScale reported that “The landing gear legs are also well detailed, but I found them tricky to position as the main locating hole is quite shallow. Patience and repeated test-fitting is the answer here.”
All that is left to mention is a pitot for the starboard wing, ventral antenna (choice of PE or styrene), DF-loop, boarding step, and outboard MG FF barrels if applicable.
Given it relative complexity, it seems that the less-detailed Hasegawa kit will probably beat the Eduard kit for ease of assembly. However, Brett Green’s build article of the similar Fw 190A-8 mentions the very good fit and general ease of assembly, provided test-fitting is practised. His article included a couple of useful pointers about removing a mounting lug when fitting the upper cowl panel, and spreading the fuselage slightly to meet the wing roots. I would also add to pay careful attention to the instructions, as there are several surplus parts that appear similar to those required; this being the result of mould engineered for multiple versions.
Of course, Eduard specialises in aftermarket details and accessories; and in the case of the Fw 190A-5 these are several sets well worth checking out at Eduard’s website.
Marking Options
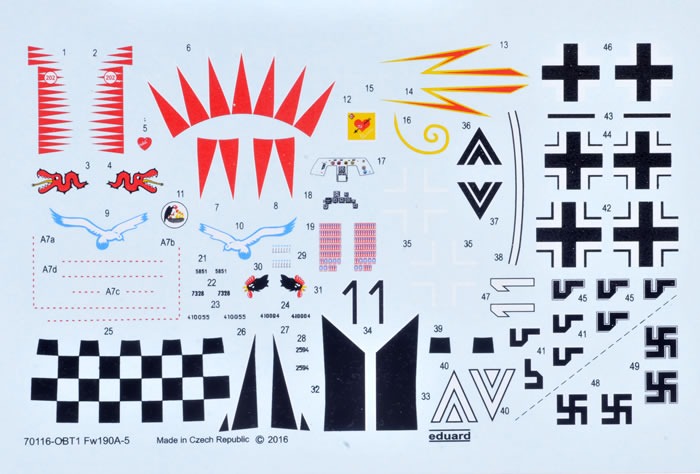
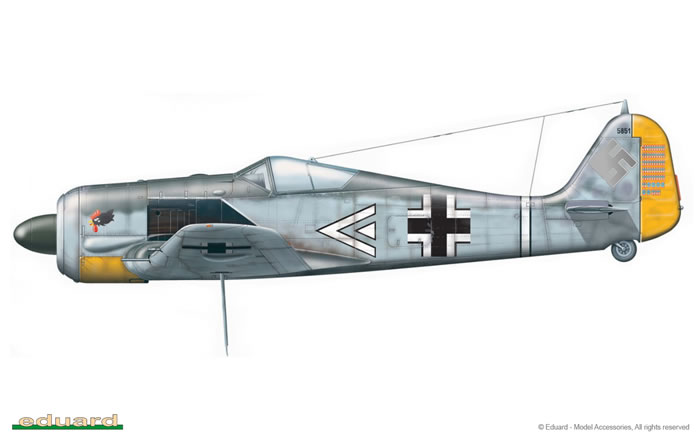
The decals provide for five markings options, along with quite extensive stenciling.
Each scheme is illustrated in colour with a single page of four-view drawings, whilst the stencil locations are identified in a separate page of their own.

The machines covered are those of:
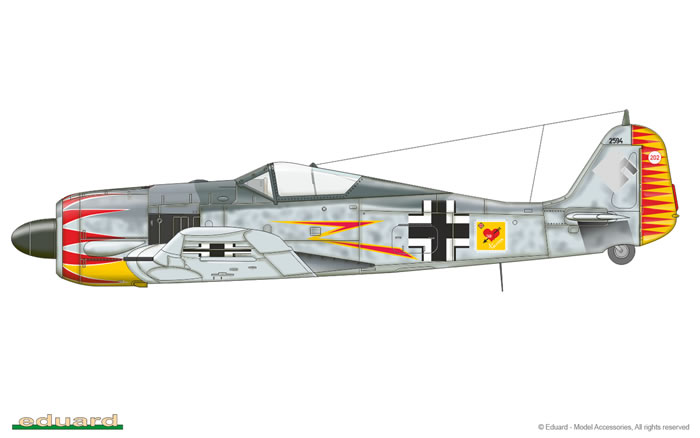
- Werk No. 2594 flown by Maj Hermann Graf CO of JGr Ost, Bordeaux, France, Spring 1943;
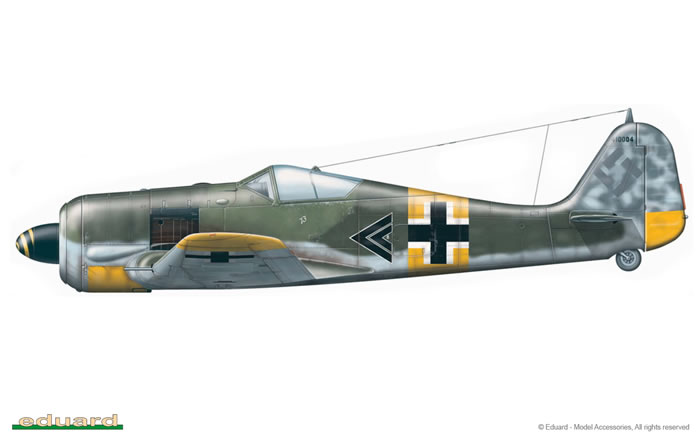
- Unknown Werk No. flown by Hptm Walter Nowotny, CO I./JG54 Grünherz, Orel, Autumn 1943;
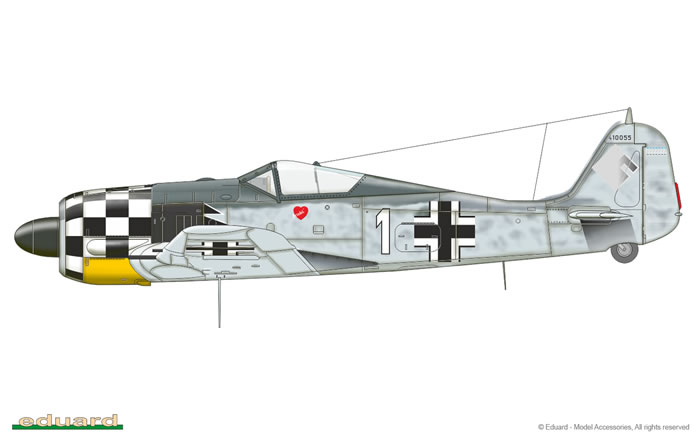
- Werk No. 410055, flown by Uffz Bernhard Kunze, 2./JG1, The Netherlands, October 1942;
- Werk No. 7328, flown by Hptm Dietrich Wickop, CO II./JG1 , Woensdrecht, The Netherlands, May 1943; and
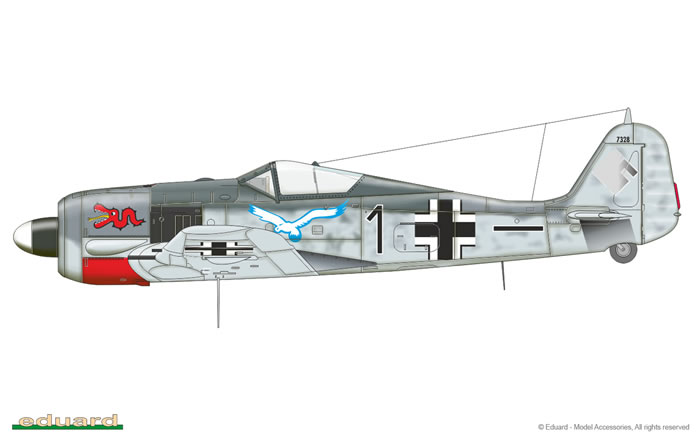
- Unknown Werk No. flown by Hptm Egon Mayer, CO of III./JG2 Richthofen, France, Spring 1943.
The decals appear to be of excellent quality. Nazi swastikas are provided as two-part decals on all sheets, with complete swastikas included in a corner that can be cut off for markets that do not permit its display.
Eduard’s website includes several images of two completed models in different markings options, of which a couple are included here:
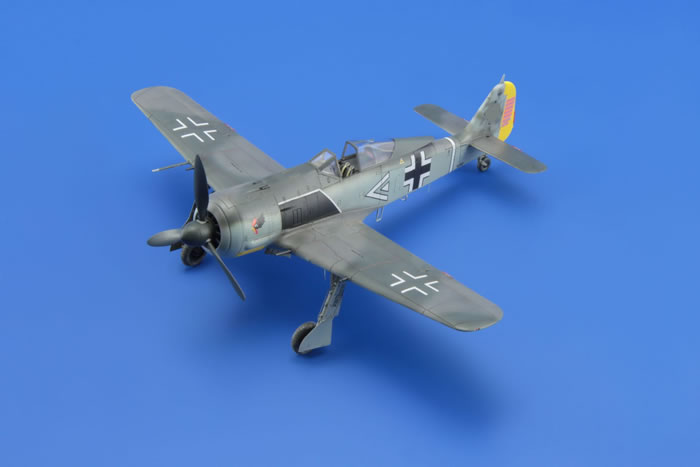
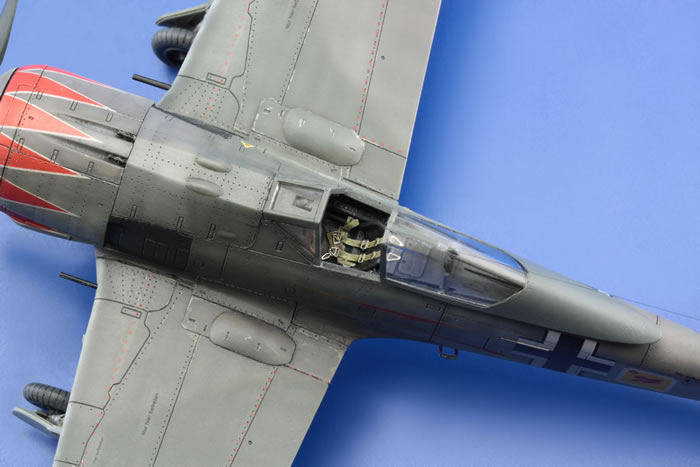
Eduard’s Fw 190A-5 is the best in 1/72 scale by a long measure, and is a superb example of the 1/72 kit maker’s art.
I think it represents great value and cannot recommend it highly enough.
Thanks to Eduard for the sample
Review Text Copyright © 2016 by Mark Davies
Page Created 26 May, 2016
Last updated
26 May, 2016
Back to HyperScale Main Page
Back to Reviews Page |
