|
RAAF Short ‘C’ Class Empire Flying Boat Conversion
Red Roo Models, 1/72 scale
S u m m a r y : |
Catalogue Number: |
Red Roo Models Item No. RRR72155 - RAAF Short ‘C’ Class Empire Flying Boat Conversion (for the CMR kit) |
Scale: |
1/72 |
Contents & Media |
One clear and two green resin parts, twelve cast brass parts, one clear scribing template, and decals for eight schemes. |
Price: |
AUD$30.00 plus shipping available online from Red Roo Models
(Approx: US$21.70 / €19.70 / £15.50) |
Review Type: |
First Look. |
Advantages: |
Well-researched, extremely thorough instructions, good quality components, and the inclusion of a scribing template is a nice touch. |
Disadvantages: |
None noted. |
Conclusions: |
This conversion set is has some attractive and interesting options for those who want their Empire Flying Boat in something other than overall aluminium; it should also appeal to RAAF fans as well.
Initially I thought more information on beam guns might be helpful, but on reflection I suspect their hatches were only opened in flight when interception was a possibility.
This is an impressive package that addresses all if not more than would be reasonably expected in a conversion set.
I highly recommend it. |
Reviewed by Mark Davies

Eduard's 1/72 Avia B.534 IV serie Weekend Edition is available online from Squadron.com
CMR released their superb Short C-Class flying boat kit back in 2008; my review of which may be found here on HyperScale.
Like the original aircraft, all of the kit’s markings are for overall aluminium machines with large civilian serial numbers. CMR did announce an intention to produce a kit of the RAF’s militarised C-Class with powered gun turrets, but this did not eventuate.
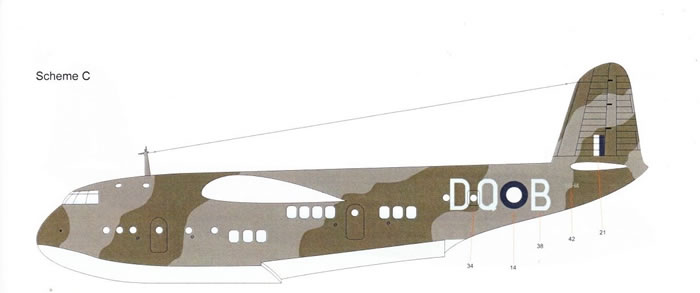
Red Roo has addressed the militarised option from an Aussie perspective with the release of the conversion set reviewed here. It covers five C-Class flying boats impressed into service with the RAAF with eight colour scheme options. These aircraft featured various modifications, ranging application of national insignia and camouflage, to additions like bomb-racks, bomb-aimer’s cupola, and dorsal machinegun positions with Scarf-rings and beam guns protruding from a side hatch and window.
The Conversion
The conversion set comes in a sturdy flip-top box that would be suitable for mailing a DVD movie case. The box lid features a couple of photo images of the subject. The contents are contained in three zip-lock plastic bags and according to media type.
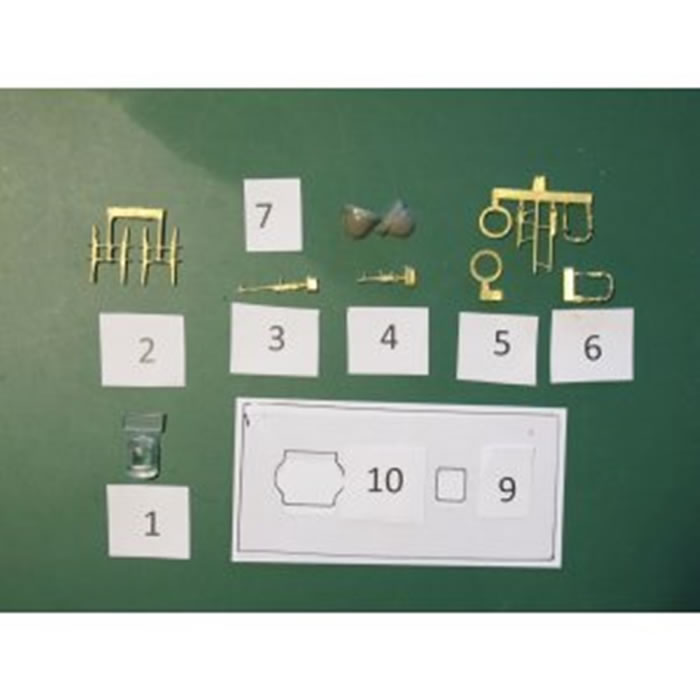
The components, excluding the decals, are as indicated in the image below (courtesy of Red Roo Models):
-
Bomb-aiming cupola (clear resin x 1),
-
Bomb racks (brass x 4),
-
Browning 0.05” machinegun (brass x 2),
-
Lewis 0.303” machinegun (brass x 2),
-
Scarf ring (brass x 2),
-
Azimuth arm (brass x 2),
-
Wind deflector (resin x 2),
-
Scribing template for port hatch, and
-
Scribing template for starboard hatch extension.
The resin parts appear nicely cast, and the brass parts are also well made. The brass items will need a very slight cleanup after removal from their runners, and thinner pieces may need tweaking to restore their exact original shape; such is the nature of soft metal castings.
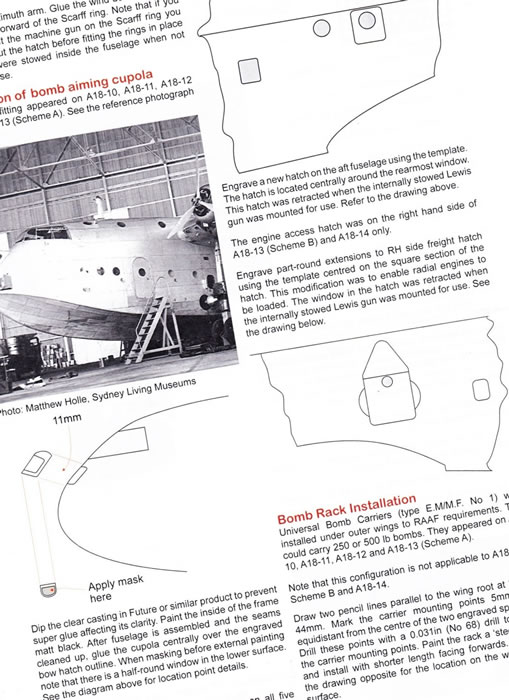
A standout feature of all the Red Roo conversions I have reviewed is their instructions. The thoroughness of these in terms of guidance, explanations, diagrams, and illustrations places them in class of their own. This conversion set maintains this standard, with no less than eighteen A4 pages printed in a combination of monochrome and colour.
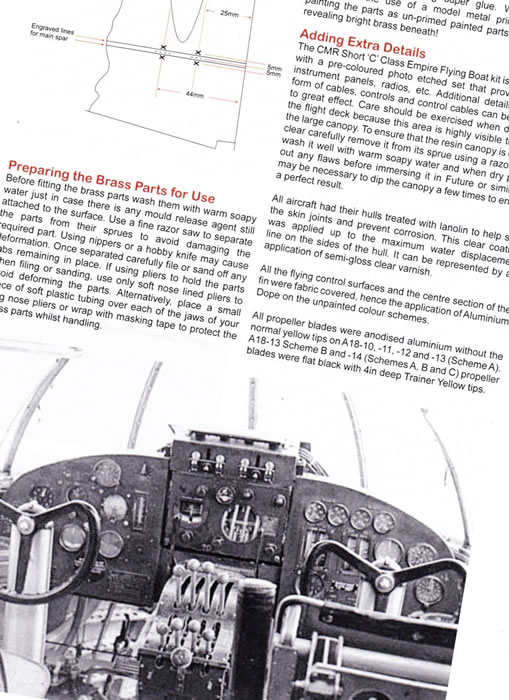
The instructions are broken down into several sections:
-
Parts List – As described earlier.
-
Installation of Upper Guns – The various conversion features are explained and cross-referenced to their applicable colour scheme.
-
Installation of Upper Gun Positions – Two photos and a diagram illustrate how the single or paired Scarf rings mount over existing hatches in the kit fuselage. A note points out that the guns were dismounted from the rings and stowed inside when the hatches were closed; so if mounted guns are preferred, and most will I think, then the hatches need to be cut open.
-
Installation of Bomb Aiming Cupola – The cupola mounts over the kit’s bow hatch, and a diagram and detailed notes on mounting, applying Future, and masking are provided.
-
Hatches – A new hatch applicable to all five options needs to be scribed on the rear port fuselage, whilst a single options needs curved lines to be scribed around an existing hatch (the hatch on the real aircraft was rounded out to facilitate loading of radial engines). A clear acetate plate is provided to guide scribing of both hatches. The instructions mention that the port side hatch was retracted and a Lewis gun deployed through the opening, and that the window starboard hatch modified for engine stowage was put to the same use. Mounting of the twin beam guns is not detailed as part of the conversion instructions, but is mentioned in passing in a couple of the aircraft histories.
In the case of the four aircraft with one dorsal Lewis gun position there will be just one Lewis gun remaining from the parts for beam mounting. You might think that two beam guns could be accommodated with the parts provided in the case of the two schemes for A18-14 that features 0.50” guns in the two dorsal positions (I am surprised that a Scarf ring be used with such a heavy and powerful gun), but A18-14’s aircraft history notes mentions this aircraft’s two beam guns were changed to .30” Brownings which are not included in the parts. To be fair, all of Red Roo’s photos show the side-gun hatches closed when the aircraft on the water; which makes sense to prevent the ingress of sea-spray.
-
Bomb Rack Installation – Written notes, dimensions and a diagram explain the positioning of the four bomb-racks.
-
Preparing the Brass parts for Use – A thorough explanation on preparing brass parts is provided. Being a little but nick-picky, I feel this section should logically have preceded “Installation of Upper Gun Positions” above, as the enthusiastic may discover how to prepare brass parts after starting the gun positions.
-
Adding Extra Details – Detailed notes and tips are provided covering cockpit detailing, preparing the CMR canopy, the lanolin treatment of hulls and how to replicate this finish, control surface colour, and detailed notes by scheme on propeller blade finish. This section is supported by very good photos of the cockpit and the engine collector-ring.
-
Aircraft Histories & Colour Schemes – Thirteen pages are devoted to giving the history of each colour scheme option along with a whole page featuring a four view colours & markings diagram. The narratives are complimented with period images of the aircraft concerned.
-
Decal Sheet Road Map – Illustration of decal sheet with each decal numbered to cross-reference to numbered locations on the colours & markings guides; something the decal sheet itself lacks.
-
Decal Application – The heading also includes “Thin Film Decals – Please Use Care” along with decal preparation and application advice.
-
References – Detailed list provided.
-
Acknowledgements – Two listed.
Marking Options
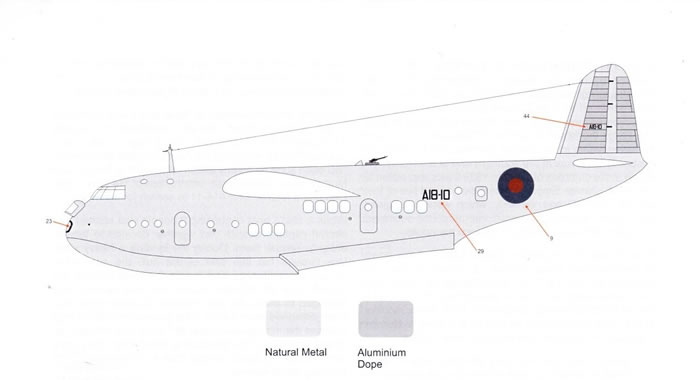
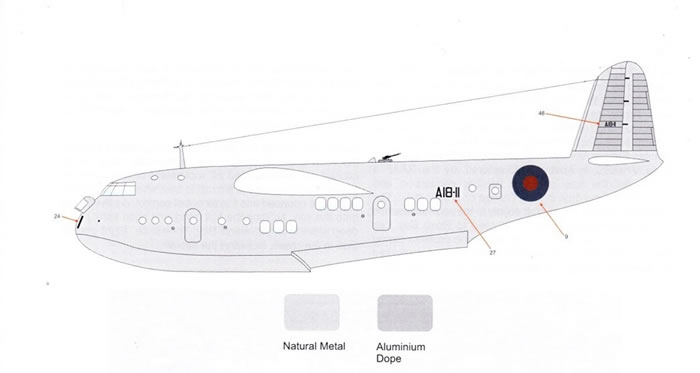
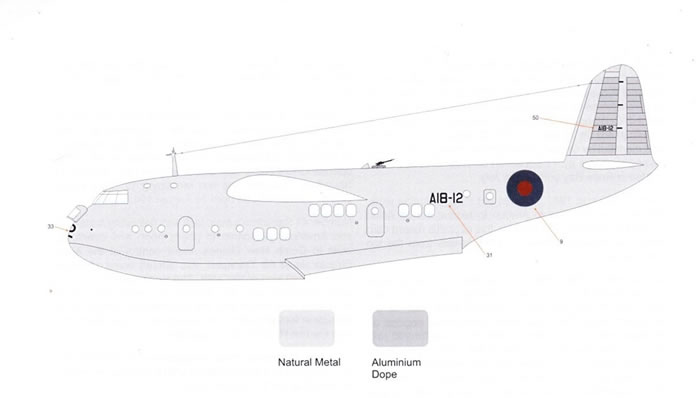
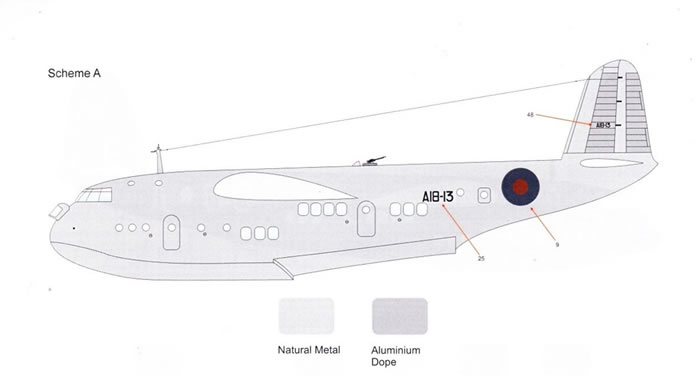
The eight colour schemes across five aircraft covered are:
- A18-10, Short Constructor’s number S.811,
- A18-11, Short Constructor’s number S.843,
- A18-12, Short Constructor’s number S.849,
- A18-13, Short Constructor’s number S.877 with two options, and
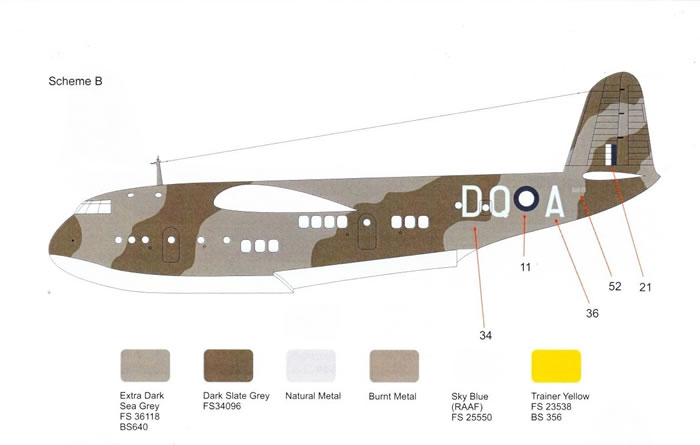
- A18-14, Short Constructor’s number S.1025 with three options,
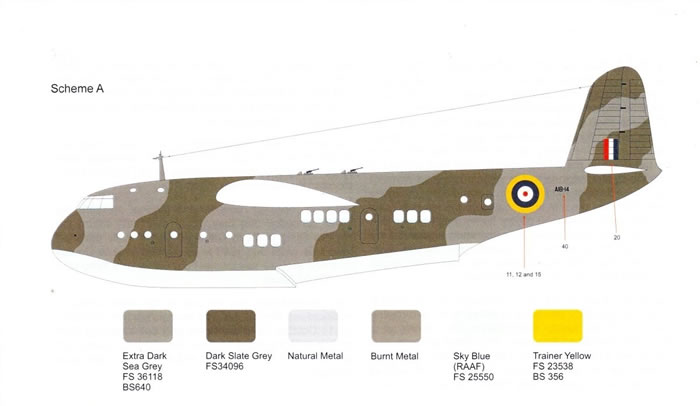
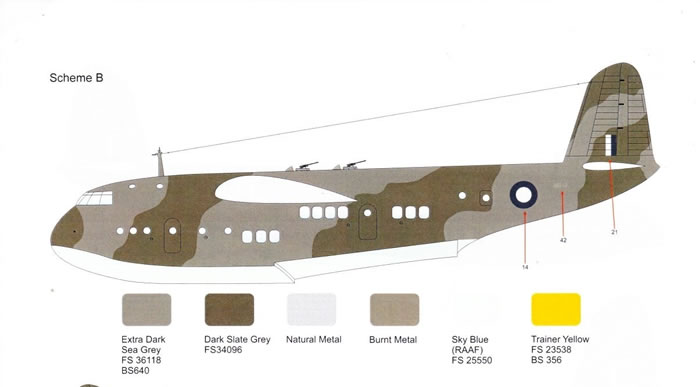

The decals appear to be well printed with good registration.
This conversion set is has some attractive and interesting options for those who want their Empire Flying Boat in something other than overall aluminium; it should also appeal to RAAF fans as well.
Initially I thought more information on beam guns might be helpful, but on reflection I suspect their hatches were only opened in flight when interception was a possibility.
This is an impressive package that addresses all if not more than would be reasonably expected in a conversion set. I highly recommend it.
Thanks to Red Roo Models for the review sample.
Review Text Copyright © 2016 by Mark Davies
Page Created 2 March, 2016
Last updated
2 March, 2016
Back to HyperScale Main Page
Back to Reviews Page |
