Zvezda 1/144 scale
Boeing 777-300 ER
by Steve Pritchard

|
Boeing 777-300 ER |

Zvezda's 1/144 scale Boeing 777 is available online from Squadron
Kit and Aftermarket Products:
Paints used:
Humbrol enamel 129 for the wings and tail plane ,Tamiya fine surface primer (white) and TS-26 ‘Pure White’ straight from the spray can for the fuselage, Alclad shades Jet Exhaust, Steel, Aluminum and Dull Aluminum for the metallic areas. Finish coats were Tamiya X-22 Clear for the fuselage and Estapol Polyurethane Satin varnish for the grey areas.
I normally exist on a diet of 1/48 and 1/32 military aircraft kits, but have long admired the Boeing 777-300 – those sleek lines and massive engines – and up until recently we had a daily Emirates flight into Christchurch (now replaced with an A380). I have also enjoyed a television series called ‘Ultimate Airport Dubai’, which featured a lot of coverage of 777 maintenance. When the Zvezda kit was announced, I quickly put it on back order at Hannants thinking that, while it would be my first attempt at a1/144 airliner, a gloss finish coat and using aftermarket decals with a continuous carrier film, what could possibly go wrong?

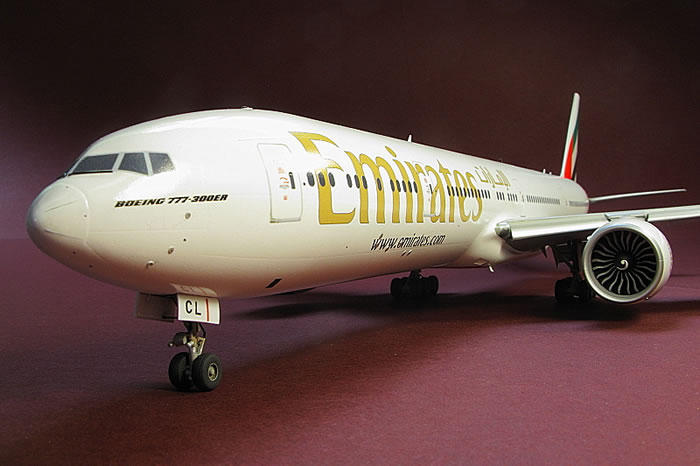
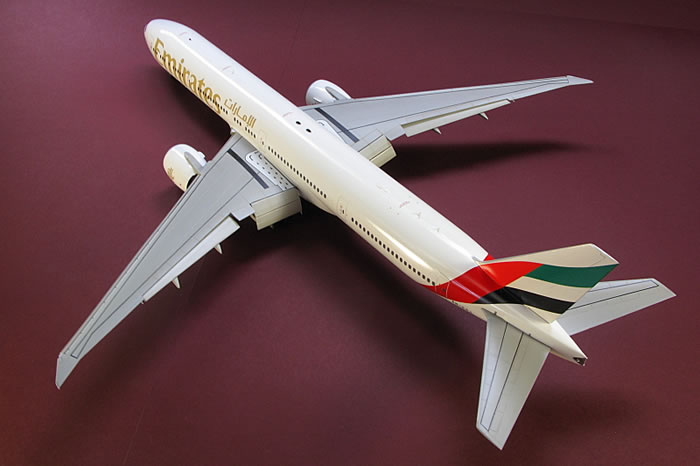
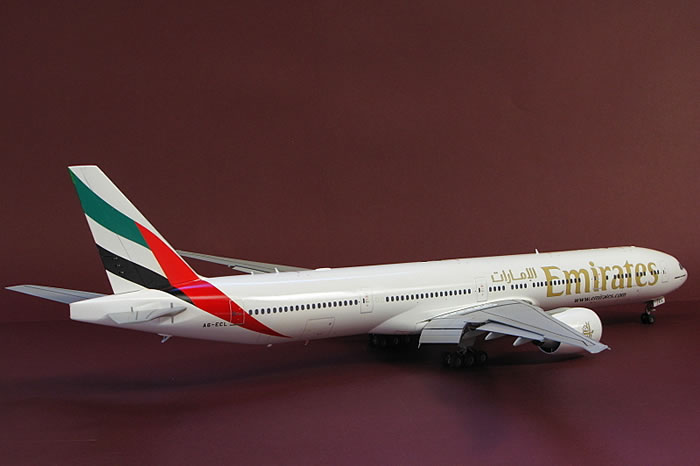
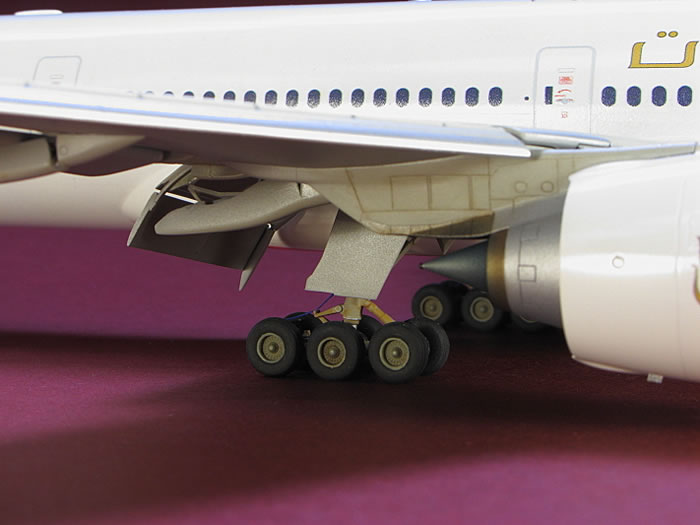
Construction was very straightforward, I did add some strips of plasticard along one of the fuselage halves so as to provide a stronger join when bringing these very long parts together. I also added card behind the window strips – I didn’t want the windows coming loose after the halves were joined. I chose to show the flaps and slats deployed as if on final approach or at touchdown just before the spoilers deploy, just to add some interest. I had several photos of the actual aircraft modeled landing in Christchurch, so these and the many images on the net were my main resource. I also added some brake lines to all three undercarriage assemblies. The only other detail added were some stetched sprue windscreen wipers.
I quickly got the engine nacelles together, keen to try out the Tamiya spray paints and Draw Decals, and I have to say I was quite pleased with the results. The engines can be left off the wings until final assembly – in fact the fit is so good they will stay put without glue. I also left the wings off until painting and decaling of the fuselage was complete.

I hinted earlier that things may have not gone as smoothly as I had hoped – the list below indicates some of the generally self inflicted issues I had with the build:
-
The surface detail is very fine – I found that a coat of primer, then a couple of top coats almost obliterated the panel lines. This may have been poor technique as I usually use an airbrush. I also found the spray results were better for the nacelles than the fuselage, but this was possibly due to the much cooler air temperature when spraying the latter.
-
The window parts supplied are a relatively soft plastic which I found didn’t sand very well and I never achieved a really smooth flush fit. I also added some details to the cockpit, finished in a rather fetching shade of Boeing beige, but decided when fitting the windscreen (again, rather a soft plastic) that it was not really clear enough. I tried various ways to improve clarity but in the end went with the Draw Decals windscreen.
-
This led to another problem – I managed to place the decal windscreen a bit lower on one side than the other – but managed to salvage it reasonably well by trimming and using the second screen supplied by Draw, and a little grey paint to touch up.

-
I ended up with the fuselage window decals being a little out of step with the location of the doors over the wings – It may be that the large Emirates logo and Arabic text are a tad too large and go too far aft – I removed a couple of blanked off window frames and managed to get a reasonable alignment.
-
I found the Draw Decals reasonably easy to work with – I trimmed each portion with scissors, about a millimeter from the design. I did find they were quite hard to reposition once on the model – hence the trouble with the windscreen, but overall good quality, other than perhaps lacking a little colour depth. I also managed to position the port side red and black fuselage portion of the tail stripes incorrectly – when I tried to reposition I managed to tear the decal. I ended up painting this with Humbrol enamels.
- I found it quite difficult to get all 14 wheels touching the ground at once – I placed a sheet of sandpaper beneath the completed model and gently worked it back and forth until contact with all wheels was made. The location points for the main undercarriage support arms are a bit indistinct, but otherwise the parts were easy to assemble.
Overall an enjoyable build – more challenging than I had expected, but useful experience for my next airliner should there be one, perhaps Zvezda’s B787 in Air New Zealand colours?
Model, Images and Text Copyright ©
2016 by Steve Pritchard
Page Created 7 December, 2016
Last Updated
7 December, 2016
Back to
HyperScale Main Page

|
Home
| What's New | Features | Gallery | Reviews | Reference | Resource Guides | Forum |