Hansa-Brandenburg W.12
(early)
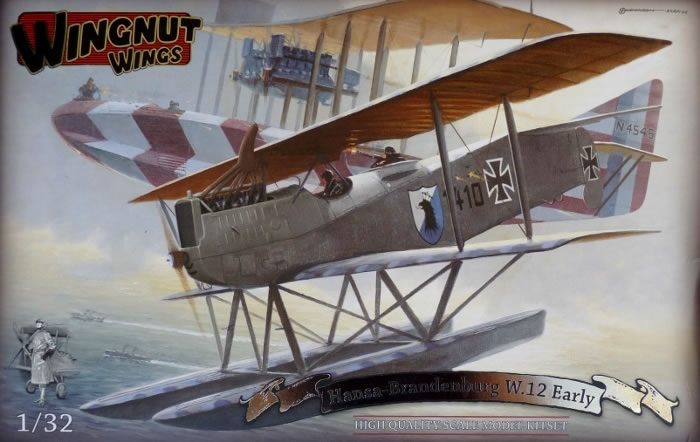
Wingnut Wings, 1/32 scale
| S u m m a r y |
Catalogue Number: |
Wingnut Wings Kit No. 32036 - Hansa-Brandenburg W.12 (early) |
Scale: |
1/32 |
Contents and Media: |
216 injection moulded plastic parts; 11 photo-etched parts; decals for five options. |
Price: |
USD$99.00 with free shipping worldwide, available online from Wingnut Wings' website. |
Review Type: |
First Look |
Advantages: |
Superb engineering; excellent mouldings with well-defined detail; good use of photo-etched parts; comprehensive decal sheet with perfect colour registration and minimal carrier film; an informative instruction booklet that includes enlightening period images. |
Disadvantages: |
|
Conclusion: |
This is an ideal kit for those wanting to build their first WWI biplane. Apart from the precision fit of the parts, there is minimal rigging, and a foolproof method of assembling the network of struts. It’s an attractive subject and could be the catalyst to kick start your 1:32 scale seaplane collection.. |
Reviewed by Rob Baumgartner

HyperScale is proudly supported by Squadron
Conceived in 1916 as a two-seat fighter, the Hansa-Brandenburg W.12 underwent a multitude of modifications throughout its lifetime.
When the production version finally entered service it was powered by a 150hp Benz Bz.III engine as opposed to the 160hp Mercedes D.III fitted to the prototypes. The German navy air arm now had a seaplane with the speed, range, performance, and firepower to take on the powerful British flying boats.

The type wasn’t perfect however as it was hampered by longitudinal control issues. Various tailplane and elevator modifications were carried out on a number of airframes but to no avail. Eventually it was decided to rebuild W12 1185 with a longer fuselage. This improved matters significantly and would become standard in the third production order.
These were powered by both the Mercedes D.III and Benz Bz.III engines. Other visible changes included ailerons on the lower wings, redesigned cabane struts and a revised tailplane. The new features did come at a price with the type now exhibiting reduced speed and climb performance.

The type soldiered on until the Armistice with a total of 146 W12s being built and delivered to the German navy air service.
The “Kamel”, as it was nicknamed, was first made famous when a group of W.12s lead by Oblt. d. R. Friedrich Christiansen succeeded in shooting down the British coastal airship C27 on December 11 1917. Other prominent victories soon followed.
The box is the usual size for a two-seater and from the outset it is clear that the contents are up to the high standards expected from this manufacturer.
Inside are 10 sprues of plastic, each sealed in their own bag for added protection. Also included is a fret of photo-etched metal, two sheets of decal, and a comprehensive instruction booklet.
Everything is beautifully moulded with minimal flash and sharply defined detail. The necessary ejection pins are not a problem as all are cleverly concealed on the finished aircraft.
The plastic is quite soft which means that a sharp scalpel blade is mandatory. This flexibility does have its advantages though. During the clean-up process, it saved me on more than one occasion from breaking a few of the more delicate items.
Not surprisingly, assembly starts with the cockpit. The very visible interior is made up of 31 parts and it here that the p-e makes its first appearance. As well as the lap belts, the etched metal is utilised to detail the control column base and provide the linkages to the steering wheel.
The internal framework on each side of the fuselage comes as a single piece and incorporated into these mouldings are the throttle, oil tank, and most importantly, the inner struts. This makes assembly a cinch.
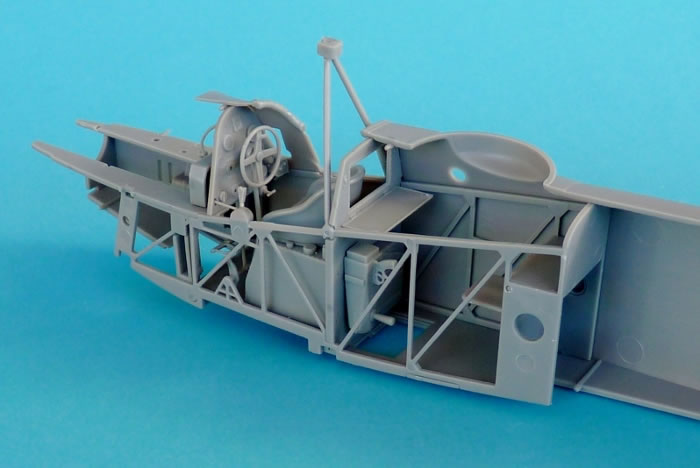
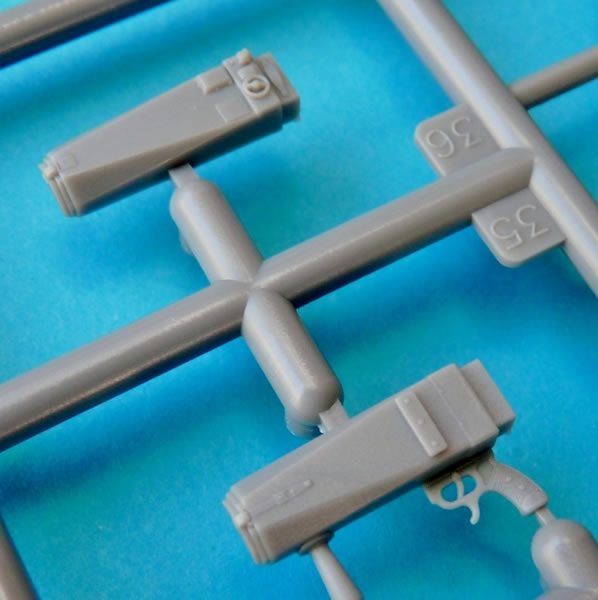
Other items of interest are the lovely hand-held camera, storage case (with open flap revealing stored items), fuel tank pressure pump, map board (with decal), starting magneto, and 250 round magazines for the Parabellum LMG 14.
The floor incorporates the observer’s window, and another is seen on the bulkhead directly behind the pilot’s seat. Clear parts are supplied for these openings and as expected, they both fit perfectly.
The instrument panel is detailed front and rear with the latter displaying additional cabling, piping and a fuel filter. A test fit will ensure that you mount this at the correct angle when attaching it to the engine bearers. The dial faces come from the comprehensive decal sheet which also takes care of the placards, and assorted stencilling.
Before closing up the fuselage halves, an internal rigging guide clearly shows how one should direct the various control cables.
The engines are always a showpiece in these kits and the 150hp Benz Bz.III is no exception. It’s made up of 23 parts and is detailed enough to be displayed inside or outside the airframe. There is a sink mark that can be found on each magneto but it’s safe from prying eyes inside the well-appointed engine bay.
Note that there are 2 types of cylinder halves available for the builder. One set has the pushrods moulded in situ, the other not. The instructions suggest the simpler route but it’s good to see an alternative for the hyper-detailer.
There were no problems at all when it came to putting it all together. The fit was exact and the positive location tabs left no room for misalignment.
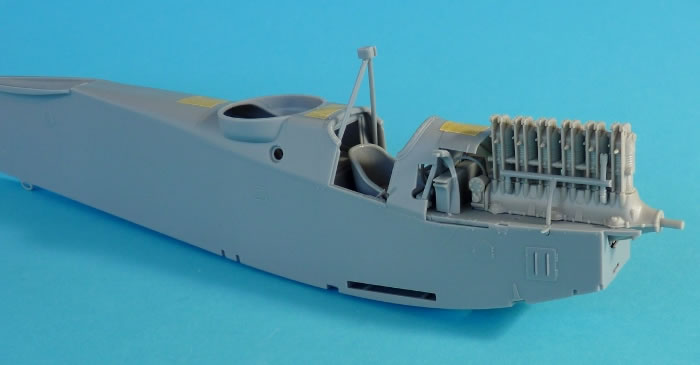
For better visibility, some W.12s had an increased cut-out in the upper wing. To allow for this option, the kit is designed with an alternative centre section. When the port and starboard outer assemblies are added, a modicum of filler will be required to disguise the join. Sensibly the seam line runs chordwise on the top surface and is centrally located between the rib tapes. This should result in no detail being lost during the sanding process.
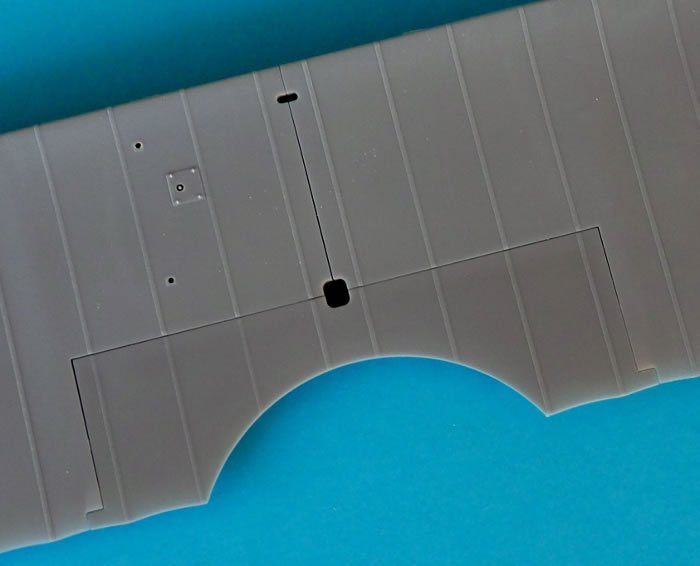
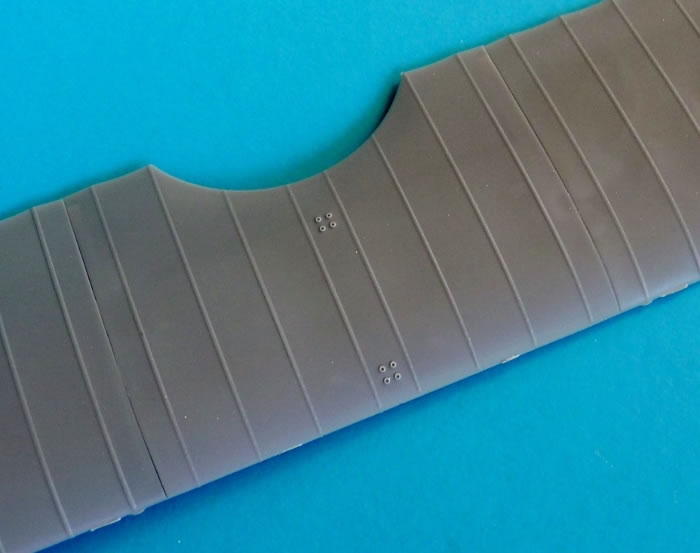
Large areas of overlap ensure a strong robust structure. The trailing edges are commendably thin and the washout on the ailerons is especially noteworthy.
Separate flying surfaces allow you to animate your aircraft but make sure your rudder and control column match reflect those deviations. The wing stacking pads can easily be mistaken for excess plastic so be careful not to accidently sand these off.
To avoid any mistakes, the struts are keyed to fit precisely into their allotted slots. The eagle-eyed modeller will also note that each is engraved with an “L” or “R” to further save embarrassment.
More choices come courtesy of the forward firing machine guns. Depending on the aircraft chosen, your subject can mount single or dual IMG 08 “Spandaus”. The plastic detail is excellent but for those wanting a more realistic look, photo-etched jackets are supplied. This material is also available for the observer’s LMG 14 Parabellum.
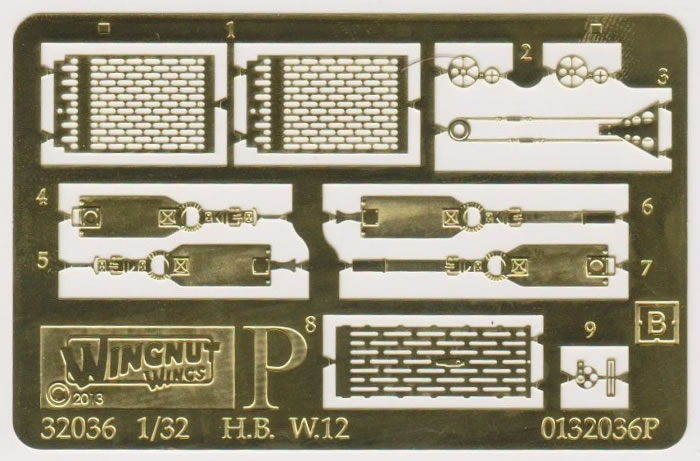
Another nice touch is the separate pilot’s door on both the port and starboard sides of the fuselage.
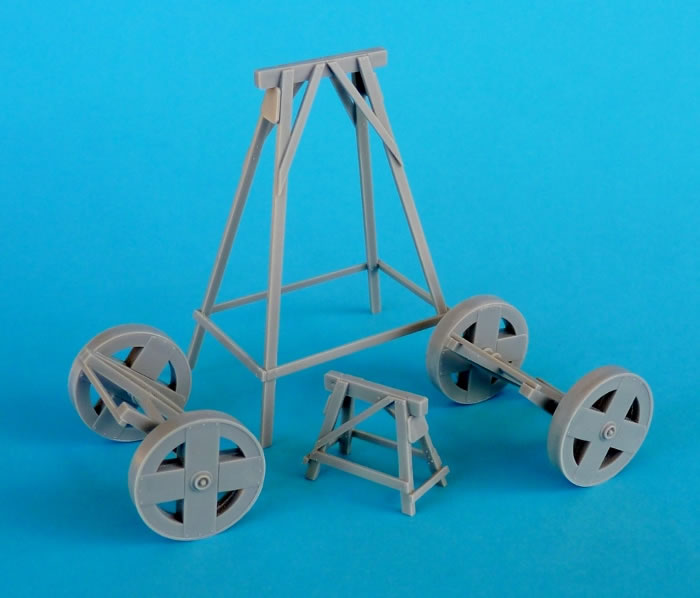
To display the finished product, we get the familiar beaching dollies and trestles first seen in the W.29 kit. Purists will want to relocate the nail heads on “D2” as these completely miss the “D13” trestle legs they are supposed to strengthen. Note also that there a minor sink mark to fill on the smaller trestle.
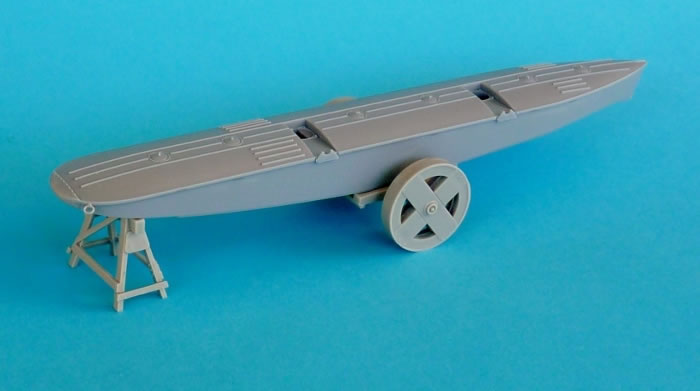
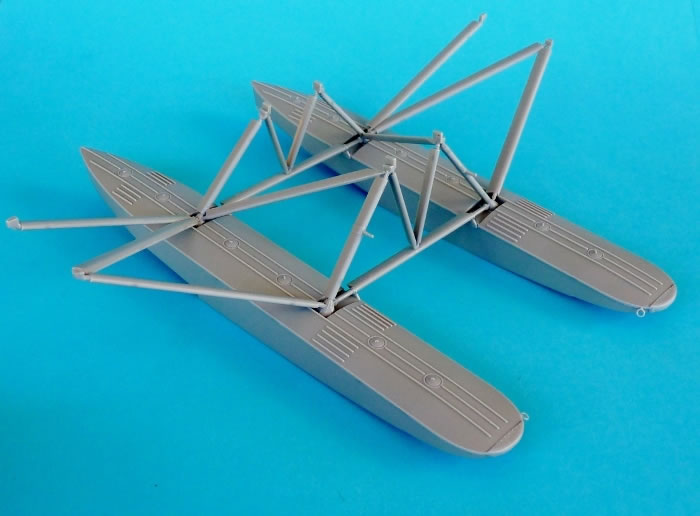
The complex float arrangement offers no construction problems. Once again the supports are keyed so that they only fit one way into the floats.
The instruction book is one of the hallmarks of this company. The format is excellent as it mixes colour construction sequences with educational period photographs of the aircraft and their equipment.
Marking Options
There are 5 aircraft for the modeller to choose from on the well-appointed decal sheets. Once again, Ronny Bar’s superb artwork shows the way.
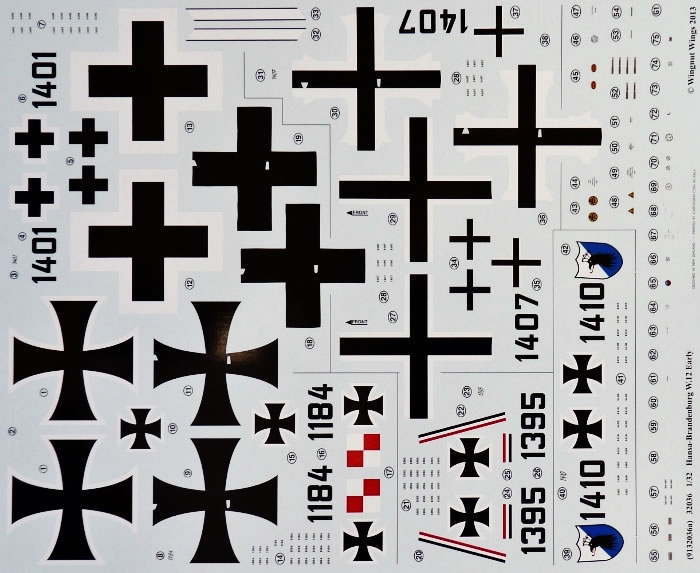
The colour registration was perfect and each item was surrounded by a minimum of carrier film. As well as the usual national and personal markings, there is a plethora of placards, logos, and stencil data. The reproduction is exquisite with even the smallest printing being legible under magnification.
The hexagon camouflage comes in “cookie cut” fashion which will greatly aids application. Two different colour schemes are presented as photographs show the tonal quality on the ply surfaces to be different from that on the fabric material.
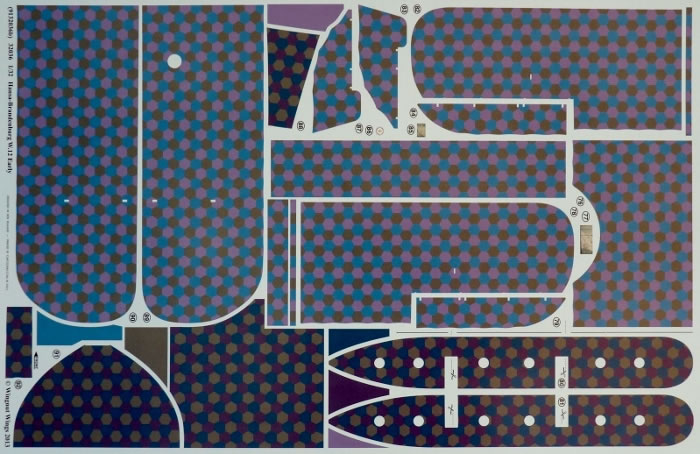
If you are not adept at applying decals over raised detail, you may want to skip options A, and B. These aircraft carried hexagonal camouflage on the top of the floats and getting the decals to snuggle down over the ribs will take a deft hand and a lot of patience.
Spare decal is supplied but aspirin is not.
-
Hansa-Brandenburg W.12 1184 C3MG , Fl.Mt. Urban, Lt. Ehrhardt, C-Staffel, Zeebrugge, December 1917
-
Hansa-Brandenburg W.12 1395 C2MG , C-Staffel, Zeebrugge, Late 1917 to Early 1918
-
Hansa-Brandenburg W.12 1401 C2MG , Sylt, Mid 1918
-
Hansa-Brandenburg W.12 1407 C2MG , Norderney, July 1918
-
Hansa-Brandenburg W.12 1410 C2MG, Zeebrugge, February 1918
Those of us with a passion for WWI seaplanes never thought we would get one in 32nd scale.
Thanks to Wingnut Wings, we now have a number of them to add to our collection.
With only 36 being manufactured, the release of an early version Brandenburg W.12 was certainly a surprise, but a very welcome one at that. The minimal rigging and precise fit make this an ideal subject for your first biplane kit.
Assembly is straight forward and of the 216 plastic parts, only about 70% are needed, so the build should not be a long one. Both C2MG 2 gun and C3MG 3 gun aircraft are catered, as well as a set of beaching dollies and trestles for the diorama afflicted.
The Cartograf printed decals and the photo-etched detail parts all add to the quality of the product and complete another first-class offering from Wingnut Wings.
Thanks to Wingnut Wings for the sample
Review Text and Images Copyright © 2015 by Rob Baumgartner
Page Created 6 January, 2015
Last updated
6 January, 2015
Back to HyperScale Main Page

|
