|
Westland Wessex HC.2
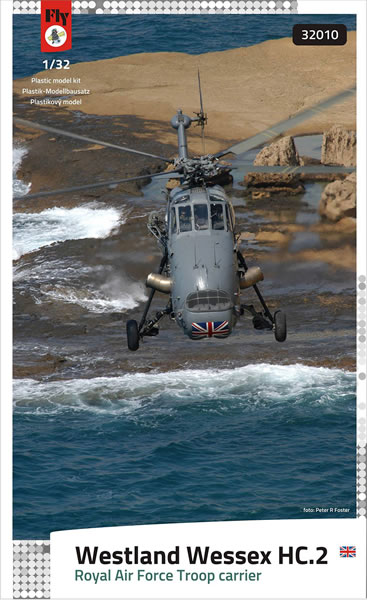
Fly Model, 1/32 scale
S u m m a r y : |
Catalogue Number: |
Fly Model Kit No. 32010 - Westland Wessex HC.2 |
Scale: |
1/32 |
Contents & Media: |
Seven light grey sprues; one clear sprue; photo-etched fret; markings for five aircraft |
Price: |
Available from Fly for 2066,00 CZK (approx. £55 at time of writing) |
Review Type: |
First Look |
Advantages: |
High level of detail; conventional parts breakdown; subtle and crisp surface features; screams to be built! |
Disadvantages: |
None noted. |
Conclusion: |
Highly Recommended. |
Reviewed by
James Hatch

Kitty Hawk's 1/32 scale F-86D Sabre Dog
is available online from Squadron.com
I’ve said to a few people that the Wessex appears to be typically British in appearance, but is literally only by design, and to be more accurate – RUSSIAN design!
Of course, the Wessex was actually a licence-built version of the Sikorsky H-34, built by Westland Aircraft. The Wessex was slightly different to its Sikorsky cousin, in that rotor power was generated by a turbo-shaft engine, rather than the piston engine of the Russian machine. In fact, the Wessex was the first mass-produced helicopter in the world to be powered by a gas turbine engine.
Seeing initial production to satisfy a Royal Navy order, the type, having been proved successful, was also then ordered by the Royal Air Force for Air – Sea and Mountain Rescue duties. Of course, the Wessex was also employed for military duties with the RAF, being capable of transport and battlefield support, and saw service in both Hong Kong and Northern Ireland, on extended detachments.
The naval HU.5 type saw service during the Falklands Conflict, where 55 Wessex were used to move equipment to frontline units and support battlefield positions.
Entering service with the Royal Navy in 1961, it saw a respectable and pretty trouble-free operational period of over 40yrs, with the last Wessex being retired by the RAF in 2003.
Other notable operators were Australia, Uruguay, Brunei and Oman. It was also used in a civilian role in Britain for ferrying of crew for North Sea oil rigs in the 1960s and 70s, with Bristow Helicopters operating the Wessex 60 type.
Just wow! Not only do we get a new helicopter in 1:32 (I hate 1:35!!), but it’s also one of the few I actually like….the Westland Wessex! Serious kudos to Fly Model for not only developing this Holy Grail, but also shipping me one out so quickly.
I was asked which version of this I wished to look at, so I opted for the HC.2 RAF version. Fly also produce the naval HU.5 too, with some beautiful colour schemes. However, the options here are also pretty colourful too, as we’ll see later. Packed into a relatively small box for the model’s finished size, it is nonetheless crammed with plastic, photo-etch and resin parts. Unusually for a box lid, the subject is shown in photographic form, with an action photo of the HC.2 in operation over a coastline. Also unusually, the photo is portrait in layout, unlike most artwork which is landscape. A nice photo which shows what this kit is all about. The colour schemes, four in all, are shown on the box lid side.
A friend was here earlier, drooling over this release, and until he saw the resin bags, he said that the kit seemed to have a fairly small parts count. To a degree, that is true, as much detail relies on all those resin and PE parts, but there are still SEVEN sprues of medium grey styrene, and TWO clear sprues. With the exception of Sprue F, all the others are packed into a single clear sleeve. TWO photo-etch frets are included, a set of paper parts, one large decal sheet and I haven’t even begun to count the many, many resin parts in this release. Like other kits from FLY, the resin is cast by Artillery, and is excellent quality. There are a small number of broken parts in this sample, but we’ll look at that later.
SPRUE A (x2)
This is the only sprue for which there are two identical items supplied.
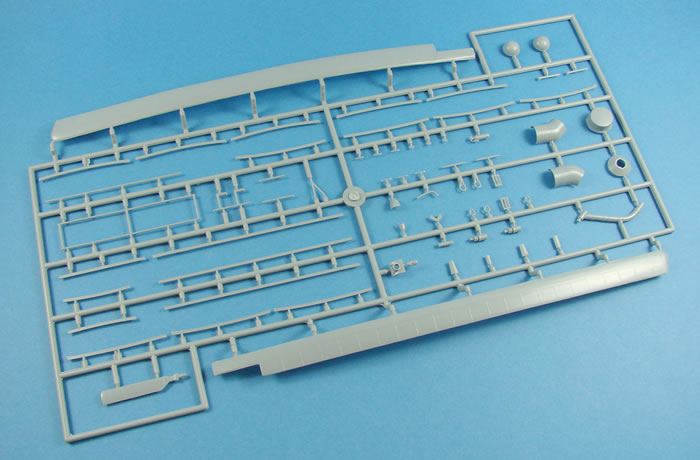
Essentially, parts that have multiples tend to be moulded here. The main protagonists are the main rotors themselves. A quick note here is that no sprues have part numbers on them. You will need to refer to the parts map in the instruction manual. Being short-run in nature, you also won’t find any interconnecting pins either. You need to align things yourself. Ok, back onto those rotors. These have been represented in their at-rest, drooped stance, with the correct level of droop already set for you. Now, I can’t vouch these drooping more as time goes by, but I can say that Fly’s plastic is quite light, so fingers crossed, you won’t have an issue. These rotors will slip into resin mounts, and then secure to the resin hub. I suggest you pin these with rigid wire to prevent any stressing. Rotor detail is very good too. Two of the four tail rotor blades are also to be found here, and will fit to the main part that is full span.
A multitude of parts on this sprue are concerned with the internal ribbing and framing of the crew compartment. This will also be supplemented by photo-etch joint plates. In all, it should look pretty impressive when complete.
Other parts that can be seen here are engine exhausts, main gear struts, foot control pedals, and a good number of small external and internal parts such as scoops, vents, and minor hub parts etc.
SPRUE B
Here you will find various floors and bulkheads, plus the underside of the main fuselage area. This latter parts gives us an idea about what we can expect from the surface detail of this model. Now, if your impression of short-run kits hasn’t been good with regards to details, then this will shatter that illusion. Panel lines are as refined and as you would expect to see on a high-end manufacturer’s release, and as importantly, they are also even. External detail will be supplemented by further resin detail. I can also tell you that the exterior of this model is riveted too, and they look just perfect, as in not too defined to distract, and just enough to perhaps catch a little wash here and there. They are very subtle and only a secondary feature of the exterior detail. Reference I have does show that at least some riveting was actually raised. If you feel you wish to correct this, then I suggest either Archer or HGW positive rivet decals.
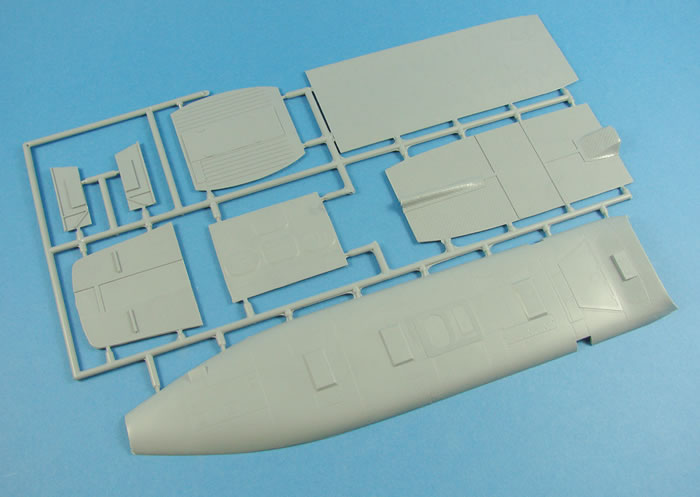
Attention to interior detail is also very good, with chequerboard panelling on the floor of the upper rotor shaft assembly, and the same attention to on the crew cabin bulkheads. Of particular note here are the circular port details on the cabin floor. This is some of the best detail engraving I’ve seen, let alone on a short-run kit.
SPRUE C
As you’ll instantly recognise, the tail section halves are moulded here. This not only helps with tooling a large model, but the tail can also be posed in a folded position, complete with internal bulkhead joint detail, such as the rotor drive coupling. Again, I’m impressed by the fine surface detailing. I do note that these parts, as with the main fuselage and nose sections, have a feint patina. Before use, I would perhaps gently buff these with a very fine sanding sponge, followed by a polishing sponge. It’s no biggie at all, and I think would hep things massively, and of course, not damage any other raised detail. Some of that interconnecting bulkhead detail, plus the bulkheads, are moulded here. These will be supplemented by extra plastic and resin detail.
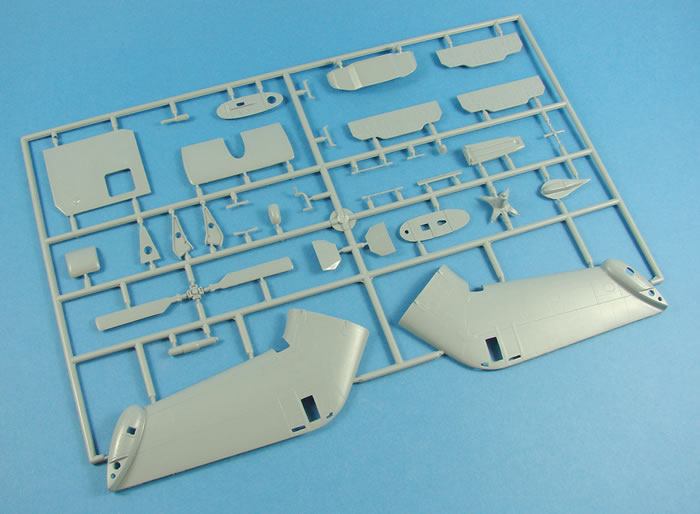
There are THREE instrument panel parts moulded here, but only one part (#9) is used for the HC.2 release. Another is for the HU.5, and most tellingly, the last part is described as for ‘other versions’. I wonder is this means we’ll see further versions of this kit.
Other sprue parts include tail rotor items, stabiliser, instrument panel coaming and the crew compartment door.
SPRUE D
Just two parts here; the main fuselage halves. And….totally Wessex! These look just great. I really hope my photos here help to show that external detail. I’ve built a few Fly model kits, and this looks to be the very best of them yet, and that’s including their Ar 234 that I recently built and raved about. Internally, there are engraved lines to help you place the internal frame parts.
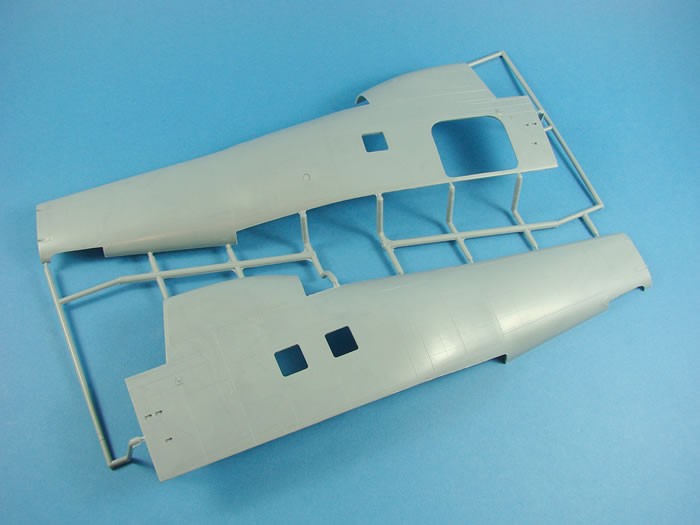
Note that there are also engraved lines to help with bulkhead placement etc. too. If you buy the other HU.5 version, you will need to open up the side fuselage windows, and there is some faint scribing within the fuse to show you this.
SPRUE E
Also helping with fuselage breakdown is the moulding of the nose sections as halves. The instructions show these being attached to their respective fuselage halves almost at the very start of construction, so I would do the same and not chance them being fitted later. I would also advise this of the tail section, providing you aren’t displaying it in its folded position. The upper, meshed area of the nose is actually left open, and without the mesh, but there is a resin cover that sits over this and looks very good. Should you wish to display that area without the cover, you will need to fabricate your own mesh and frame. That’s the only real downside here, as I would have liked to se both options provided.
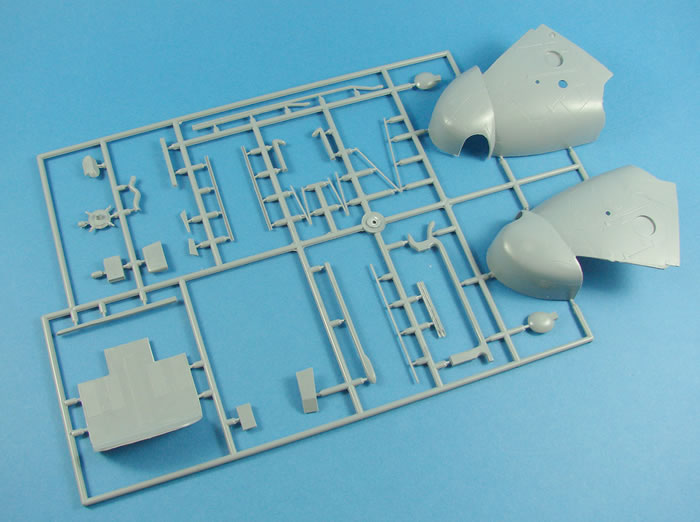
Apart from the bare cockpit floor, the rest of this sprue is taken up with various exterior sliding rails for doors etc. external pipework, and also support frames for the main rotor shaft.
SPRUE F
This sprue is the only grey one to be packed separately, and this is due to the fragility of the parts therein. Moulding also seems slightly more refined, with zero flash, compared to the other sprues.
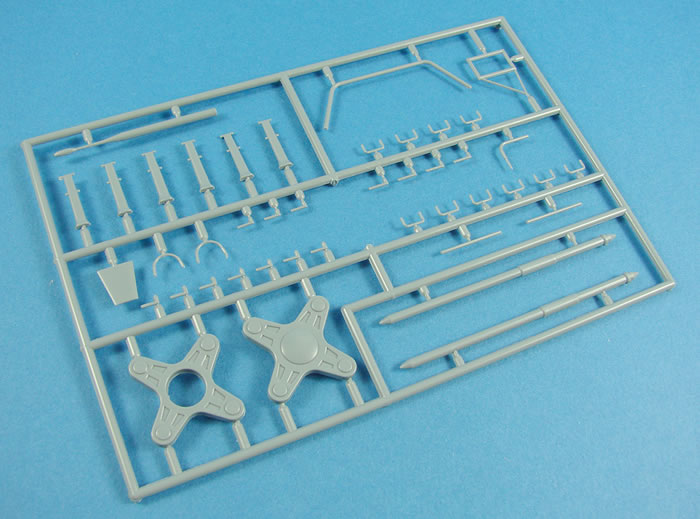
The plastic also looks slightly different (glossy) too. Here, you will find external grab handles, pitot, main rotor plates, and undercarriage damper legs etc.
SPRUE CP-A, CP-B
These are the clear parts. CP-A contains those blown cockpit side windows that are so familiar, as well as the other openings. Two bulged windows are included for the HU.5, that aren’t for use here. I’ll add my own notes about these possibilities soon though…
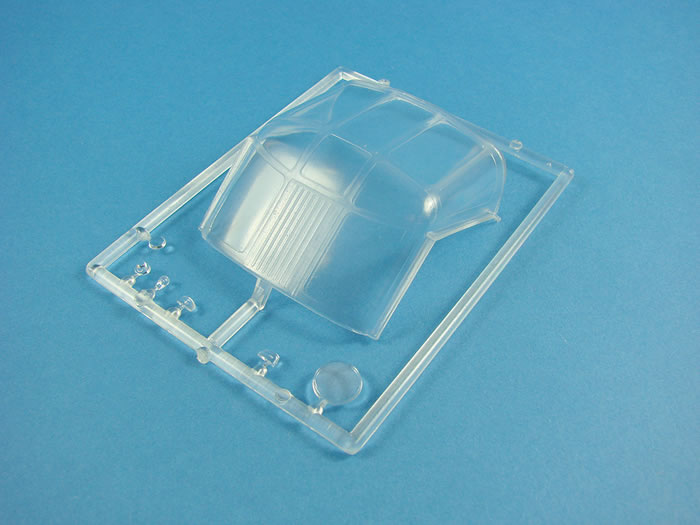
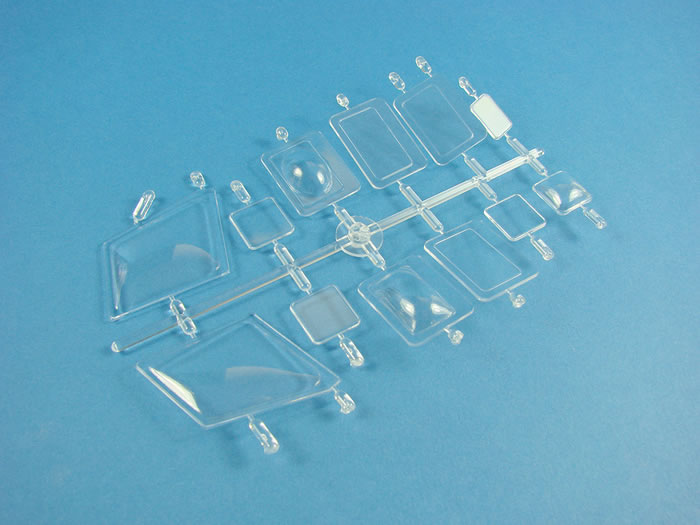
CP-B is a single part, namely the main cockpit window. Framing is very good, with none clear areas being frosted. Clarity is very good, but not in the same league as a Trump, Tamiya, HK or other kit that’s not limited run. However, I still don’t think the parts are too bad at all, and I have no problem with them personally. A dip in Klear may improve them further.
Plastic Summary
Sprue gate attachments should be easy to clean up, and moulding is very nicely executed. Small levels of flash occur in some places, but no actual defects can be seen. For a short-run kit, this is certainly far more than acceptable, and quite impressive. Ejector pin marks are no real issue, and seam lines are minimal.
RESIN PARTS
I’m really not going to go into naming every part here, but instead do a photographic breakdown of the various supplied components. See that there are parts here that are also HU.5 specific too. Essentially, apart from the box itself, and the decals. The parts included in this release could also build you the HU.5 version. If you wanted to build your own HU.5 scheme from masks or aftermarket decals, then buying the HC.2 kit is a perfectly acceptable thing to do. Even the instructions are common to both kits ;)
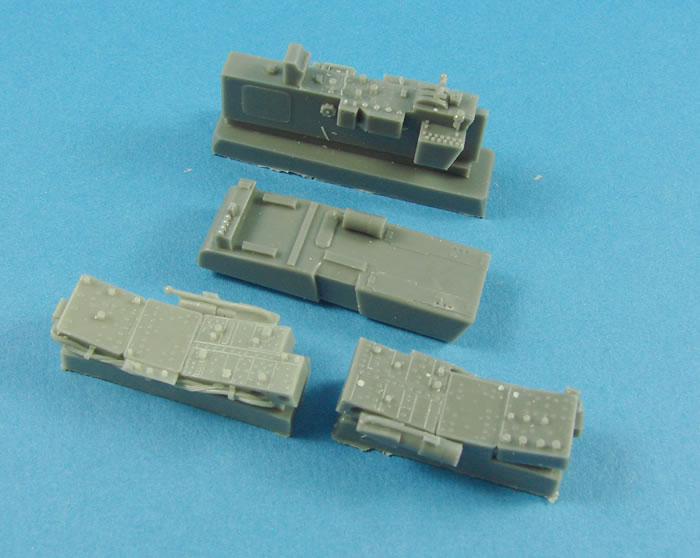
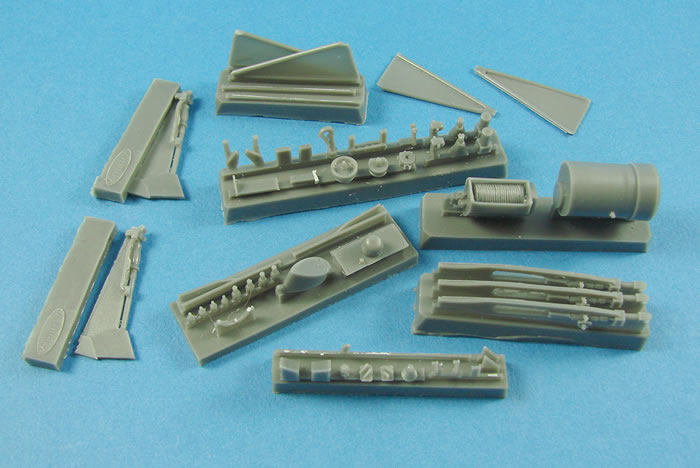
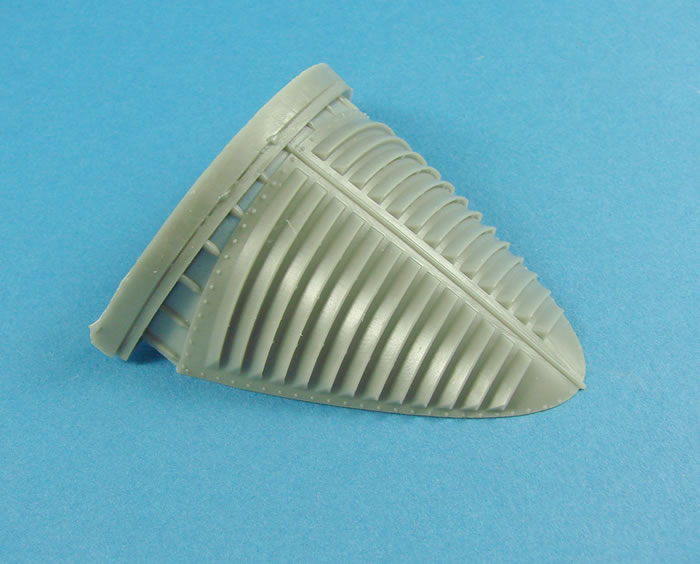
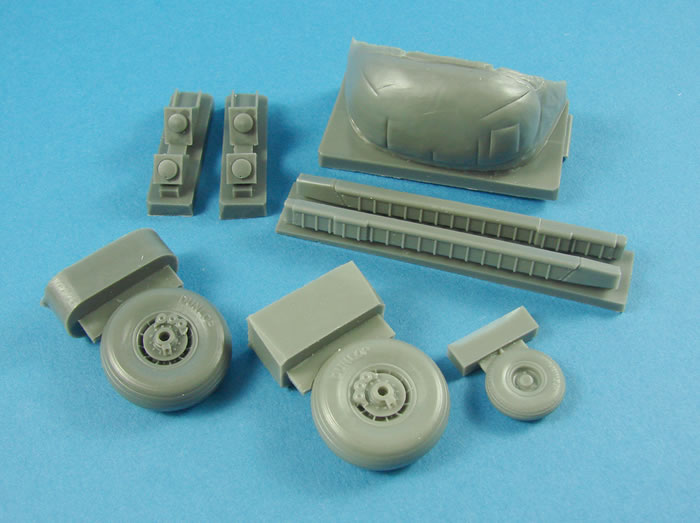
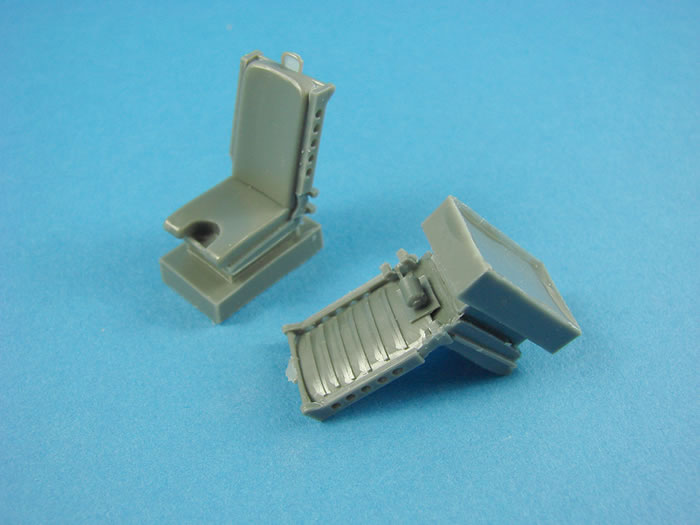
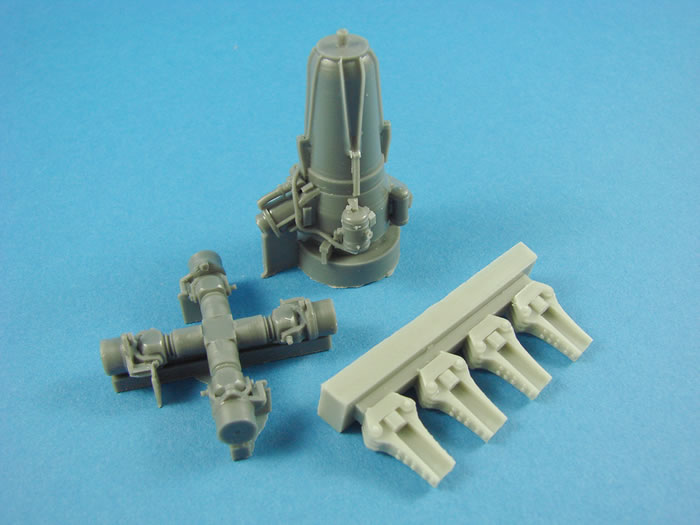
Take a look at these parts, all produced by Artillery, and you’ll see just how good they are. Casting is excellent, although I do have a very small number of minor breakages that are fixable by me. I’m sure if I ask Fly, they will send out any replacements I should ask for. Detail parts include those for the cockpit, rotor stack, rotor hub, plus other internal and external details.
PHOTO ETCH
Two frets here, which are again applicable to both the HC.2 and HU.5 kits. These pare packed into a single sleeve, along with some paper parts that we’ll look at next.
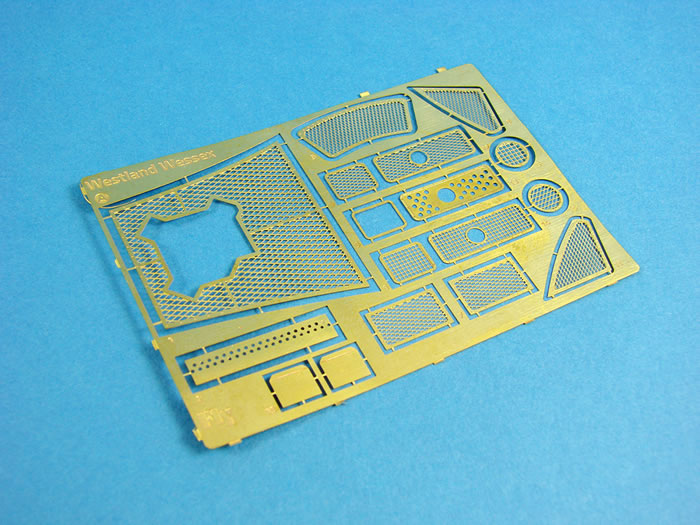
PE is included for internal cockpit detail and framework stiffener plates, external rails, louvres, various mesh grilles, straps etc. There is a lot of metal here, and you’ll get a better idea of what is offered by looking at the photos of the finished text shot that I’ve included at the end of the article.
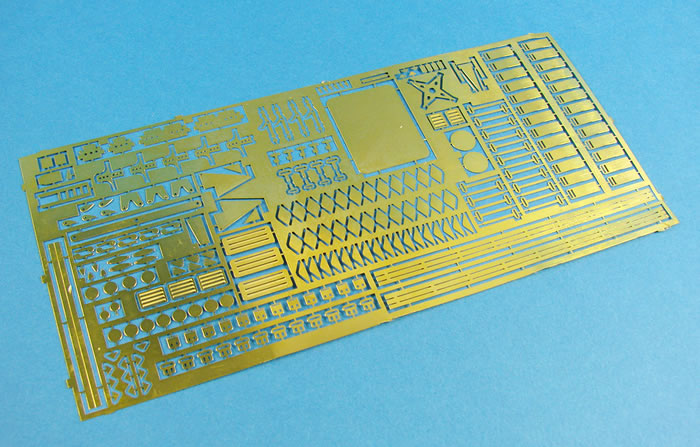
PE quality is excellent, very small fret connecting tabs, and high quality, sharp detail and detail relief.
PAPER PARTS
A single sheet is included that feels slightly plasticised. The various crew cabin belts are printed on one side, in the correct blue colour, and the rear of the sheet is also in blue, so no having to paint the rear. You might need to touch up any white edges you see, but that’s no real issue.
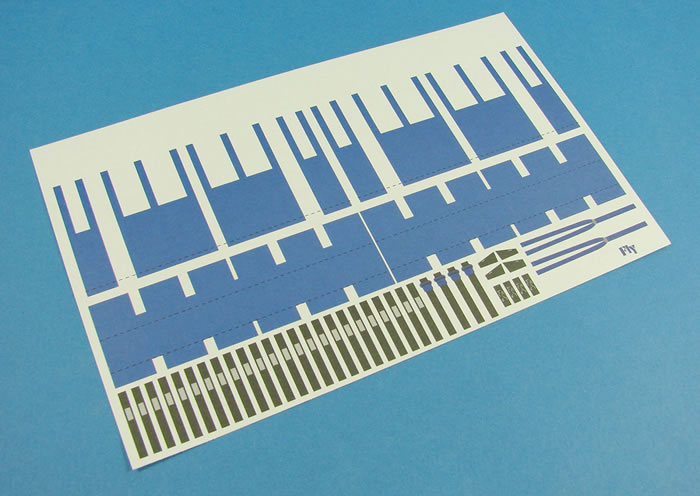
I think you can also scrunch this material a little to make it look more naturally like fabric. Seatbelts for the cockpit are printed here too, but I’m not too impressed with these. They lack buckles, and look very two-dimensional.
DECALS
One large sheet is included, and this is pretty comprehensive. Not only does it contain markings for the FOUR included schemes, but a thorough set of stencils. I don’t know where these are printed, but they do look perfectly fine to me, and having used Fly decals in the past, I have no issue with them.
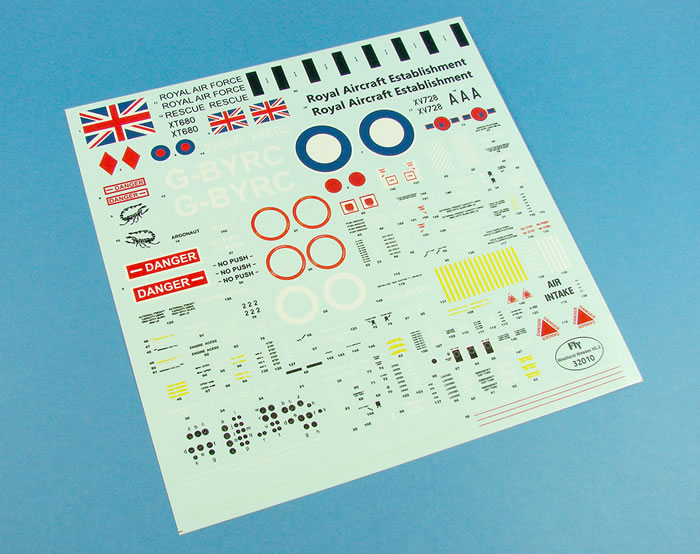
They are thin, glossy, have little carrier film, have solid colour, and are in perfect register. My only criticism is that the instrument dial decals don’t have great definition. I would maybe use Airscale for my build.
Instructions
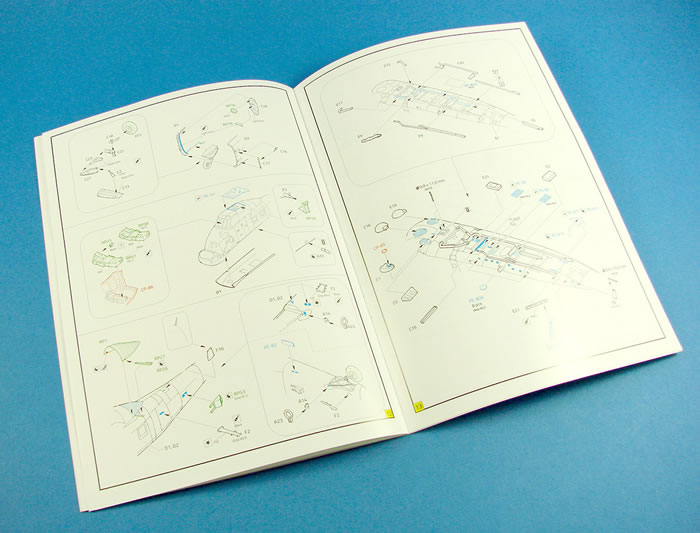
These are mostly very easy to follow, being printed as a glossy A5 manual. You will need to be careful that you note all the correct HC.2 details, and not mix up with HU.5, due to the manual being used for both releases. Coloured ink is used to denote PE, decals, and clear parts, and the constructional sequences also have some simple colour notation. I would certainly look for some online reference to help you further though.
A single full colour sheet is supplied simply for scheme illustration, and this is also high quality with easy decal placement identification and colour notation.
I love the Wessex. For me, it evokes memories of the 1970s and 80s and it’s one of those copters that just looks ‘right’, and purposeful. Fly have captured that very essence with this release.
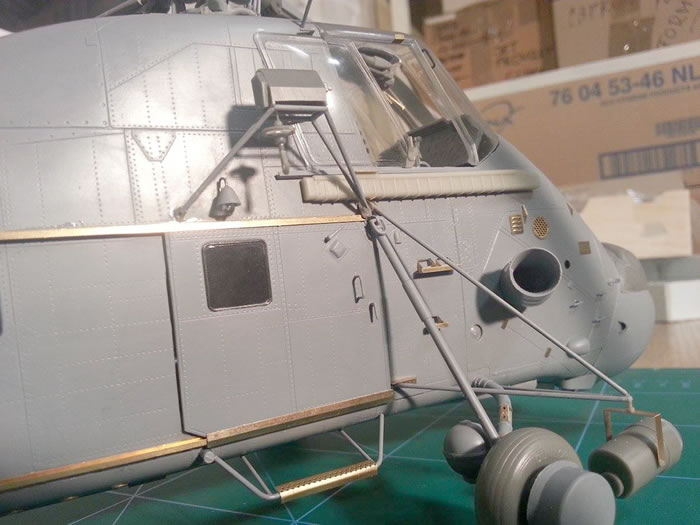
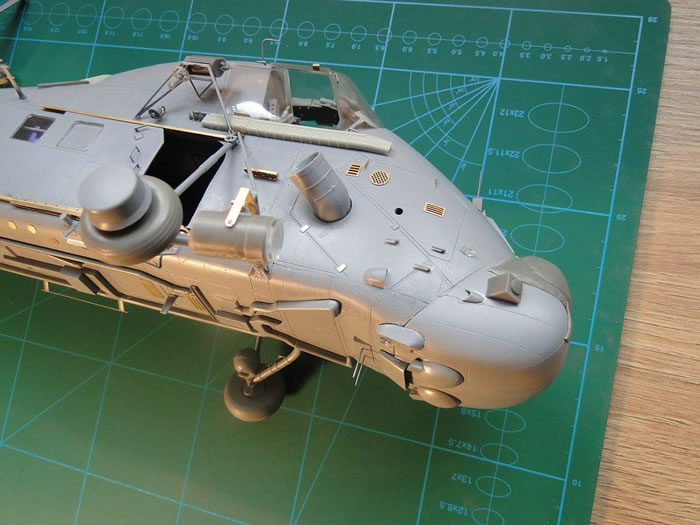
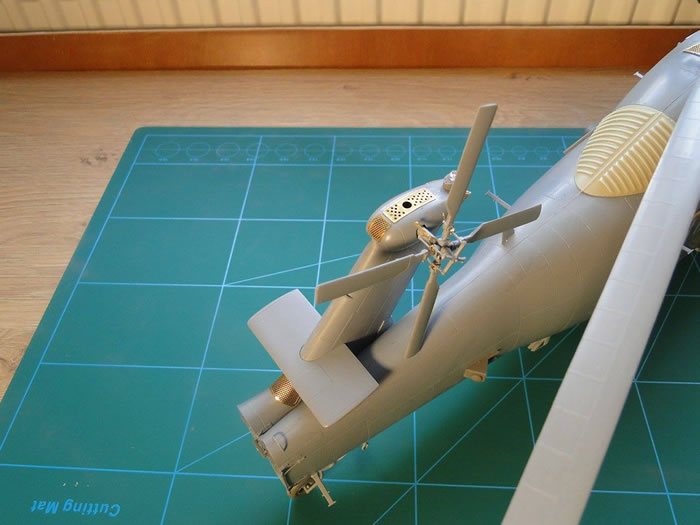
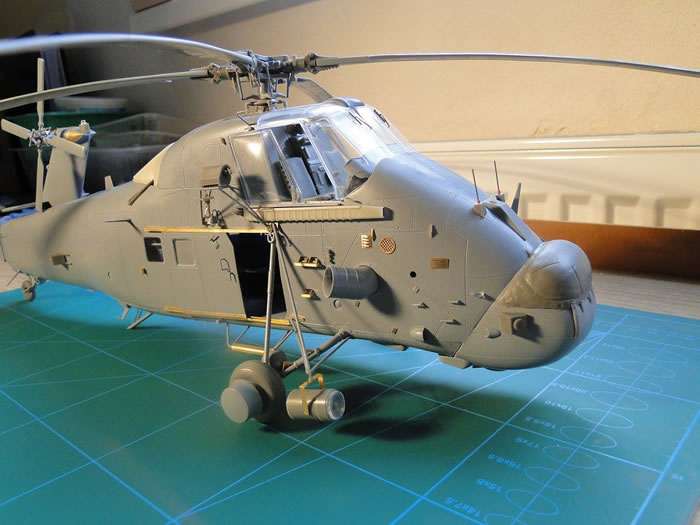
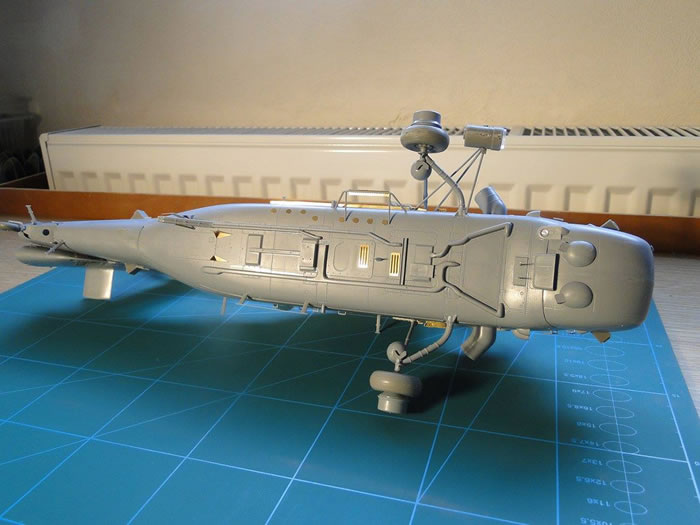
Detail, both internally and externally, is incredible, and you can guarantee it will build up into a perfect replica of this iconic machine. Apart from a few minor niggles with small, broken resin detail, there isn’t anything to fault here in terms of quality. The external representation of the aircraft is well thought out and executed, and I really can’t wait to tackle it. If there is only one other niggle, I would perhaps wish that there was an option to display it with folded blades, as the full span of this is about 500mm. Maybe look at pinning those rotors with rigid wire so it can be dismantled when not on display.
For me personally, perhaps one of this year’s most anticipated releases, and I’m certainly not disappointed.
VERY highly recommended.
My sincere thanks to Fly Model for the review sample
Review Text Copyright © 2015 by James Hatch
Page Created 4 November, 2015
Last updated
4 November, 2015
Back to HyperScale Main Page
Back to Reviews Page

|
