|
Fairey Gannet ASW
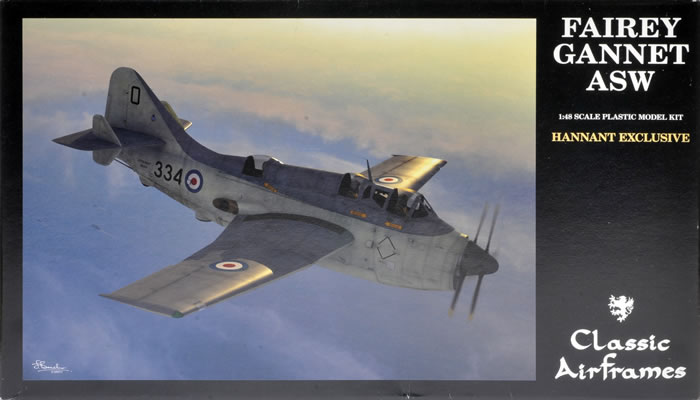
Classic Airframes, 1/48 scale
S
u m m a r y |
| Description and Catalogue Number: |
Classic Airframes Kit No. 4158 - Fairey Gannet ASW |
| Scale: |
1/48 |
| Contents and Media: |
56 parts in shiny grey plastic, 29 parts in grey resin and 7 clear injection molded parts; markings for four aircraft |
| Price: |
£41.63 (Export) or £49.95 (EU) plus shipping available online from Hannants |
| Review Type: |
FirstLook and Construction Notes |
| Advantages: |
A welcome re-release of this kit; crisply engraved and excellent surface detail; first injection molded Gannet in 1/48; separately packed clear parts; decals for four different naval air forces. |
| Disadvantages: |
Modelling experience helpful; undersized nose casting. |
| Conclusion: |
It is great to see Classic Airframes’1/48 scale Fairey Gannet available again. After careful preparation and test fitting this model delivers a good looking and well detailed result with nicely restrained surface texture. The main issues to watch out for are fairing in the undersized resin nose casting and making sure that the cockpit parts are precisely aligned. Some filling underneath the wing roots will be necessary too. However, none of these challenges are beyond the capabilities of a moderately experienced modeller. |
Reviewed by Brett Green

Airfix's 1/48 scale Spitfire Mk. Vb will be available online from Squadron.com
Introduction
I was very sad to see Classic Airframes go into hibernation around five years ago.
Over the previous two decades, “Uncle Jules” had brought us a large selection of subjects that would otherwise never have seen the light of day in 1/48 scale. He was particularly fond of British and Italian aircraft, with these forming the bulk of his catalogue.
It was a pleasure to watch the products of Classic Airframes evolve from sometimes basic and tough to build kits; to high quality, well-detailed limited run models.
Classic Airframes kits still demanded close attention and the application of modelling skills, but for me, the subject matter and the impressive finished result made the extra effort well worthwhile.
Earlier this year I had a phone call from Jules Bringuier, maestro of Classic Airframes. He told me that a number of Classic Airframes kits would be re-released in an exclusive arrangement with Hannants. He also said that it was not be out of the question that new subjects might be released under the Classic Airframes label in the future.
The first of the Hannants re-releases a few months ago was the Bristol Blenheim Mk. I.
This has now been joined by the Classic Airframes 1/48 scale Fairey Gannet ASW.
The Fairey Gannet *
If ever there was a nation that was painfully aware of the effect of submarine warfare, it was Great Britain. Near the end of the Second World War, it was clearly recognized that a dedicated anti-submarine warfare aircraft was needed, and the Fairey Firefly was not capable of fulfilling that role.
Specification GR. 175/45 was put out at the end of 1945 for a dedicated anti-submarine warfare aircraft that was also able to perform anti-shipping duties. Gr. 175/45 was also grounded in a technology that had been previously developed by Fairey, that was the use of two engines, each with its own crankshaft to power co-axially mounted, contra-rotating props. This had great advantage for carrier based aircraft in that there was the safety of two engines, rather than one; the engines could be mounted in the fuselage, rather than enlarging the wings to accommodate two propulsion units; and contra-rotating props eliminated the effect of propeller torque. Another advantage of such an arrangement was that one engine could be shut down to conserve fuel and extend flight time, an important factor in long-range anti-submarine patrols. With the improvements in turbo-engine design, the Armstrong Siddeley Mamba engine became the power plant of choice. When Fairey coupled two together for its proposed Type Q (the Gannet) it became known as the “Double Mamba”.
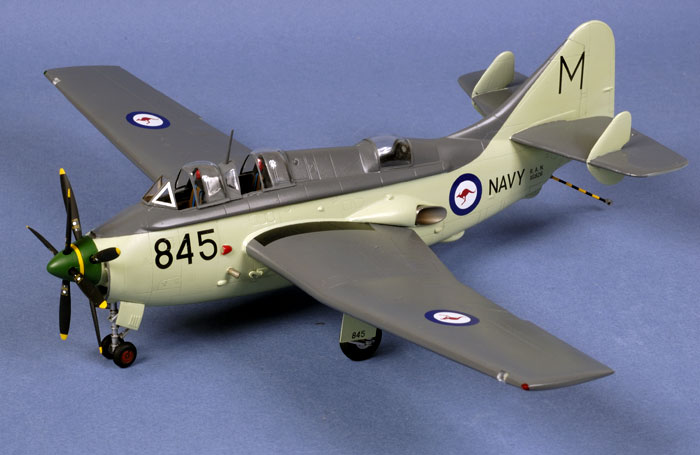
Development of the Type Q began in 1946, but it was not until 19 June 1950 that the first Type Q actually engaged in flight deck trials on HMS Illustrious. On that date, the Type Q became the first turbo-prop aircraft to take-off and land on an aircraft carrier. Nearly another three years would go by until the first production Gannet AS. 1 made it debut in June 1953 and two more years until the gannet entered operational unit service with 826 Squadron in January 1955.
The AS.1 Gannet had a crew of three - pilot, observer and rearward facing radar operator. Its offensive weapons were carried in the weapons bay, which could accommodate various combinations of torpedoes, depth charges, sea mines, conventional high-explosive bombs and sonobouys. Four mounting points under the centre section of each wing could be used for up to 24 unguided rockets.
This re-release contains the same plastic and resin parts as the original 2007 kit. As far as I can tell, only the box top is different.
The Fairey Gannet sits right in the middle of Classic Airframes' subject sweet spot - a 1950s Fleet Air Arm aircraft that had never before appeared as a 1/48 scale injection moulded kit. In fact, as of 2015, it still has not been kitted by any other manufacturer in 1/48 scale.
Classic Airframes Gannet comprises 56 parts in shiny grey plastic, 29 parts in grey resin and 7 clear injection molded parts. Markings for British, Indonesian and Australian aircraft are included.
The quality of the plastic is very good, with no sink marks or ejector pins in obvious locations. Being a limited run model, however, there are no locating pins so test fitting and careful alignment will be essential during construction.
The resin parts are beautifully detailed, convincingly fitting out the three cockpits and wheel wells.
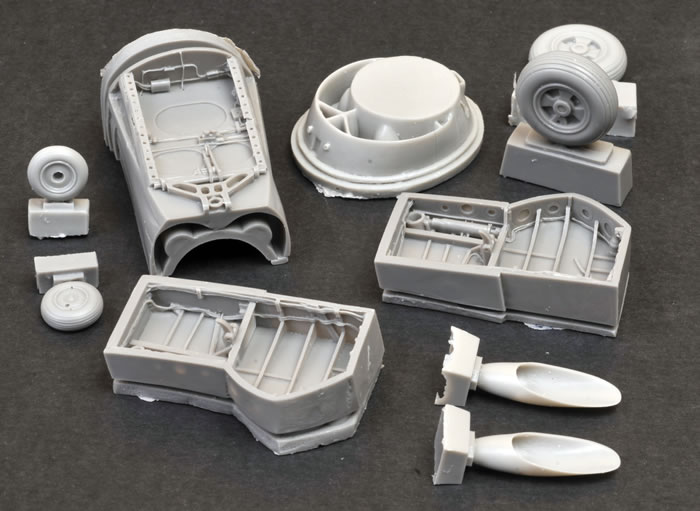
The casting blocks on the wheel well and nose parts are quite imposing, so a stout razor saw or a cutting wheel attachment on a Dremel motor tool will be the order of the day.
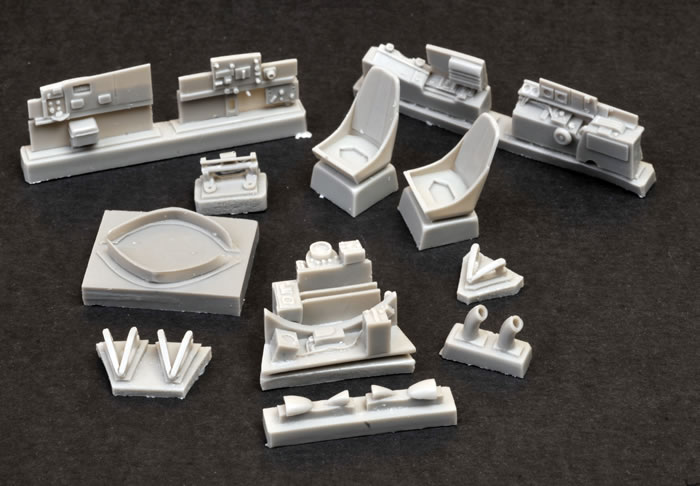
Clear parts are free from distortion and packed in a separate bag.
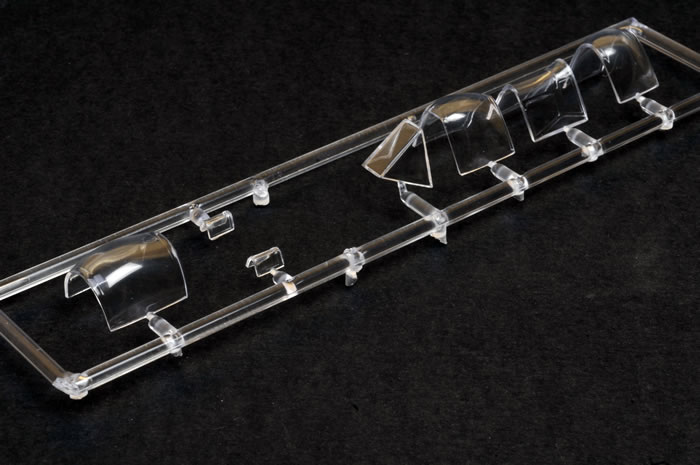
Separate sections are supplied for each of the canopy parts, so the modeller can choose which sections to slide open and which to keep closed.
Markings *
Markings for the aircraft of four different nations are included on the lovely Cartograf printed decals.
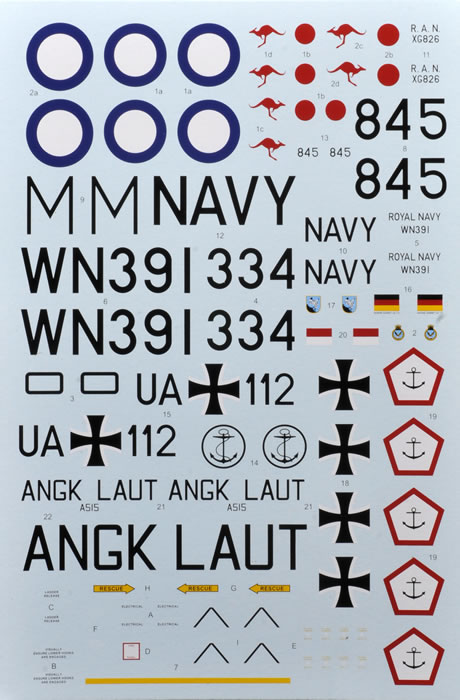
As for the colour scheme, all are in Extra Dark Sea Grey over Sky.
-
824 Squadron, HMS Ark Royal, Circa 1956. This unit replaced its AS.1s with the AS. 4 by October 1956 and was the first unit to receive the AS.4
-
816 Squadron, Royal Australian Navy, HMAS Melbourne, circa mid-1960s. The RAN operated the AS.1, which were delivered in 1956. The AS.1 portholes were most likely blanked out.
-
MFG 3 (Marinefliegergeschwader) Federal German Navy, circa 1980s (This appears to be a misprint and should read 1960s). This aircraft is an AS.4 originally assigned to MFG 1. When MFG 1 was placed under MFG 3 control, the aircraft retained their MFG 1 code of ìUAî.
-
Indonesian Navy, Circa 1962. This aircraft is an AS.4. The serial number as printed is not correct. The decal has the serial number printed as A515, it should be AS 15, and there should be a space or dash between the AS and the 15.
I built the original edition of this kit back in 2007.
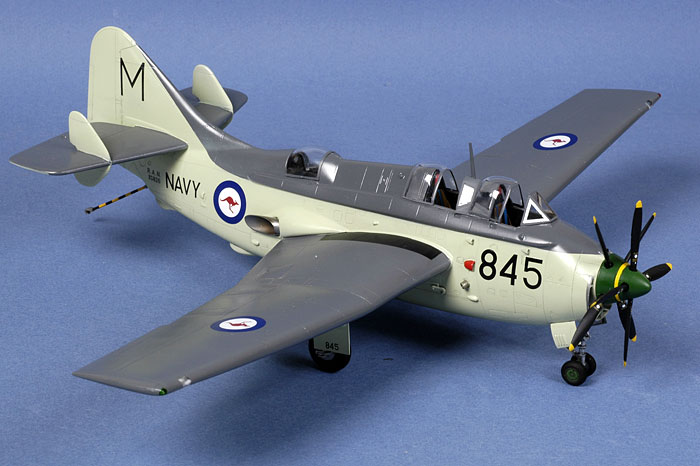
As with all Classic Airframes kits, the most important step is careful and thorough preparation of the kit parts prior to assembly, both plastic and resin. I spent around an hour and a half removing flash from the kit parts and separating resin pieces from their casting blocks.
Nose Casting
The large nose casting is a bit tricky to clean up. I followed this process:
I started by cutting a groove into the back of the part using my razor saw. This gave a definite line of demarcation between the resin part and the casting block.
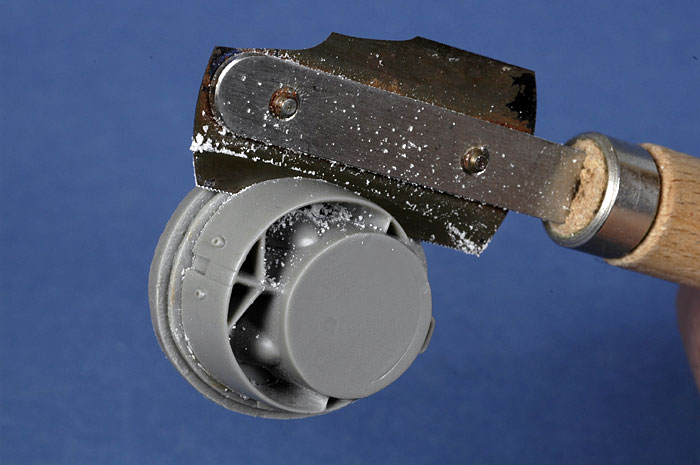
Once I had cut all the way around the nose part, I attached the round cutting wheel to my Dremel Motor Tool. This was used to "slice and dice" the rear of the casting block, all the time being careful to avoid intruding on the part itself. The smaller blocks resulting from the "dicing" were then ground off with the cutting wheel.
The Dremel was also used for the casting blocks on the wheel wells, rear cockpit tub and the second cockpit's radar unit.
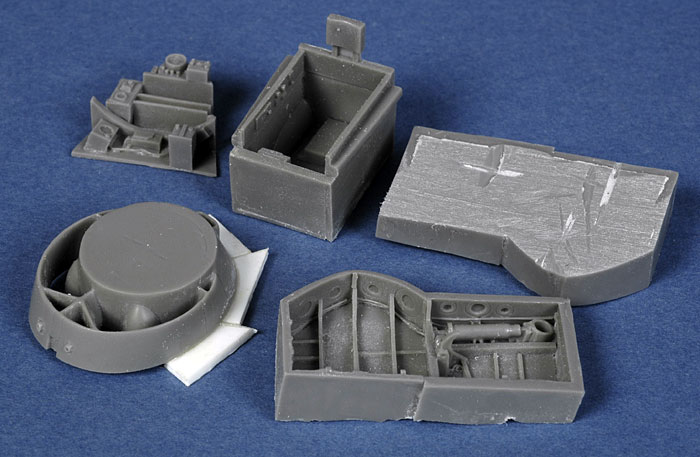
Test fitting the resin nose casting against the front of the fuselage showed a mismatch - the diameter of the nose was slightly smaller than the front of the fuselage. I corrected this by gluing plastic strip to the back of the resin nose part as an extension plug.
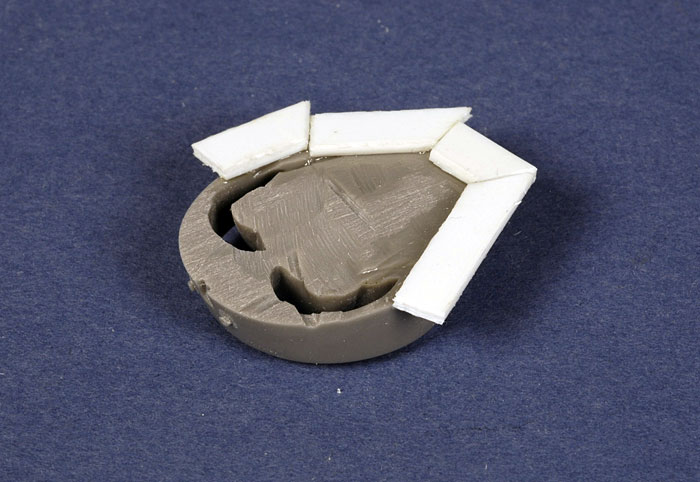
This was sanded back to match the contours of the fuselage once the resin part is glued in place later in construction.
Main Wheel Wells
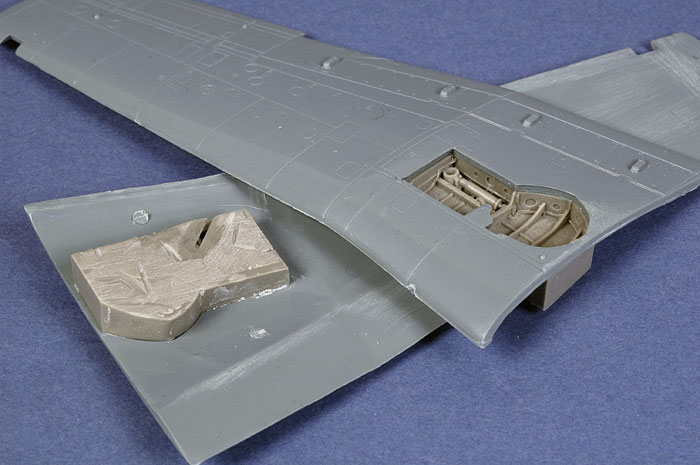
The nicely detailed mail wheel well parts fitted easily inside the wing halves without the need for any further thinning.
Cockpit Fit
The exact position of the side consoles is a little vague, but I managed to get it right the first time after test fitting. I found that all the cockpit components fitted exactly as they should, and the very clever method of mounting the cockpit on the wing spar worked perfectly.
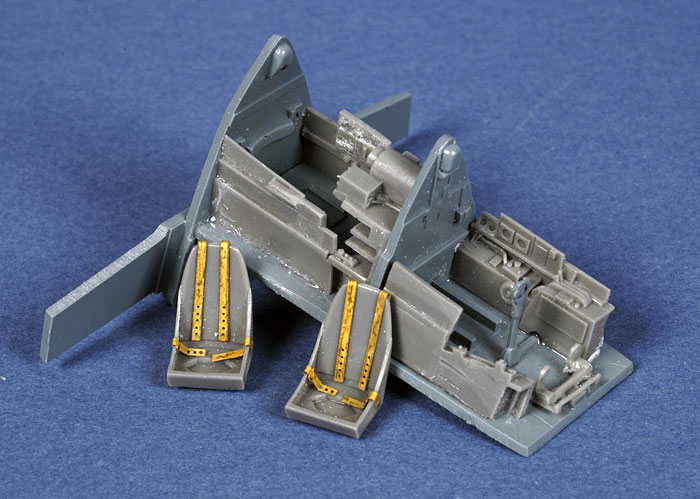
The assembled cockpit was test-fitted to the fuselage to ensure precise fit. The rear cockpit is simple, but looks fine.
Nose Wheel Well and Nose Weight
I positioned the wheel well around 1.5mm further forward than the locating mark on the port side of the fuselage. This means that the front of the wheel well extends beyond the plastic fuselage halves. This ensured that the ducting lined up with the extended resin nose part.
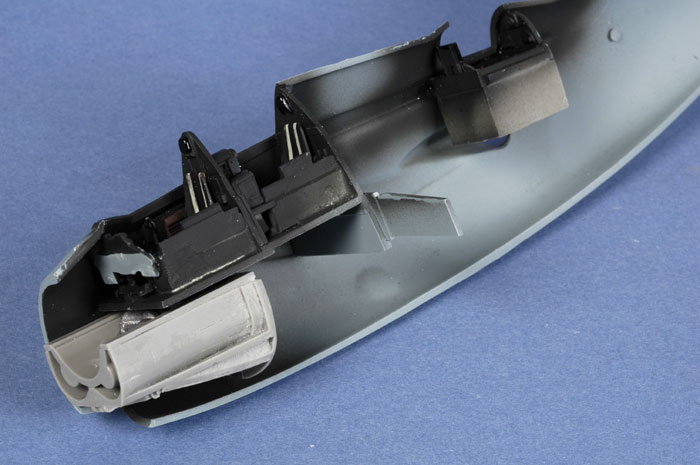
Classic Airframes' Gannet needs plenty of nose weight. Before buttoning up the fuselage, I flattened some lead sinkers and glued them into the cavity between the intake ducting and the bottom of the fuselage.
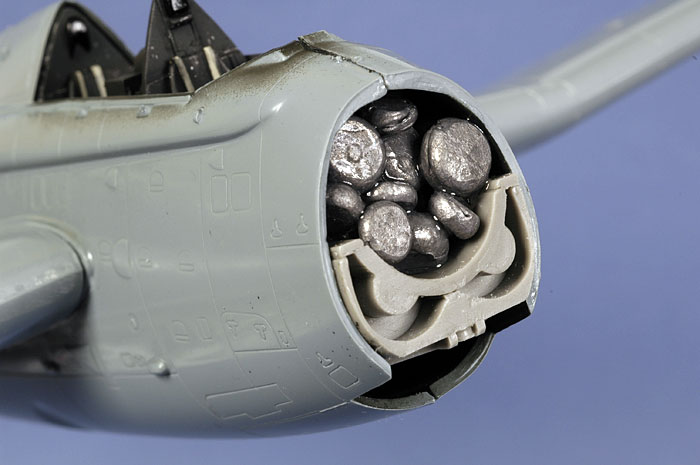
More weights were added when the fuselage halves are joined.
Wing Fit
With the wings assembled, I test fitted them against the fuselage (which was taped together and fitted with the supplied wing spar).
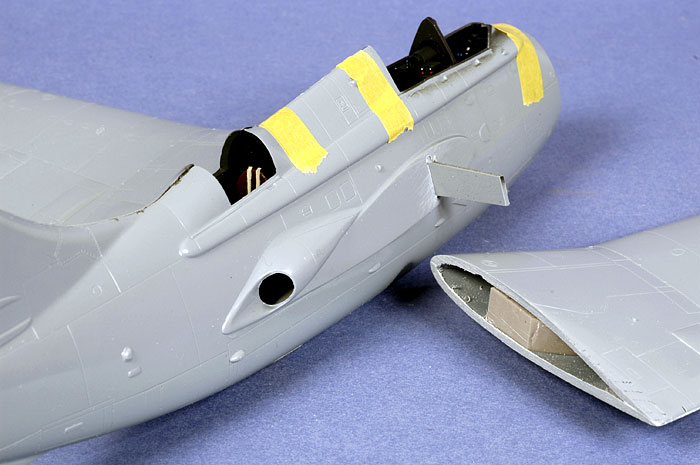
The fit was not completely flush and the wing was wider than the wing root, so I sanded the mating edge of the wing back with a coarse sanding stick. The spar interfered with the fit too, so I sanded the top and bottom on both sides. On the starboard side, the fuselage exhaust fairing prevented the rear of the wing from fitting properly, so the top-rear of the wing was sanded back.
Filling and Finishing Touches
The fit of the wing to the wing roots was less than perfect underneath. The port side in particular left quite a deep trough between the fuselage and the wing. Fortunately, this was easy to fix by filling with Milliput.
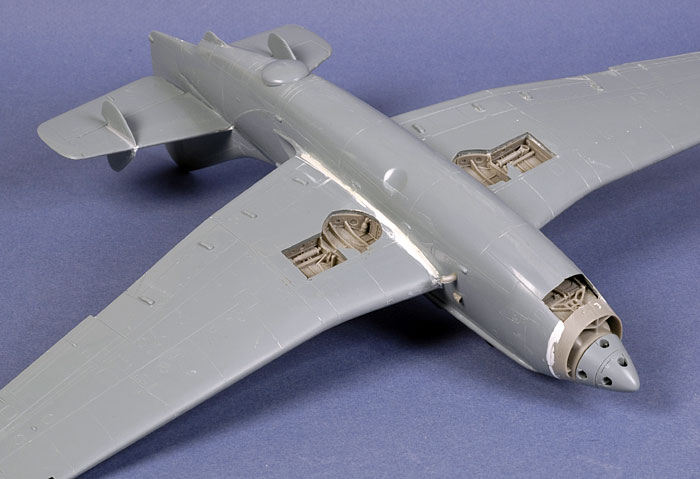
Milliput was also used to fair in the resin nose casting. I had earlier built up the rear of this undersized resin part with plastic card to match the contours of the plastic nose.
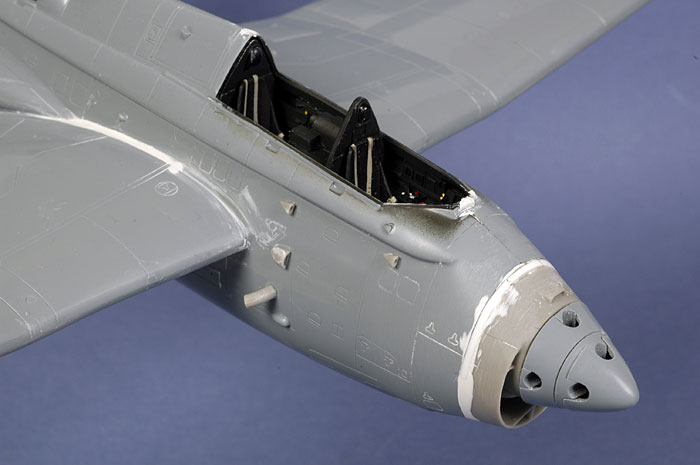
The forward propeller spinner very slightly overlapped the rear section, and the rear section very slightly overlapped the forward fuselage. The base of both parts were sanded back using a coarse Mastercaster sander.
It is great to see Classic Airframes’1/48 scale Fairey Gannet available again.
In common with most of the later Classic Airframes kits, after careful preparation and test fitting this model delivers a good looking and well detailed result with nicely restrained surface texture.
As pointed out above, the main issues to watch out for are fairing in the undersized resin nose casting and making sure that the cockpit parts are precisely aligned. Some filling underneath the wing roots will be necessary too.
However, none of these challenges are beyond the capabilities of a moderately experienced modeller.
I do hope that we’ll see more of Uncle Jules’ Classics back, including the Defiant, early 109s, Anson, Baltimore, Dornier Do 17Z and more. It would be great to see some of the older subjects re-worked too; or even some that slipped through the cracks.
Who’d like to see a 2015-quality Classic Airframes 1/48 scale Fairey Battle or Bristol Beaufort?
Me!
Thanks to Classic Airframes and Hannants for the sample
Text and Images Copyright © 2007 & 2015 by Brett Green
* Historical and Markings Text Copyright © 2007 by Steven Eisenman
Page Created 10 April, 2015
Last updated
10 April, 2015
Back to HyperScale Main Page |
