B-1B Update Parts
for Revell's kit
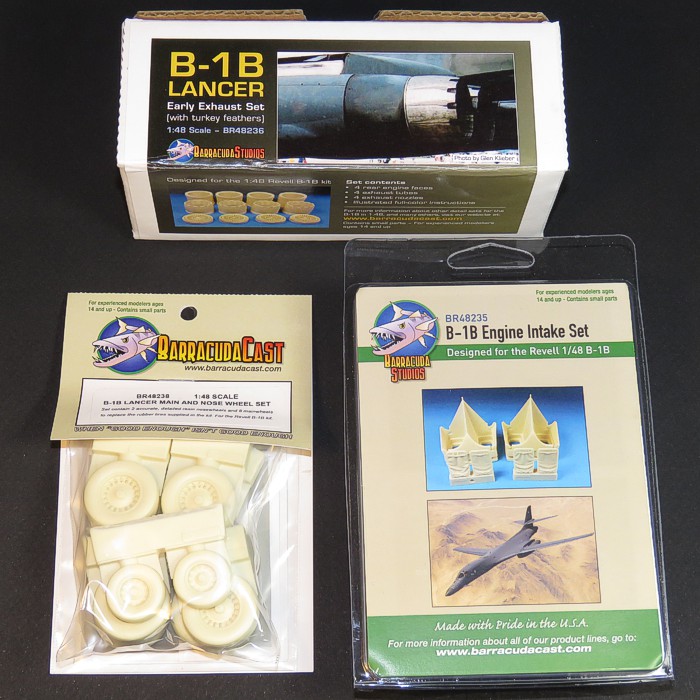
BarracudaCast, 1/48 scale
Reviewed by David W. Aungst

HyperScale is proudly supported by Squadron.com
Many modern jet model builders, myself included, have this (or one of its other boxings) in their model stashes:
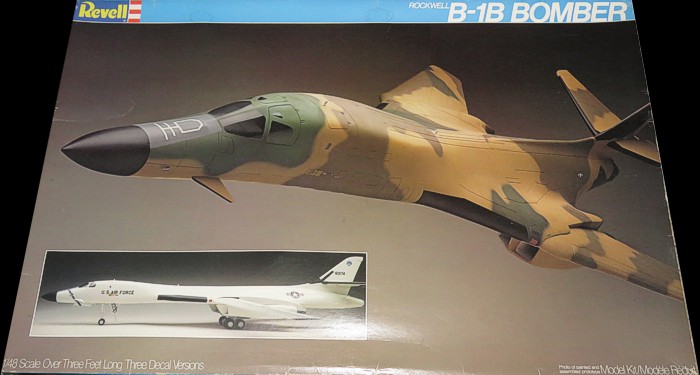
This is the mammoth 1/48th scale Revell B-1B Lancer. I picked mine up at a model club meeting about 30 years ago (no exaggerating). One of the other club members had bought it and had nowhere to put it. So, he dumped it at half price - SCORE for me! I played with it for a little bit, then added it to my stash. In 1996, I decided its time had come and dug the kit out to build it.
As any review of the kit will quickly say, Revell did well in getting some of the production B-1B details right, like most of the overall airframe shape, size, and contours. However, they chose to use B-1A details on some critical areas of the kit, namely the engine nacelles. The engine intake ducts are the more straight B-1A style without the inner baffles found on the B-1B. And, the engine exhausts are the longer eyelid pattern found on the B-1A. When I started the kit back in 1996, I thought I could fix these issues with a little kit bashing. After a few months of tinkering, all my ideas to fix these issues came up empty, so I re-boxed the kit and placed it back into the stash to await "divine intervention".
Well, more than 18 years later, the "intervention" finally came. BarracudaCast released a few resin sets to address the B-1A kit flaws of the Revell B-1B kit. I snagged a few of the sets off the Barracuda web site. When the sets arrived, I liked what I saw enough to immediately set out and write these reviews.
To better define my choices on which sets I bought, I want to build an original B-1B Lancer, back when they were SAC's "big stick" nuclear bombers. This dictated me buying the engine exhausts that still have the "turkey feathers". It also meant not bothering to buy the sets that provide the late airframe updates from the last decade. So, I bought these three sets:
-
BR48235 - B-1B Engine Intakes
-
BR48236 - B-1B Engine Exhausts (with "Turkey Feathers)
-
BR48238 - B-1B Resin Wheels
The other sets produced by BarracudaCast for the B-1B relate to airframe updates from later time periods, after the time period of the model that I want to build.
BR48235 - B-1B Engine Intakes
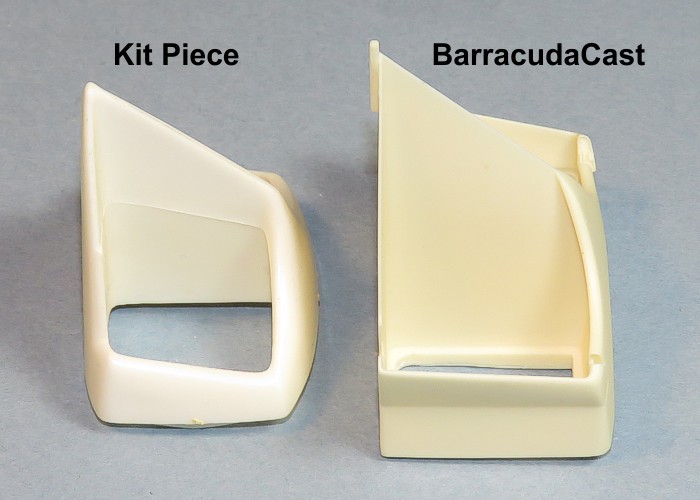
As I wrote earlier, the Revell engine intakes are patterned after the B-1A. In the B-1B, they subtly re-defined the intake cross section and added hinged lips to deflect greater air flow into the intake at slower airspeeds.
The BarracudaCast resin parts capture both these details well.
The BarracudaCast instructions are a little lacking (the following image). The pictures indicate to simply remove the resin wastew and then attach the parts to the kit. I wanted to include a little more descriptions here for everyone to benefit.

Resin Set Instructions
The picture shows a saw blade doing the slag removal on the main intake pieces. I did my first intake piece this way and found it difficult to remove the center-most portion of the resin waste. Simply, my saw blade was almost not deep enough to reach the center of the piece. When I do the waste removal on the second piece, I will set up my belt sander and sand off the entire slag. This goes faster than you think and will not have the issue of trying to reach the center-most part of the intake piece.
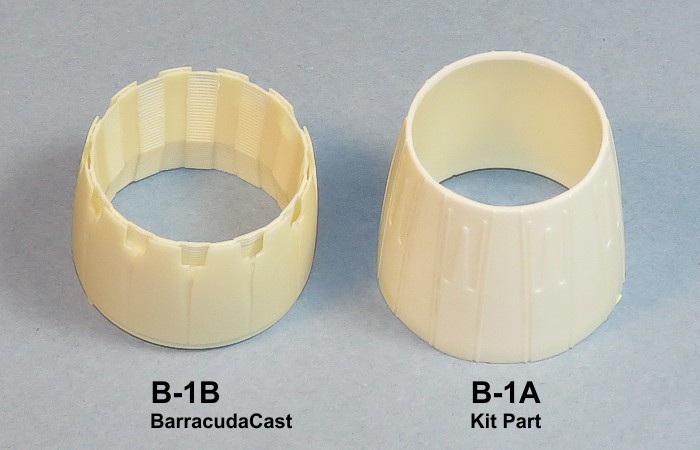
BarracudaCast also captures the thin splitter plate detail better than the kit parts. Here are the kit and resin pieces for comparison:
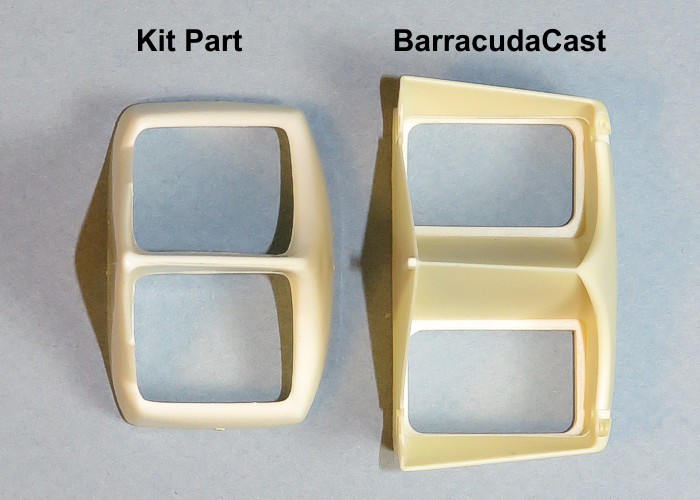
Note particularly the thickness of the splitter between the intakes. This was a big change between the B-1A and B-1B. They separated the intakes and added "S" bends in the ducting, with air baffles to assist the air flow. This helps to hide the B-1B engine faces from radar when viewed head-on, reducing the radar cross-section of the front of the aircraft.
Of note, the new resin intake pieces are not direct kit replacements without some modification. In order to capture the more squared shape of the B-1B intakes, BarracudaCast molded the first quarter inch of the engine nacelle as part of the intake pieces so you'll need to cut off some of the front of the nacelle, as follows:
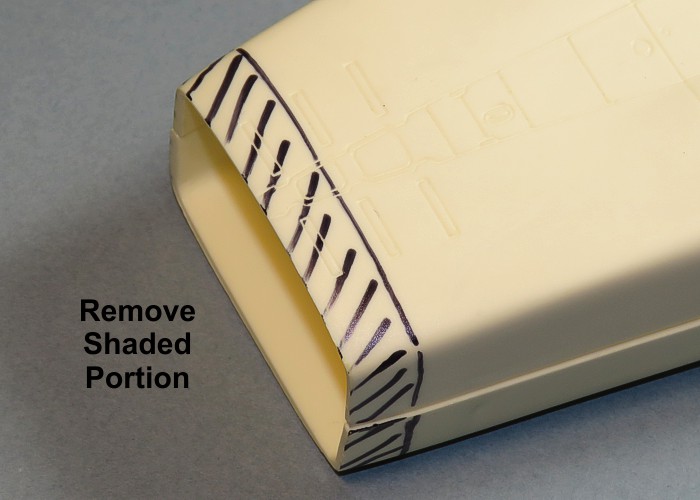
Kit Parts Modification
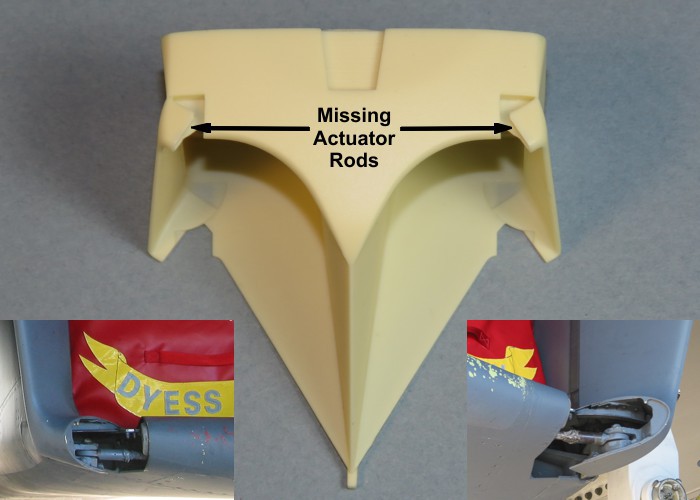
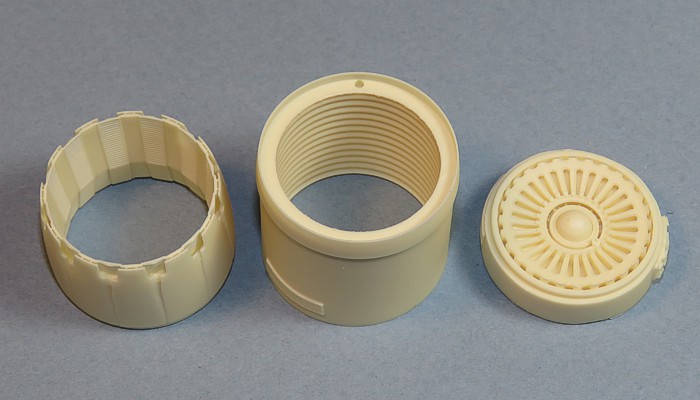
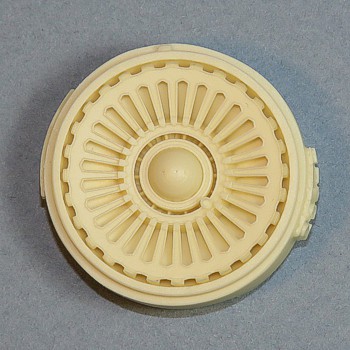
These last two images show details of the resin intake pieces. The intakes are designed to use the included intake covers. The ledge inside the intakes is for mounting the intake covers. Also, there is a missing actuator rod on each lip. The resin pieces have a mounting point molded in the lip. A small piece of plastic rod will represent the actuator. The set's instructions should have called this out.
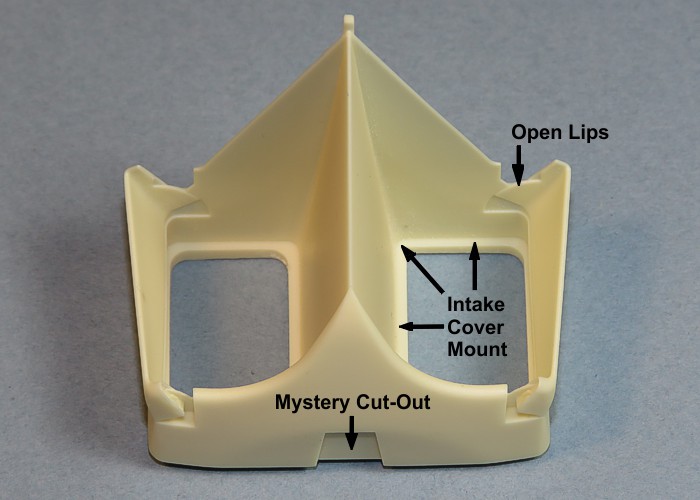
Resin Parts Details
I am unsure what the lower rear cut-out is for on the parts. The kit nacelles have scribing in this area, so perhaps the cut-out is to accommodate leaving a section of the nacelle in place with the scribing. If this is true, the scribing area is larger than the cut-out area on the part, so I am not sure about it.
This is a simple set to use. The only real down-side (for me) is that you have to use the intake covers. My problem with that is when the covers are installed, most often all the rest of the "remove before flight" items are also installed. I prefer my models to not have all that red stuff hanging all over them. I think I will try my hand at creating the intake ducts. If I fail, I can always still use the covers.
B-1B Engine Exhausts (with "Turkey Feathers")
The Revell kit provides the engine exhausts of the B-1A. They have rather long eyelids and a smooth overall appearance with just some minor ribbing details. Revell also provides no afterburner interiors, instead mounting the flame holders right into the exhaust cones. While that is a little better than seeing through the completed model, there really should be some depth inside the afterburners. BarracudaCast completely replaces the engine exhausts with the corrected style of engine eyelids. The eyelids are shorter in length and very noticeably segmented into individual eyelids. They also provide full depth afterburner details.
The BarracudaCast instructions, again, are a little lacking. The pictures indicate to simply remove the slag and then attach the parts to the kit. The written instructions also make mention to paint the engine interiors prior to assembling the exhausts - sound advice. Again, I wanted to include a little more descriptions here for everyone to benefit.
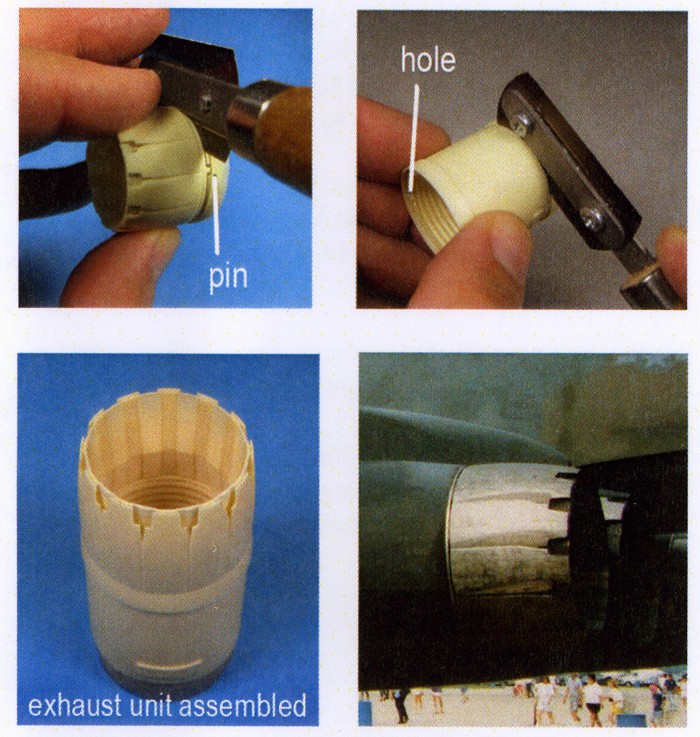
Resin Set Instructions
The pictures show a saw again as the tool to remove the slag. I also used a saw and had no real issue. The parts are thinner so the blade did not have to cut so deep to free the slag. It was a bit of a chore to carefully cut around and preserve the mounting pins on the eyelids parts. It was not hard, but one extra saw swipe and I would have needed to be recreating my own pin. The pin provides proper alignment of the eyelids to the afterburner flame holder. However, no mention is made in the instructions as to which portion is the "up" side of the exhaust. After looking at some reference pictures, the point with the pin is the top of the engine exhaust.
BarracudaCast has captured all the details I can see in my reference images. The afterburner flame holders are things of beauty! Here are the kit and resin pieces for comparison. There are substantial differences in the eyelids from the B-1A to the B-1B. For those noting that these look a lot like F-14B/D or F-16 block 30 engine exhausts, they are quite a bit bigger in diameter than F-14/F-16 exhausts.
Here are the pieces of one complete engine exhaust. The afterburner flame holders are things of beauty! The locator pin on the engine eyelid piece aligns to a notch in the back of the afterburner tube that receives the square locator on the flame holder. These provide positive alignment of the parts. As I wrote earlier, the pin on the eyelid piece is the top of the engine exhaust when mounted in the engine nacelle.
Resin Parts Details
There are modifications needed to the kit for the engine exhausts, too. The nacelle walls need some thinning to make space for the afterburner. Also, the fairings on the outside of the panels in front of the exhausts need to be sanded off and smoothed. Lastly, the seam where the resin meets the plastic needs to be totally filled and hidden. The whole panel in front of the engine eyelids is some type of boron epoxy that is all smooth without a panel line where the seam is found.
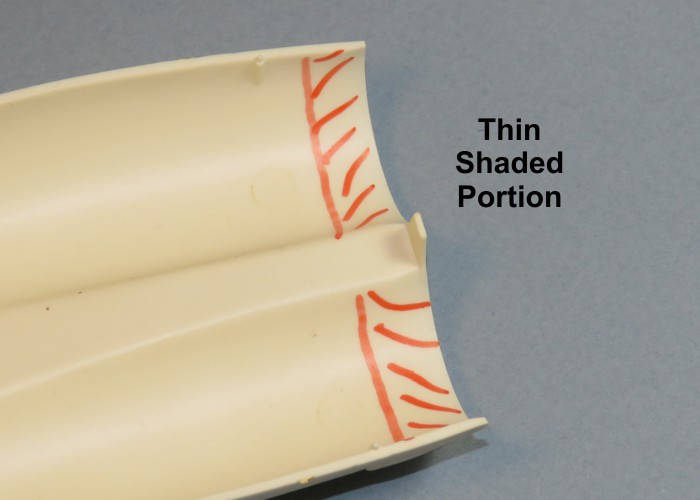
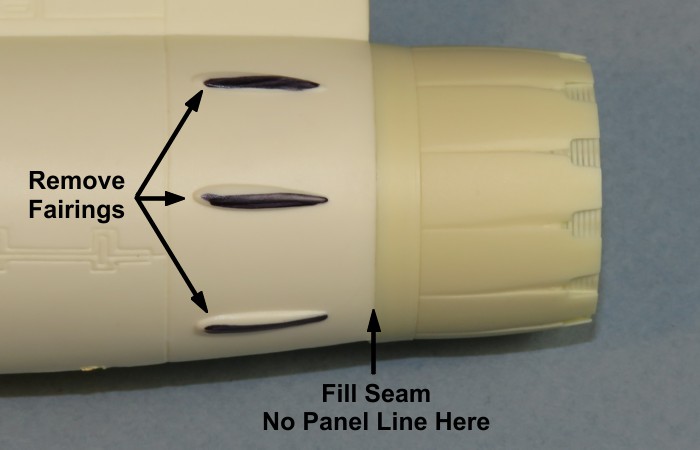
Kit Parts Modification
BR48238 - B-1B Resin Wheels
The wheels are cast well and have a good tread pattern all the way around them. There is a flat spot on the bottom where the wheels will sit on the ground.
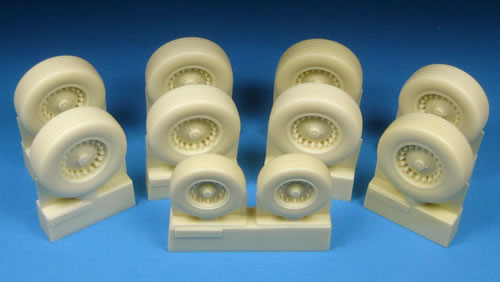
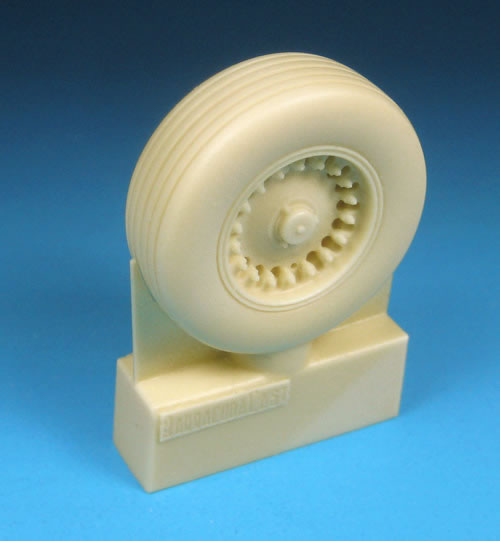
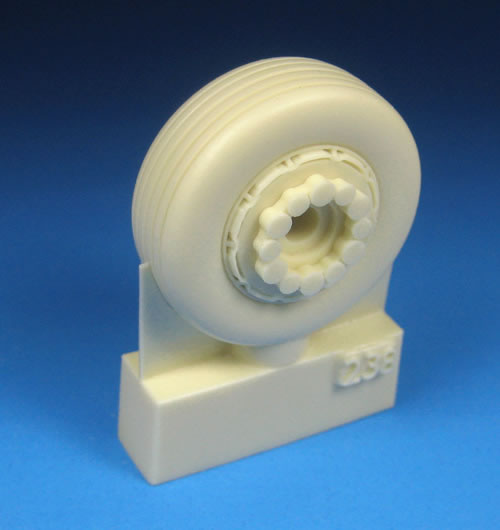
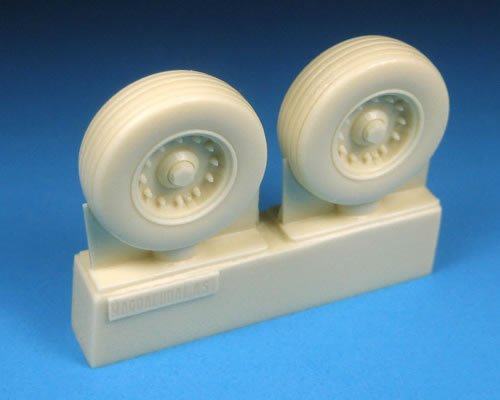
They are simple resin replacements of the kit's rubber tires on plastic wheel hubs. The resin wheels will need to have an axel created from brass wire, but that should not be much of an issue.
Conclusion
BarracudaCast did well on these sets, although in my opinion they should have included a bit more description in the instructions. Even so, I expect that any modeler capable of using these sets would likely not have any real difficulty figuring them out.
See the product announcement on HyperScale for more pictures of these resin sets.
I finally have the parts I need to correct the most glaring of the Revell misses in their huge B-1B kit. Of course, I still have way too many things I want to fix, enhance, and super-detail on my B-1B kit that it may still be a while before I tackle this monster. And, if I did build it, I have no idea where I could display it....
Recommended
Thanks to Barracuda Studios for the images and information
Barracuda Studio products are
available online from their website
Text and Images Copyright © 2015 by David W. Aungst
except Blue Background Images Copyright © 2015 by Barrcuda Studios
This Page Created on 10 November, 2015
Last updated
10 November, 2015
Back to
HyperScale Main Page |
 Home
| What's New |
Features |
Gallery |
Reviews |
Reference |
Forum |
Home
| What's New |
Features |
Gallery |
Reviews |
Reference |
Forum |