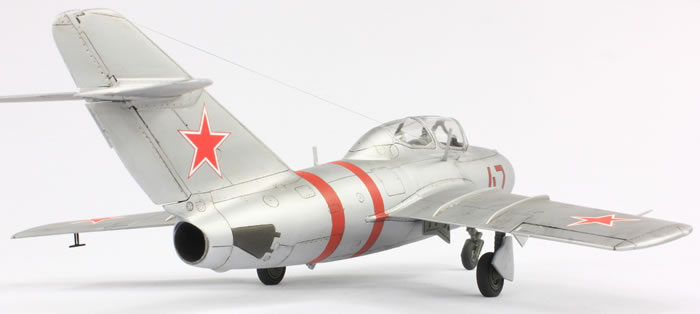
Trumpeter's 1/48 scale
MiG-15UTI
by Jon Bryon
|
|
Mikoyan-Gureyvich MiG-15UTI |

Hasegawa's 1/48 scale F-15E is available online from Squadron.com
Probably the best birthday present I ever received (and ever will receive) was for my 29th in 2007, when my wife surprised me with a weekend trip to Hong Kong from where we were living in China. Part of the activities included shopping for model aeroplanes; I've never been anywhere better in the world for model shopping than Hong Kong! In a small dingy shop off Dundas Street I spotted this kit at HK$99, or about £6.50. I'd never had any intention of buying the Trumpeter two-seat MiG-15, but at that price I couldn't pass it up.
Fast forward to summer 2014 and I'm dreaming about which model to build next. My thoughts drift to Russian jets and the pleasing numbering system they seem to use...and I have a fair number of MiGs in my stash...so why not build what I've got in numerical order? And the earliest I've got is a MiG-15UTI, so this is where I shall start.
Trumpeter's MiG-15s date from 2002 (at least that's the date printed on the box) and this issue is fairly nicely moulded. Surface detail is precise, if rather chunky. Two decal options are provided: a Pakistani Midget and one purporting to be white 15 from the Soviet Air Force. Puzzlingly, the example in the box art (red 18) is not provided...more on this later.
Chatter on the modelling boards indicated that this kit is considered pretty accurate; indeed, more so (according to some) than the Tamiya MiG-15s. However, digging a little deeper revealed that the tail is not quite right because the leading edge isn't swept back enough. A Bulgarian company called Cold War Studio makes a resin replacement and I duly purchased one direct. It cost 9 Euro including postage and service was quick and friendly.
With all this, it was time to start construction. This kit does not have a good reputation when it comes to fit, so I was pleasantly surprised to find that it went together without any major issues. Having said that, some parts are not well-moulded and do need cleaning up. I can see that if this is not done the fit will appear to be bad. An example is part A12, which is the nose wheel bay. This needs a lot of cleaning up, but once done, the fit of the inner intake and the nose ring to the main fuselage is excellent. I also ground away the light (moulded in solid opaque plastic) at the front of the intake splitter and built it up using superglue which I then polished to a clear finish. It's not perfect, but much better.
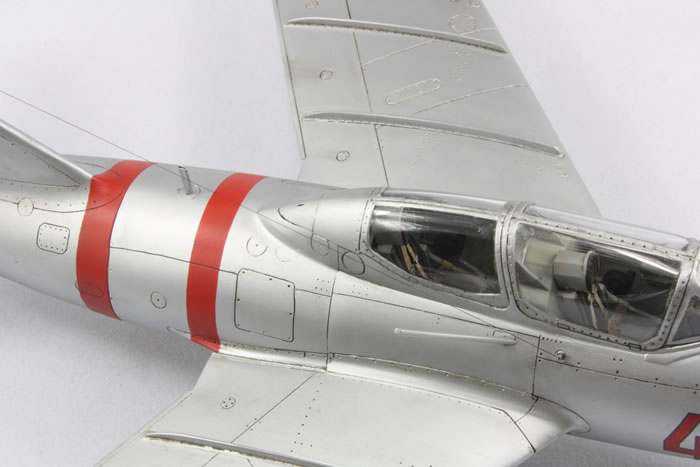
The cockpit is adequate if rather simple. The seats are missing their ejection handles and belts, but since I was going to close the canopies, I only added the latter using some Eduard pre-painted photo-etched items. The instrument panels are meant to be a sandwich of opaque and clear plastic parts with printed acetate dials in between. Unfortunately this is pretty useless as the clear panel is devoid of any surface detail. In the end I abandoned the acetate and added instrument bezels using Reheat photo-etched parts. Once painted Lifecolor Deep Cockpit black I added a white decal stripe down the centre of each panel; this was an anti-spin aid. The cockpit parts go together fine, although I would leave off the internal glass panel between the front and rear cockpits for now, along with its frame; it'll only get knocked off later.

A complete engine is provided and the fuselage is split fore and aft to enable it to be displayed. I was not interested in this and so didn't bother with the engine at all. The exhaust can be installed with the turbine (part D5) independent of the main body of the engine. Given that MiG-15s are bad tail sitters, the less stuff in the rear fuselage, the better. The fuselage fits together very well if the instructions are ignored and complete sides are first assembled before joining left and right halves. However, before doing this, I removed the tail along the relevant panel line, and then joined the fuselage halves together.
The fuselage needs two big inserts added. The first under the cockpit is a relatively poor fit. Before adding it I installed four 1p coins as nose weight, which proved to be (just) enough. I faired the insert in with superglue and then rescribed the panel lines. The other insert is around the airbrakes, and again is not a perfect fit and needs some flash removed. Lots of superglue and careful rescribing left me with a satisfactory result.
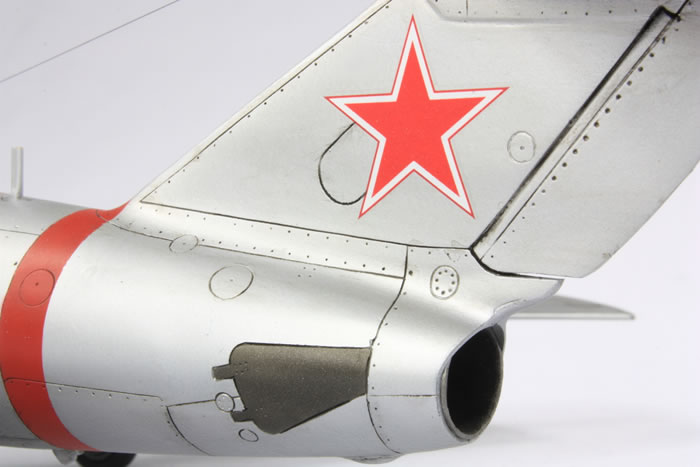
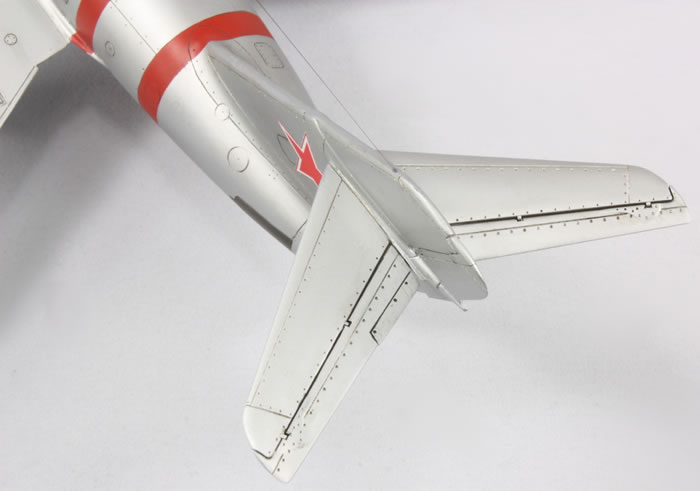
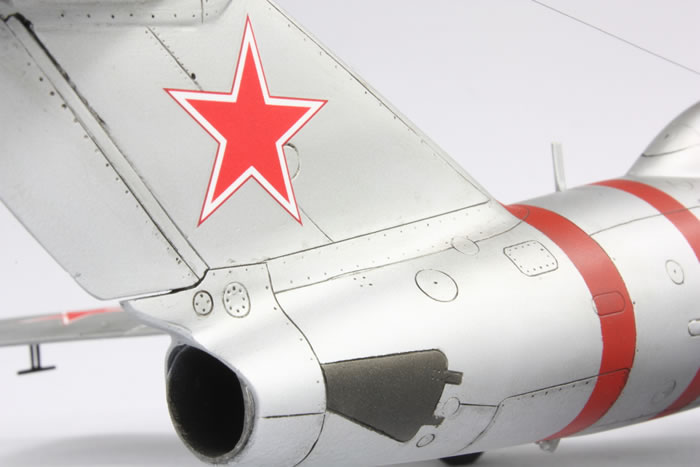
The Cold War Studio tail is nicely moulded with separate rudders. The resin is hard but, as far as I can make out, pretty strong. The surface detail is petit, but rather inconsistent in some places. The resin doesn't polish up very easily and I never quite removed all of my sanding scratches. Some surface detail I filled in and rescribed. The fit along the length of the fuselage is excellent, but the main problem is that the tail is much, much thinner than the base on the fuselage that it's meant to fit into. Since this is going to be finished in silver, that troubled me as this is one serious joint that needs to be dealt with and the surface detail would be none too easy to reinstate. Deep breath and lots of superfine white Milliput.
The problem was made worse by the rudder. It wasn't long enough to meet the lower fuselage, but short by about 4mm. I ended up hacking the bottom off the kit's rudder and using that to make up the difference. Unfortunately, the trailing edge of the resin and my added plastic didn't quite add up and I used superglue to fill the gap. This didn't work very well as the trailing edge is so fine...the upshot was I ended up reshaping the base of the rudder quite a lot, and thus it is not accurate at all. Which is ironic, since the whole point was to end up with a more accurate tail! In all honesty, the difference between the resin replacement and the Trumpeter original is rather marginal to my eyes, and were I to do this all over again, I would have just left the kit tail alone.
Eventually, after a lot of sanding and polishing I had a joint between the tail and the fuselage I was very happy with. That was the easy bit though...now came rescribing the panel lines. Using Dymo labelling tape, I gingerly used an RB Productions photo-etched scriber to add in the panel line between the fuselage and tail. Later priming showed I had made a good job of it, and I breathed a sigh of relief.
The wings were next. These fitted together okay, but out of alignment along the span. I attached one to the fuselage and then used a Lego jig to ensure the other wing fitted square and level. The gaps between the wing and fuselage on the underside were enormous. Milliput came to the rescue again, as it did for the minor gaps between the tailplanes and the fin. There are optional inner wing fences to cater for notched and unnotched options. I used the unnotched ones matching the profile I was using. Most photos seem to show this, but both were possible for Midgets.
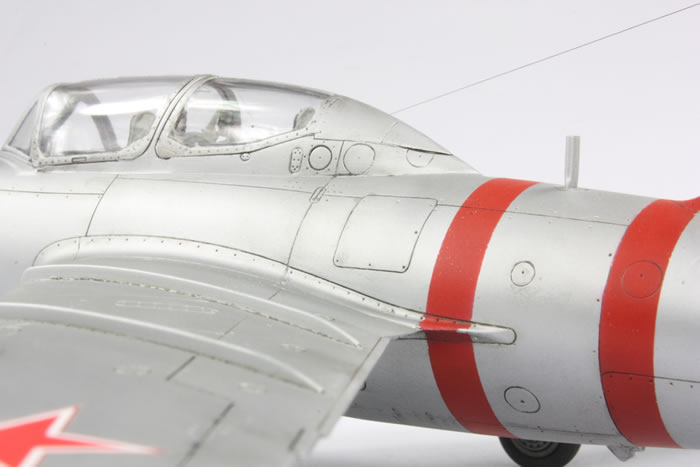
I now had a pretty complete airframe. The rudder shape was poor, and during all the filling and sanding, I'd lost more of the trailing edge, as well as over-sanding the lumps (mass balances?) at the extremities of the elevators and top of the rudder. For the airframe I was modelling I needed to add an antenna (SRO-1) on the fuselage spine. For this I used Albion Alloy tubing flattened in some pliers. Another omission in the kit is some kind of protrusion (a vent?) from the lower fuselage, between where the canopy is and the tail. I fashioned this from the tail tip of a Hasegawa A-4. It's slightly overscale, but will do. The gun barrel was also replaced with brass tubing.
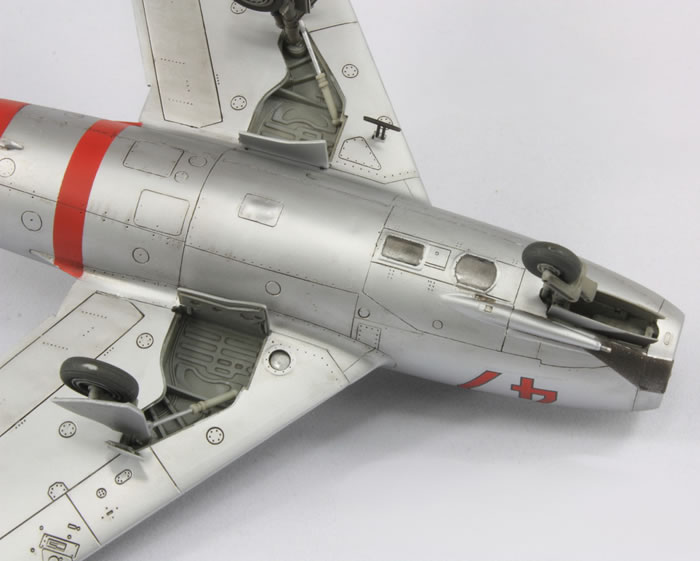
One remaining thing of note is that, whilst the fit of the nose/intake assembly to the fuselage is good, the view into the intake isn't great, particularly around the nose wheel bay, and clearly doesn't match reality.
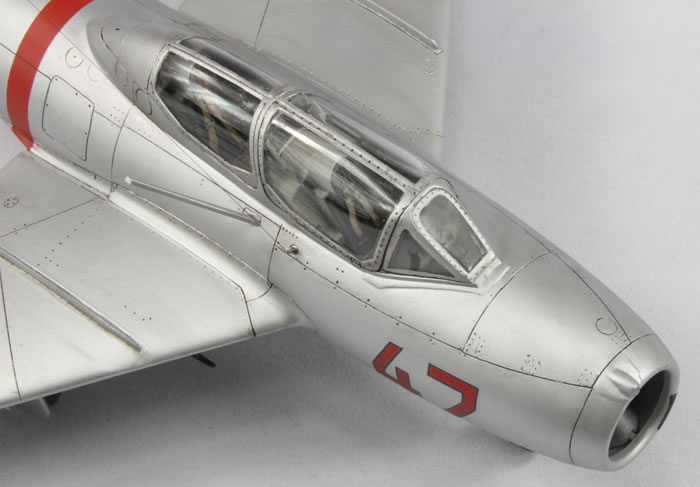
Because of my recurrent problems with canopies recently, I next thoroughly washed the model and left it to dry. I dipped the canopies in Johnson's Klear and then attached them to the fuselage from rear to front. They fitted very well. The rear canopy went on first. The dividing arch that comes next is opaque plastic and didn't fit so well. Once I'd attached the front canopy and windscreen I used Milliput to fair in the middle arch.
Final items before painting included the wire antenna mount under the front canopy; the kit part is overscale so I used a very narrow piece of Albion Alloys brass tubing. The larger mast behind this was pinned to the fuselage, but not glued so I could attach it after painting. The kit wing pitot was also discarded in favour of a scratch built one made from telescoping brass tubing (Albion Alloys again).
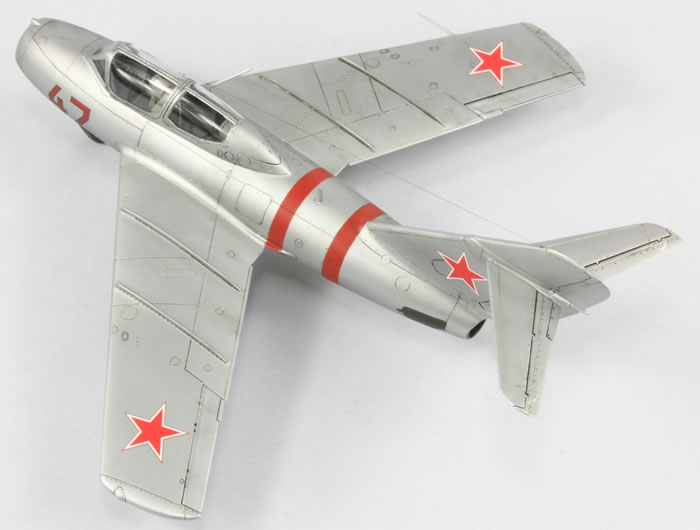
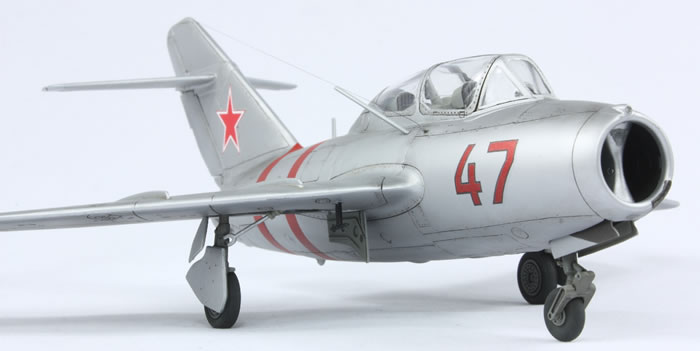
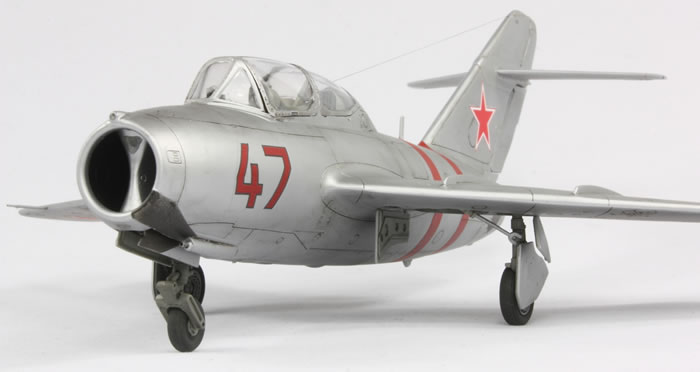
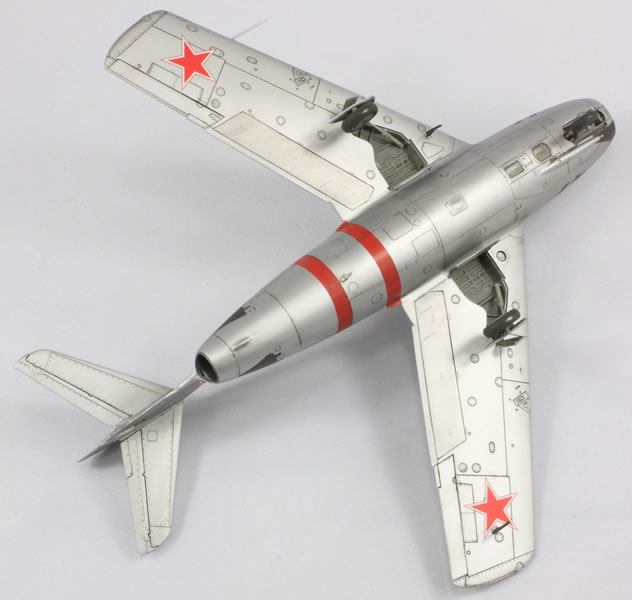
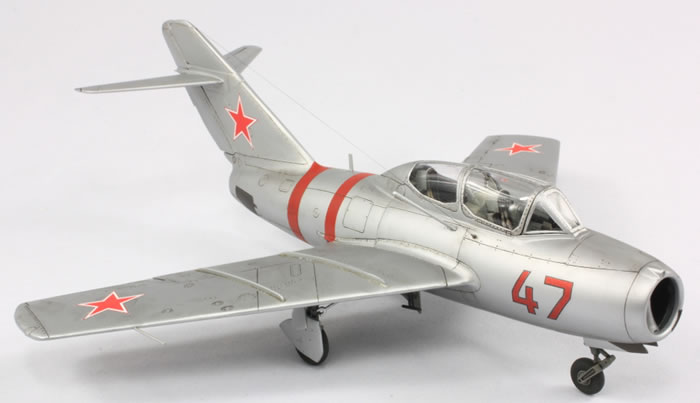
By this point I had eventually figured out what markings I was going to use. I insist my MiGs carry the red stars of the Soviet Union, so the Pakistani option was instantly ruled out. The other kit option was useless; as far as I know they don't represent a genuine operational, but rather a private warbird, and I didn't want to model a warbird. To my knowledge, no aftermarket decals for Soviet Midgets exist, so I spent ages looking at photos and profiles.
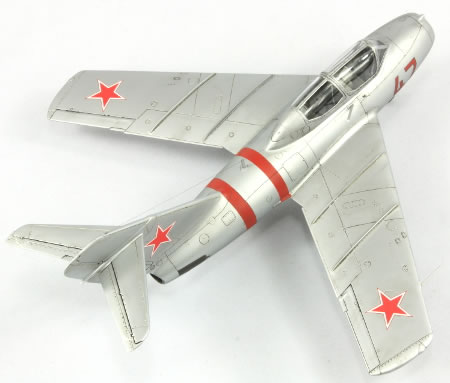
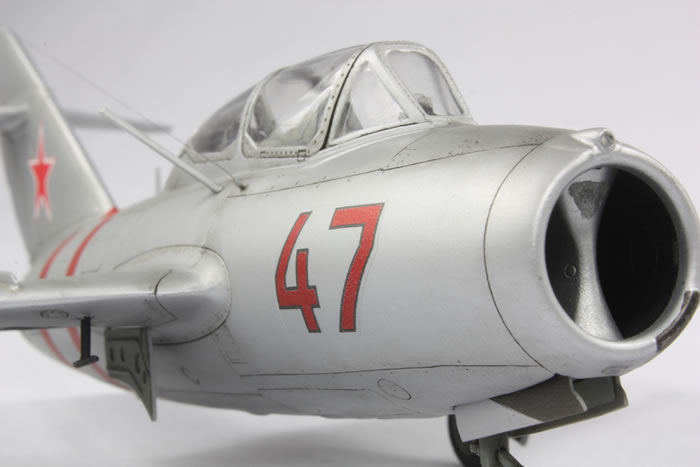
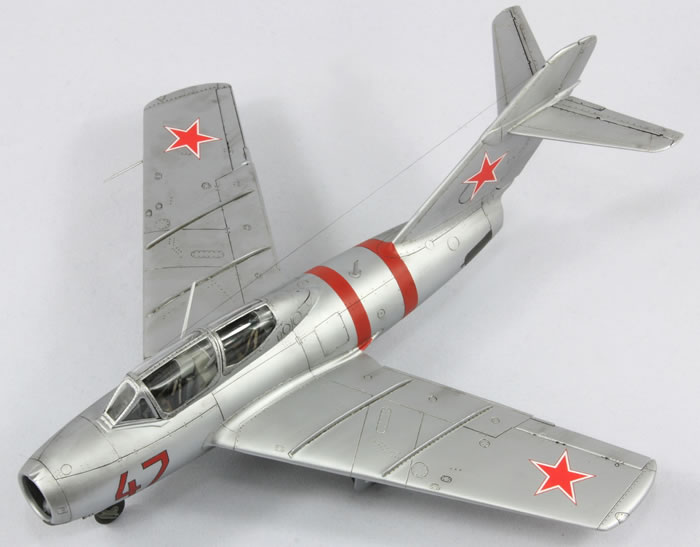
Because of when the MiG-15 was in Soviet service, photos were mostly in black-and-white, and I couldn't determine the colour of the bort numbers. In the end, I went with a profile from Yefim Gordon's 'Famous Russian Aircraft MiG-15', red 47 with red fuselage stripes and crooked stars on the tail. I don't like using profiles since I prefer a photo to work from, but this is what I went with.
I've recently purchased a new kind of airbrush to me: an Iwata RG-3 large airbrush. I gave this a run out with Mr Surfacer 1000 as the primer, and I can see myself liking this kind of airbrush for primers, single-colour finishes and clear coats (with one exception, as we shall see...).
The joints were all pretty good, so I polished the primer with very fine MicroMesh (the aim of using the RG-3 is to spray primer smooth enough to not need this step, but I was just starting to use it and I hadn't managed to spray it perfectly smooth). I would have liked to use Mr Color Silver (8) but had run out. I tried ordering some from MDC, but got muddled up and ended up with three pots of Mr Hobby Color Silver (8). I thought I'd give this a go, but it was horrible. Very smooth, but the grain is too large and it looks glittery.
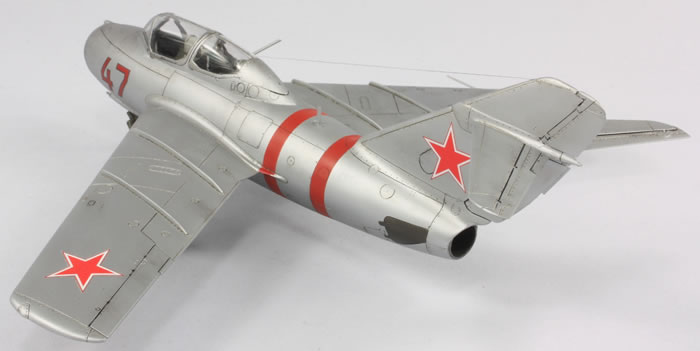
I fell back on Alclad II White Aluminium, again applied with the RG-3. This operates at pressures probably too great for Alclad to work with properly, but I was happy. A smooth aluminium finish with good joints. Aside for some scratches on the tail tip (which I was too nervous to deal with properly – I didn't want to detach the tail by accident) it was looking good.
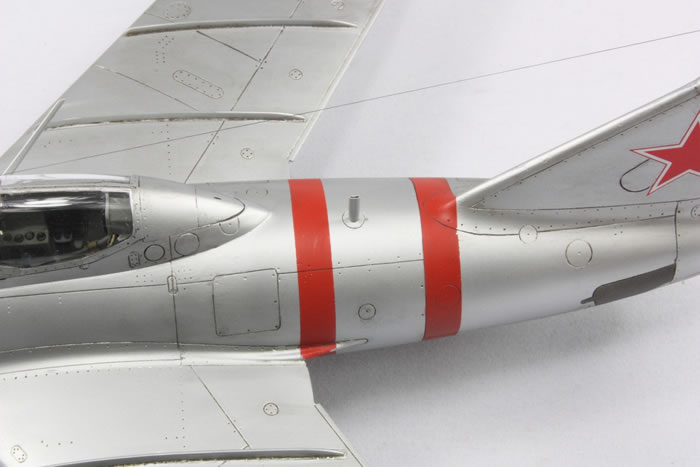
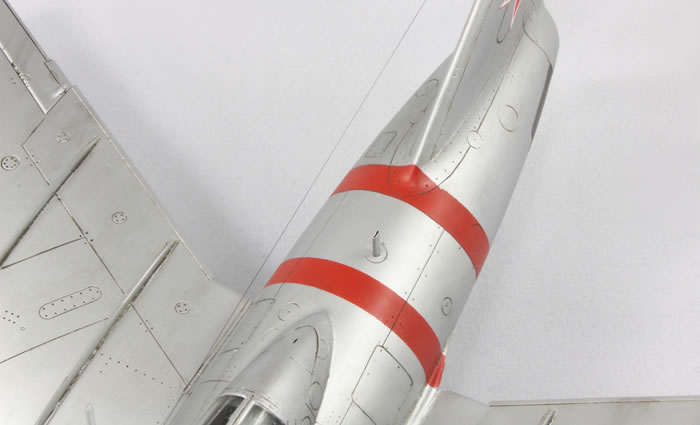
I carefully masked the stripes for the fuselage bands (something I dislike doing since it's hard to get perfectly parallel stripes, and their positioning was tricky over the fin and wing roots) and used Mr Color 329. I knew I was never going to get all the reds (stars, stripes and bort numbers) to match, but this was the closest I had. I also masked off the airbrakes and the panel in front of the gun and sprayed with Mr Color Steel 18. Too dark, but it'll do.
And then came the disaster (there's one with every model!). I loaded up the RG-3 with Johnson's Klear, since that's the clear coat I've been using for 20 years between the paint and the weathering, and sprayed it on. Not a good idea. The material flow for the RG-3 is far too great and Klear is not designed to be sprayed on. It just blew all over the model in massive runs. What I should have done is rush to a sink and wash it off straight away. What I actually did (inexplicably) was press on.
So I ended up with a horrible, horrible clear coat with massive runs everywhere. Once dry I tried sanding it out. It turns out Klear doesn't sand well at all. In the worst areas I sanded back to the plastic, but it proved impossible to feather the Klear-coated areas into the surrounding paintwork. In the end I admitted defeat and just reapplied the Alclad over the areas I had sanded. It's all pretty ugly; I'll chalk that one up to experience.
Somewhat deflated I pressed on. Since it was never going to look great I didn't spend long on the weathering. I started with Ammo's dark grey panel line wash. This doesn't work well over silver: it's not intense enough and takes forever to dry. I also tried Tamiya's black panel line wash, but I'm increasingly disliking this product: it dries too fast and is hard to remove. In the end I went back to black oil paint and white spirit. I think this really is my favourite for silver aircraft. The problem with silver finishes is that if panel lines that are not filled with some kind of wash they glint in a way I find very unattractive, so I do prefer a good, dark wash.
The decals were more of a problem. The kit star decals were used. I couldn't get them to work with any decal solvents or setting solutions (Microscale, Mr Setter/Softer, Daco Strong) and they remained unmoved. Very thin and nice, but absolutely no desire to settle into recessed detail. This, unfortunately, is very obvious on the finished model.
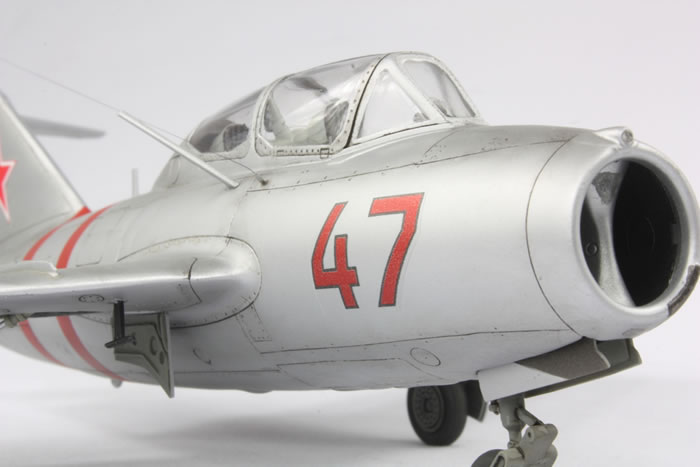
The numbers were a bigger problem. Going through my stash and unused decals turned up nothing suitable I could use. I was going to have to make my own. I have always been very sceptical about homemade decals. I only have a cheap inkjet and I was sure something would go wrong; either decal paper would jam my printer or the ink would just bead and/or smudge. But without any other options I went ahead and ordered some Expert's Choice (Bare Metal Foil) clear decal paper from Hannants, along with some Microscale Liquid Decal Film.
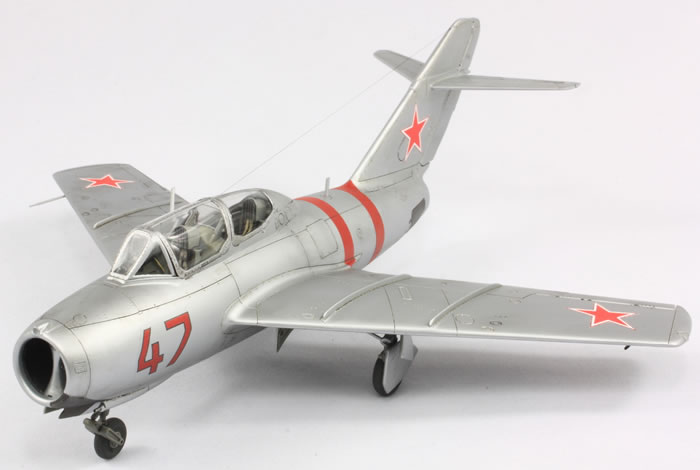
I loaded the profile into a free vector graphics drawing program (Inkscape) and traced over the 47 with black and filled it in red. By printing several trial copies on regular paper I was able to adjust the size to something that would work. After plucking up my courage I printed eight copies of the number 47. No jamming, no beading, no smudging. After several days I brushed on the liquid decal film, which levels beautifully and dries extremely thin. I then cut out a couple and applied them to the nose, using Microset and Microsol.
It worked very well. The edge of the film is more apparent than normal, but I can live with it for the sake of getting custom decals! The only problem is that red is a little translucent and so the resulting bort number looks a little metallic, but overall I am very happy with my first attempt at making decals. If I was feeling fussy I could have simply applied another decal over the top to make the red less shiny, but I didn't bother.
So only eight decals used in all. I then added all the other bits, starting with the landing gear. The nose gear fits positively; the main legs less so. I used Tamiya Extra Thin and a Lego jig to give me time to get everything level. The undercarriage doors all fitted fine.
The antenna mast was attached, as was the wing pitot and the two radio altimeter antennae under the wings (painted black). I wanted a fairly flat finish, befitting an operational aircraft in a silver lacquer finish, and used my usual mix of Tamiya Semi-Gloss and Gunze Mr Hobby Color Flat, thinned with Mr Leveling Thinner. This, unlike the Klear, did spray beautifully through the RG-3.
And then it was the final steps: Take a strand of my wife's hair, run it under a black permanent marker and attach it from the canopy to the tail (technically it passes the wrong side of the larger antenna). Add in the gun camera window using Kristal Klear (I couldn't get the kit part to fit). And remove the masking from all the transparent parts: hooray! No fogging, and relatively dust free.
So now it is on my shelf. The resin tail is a luxury I wouldn't avail myself of next time, but the kit is good, and I recommend it. If only I hadn't had the Klear disaster I would be delighted with this. The next model will be disaster free. Next time...
To see more articles like this please visit my website at www.jonbryon.com/model_index.html.
Text and Images Copyright ©
2014 by Jon Bryon
Page Created 25 May, 2014
Last Updated
25 May, 2015
Back to
HyperScale Main Page

|
 Home
| What's New |
Features |
Gallery |
Reviews |
Reference |
Forum |
Search
Home
| What's New |
Features |
Gallery |
Reviews |
Reference |
Forum |
Search