Martin Mariner GR.1 Conversion for the Minicraft PBM-5A Kit
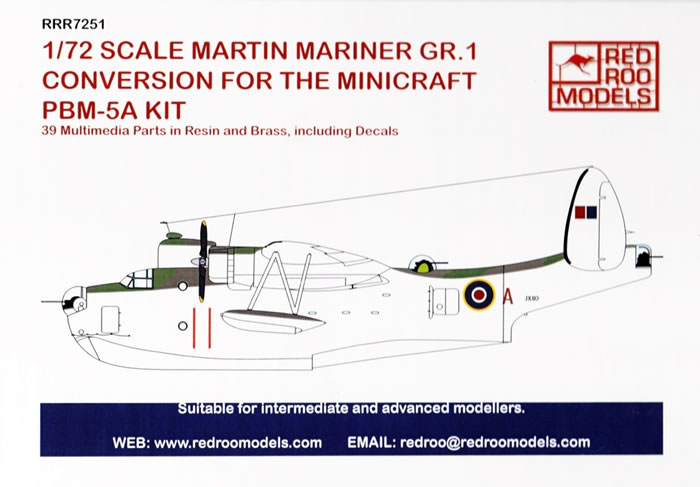
Red Roo Models, 1/72 scale
S u m m a r y : |
Catalogue Number: |
Red Roo Models Item No. RRR72154 - 450-lb Depth Charges (British Pattern) |
Scale: |
1/72 |
Contents & Media |
70 parts in total; mainly resin, with some cast metal, brass and wire components, plus decals for one scheme with serial numbers for four aircraft |
Price: |
$40.91 directly available from RedRoo Models |
Review Type: |
First Look. |
Advantages: |
Well-researched, extremely thorough instructions, every item and miscellaneous material needed is supplied, and all the components are very good quality. The inclusion of jig for prop assembly and a scribing template are a nice touch. |
Disadvantages: |
None noted. |
Conclusions: |
This is an impressive package that addresses all, and perhaps even more, than would be reasonably expected in a conversion set. The thorough instructions are made even better by their logical linkage to Minicraft’s instructions, and because they correct inherent accuracy and constructional faults associated with the Minicraft kit.
This Mariner set represents very good value in my view, either to convert and correct the Minicraft PBM-5A, or improve the Rareplanes’ vac-form kit as is my intention. I highly recommend this GR.1 and the other PBM Mariner sets by Red Roo Models. |
Reviewed by
Mark Davies

HyperScale is proudly supported by
Squadron.com
The Martin PBM Mariner was a patrol bomber flying boat of World War II and the early Cold War period. It was designed to complement the Consolidated PBY Catalina in service. A total of 1,366 were built, with the first example flying on 18 February 1939 and the type entering service in September 1940.
In 1937 the Glenn L. Martin Company designed a new twin-engined flying boat, the Model 162, to succeed its earlier Martin P3M and complement the PBY Catalina. It received an order for a single prototype XPBM-1 on 30 June 1937. This was followed by an initial production order for 21 PBM-1 aircraft on 28 December 1937.
To test the PBM's layout, Martin built a ? scale flying model, the Martin 162A Tadpole Clipper with a crew of one and powered by a single 120 hp (89 kW) Chevrolet engine; this was flown in December 1937. The first genuine PBM, the XPBM-1, flew on 18 February 1939.
The aircraft was fitted with five gun turrets, and bomb bays that were in the engine nacelles. The gull wing was of cantilever design, and featured clean aerodynamics with an un-braced twin tail. The PBM-1 was equipped with retractable wing landing floats that were hinged outboard, with single-strut supported floats that retracted inwards to rest beneath the wing, with the floats' keels just outboard of each of the engine nacelles. The PBM-3 had fixed floats, and the fuselage was three feet longer than that of the PBM-1.
The first PBM-1s entered service with Patrol Squadron Fifty-Five (VP-55) of the United States Navy on 1 September 1940. Prior to the outbreak of World War II, PBMs were used (together with PBYs) to carry out Neutrality Patrols in the Atlantic, including operations from Iceland. Following Japan's attack on Pearl Harbor, PBMs were used on anti-submarine patrols, sinking their first German U-boat, U-158 on 30 June 1942. PBMs were responsible, wholly or in part, for sinking a total of ten U-boats during World War II. PBMs were also heavily used in the Pacific War, operating from bases at Saipan, Okinawa, Iwo Jima and the South West Pacific.
The United States Coast Guard acquired 27 Martin PBM-3 aircraft during the first half of 1943. In late 1944, the service acquired 41 PBM-5 models and more were delivered in the latter half of 1945. Ten were still in service in 1955, although all were gone from the active Coast Guard inventory by 1958 (when the last example was released from CGAS San Diego and returned to the U.S. Navy). These flying boats became the backbone of the long-range aerial search and rescue efforts of the Coast Guard in the early post-war years until supplanted by the P5M Marlin and the HU-16 Albatross in the mid-1950s.
PBMs continued in service with the U.S. Navy following the end of World War II, flying long patrol missions during the Korean War. It continued in front line use until replaced by its direct development, the P5M Marlin, with the last USN squadron equipped with the PBM, Patrol Squadron Fifty (VP-50), retiring them in July 1956.
The British Royal Air Force acquired 32 Mariners, but they were not used operationally, with some returned to the United States Navy. A further 12 PBM-3Rs were transferred to the Royal Australian Air Force for transporting troops and cargo.
The Royal Netherlands Navy acquired 17 PBM-5A Mariners at the end of 1955 for service in Netherlands New Guinea. The PBM-5A was an amphibian with retractable landing gear. The engines were 2,100 hp (1,600 kW) Pratt & Whitney R-2800-34. After a series of crashes, the Dutch withdrew their remaining aircraft from use in December 1959.
Source: Wikepedia
Previous PBM Kits in 1/72 Scale
There have been four PBM kits of any consequence in the One True Scale that I am aware of. These are by:
-
Execuform - A vac-form from 1981, I have read it is has a mixture of a PBM-1 and 3 features and other accuracy issues.
-
Rareplanes - A vac-form from 1987 with white-metal detail parts; and this company’s last kit release. It can be built as a PBM-3C, 3R and 3S, or as a PBM-5. I have one; it looks the part, and has very nice delicate raised surface detail. It was praised by the late Alan W. Hall in a build-review published in Scale Aircraft Modelling magazine’s February 1988 issue.
-
Mach 2 - A limited-run injected kit from 2001 that can be built as either a PBM-3 or 5. It has rather indifferent moulding; poor quality detail and clear parts, and like most Mach 2 kits it’s a bit of pig to build. Many regard it to be expensive for what you get. The kit that was reviewed here on HyperScale by Brett Green in July 2001.
Minicraft - A long-run injected kit from 2013. Not perfect in outline shape, it has good fit other than the wing to hull join; it is a modern, nicely-detailed, and generally worthy kit of this interesting flying boat. Check out one built by Carl Knable here on HyperScale.
Minicraft’s PBM Mariner kit was eagerly awaited for what seemed like ages; in fact, I think around a decade passed between its announcement and realisation. Somewhat surprisingly, Minicraft kitted the last production version, the PBM-5A amphibian; of which only forty were produced. In many respects this is a pity, as many would have preferred to model the more numerous and widely used PBM-3 and PBM-5 pure flying-boat variants.
Minicraft may have other versions planned for release, but I for one am not anticipating any new releases soon, given the time it took for them to release their PBM-5A. This said, a PBM-5 should be easy enough to cater for by providing blanking panels over the 5A’s undercarriage, but PBM-3 versions will need different engines and other more subtle changes.
Aftermarket Opportunity
Minicraft’s decision has left the field wide open for aftermarket conversions to cater for the other versions, and I can think of no better company to do so than Australia’s Red Roo Models. For me, Red Roo is almost a byword for thoroughly researched and comprehensive conversions. At times they retain a hint of cottage industry flavour, but they deliver the goods in way that is rarely equalled. To date they have released three sets intended for Minicraft’s PBM-5A kit. These are:
I bought the Mariner GR conversion to provide improved parts and detail to a Rareplanes' PBM Mariner vac-form kit I have. This is a good kit, and I like the character its subtle raised surface detail provides. As such, it seems as good a basis for an RAF Mariner GR.1 as Minicraft’s PBM-5A, especially as the exorbitant overseas postage costs most US retailers charge has dissuaded me from buying the Minicraft kit to date.
The Conversion Set
The conversion components come supplied in a sturdy top-opening box, and are distributed between several zip-lock plastic bags. The resin components are very good, and are cast by Czech Master Resin Moulding & Casting.
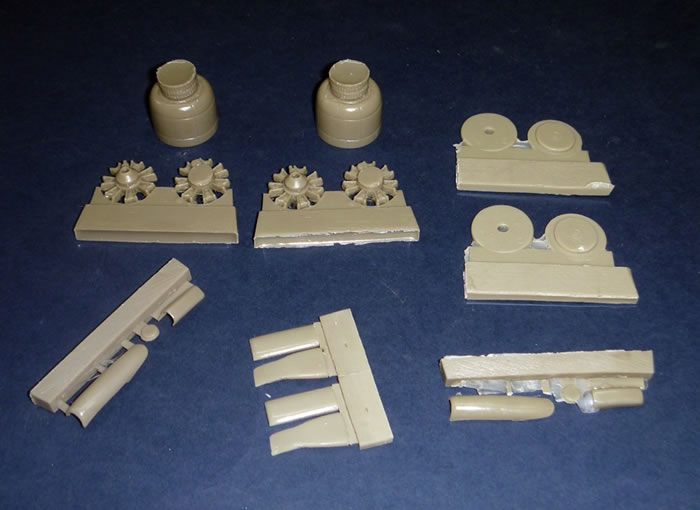
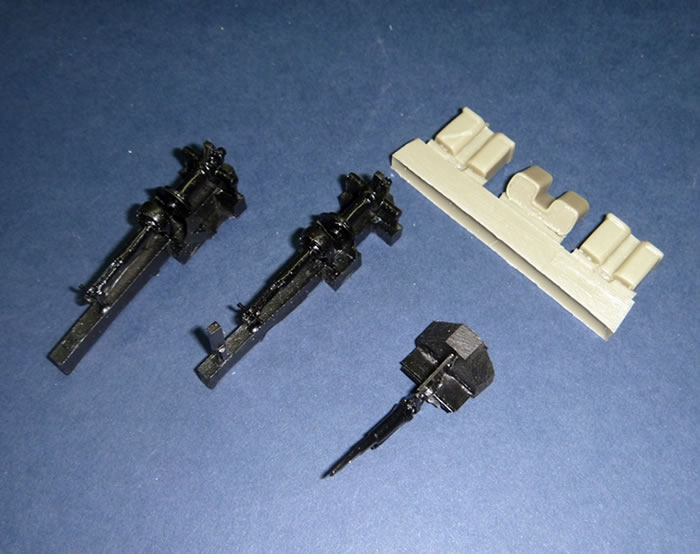
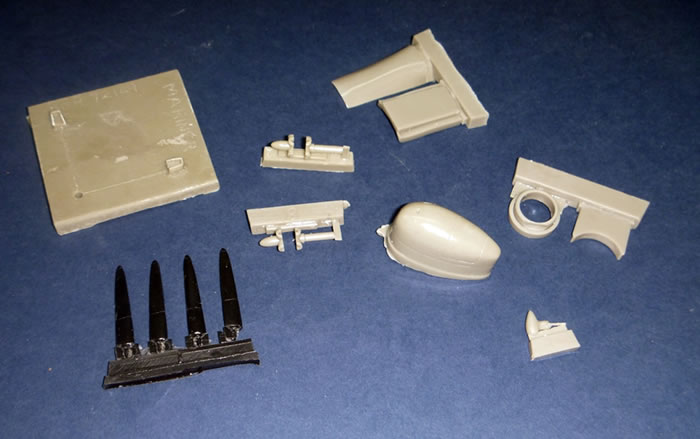
Most parts are in olive-green resin, but those needing extra strength, such as the beaching gear, are cast different black resin.
Some hull windows are supplied as clear resin that will benefit from a quick polish and lick of Future.
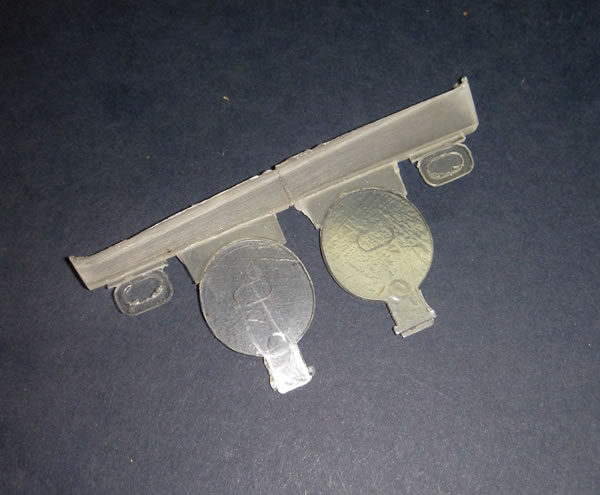
A nice touch is the inclusion of jigs to aid propeller assembly and scribing of rudder trim-tabs.
There is a small bag containing some cast metal parts (possibly brass?), plus a brass shim and some wire that will be used in the conversion.

The decals appear to be of excellent quality too. They are printed by the Czech company Boa, whose brand-name may be familiar to airliner modellers, although they do affair amount of third-party work as well.
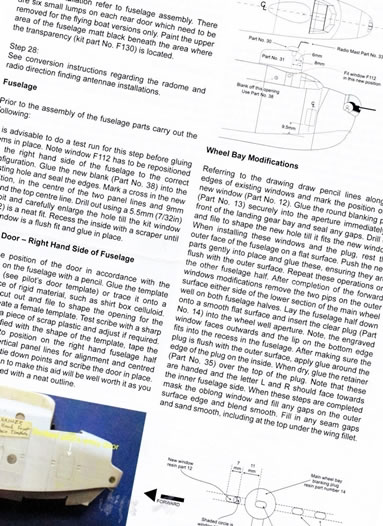
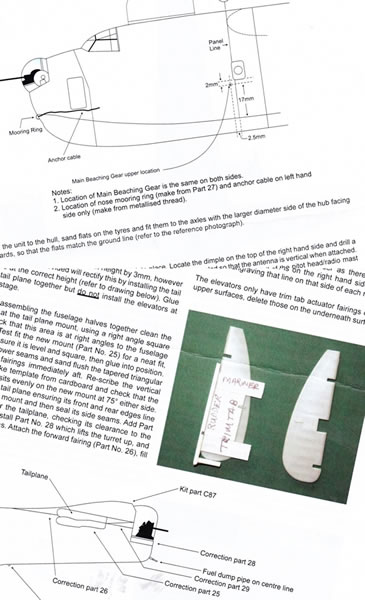
The instructions consist of twelve stapled A-4, and use a combination of colour and monochrome images, and include a parts map. They are also replete with diagrams and dimensions regarding various steps in the conversion process. Other illustrations include photos of the real aircraft and a colour-printed 3-view painting and markings guide. A feature of Red Roo conversion instructions is their highly detailed written descriptions of each construction stage. A nice touch is the way Red Roo identifies Minicraft’s instructional steps, and then advises when reference needs to be made to their conversion instructions. Red Roo also gives advice on how to avoid assembly problems inherent in the kit, such as where areas need to be trimmed in order to ensure a correct wing to hull fit.
The parts provided by this set include cowlings, engines, air-intakes, engine nacelle plugs, propellers (with jig), various windows, beaching gear with flotation tanks, tailplane mount and fairing, rear turret extension ring, tailplane to rear turret fairing, RDF antenna radome, large radome, radio mast, radio altimeter antenna, and trim-tab scribing template. The wire is provided to scratch-build tie-down rings and the like, whilst the brass shim is to make lading light glare shields. There is also a paper template for locating the position of a side door that needs to be scribed in. As I have said, Red Roo is nothing if not thorough! There is also a sheet of decals, with national insignia, squadron letter, and serials for four different aircraft.
I shan’t describe the conversion blow by blow, but instead will list the instructional headings to give some idea of Red Roo’s approach to it. Under each is a highly detailed, and sometimes lengthy description of what needs to be done, and includes specific advice on things like drill-bit sizes needed, or specific techniques to use. The step headings are:
-
Assembly Sequence (overview linking Minicraft’s and Red Roo’s instructions).
-
Fuselage.
-
Pilot’s Door – Right Had Side of Fuselage.
-
Wheel Bay Modifications.
-
Front Ball Turret.
-
Tail Plane Installation (corrects kit inaccuracy).
-
Rudder Trim Tab.
-
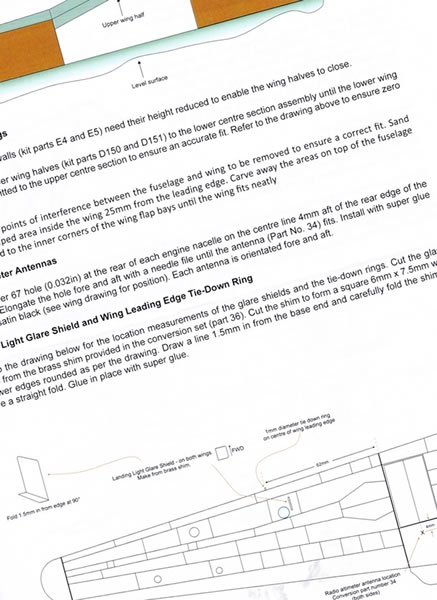
Assembling The Wings (advises fix for incorrect fit of kit parts).
-
Radar Altimeter Antennas.
-
Landing Light Glare Shield and Wing Leading Edge Tie-down Ring.
-
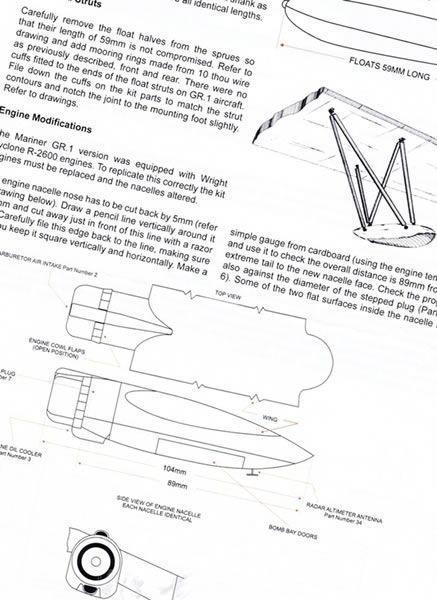
Floats and Struts.
-
Engine Modifications.
-
Propeller Assembly.
-
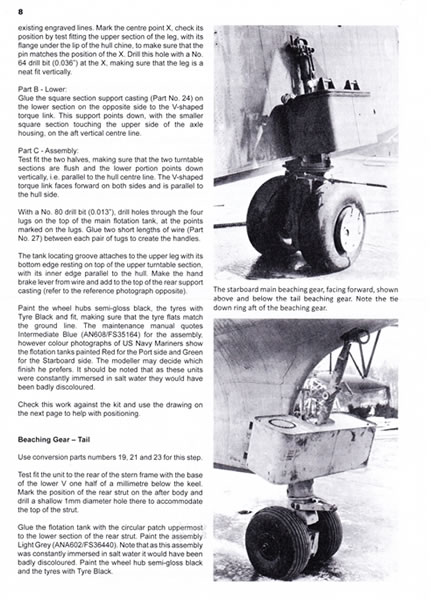
Beaching Gear - Main.
-
Beaching Gear – Tail.
-
Radome.
-
Antenna Cables.
As modellers, many of us tend to ignore instructions, or at best take a cursory look at them; in part because often kit manufacturer assembly sequences do not consider detail painting, seam filling, or avoiding braking small parts along the way. However, in this case I am confident that the most efficient and successful approach to achieving this conversion is to adhere to the instruction religiously. It is obvious that Red Roo have put a lot of thought and effort into the instructions, and based their approach on practical experience – Don’t waste it!
This is an impressive package that addresses all, and perhaps even more, than would be reasonably expected in a conversion set.
The parts are all good quality, the instructions are as detailed as any you will find, with some jobs made easier by the provision of a jig or scribing template; even the various raw materials required for scratch-building are supplied. The thorough instructions are made even better by their logical linkage to Minicraft’s instructions, and because they correct inherent accuracy and constructional faults associated with the Minicraft kit.
I am sure that the other two Mariner sets by Red Roo will be as good as this one; and I base this confidence on my experience of reviewing Red Roo conversion sets in the past, as well as the one examined here.
Purchased from Red Roo Models
Review Text & Blue Background Images Copyright © 2014 by Mark Davies
Page Created 27 August, 2014
Last updated
28 August, 2014
Back to HyperScale Main Page

|
 Home
| What's New | Features | Gallery | Reviews | Reference | Resource Guides | Forum |
Home
| What's New | Features | Gallery | Reviews | Reference | Resource Guides | Forum |