Airfix's 1/72 scale
Fairey Swordfish Mk.I Floatplane
by Roger Hardy
 |
Fairey Swordfish Mk.I Floatplane |

Airfix's 1/72 scale Fairey Swordfish Floatplane
is available online from Squadron for only $15.74!
S
u m m a r y |
| Catalogue Number: |
Airfix Kit No. A05006 - Fairey Swordfish Mk.I Floatplane |
| Scale: |
1/72 |
| Contents and Media: |
123 mid-grey plastic parts on 4 sprues, 5 clear parts on one sprue, decals for 2 aircraft plus an A4 sized 12 page instruction booklet with history, 74 build diagrams and 2 pages of full coloured paint/decal instructions.. |
| Price: |
Available from:
Squadron for USD$15.74
Hannants from £14.16
|
| Review Type: |
Build Review |
| Advantages: |
Very detailed and accurate, jig for folding wing option and ease of biplane construction. Excellent clear parts and decals. |
| Disadvantages: |
No parts plan and no rigging diagram. |
| Conclusion: |
Not only have Airfix given us extreme detail in this model but they have also made an effort to solve the biplane construction problem. |
Background
The Swordfish really needs no introduction.
Obsolete at the beginning of World War II, it soldiered on throughout the war, excelling in carrying enormous loads off the small British aircraft carriers. It was an anachronism, so slow that the Italian guns at Taranto could not get their range because the minimum speed setting was, I think 120 kts. The Swordfish was came in at about 80-90 kts!
It is credited with the destruction of 30 major enemy ships (including the Bismarck), the Italian fleet, 12 U-boats and 35,000 tons of enemy shipping. Not bad for an obsolete aircraft.
The Swordfish outlived its intended successor, the Albacore.
The Kit
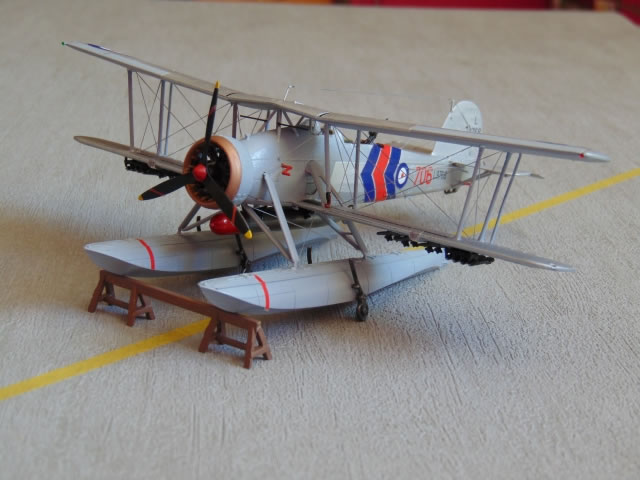
This model was reviewed in its wheeled undercarriage version (A04053) comprehensively by Glen Porter when first released: http://www.hyperscale.com/2012/reviews/kits/airfixao4053reviewgp_1.htm so I won’t go into that detail again. The floatplane has additional parts for the floats and beaching trolley.
The last Airfix Swordfish I made was the Series 2 model from the late 1950s but I have since made the 1/48 Heller (Smer), 1/48 Tamiya and 1/32 Trumpeter offering so was looking forward to making the liitle’un. This model has been reviewed elsewhere but I wanted to do the silver pre-war variant which I have not seen reviewed before; later I will also do the wheeled version. I also wanted to try to rig the model without drilling right through the wings and, on this model, it is possible because the wings are relatively thick and each one has a top and bottom parts so it should be possible to rig the aircraft during construction.
The first major irritation is that the step-by-step painting guide refers only to Humbrol colours. Yes, I know Airfix is a Humbrol company but I hate enamels and live in Portugal where I can only get Tamiya acrylics (which are brilliant) so there is no way I’m going to use Humbrol. When they get as good as Tamiya or Gunze Sangyo, then maybe. At least Revell tell you what the colours are. So I downloaded this colour chart: http://scalemodeldb.com/paintcharts/humbrol.
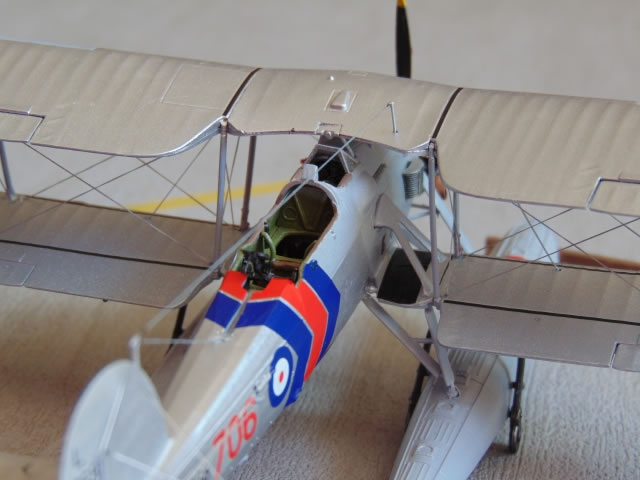
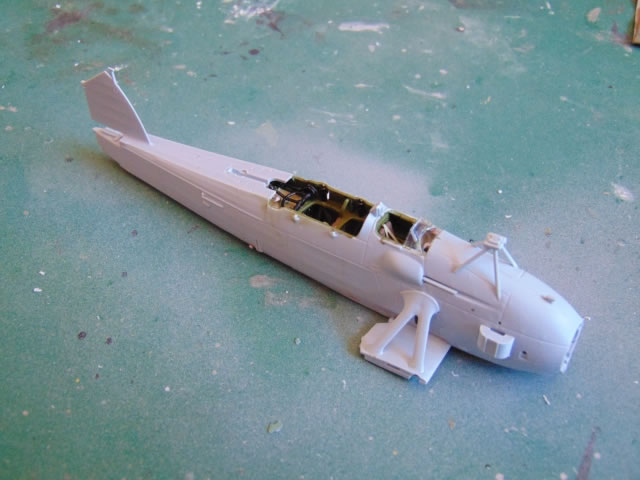
The construction starts with the cockpit which is as well detailed as you can expect in 1/72 scale. However, the cockpit openings are quite large and a lot can be seen so there may be some benefit in using Eduard’s photo-etched set (http://www.hannants.co.uk/product/EDSS432). Once the fuselage is closed up, the cockpit looks very good. I added some generic Eduard pre-painted seatbelts at all three crew stations, as usual. At this stage, it’s a good idea to mask the little windows at floor level as they are difficult to get to later. It’s starting to look like this model will require no filler on the joints.
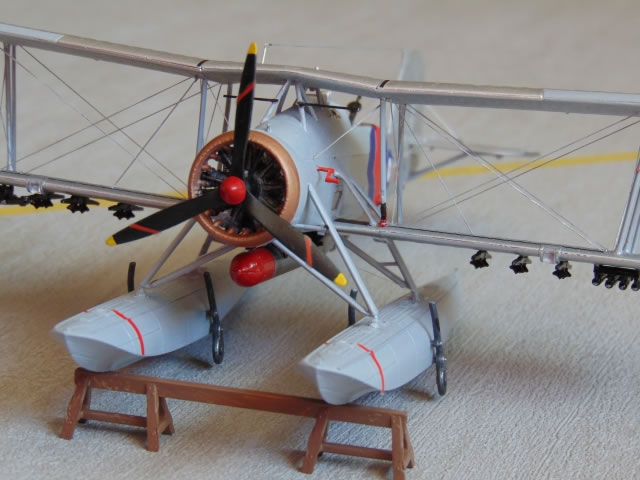
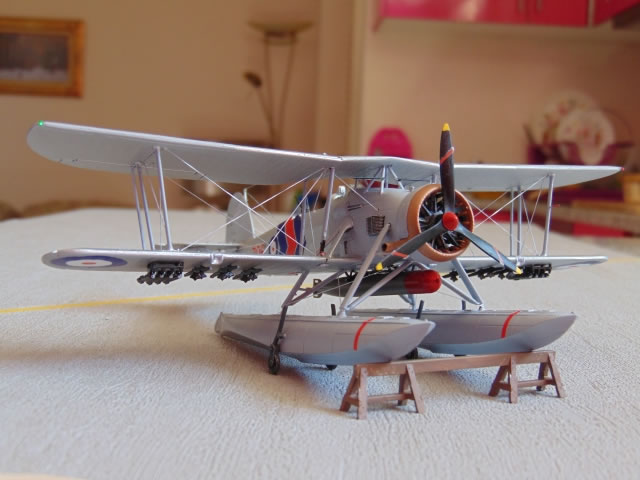
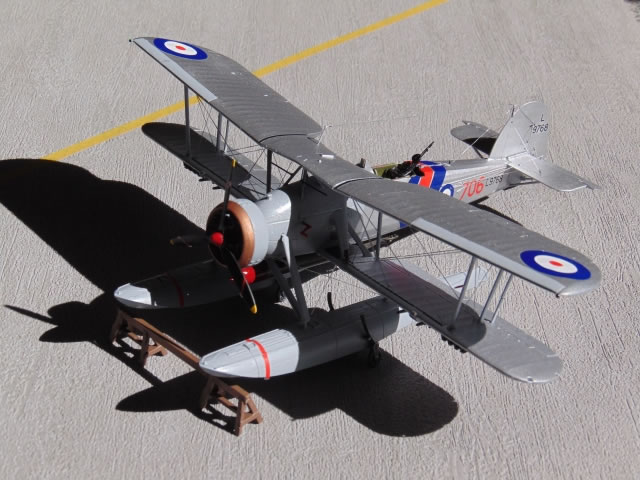
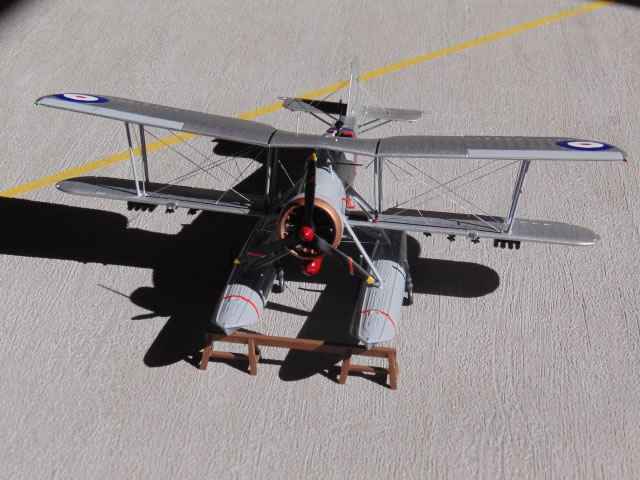
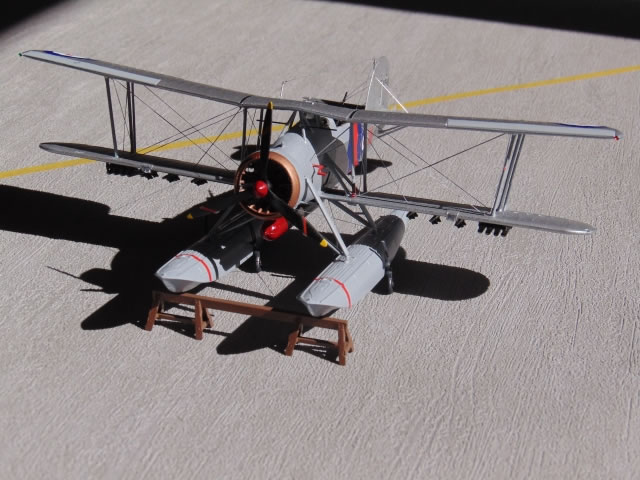
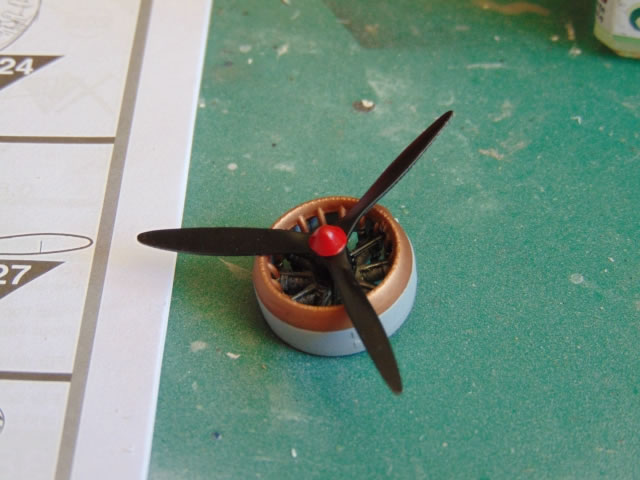
I noticed that Airfix have started to engineer the moulds so that the injection gate to each part is via a mating surface rather than an external surface. Whilst this makes sure that the external surfaces do not need cleaning up, it does mean that you have to be very careful in removing the injection tag in order to get clean joints, especially with the cowling parts. I diverged from the instructions for the engine installation as I wanted to spray the front collector ring/exhaust antique copper before attaching it to the main Townend ring which will be the light grey of the nose metal-skinned panels. I planned to leave the entire engine off until final assembly to ease spraying. Putting the powerplant together was quite fiddly and I resorted to superglue to ensure that the engine exhausts were secured to the collector ring. The real aircraft has a lot of additional detail; a prominent oil ring and triangular frame which is obvious from the front. These are too fine to be reproduced by plastic, so using Eduard bits may be in order for the purist.
The tailplane and rudder are next and slot together nicely. I drilled 0.5mm holes for the bracing wires, two in the fin, one on each tailplane. Elevators and ruder are separate items so can be posed ‘relaxed’. The tailplane struts are a one-piece item but the rear set of struts do not quite reach their holes in the tailplane. Next come the wings.
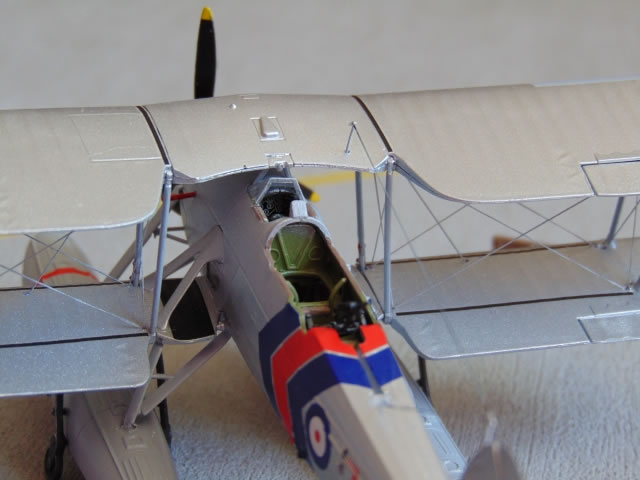
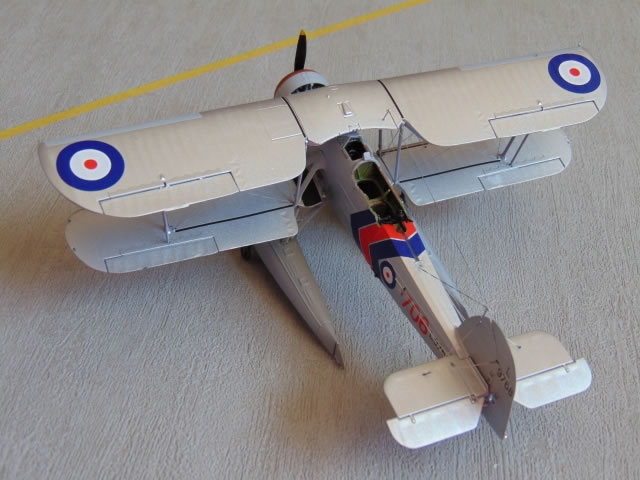
First I drilled the holes for the rigging wires and stores. Before going on, I must say that this is the best-designed biplane structure with the easiest assembly I have ever made; it simply slots together and is almost impossible to mess up. For the wing folded model, they even supply a simple jig to ensure correct alignment of upper and lower wings. This is so simple that all biplane kit manufacturers should do it. Because of my plan to rig the aircraft during assembly, I diverged from the instructions again, assembling only the lower parts of the upper wings and the upper parts of the lower wings. With the Swordfish, all the rigging is in the outer wing panels (except for a couple of wires to the nose) so the idea of rigging the wings before assembly is workable given that I use haberdasher’s elastic thread, so maintaining tension is not a problem.
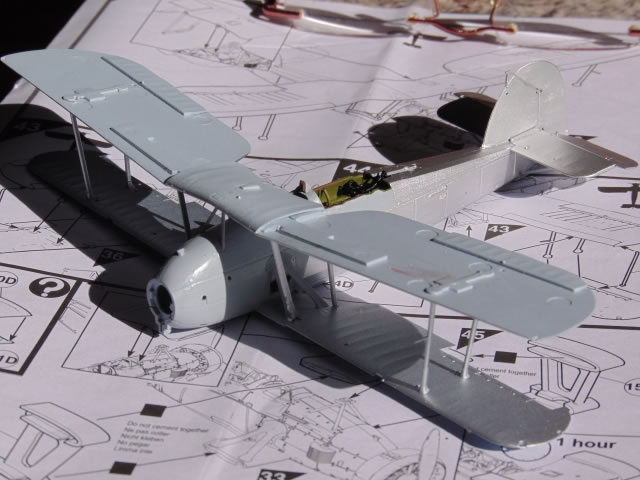
I trial fitted upper and lower wing pieces and encountered my only problem; the upper wing centre-section pieces do not marry up unless a lot of plastic is removed from the inner surfaces of both upper and lower parts. Both pieces can be glued together as there are no rigging wires in the centresection. It was at this stage I realised that I could actually assemble the half-wings to the fuselage before rigging, but first I needed to spray the main assemblies. I used a car alloy wheel rattle can for the silver (it looks like silver paint, not metal) and a mixture that I had made up of satin light aircraft grey/sky grey. In the end, I brush-painted the grey as the silver was a bit sensitive to masking tape. Assembling the wings was easy and the entire structure is self-jigging and foolproof. It holds together perfectly even without the top of the upper wing and bottom of the lower wing. Also, the good news is that the lower wing has slight dihedral (correct), which is an improvement over 1/48 Tamiya and 1/32 Trumpeter where the lower wing (built and rigged according to instructions with manufacturer-supplied p/e rigging) had a decided sag. OK, Ready for rigging.
I use elastic thread and the rigging process was simplicity itself as all the holes were there and all I had to do was get the thread through them and pull a bit, securing the end with a spot of superglue (do not get superglue on the rigging at it will frizz it). I managed to rig each side using only one piece of thread. I initially drilled the holes 0.5mm but broke three bits and resorted to 0.7mm which is actually better because in some of the holes, the diameter needs to be big enough for 4 passes of the thread (in some cases, doubling back, the loop secured by tape) and 0.7mm drill bits are much stronger. Each side took about an hour and required light, patience, magnifying spectacles and a pair of good tweezers. Then it was a case of closing up the wings. Remove the locating pins for the lower wings as they are too long and stop them closing up properly. Remember to add the aileron tie rods as they are difficult to get in after assembly and I broke one.
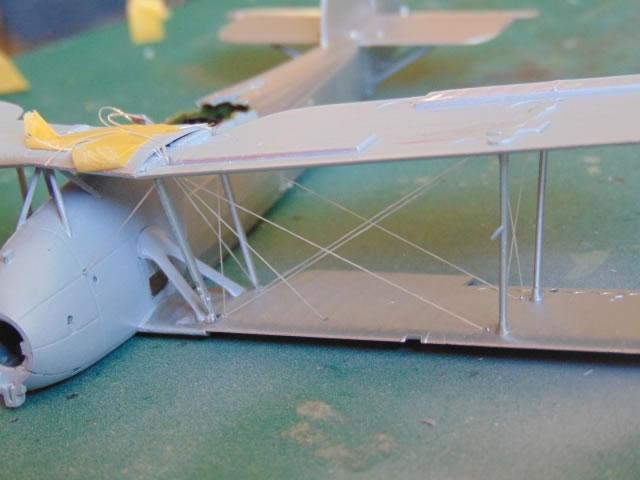
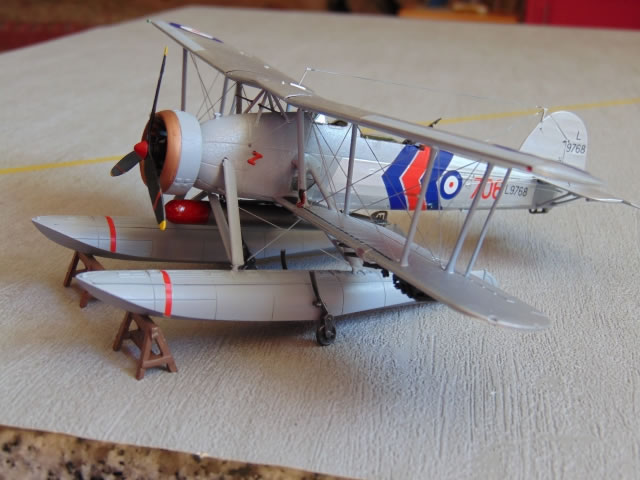
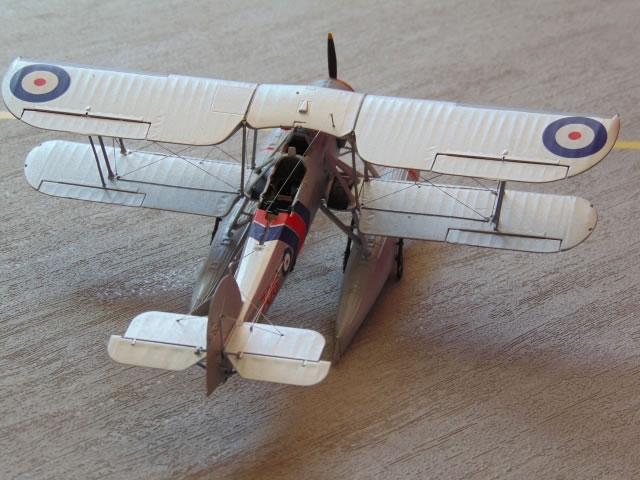
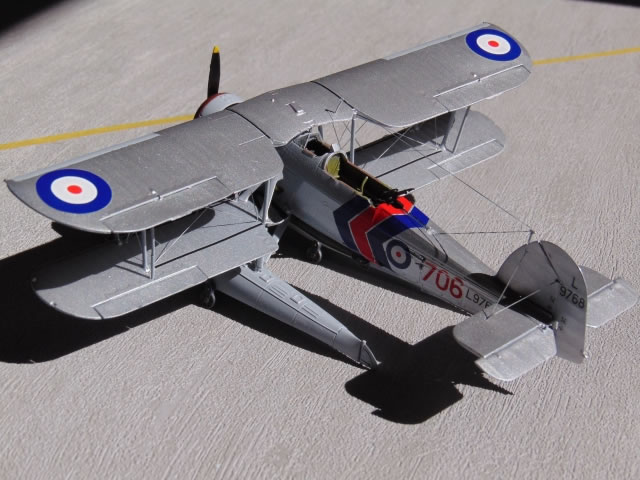
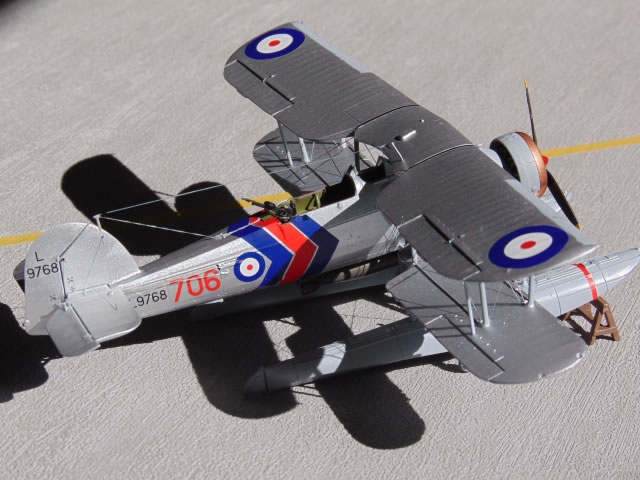
The next stage was to spray the bits that weren’t already silver and should be. The struts should all be medium grey, not silver. I left the rigging unpainted as it catches the light nicely; the Swordfish was braced with streamlined extruded stainless steel rods, not cable, and was actually silver. My rigging thread is actually clear but in the light looks like silver.
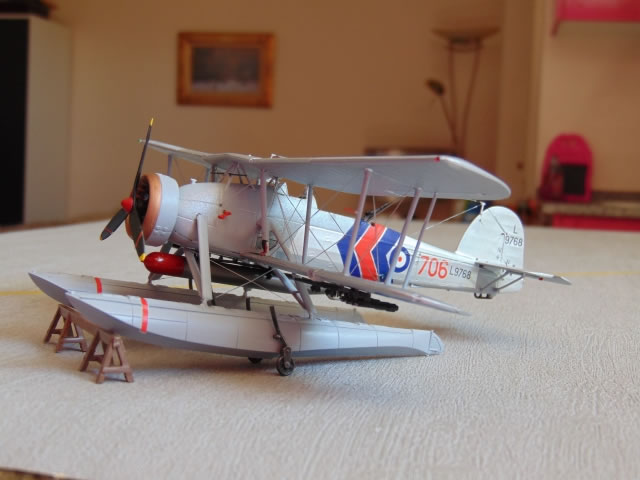
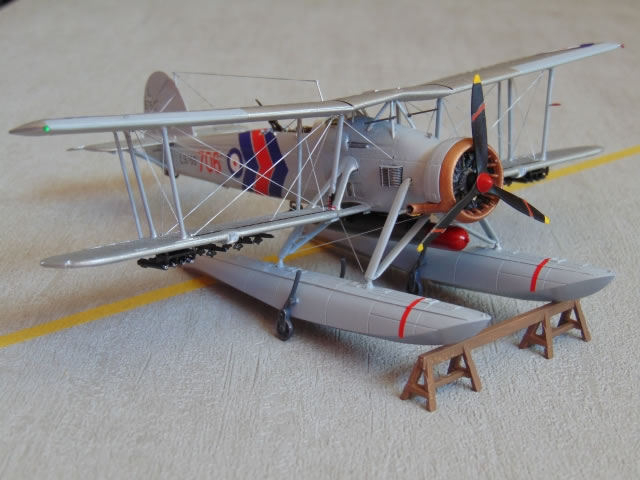
I then rigged the tail area including the control cables to rudder and elevator. There are three cable outlets on the fuselage side and the order from top to bottom is (1) top; elevator lower horn (2) middle; rudder: (3) bottom; elevator upper horn. It only remained to add the weaponry and floats which were a tight fit onto the struts so it’s best to open up the large round holes a bit. Incidentally, the small racks outboard under each wing are for flares and, although the instructions do not state it, these are included in the kit (8 parts D27) and can be fitted (they were black with silver tips). I also added the bomb racks but left them empty as torpedoes and bombs were not carried at the same time. There should be a sighting bar across the front cabane struts which I added from sprue; it’s not exactly right but the best I can do at this scale. Again, Mr Eduard can help here. There should also be an aerial mast on the right-hand rear part of the upper centre-section which holds the aerial wire that runs to the fin. The colour drawings also show a whip aerial on the upper fuselage and, although this is fitted to the surviving RN Historic Flight Swordfish, it was not fitted originally. The tie-bars between the front and rear sets of wing bracing wires (seen on the surviving Swordfish) were also not used at the time.
When assembled, the impression is of detail and lots of it. The tail control surfaces can be positioned and the ailerons look distinct and separate. Nice touch and good design. The model comes with beaching gear fitted to the floats and a support for the front of the floats so you’re all set for a diorama.
The decals are nice and quite matt. I’m always suspicious of wrap-around decals but took the plunge for the big chevrons around the fuselage. Sure enough, they are a little too big but the excess is around the cockpit and can be trimmed when dry. The fuselage is full of lumps and bumps but responded well to decal softening solution and the occasional scalpel cut. The red prop warning stripes on the floats are too long and need to be trimmed. The fuselage decals would have been easier if I hadn’t added the control cables; it’s best to do this after decalling but I managed to get them to slide under OK. Finally, I added the aerial wire using the haberdasher’s elastic thread. I also added some navigation lights using MV lenses, of which I have a small stash. I think that these were made for model trains but are perfect for aircraft: red port, green starboard, white rear.
I really enjoyed making this model and am very pleased with the result. The rigging was all done without a blemish to the external surfaces and looks good to me. The kit itself was a pleasure to build; not perfect, but pretty damn close and for the price it is outstanding. I frequently find myself getting frustrated with biplanes but not so with this one which was completely stress-free. Congratulations to New Airfix for raising their game to this new level and I look forward to each new offering.
Model, Images and Text
Copyright ©
2014 by Roger Hardy
Page Created 14 July, 2014
Last Updated
14 July, 2014
Back to HyperScale Main Page
|
 Home
| What's New | Features | Gallery | Reviews | Reference | Resource Guides | Forum |
Home
| What's New | Features | Gallery | Reviews | Reference | Resource Guides | Forum |