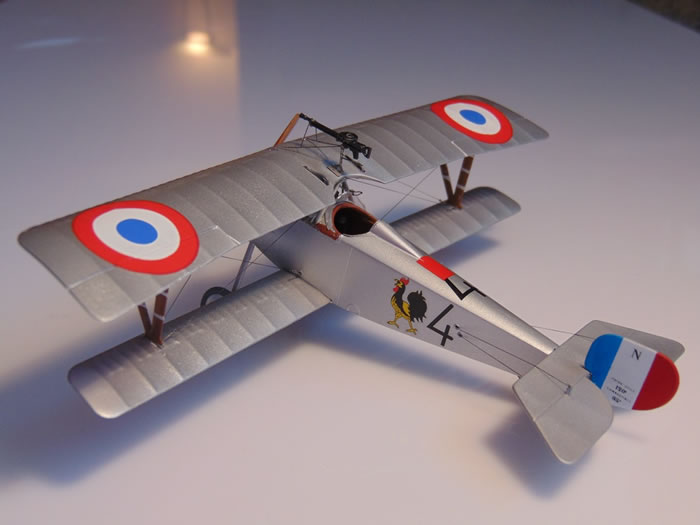
Eduard's 1/48 scale
Nieuport Ni-17 ProfiPACK
by Roger Hardy
 |
Nieuport Ni-17 |

Eduard's 1/48 scale Nieuport Ni-17 Weekend Edition
is available online from Squadron for only $17.96
S
u m m a r y |
| Catalogue Number: |
Eduard Kit No. 8051 - Nieuport Ni-17 ProfiPACK |
| Scale: |
1/48 |
| Contents and Media: |
Olive coloured plastic parts; photo-etched parts; markings for six aircraft. |
| Price: |
£13.99 available online from Hannants
|
| Review Type: |
Build Review |
| Advantages: |
Crisp mouldings, excellent detail; clever use of photo-etched parts; set of flexible masks; wings with subtle rib detail and sharp trailing edges; decal sheet with good colour registration and minimal carrier film. |
| Disadvantages: |
Confusion over engine. |
| Conclusion: |
Another competent package that sees the intelligent use of photo etched parts to enhance the level of detail in an already first-rate kit. An interesting set of markings compliment the release which is made easier to paint thanks to the included masking set. |
 The Kit The Kit
This kit was reviewed in the box by Rob Baumgartner, so I won’t repeat it here: http://www.hyperscale.com/2010/reviews/kits/eduard8051reviewrb_1.htm
This is quite a simple kit and construction starts with the cockpit which is sparse, as was the original. A nice touch is the p/e seat with lightening holes which looks exactly right. The seat belts are lap straps only which is also correct. The engine confused me because two are provided in the kit, one with a proper moulded exhaust visible from the front and another with a p/e exhaust to be fitted to the back of the engine and looks two-dimensional and…completely wrong. I used the former, having first checked that the Le Rhone 9D engine had both kinds of exhaust.
The tail unit is meant to be attached at this stage and I used the plastic control horns rather than the p/e as the latter always get knocked off and are impossible to fix with any strength. The nose-mounted machine gun comes next if you have chosen that particular version (you need to decide early which markings you want to use). There are two alternative upper wings as well. I found that I was not using many of the p/e parts (that’s just me) but they make the guns look good.
It’s best to drill out the strut attachments for upper wing and undercarriage and everything can be assembled except for the upper wing which need to have decals on the undersurface so needs to be painted first. The wings are more-or-less self-jigging.
I decided to drill the holes for the GasPatch turnbuckles at this stage.
Painting, Markings and Finishing Touches |
Paint was applied with my Testor Aztek A470 airbrush.
I had decided to follow markings Option B which requires an all-over silver finish which I did with Alclad II White Aluminium having forgotten to prime it first (which didn’t matter although the surface would have been smoother if I had remembered). I left off the upper machine gun as the final step when everything else had been done. The rigging is easy and I used Uschi van der Rosten 0.005 elastic thread.
The decals are good quality and go on easily but the fin decals are impossible, oversize and I soon removed them and sprayed the red/white/blue which was far easier.
Finally, I added the upper wing gun which is mounted on a delicate and convincing photo-etched chassis. That’s it. It was only when I’d finished that I remembered the paint masks which might have made the painting easier but, as it was, there were no problems anywhere.
This was an easy model to build and looks really sweet when it’s finished. It’s accurate and goes together with little fuss. This model in its ProfiPACK form dates from 2010 but the original is from 1993 so it’s holding up well. In addition, given what is in the box, it is amazingly good value at £13.99. I really couldn’t fault anything except the confusion over the engine and I’d recommend it unreservedly even if you don’t like biplanes.
Model, Images and Text
Copyright ©
2014 by Roger Hardy
Page Created 29 December, 2014
Last Updated
29 December, 2014
Back to HyperScale Main Page
|
Home
| What's New | Features | Gallery | Reviews | Reference | Resource Guides | Forum |