Italeri's 1/48 scale
Macchi C.200 Saetta
by Roger Hardy
 |
Macchi C.200 Saetta |

Revell's 1/72 scale Halifax is available online from Squadron
S
u m m a r y |
| Catalogue Number: |
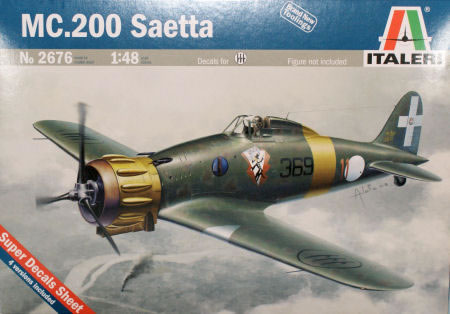
Italeri Kit No. 2676 - Macchi C.200 Saetta |
| Scale: |
1/48 |
| Contents and Media: |
2 sprues in light grey styrene; one in clear styrene; photo-etch sheet; markings for four aircraft |
| Price: |
Variously 40€ or £27.50 but limited availability |
| Review Type: |
Build Review |
| Advantages: |
Good fit. Accurate. Nice choice of colour schemes. Not over-engineered. Box insert is a modelling tray. |
| Disadvantages: |
Expensive. Separate flaps do not include the small sections under the fuselage. Costly. Did I remember to say that it was over-priced? |
| Conclusion: |
Recommended to aficionados of elegant Italian WWII fighters. |
Background
 The Macchi C.200 was one of the first operational monoplane fighters produced for the Regia Aeronautica (Italian Air Force), with its first flight in late 1937. The Macchi C.200 was one of the first operational monoplane fighters produced for the Regia Aeronautica (Italian Air Force), with its first flight in late 1937.
By the time Italy entered World War II alongside Germany in 1940, the C.200 was the mainstay of the Regia Aeronautica flying more operational sorties that any other type. Powered by an 870 horsepower Fiat A.74 engine, the rather lightweight fighter was quite agile in aerial combat. It was armed with a pair of 12.7mm (.50 cal) machine guns that fired through the propeller.
The Italians seemed to have been living in a bubble in terms of aircraft development; whilst Germany and UK were showing how to do it with the Bf109 and Spitfire, powerful well-armed fighters, Italian industry continued with this under-powered lightly-armed aircraft with a semi-open cockpit that was barely a match for even the old Hurricane. It was not until the advent of the Daimler-Benz-engined Macchi MC202/205 (developed from the MC200) that the Italian Air Force had a competitive fighter.
The Kit
My motive for buying this kit was to have a go at the complex three-colour upper surface camouflage schemes that the Italian Air Force used. I have an Aztek spray gun but cannot get it to spray small spots without spitting (just me, I guess), so I bought some Eduard photo-etched mottle spray masks as an experiment. Basically, I wanted to get this one together as quickly as possible because it was to be a canvas for the complex paint job. These masks are intended for Luftwaffe subjects but are ideal for the difficult Italian schemes.
There have been kits of this important aircraft before but they are generally poor (1/50 Smer) or not very user-friendly (Classic Airframes, Astrokit, Special Hobby) so it was a pleasant surprise to see this kit, albeit at a Tamiya price. I note that Tamiya have actually released this kit under their own label but do not be fooled; this kit is not Tamiya quality. However, having said that, it is perfectly adequate. The instruction booklet is nice and consists of photographs which are really clear. Revell please take note.
The first impression when opening the end-opening box is ‘where are all the bits of this model I just paid a fortune for?’ This is a simple model of a simple aircraft and the parts count is therefore low but the detail is provided where it’s needed. There is a second half box inside which acts as a modelling tray (Revell again please take note) and there is also a small photo-etched fret containing the essentials; seat belts, instrument panel and undercarriage door mountings. The canopy parts are clear and in three pieces so that the canopy sides can be displayed open. Most of the parts are for the engine and cockpit. There is a nice decal sheet for four variants and this includes the fuselage bands for those who don’t fancy masking and spraying around this compound curve fuselage. The box art advertises a ‘super decal sheet’. Well, it’s not, but it’s perfectly good enough.

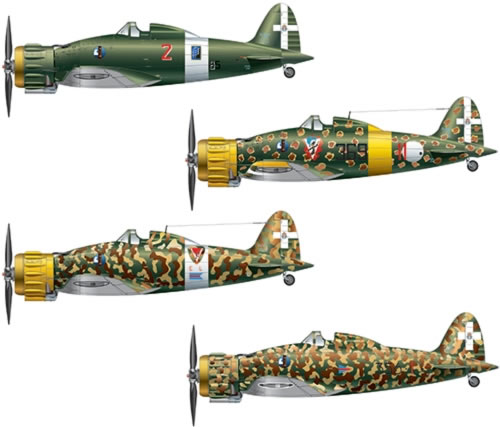
The kit provides marking options for four aircraft:
-
369a Squadriglia/22 Gruppo Autonomo CT, Russia, 1941
-
365a Squadriglia Autonomo CT, Napoli, Italy, 1940
-
85a Squadriglia/18 Gruppo, Araxos, Greece, 1942
-
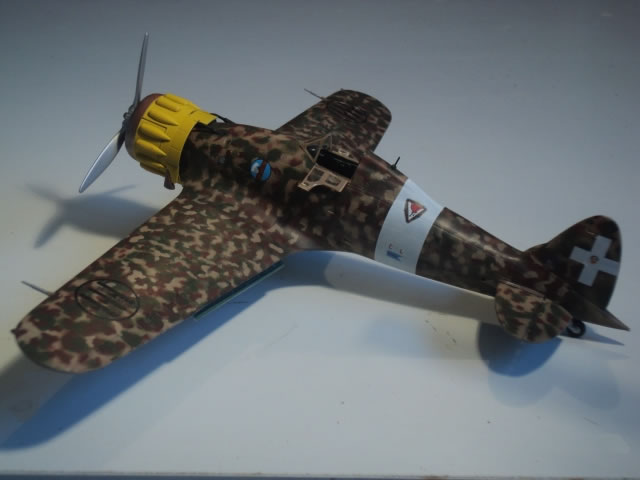
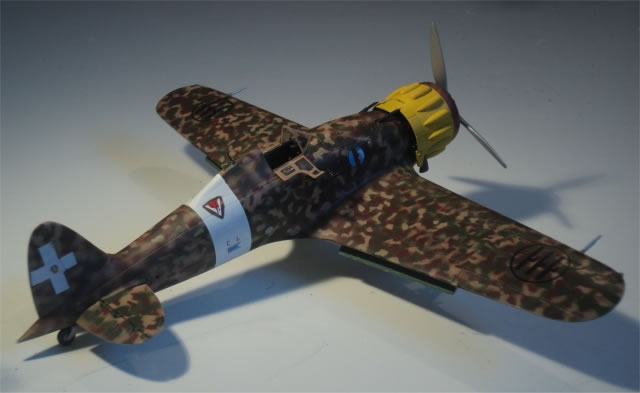
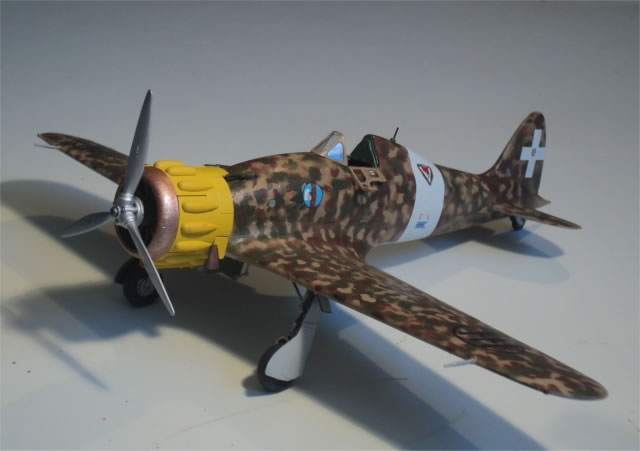
150 Gruppo Autonomo CT, Tirana, Albania, 1941. This is the one I chose.
The first impression of the surface detail is that it is a little heavy and, well, there ain’t much of it. I was concerned about this but these doubts were groundless as the finished model looks fine. The plastic is rather soft but easy to work. The flaps are separate and can be posed down but the small sections under the centre-section are moulded closed. Note that the MC200 had the feature that the ailerons also deflected downwards when the flaps were lowered but this means cutting them out of this model. I was not aware of this until after finishing the model. It’s probably best to leave the flaps up although Eduard do a nice set of replacement flaps which are correct for those who just have to have the bits dangling down. Looking at photographs in Maurizio Terlizzi’s Aviolibri No 5, the flaps were seldom down when the aircraft was on the ground. Those pilots amongst us will know that raising the flaps is a standard after-landing check; any pilot taxying in with flaps down buys the drinks.
First comes the cockpit, which is nicely detailed with its photo-etched panel and decal instruments. This looks good, although not as good as the Eduard technique of providing the instruments in the form of a film. The etched seat belts are unique to Italian aircraft and incorporate the chain attachments to the floor and seat sides. Nice.
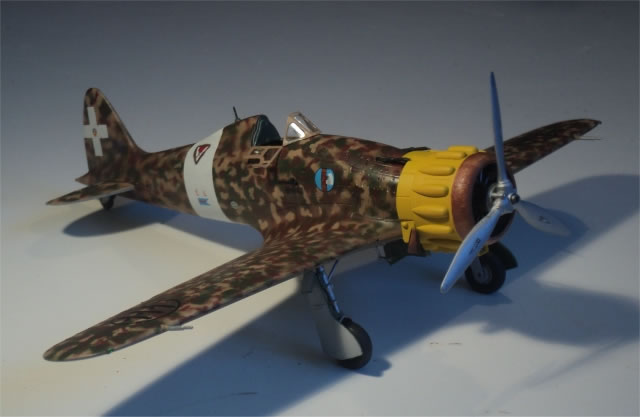
I’m told that the gunsight bears little resemblance to the real one but it looks OK to me. The finished cockpit tub is inserted in the fuselage and fits perfectly but make sure that the seat is really central. The engine is a nice little kit in its own right and it can be seen from the front and rear of the cowlings so is worth getting right. There is a removable panel on the port side to get a better view, but all you see are the rocker arm covers. Nice touches are the hollow exhausts and intake which look very good. The entire cowled engine assembly can be left off until final assembly which makes life a lot easier as the cowlings were often painted in yellow or white.
The only filler needed was the join between the rear of the wing centre-section and the lower rear fuselage. Otherwise, the joints simply responded to a little scraping and looked fine.
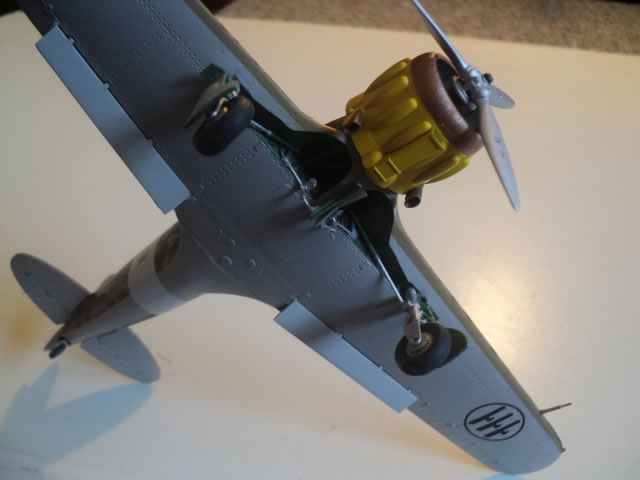
There is quite a bit of detail in the undercarriage bay but if you are into super detailing you can really go to town on this one as there is a spaghetti-like mass of wires and pipes that are visible on the real aircraft. In my case, I left it as a straight-from-the-box build and it looks good enough to me. The nicely-detailed undercarriage can also be assembled and painted but left off until after spraying . Incidentally, the main undercarriage doors are connected to the struts by photo-etched brackets which look very realistic. The small doors on the centerline have to be added when the model is almost finished but the actuation jacks are slightly too long and need to be shortened.
Overall, this kit has detail where it’s needed but is otherwise a very simple build. Nicely engineered and well thought-out.
The upper surface camouflage that I chose is the three-colour scheme; sand, brown and dark green (I used Tamiya XF-59 Desert Yellow, XF-68 NATO Brown, and XF-67 NATO Green which are close enough to the authentic Italian colours). The model was sprayed with my Testor Aztek airbrush.
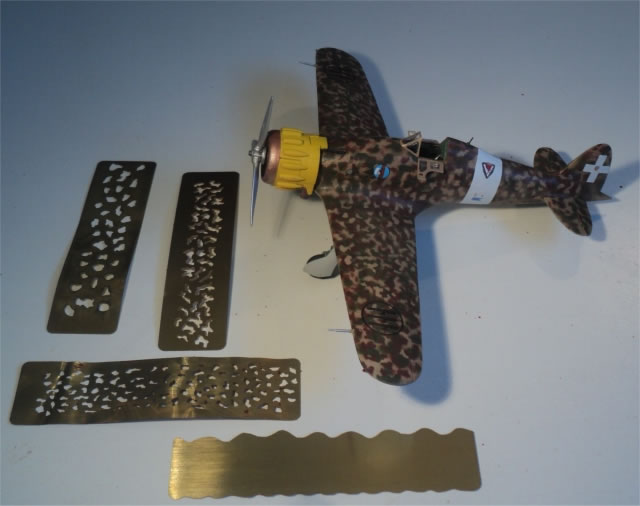
I mentioned before that I planned to use the Eduard mottle masks (three different sizes of mottle; I mostly used the finest one), so, after priming the model with Tamiya spray primer, the next step was to spray the sand colour overall. When this is well and truly dry, I laid the stencil on the surface and sprayed the green. Repeat ad nauseum with green and brown then more sand. The problem you have is that you cannot see the bits you’ve just sprayed so you get some gaps and overlap so I found that the best way to do this was simply to STAY CALM AND CARRY ON until it looked right. This takes some time because you have to wait for one coat to dry before putting the stencil back on the surface.
I found that placing the stencil on the surface gave a nice mix of hard and soft edges. Eventually I reached the stage where it wasn’t looking any better and I decided to stop spraying and break up those parts that looked too densely mottled with some light brush work. This mixture of spray and brush looks pretty good and the overall complex impression is more realistic that a fully sprayed job which looks rather indistinct and insipid.
The underside was sprayed a very light grey (Gunze H338) and there you have it.
Overall, I was very pleased with the result.
Final Bits
I used the decal band for the rear fuselage which needed to be cut away for the canopy fairing but fitted well after I had split it into two parts; left and right. The rest of the markings went on well and settled down with no need of decal solutions. Nice to see no proliferation of maintenance instructions! The engine was added, then the guns and remaining undercarriage doors. You need to shorten the jacks on these by about a millimeter otherwise they don’t fit.
The main undercarriage assemblies were then added and the aerial. Some pictures show an aerial wire from this to the fin but most aircraft did not have this so I didn’t bother and the instructions didn’t call it up.
I sprayed the entire model with Tamiya flat clear to bring everything together and added the canopy which I had hand-painted (it is simple and doesn’t really need to be masked).
The pitots were added to each wingtip (yes, two…one was heated, the other not) and, voilà; a completed Macchi MC200 in complex desert camo.
This is a nice model of a neglected aircraft and I now plan to build a MC205 Veltro and Fiat CR42 to stop it getting too lonely on the shelf. I also have the old Astrokit resin model which I’ll probably do in one of the unused schemes of the Italeri kit. My only gripe is the price of this kit; it costs more than the new Airfix Lancaster and 50% more than the Revell Halifax. I really don’t know how they justify that and I think that Italeri needs to adjust its pricing policy if it wants to compete with the reborn Revell and Airfix offerings. On the other hand neither Airfix nor Revell do a 1/48 Macchi C.200.
I’ve noticed that this particular kit is now difficult to get (I checked Hannants and Aviation Megastore) so it may be easier to look for the Tamiya boxing. The original Series 1 (fully enclosed canopy) and a new Series 2 are available from Italeri so I guess they’re only releasing limited numbers of these kits. Get ‘em while you can!
Model, Images and Text
Copyright ©
2014 by Roger Hardy
Page Created 2 July, 2014
Last Updated
2 July, 2014
Back to HyperScale Main Page
|
 Home
| What's New | Features | Gallery | Reviews | Reference | Resource Guides | Forum |
Home
| What's New | Features | Gallery | Reviews | Reference | Resource Guides | Forum |