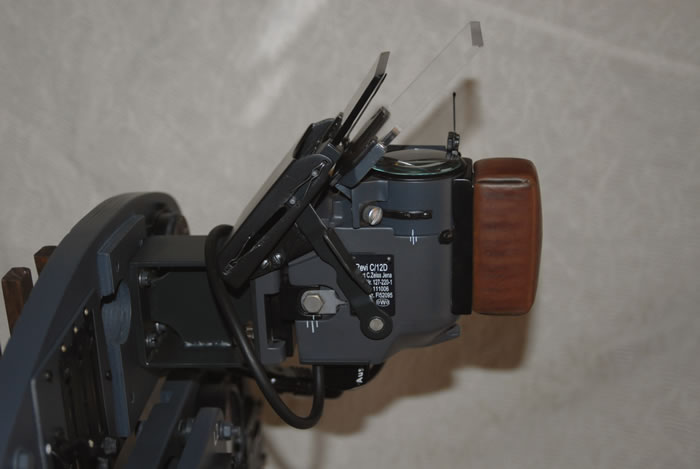
Tail Boom's 1/1 scale
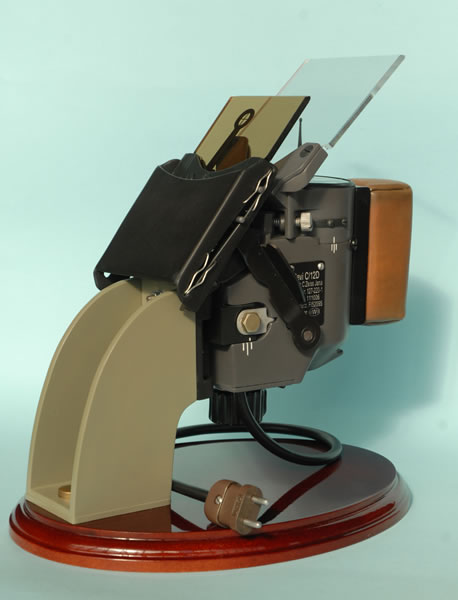
Revi C12/D Resin Gunsight
by Maurizio Di Terlizzi
|
|
Revi C12/D Gunsight |

Hasegawa's 1/48 scale P-39Q/N Airacobra is available online from Squadron.com
I am very passionate about full scale items, especially associated with Italian and German airplanes during WWII, but Some years ago I decided to produce resin limited run copies for my own satisfaction due the high price of the real items.
I keep 4-5 items for myself, and the rest are for friends, modellers and enthusiasts all over the world.
At last, now it is time to build a kit for myself, and here is the result.
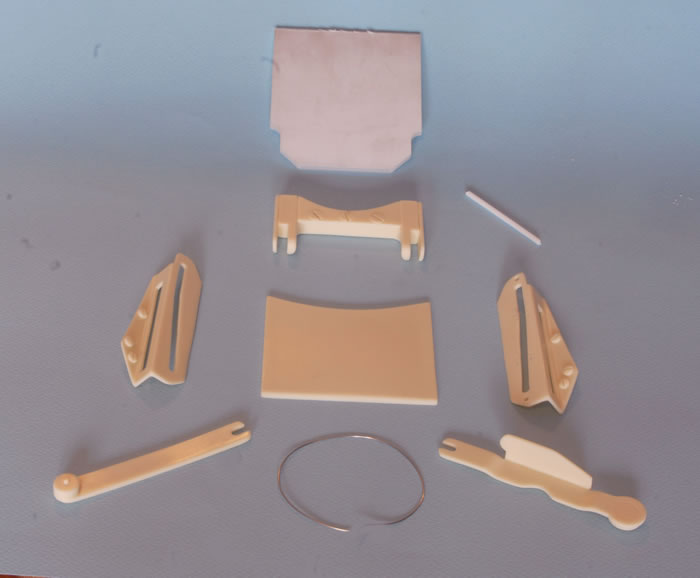
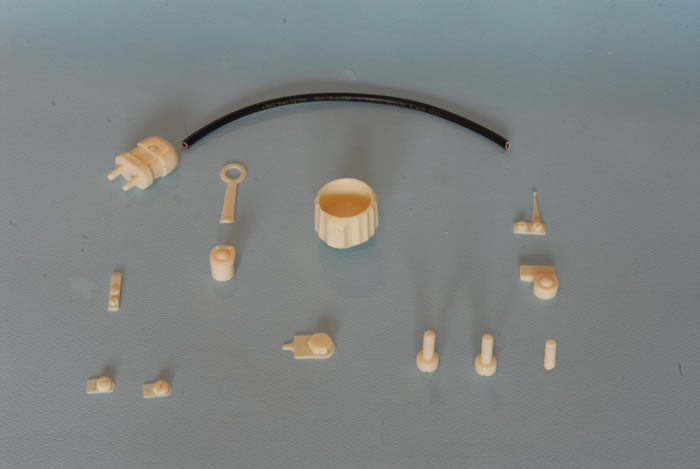
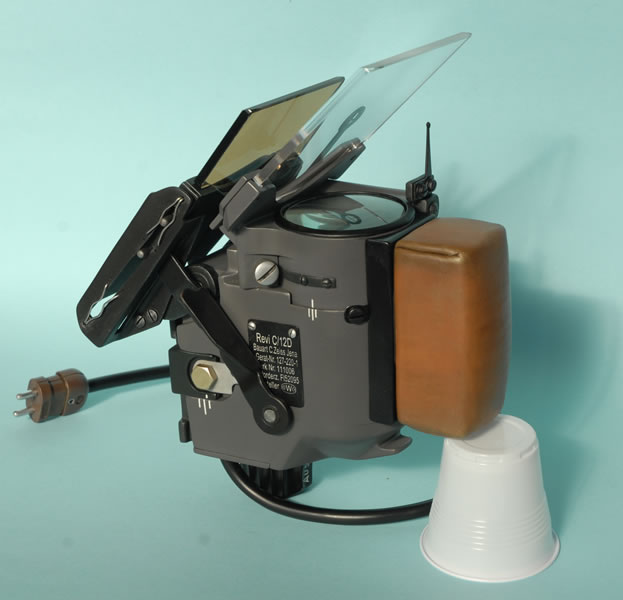
My multimedia kit is composed of many parts, casted in non-toxic resin, plus a real glass lens, real electric cable, laser-cut glasses and a segment of metal wire.
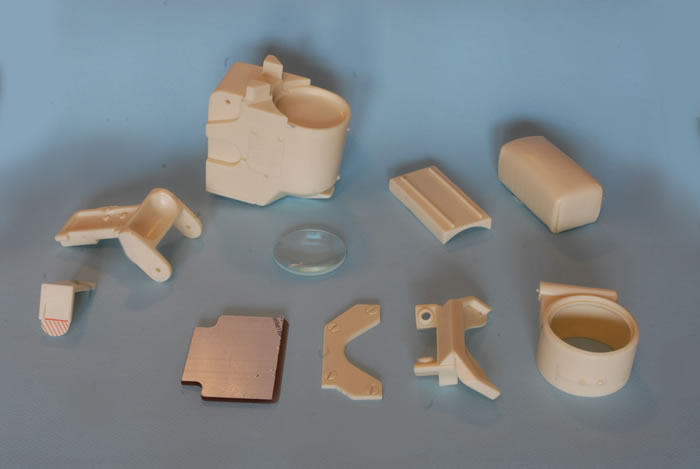
Considering that it is a copy of a real gunsight, I opted for a full resin body, that is a little heavy in weight, so I started drilling the inside (under the glass lens) using a 1 cm. diameter drill bit to remove material and save weight. The instruction sheet is a two page .pdf file, with all the instruction for the building and painting stages.
Following it, I drilled all the required holes, with the appropriate size bits.
Painting and Construction Continuing |
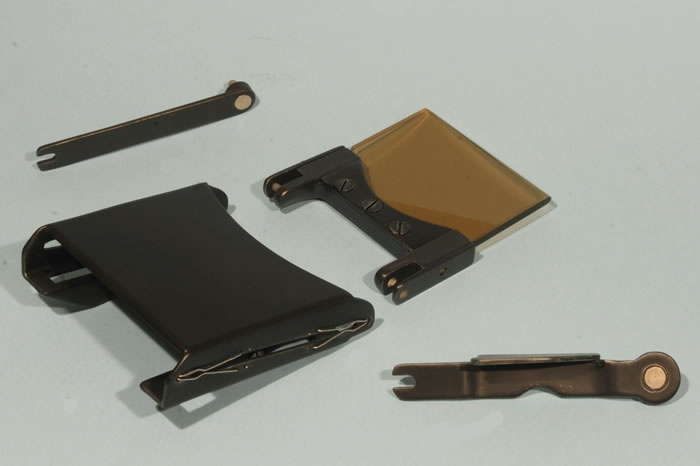
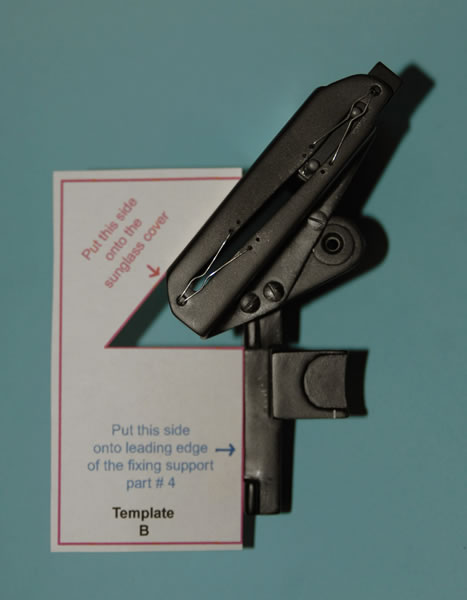
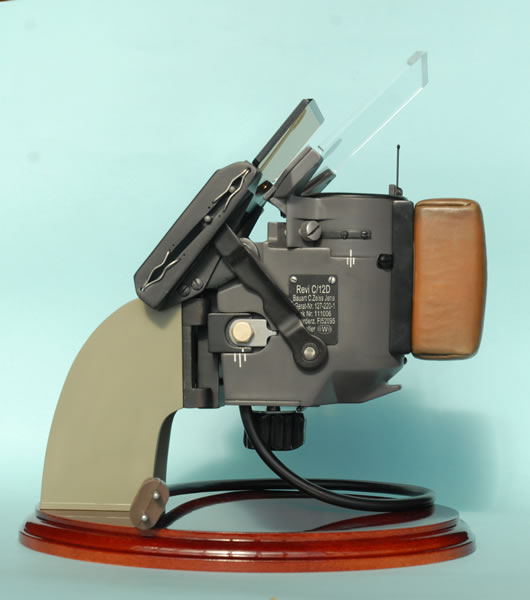
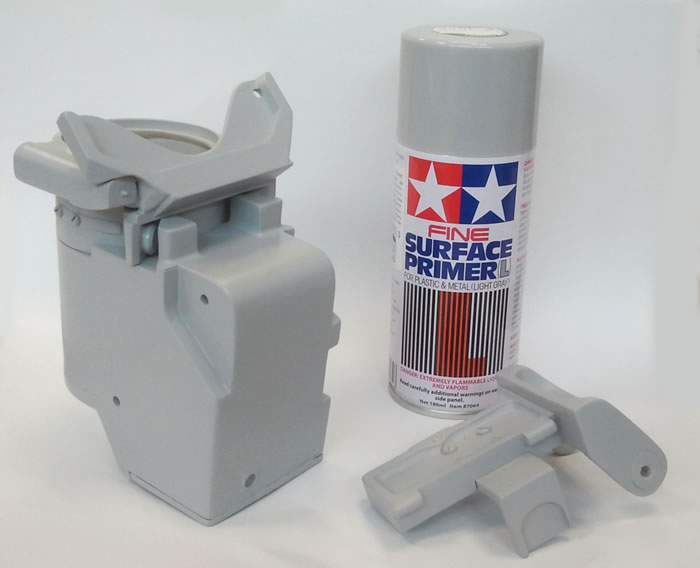
Once the main body was completed, I continued assembling the other parts such as the sunglass cover, its levers and the main front support. I decided to divide all the kit in sub-assemblies that were grouped and painted together. To achieve a more realistic look, and considering that often parts were produced and painted from sub-contractors, I used few colours and different clear cotes.
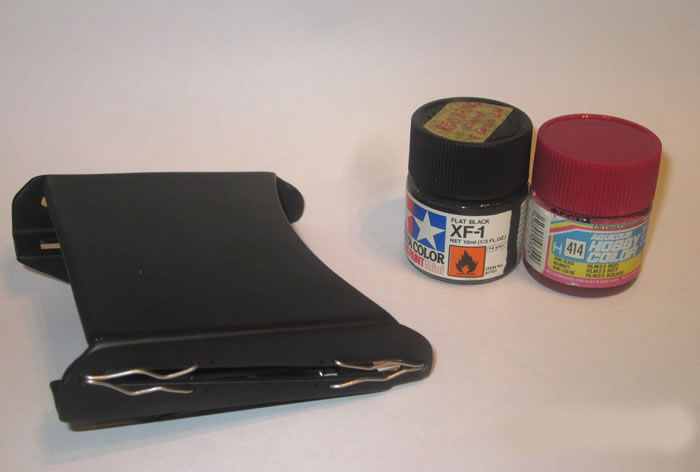
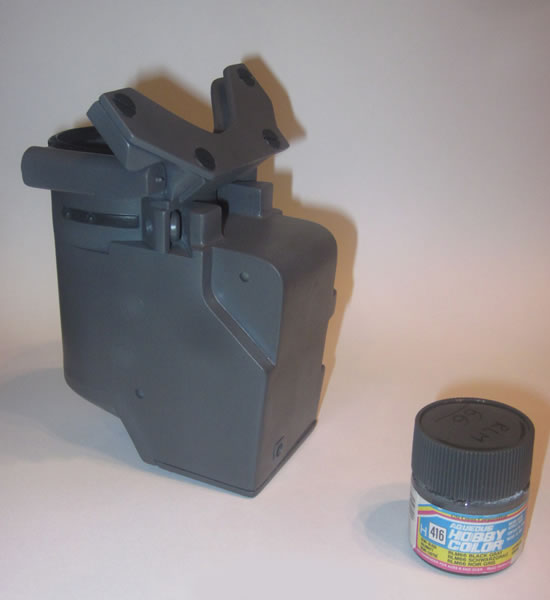
For example, main body was painted with Gunze Sangyo RLM66 and, after a very subtle weathering, it received a light well-diluted coat of Tamiya X-35 semi gloss clear. The sunglass frame was painted with a mix of Tamiya Flat Black and flat Red, to obtain the reddish black often seen on real Luftwaffe gunsights and control sticks. These parts were airbrushed with Vallejo Air satin, for a worn appearance.
The front mount, the levers, and sunglass support, were painted with the excellent Tamiya NATO Black, but finished with a semi gloss clear sprayed directly from a supermarket rattle can. This finish very close resembled the metallic appearance of these parts.
Then, the fixing plate and bead and sight items were painted with Gunze Sangyo Flat Black, flattened with Tamiya X-35 semi gloss clear.
The rotating bottom dimmer and crash pad support were painted with a rattle can of Tamiya gloss black.
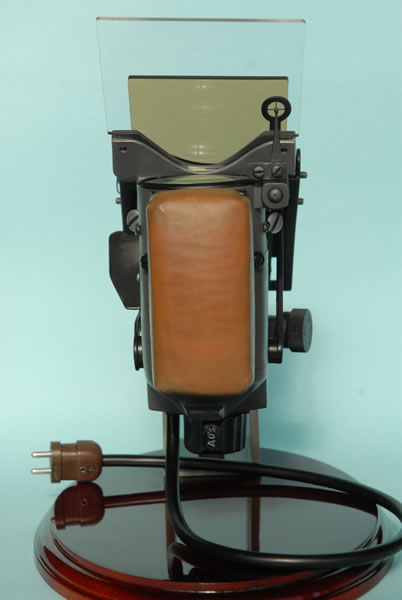
At last, I painted the most prominent looking part of the gunsight: the crash pad. When I created the kit master, I had a problem as this part was missing from the real Revi 12 it was based on. I started scratchbulding it with thick plasticard, bent and shaped with both hobby knife and a good heater. Now how to realize the leather appearance ? After few ideas, I get the right one ! I went to a cobbler near my house and asked for a damaged shoe. He presented me an old boot that was perfect for my project. I cut the leather and realize some 4-5 paper templates to cut and sew the leather suitably. I wasn’t happy with the results until a dozen dry fitting when I decided to glue it with PVA glue. I then applied a technique I learned when I attended the “Historical aircraft restoring course” at Italian Air Force and realized a “leather hammer”. I wrapped the head of a small hammer with leather, and started hitting gently the whole surface of the pad. After one hour work, this technique allowed the pad the fit perfectly, maintaining also the leather pattern and appearance. The resin part is exactly as the leather-master and a good painting process allows us to achieve a very convincing result.
I started to airbrush the part with a very dark brown, then few subtle strokes of Tan and Light Earth, then two different washes with oil paints and finally two drybrushing sessions with light brown colours. Aluminium coloured parts were sprayed with both TS-30 Silver Leaf (for brighter parts) and AS-12 Bare Metal Silver for duller parts.
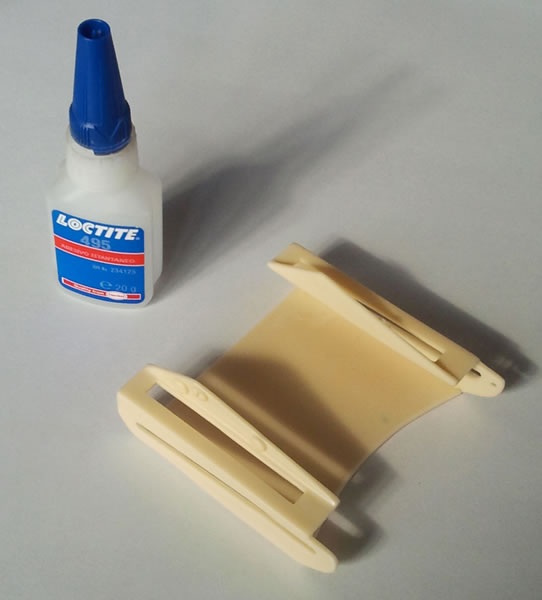
Once all the parts are assembled, painted and weathered with a very light silver drybrush, it is time to assemble them together. I used three kind of glue.
Cyano was used for small and light parts such as bead and sight aiming devices, light dimmer and so on.
PVA glue worked perfectly for the glass lens and to glue clear and sun glasses in place. Finally, two-part epoxy glue was used for all major parts such as the main support, sun glass cover and arms, electric cable and plug. A further washing with diluted oil colours would be needed to have a general wartime appearance.
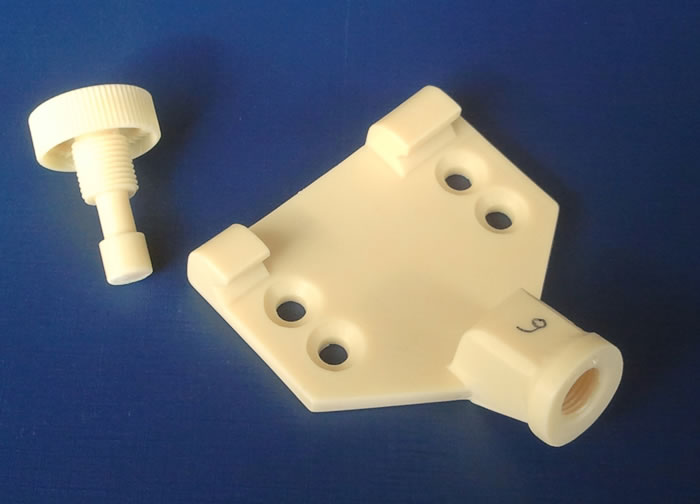
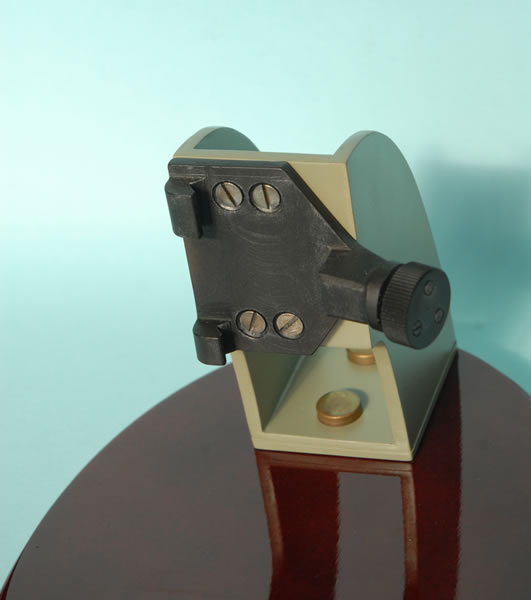
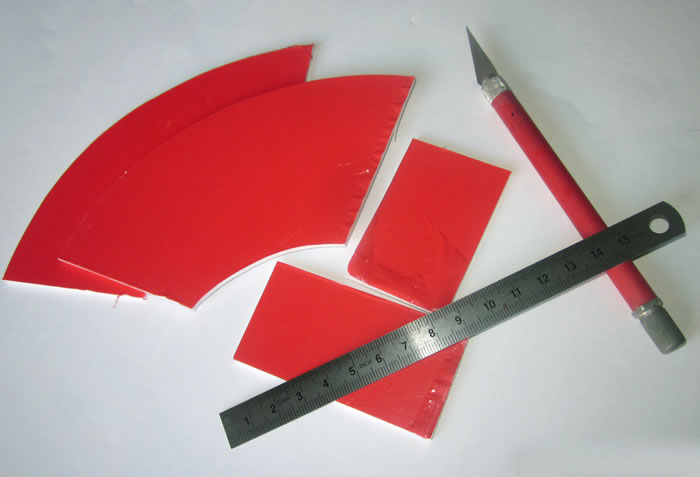
Once finished, my gunsight needed a display base. I created its support using a wonderful material called Forex. It is a lightweight very-resistant plastic material, on sale in different thickness sheets. It is very easy to be cut with hobby knife and once glued with cyano, it becomes rock solid. It can be puttied, sanded and painted on your desire. I choose 4 mm. thickness and after cutting, puttying, sanding and painting in RLM02 gray, it was fitted to a wood base with two screws.
At the other hand I fitted the fitting plate with 4 bolts. It comes as an alternate item that can be purchased apart from the gunsight. It really works !

I also tried to mate the gunsight with my scratchbuilt Messerschmitt Bf 109 G-6 full scale instrument panel, and think that attached pics speak for themselves!
After having made Italian and German control sticks and gunsights – some of them are still available but most are SOLD OUT – I look behind at my own collection of 1/1 scale items and say….”wow ! what an original and strange way of modeling!”
Model and Text Copyright ©
2013 by Maurizio Di Terlizzi
Page Created 5 March, 2013
Last Updated
5 March, 2013
Back to
HyperScale Main Page

|
 Home
| What's New |
Features |
Gallery |
Reviews |
Reference |
Forum |
Search
Home
| What's New |
Features |
Gallery |
Reviews |
Reference |
Forum |
Search