Tamiya 1/48 scale conversion
Mosquito PR I
by Jim Kiker
 |
De Havilland Mosquito PR.I |

Tamiya's 1/48 scale Mosquito B.Mk.IV is available online from Squadron
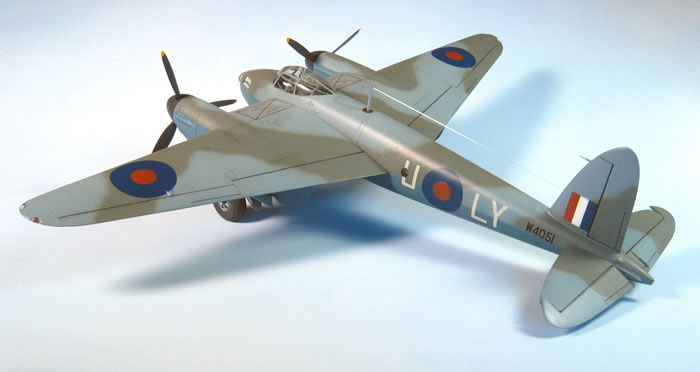
The inspiration for this build came from a particular recce mission completed in Mosquito PR I #W4051 on 4 Mar 1942. This was the first Mosquito post-strike reconnaissance mission, flown after a night bombing mission just outside Paris. The cloud cover was solid across France and down to 400-600 feet; the crew navigated up the Seine River at very low level under the clouds and brought the pictures home after making multiple low passes. A great story!
For this project I used the Tamiya 1/48 scale Mosquito Bomber Mk IV kit; a Paragon conversion set for the prototype Mosquito; a combination of kit parts, MDC parts, True Details bits, some other scratchbuilt parts for the interior; and Ultracast parts for the tail wheel assembly and mud guards on the main wheels.
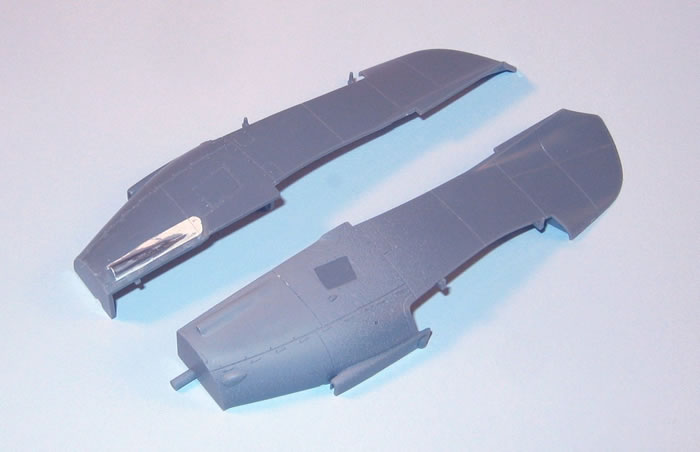
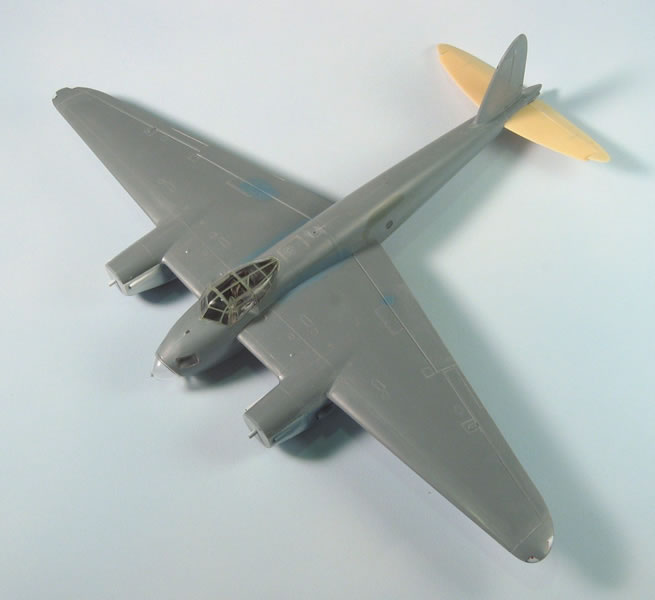
I started by tackling the engine nacelles first. W4051 had small scoops in the locations where the exhaust stacks would later be seen. The prototype parts do not have these bits, so I made them from brass tubing fitted in place with Milliput used to fill in the area. Using Milliput allowed me to do most of the smoothing work without sanding off the fastener detail on the kit parts just above the original exhaust opening.
W4051 had the early short engine nacelles, so the kit pieces were cut along a panel line at the rear edge of the wheel wells to allow the short nacelle pieces from the conversion set to be fitted. Here is an early test fit; the nacelle halves were glued up by now but the resin pieces were added later, after the nacelle was glued onto the lower wings.
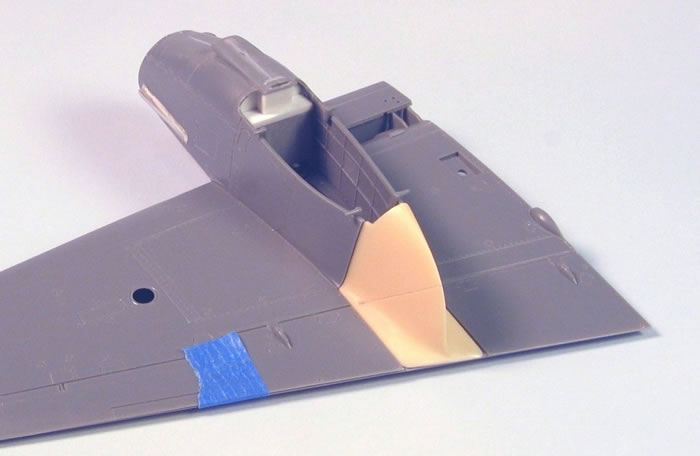
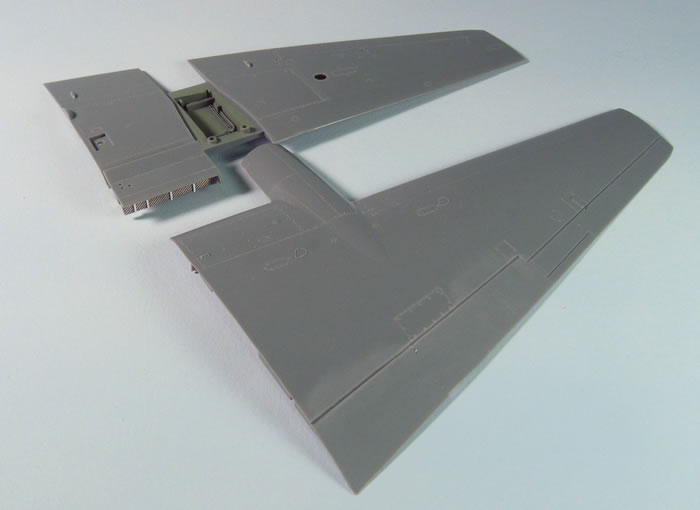
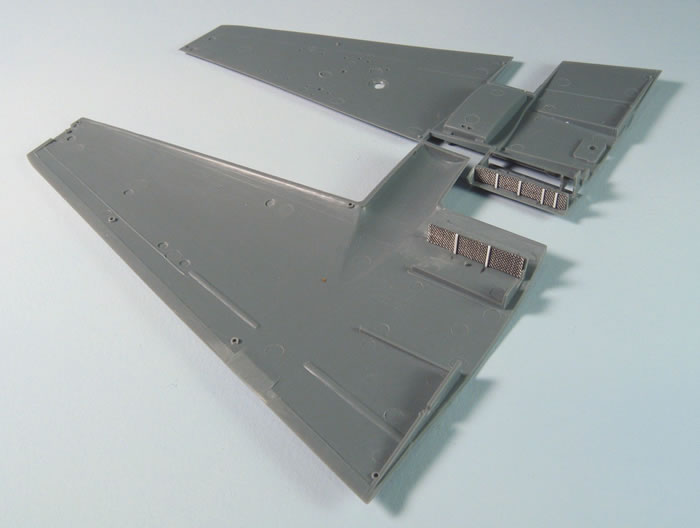
Next on the list was to modify the trailing edge of the wings. I trimmed off the engine nacelle extension, filled in the incorrect panel lines, and connected the main line of the inner and outer flaps to form one continuous line. I also pre-shaded the top of the wheel well with dark gray and added Interior Grey Green (IGG). Be sure to mask the edges of this area before painting them so the nacelle pieces will still bond well when they are glued on.
While working on the wings, I also detailed the radiators a bit. I fitted some fine screen to the radiator faces and added some fine plastic strips using reference pictures. These areas were later painted IGG, the radiators themselves were painted black and then the screen and strips were dry brushed in a medium steel color.
In looking at references I found that the reinforcing strip on the lower right fuselage side was not present on these early Mosquitoes, so I removed it. Likewise, pictures made when the aircraft was engaged in trials work (before continuing on to the 1 PRU in the fall of 1941) also show that there were no ID lights on the bottom of the fuselage. I used CA glue to fill in these lights and sanded them smooth.
The Tamiya 1/48 scale Mosquitoes have a vertical fin/rudder that is slightly too tall. Here is the method I used to shorten it a bit with the least mucking around. I started by taking approximately 1/16" off the top of one half of the kit's vertical fin. I lined up the other half of the fuselage so that its fin tip is even with the cut and the trailing edge of the rudder met at the back edge, then draw a line on the inside of the cut piece, like this:
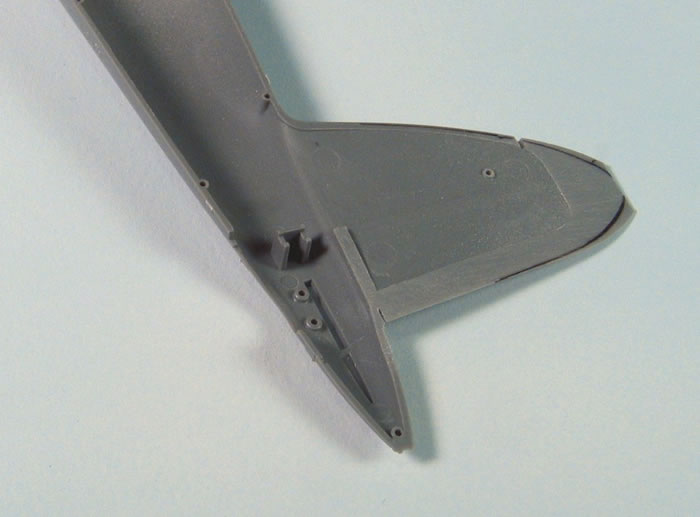
I recontoured the shortened piece to match the outline, then held the fuselage halves together as normal and marked the new outline on the inside of the other side of the fin. I trimmed and sanded that side to shape, then held the parts together again and sanded the edges lightly to ensure a good match. I also sanded the inner edges of the two fins so the rudder’s trailing edges would be a thinner. Of course, I had to fill in the engraved horizontal line of the rudder near the top and move it down 1/16", and I also moved the mount for the pitot tube down by the same amount. With a little tape and some care you can do all this without messing up the ribbing effect on the rudder. Actually, I reduced that effect a bit with a rub down using very fine sandpaper to top it all off.
It is important to note that the side oblique camera window in the left side of the fuselage moved around as production continued on the different PR versions. The PR I's had it behind the trailing edge of the left wing, starting about 1' back with the bottom of the port about 3" above the trailing edge.
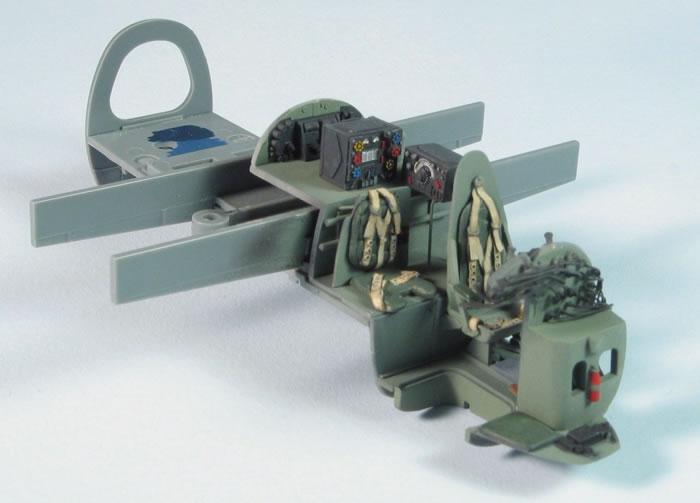
I do not have factory drawings or measurements, just the existing photographs of W4051 and her sisters. Aerial cameras in use at the time had a lens body of 5-6" in diameter; I have found that a 1/8" tube replicates a 6" diameter pretty well, and for the port itself I made a scale 9" hole. For this model I opened the hole for the port, then used a sanding drum to make a larger indention on the inside of the fuselage. This allowed me to use a spare camera port from the bomb bay cameras. In the picture below you can see the finished opening in the fuselage.
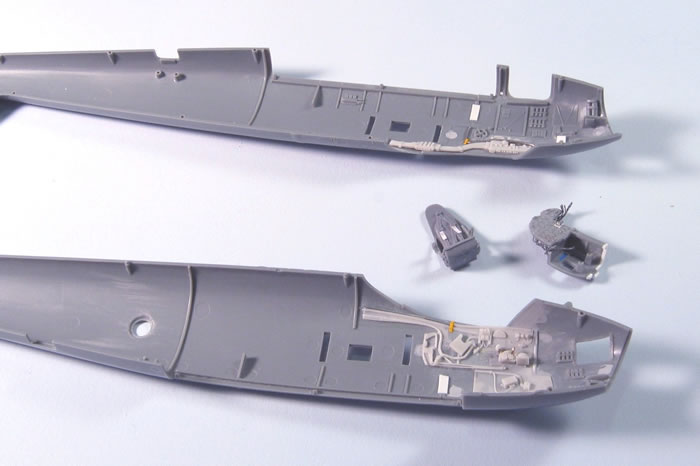
Also note the light gray cockpit bits added to the sidewall areas; these are some of the MDC interior bits. I decided to use the kit instrument panel; later on I used Barracuda Studios' instrument panel placard decals. I also added wiring on the back of the instruments and the landing gear/flaps/bomb bay control levers on the right side of the instrument panel. I replaced the seats with resin ones with Sutton harnesses, added photoetched levers for the throttles, and some scratchbuilt details as well. I like to do this stuff, but I must say that using the kit canopy (it is quite clear, but thick enough to distort viewing) makes some of the details hard to see!
Next up was to make up a faux side oblique camera and a mount; I used a large piece of plastic that was fit to be wedged vertically in the fuselage with a camera lens made from the 1/8" tube I mentioned earlier. The assembly was fitted so that the camera lens had a downward look angle of between 20 and 30 degrees from vertical, when viewed from the front. This was an educated guess on my part; it reflects my own first-hand knowledge of recce camera installations from the '70's and 80's and it comes close to similar WWII installations I am aware of. Your mileage may vary! With all of the cockpit additions done, it was time for some paint.
I painted the cockpit bits a dark gray first, then used extra thin Interior Green Grey (IGG) and painted everything on a down-ward angle. This gave me some shading of the pieces and reduced the amount of washes I needed to give some depth. I prefer subtle effects, so I tend to go easy with the washes and highlighting. I did do some highlights using RAF Sky, with a bit of silver on the metal parts for wear and tear.
Before closing up the fuselage I added a chunk of .040" plastic under the opening for the antenna mast to give myself a stronger antenna mount. The kit mast has a very shallow pin to hold it, so I made a new one from a small wooden coffee stirring stick. I made a hole for the rigging before the final shaping, and made the bottom end over-long. I slathered it with CA glue to fill the wood pores, painted it, and added one end of the monofilament before rigging it at the end of the build. It is pretty robust for such a small piece, much better than the kit piece.
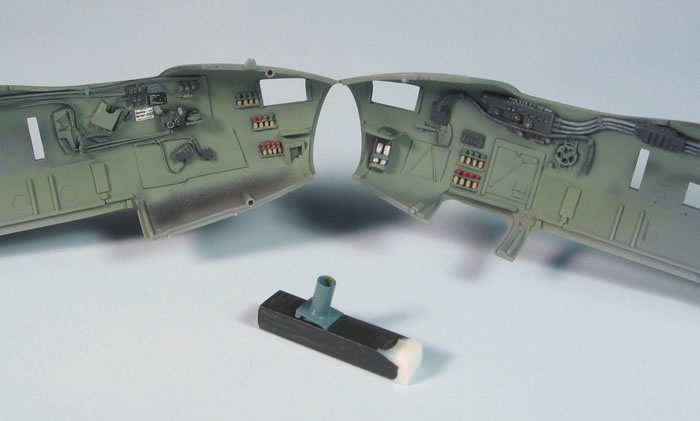
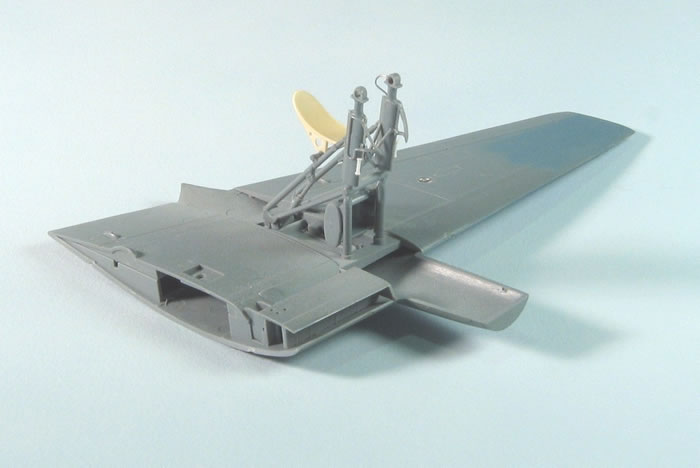
Here is a second shot showing the main cockpit pieces all ready to install.
I did some light scribing around the pads and seat belts before painting; since I used a dark green for the pads, I did not need much of a wash to "pop" the seat belt detail.
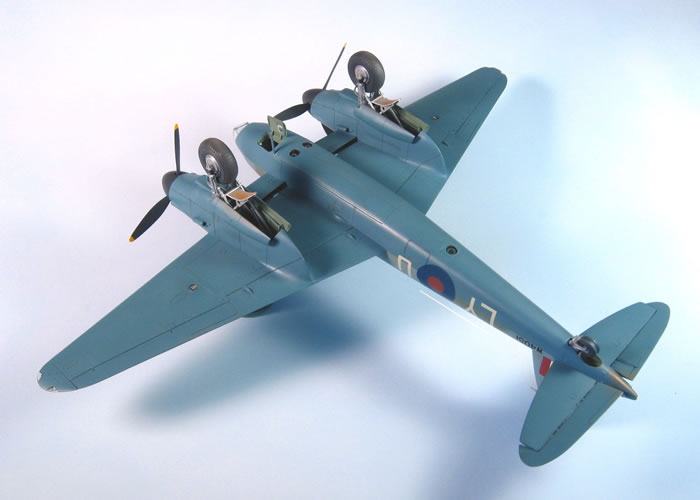
In thinking about the landing gear, I decided to clip off the axle for the main wheels and substitute a plastic rod later. This allowed me to paint and wash the gear separately from the wheels and tires, but it also meant that getting the gear pieces together in proper alignment was more difficult. I decided to use the kit's landing gear strut mounts as a jig. I took care to clean off the fine mold separation lines on all the struts; while doing that I added tiny drops of thin CA glue to the smaller joint areas on the struts. This provided additional strength to the gear without detracting from the details. I added brake lines to the right side only of both sets of struts, substituted the resin mudguards from Ultracast, and added rollers on the front of each strut from white plastic rod and strip. The gear was later painted silver, washed to pop the detail, and dirtied up a bit before being installed.
I used Montex masks on the inside of the canopy and painted the frames with IGG. Main assembly of the fuselage and wings followed.
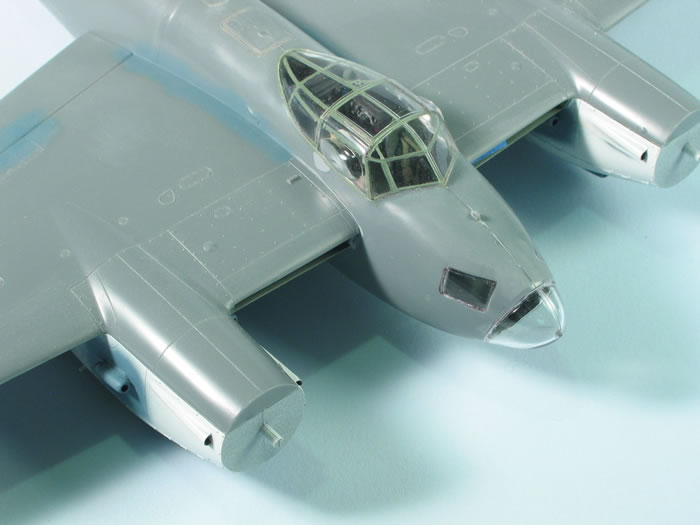
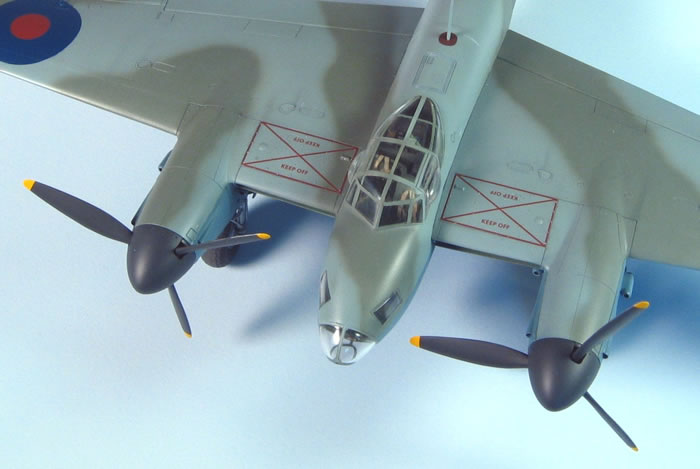
Before gluing on the wings I had painted the area around the landing lights and glued on the clear lenses. I also painted the details on the wingtip formation lights and glued on the clear lenses. The lenses were fully faired in with CA glue applied around the joints, sanded smooth, and the lenses polished back to clarity. I glued in the resin back ends to the engine nacelles and filled and sanded the rather loose joints with Milliput; much sanding and minor filling ensued to achieve a smooth sweep of the modeled skin on all these new joints. I also replaced a lot of the panel line and rivet details that run right next to the nacelles; it is tedious work but it makes the conversion parts look like they belong there.
Once the wings were on I fitted and added the prototype "short" horizontal stabs. The separate elevators were fitted, pinned with small brass pins, and installed at the proper "dropped" angle. One other small thing I will point out is that between the time this next picture was taken and the painting began, I found out that these early Mosquitoes did not have the windshield deicer system, so that tiny little bit that sticks up in front of the windshield was removed. Heaven is in the details…
It was high time for some exterior paint!
I love unusual schemes, and when I find a neat story of an airplane I'm interested in and add in an interesting scheme, I'm hooked. The only problem is, those unusual schemes can be difficult to pin down. Eventually, a round of questions over on Britmodeller brought help from the real experts, and a copy of the order for the camouflage that went on these first PR I's was turned up in the archives.
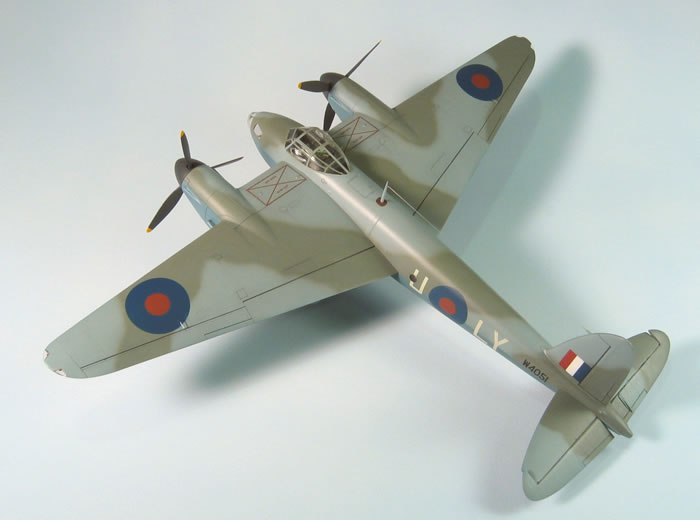
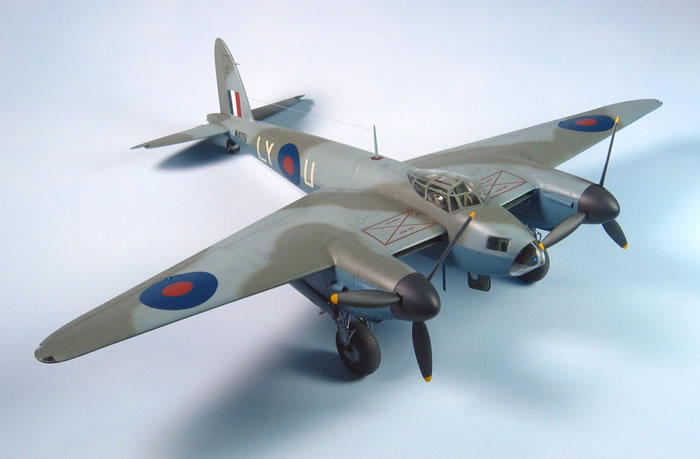
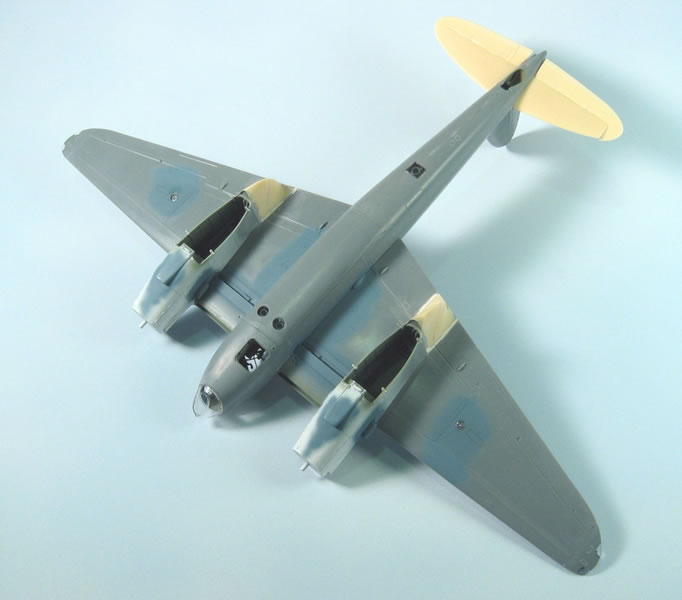
I had stopped work at the point because I wasn't sure of the colors so that was a huge boost. Based on that, the upper colors were Medium Sea Grey (MSG) and Olive Grey; the undersurfaces were initially very light color and the best we could come up with was- maybe- Sky Blue.
Note that Olive Grey is a non-standard color; it turned out to be a shade near Ocean Grey (OG) but with an olive green cast. When W4051 went to the PRU to go on ops, she received a repaint on the bottom of PRU Blue. While I had excellent color data available to work from, I make no claim to have reproduced it exactly; but I really appreciate being able to start the correct colors.
The upper surface camouflage on the early PR I's had a very soft demarcation line in the pictures. I was able to spray paint the camouflage free hand. I started with the Mosquito day fighter scheme because it was fairly close to the pictures, and then partially re-drew that to match the pictures.
I use solvent-based paints and custom mix colors most of the time. I then use clear acrylics for a gloss coat before decals and a second clear acrylic gloss coat as a sealer over the decals. I apply washes, weathering, and things like exhaust stains, and then seal it all off with a clear acrylic flat or semi-flat. I use the clear acrylics because they allow decals to settle into the finish, making them look painted on. All that said, I only have one picture of the paint work in progress, and at that the work was nearly done.
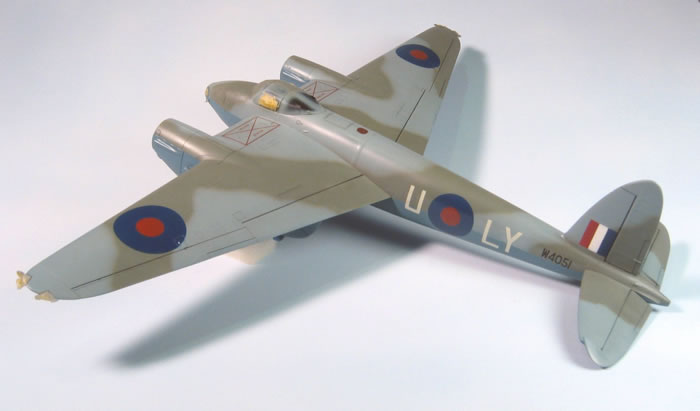
Notes: I masked off the clear parts and wheel wells first, then painted the top camouflage colors, and then masked and painted the bottom. This aircraft received type A1 roundels at the factory. After she went to the PRU, the yellow and white were painted out using dull blue and dull red, respectively. This meant that she carried non-standard sized fuselage roundels, and thus, no decals were available. I had picked up a masking set for the Mosquito markings which included masks for the A1 roundels. This allowed me to use the masks to paint the non-standard PR fuselage roundel, and I masked and painted the upper wing roundels and the fin flash so they would all match. The code letters and serial number along with a few external stencils were done with decals. I also painted the area at the bottom of the mast in a dark ruddy brown; it's made from the same material as Spitfire seats and was left unpainted in the vast majority of cases, both on the Mossies and on Spitfires.
As the painting continued, I finished the landing gear, wheels with the early spokes on the left side, and replaced the tail wheel components with an Ultracast set. I painted the prop tips in yellow and the rest of the props and spinners with Floquil's Grimy Black, a very dark gray I like for "scale" black.
Acknowledgements
I wish to thank the Britmodellers, particularly Edgar, Ben M, Graham Boak, Andy, Nick Millman, and my buddy Wally for their help in making this project as well-researched as I have been able to do. My deepest thanks to all those who helped me get the details right. That's all, folks!
Model, Images and Text
Copyright ©
2013 by Jim Kiker
Page Created 8 October, 2013
Last Updated
9 October, 2013
Back to HyperScale Main Page
|
 Home
| What's New | Features | Gallery | Reviews | Reference | Resource Guides | Forum |
Home
| What's New | Features | Gallery | Reviews | Reference | Resource Guides | Forum |