Bachem Ba 349 A Natter
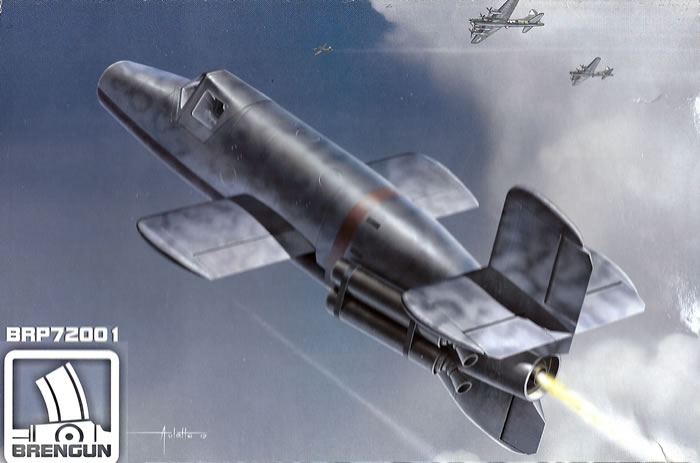
Brengun, 1/72 scale
S u m m a r y : |
Catalogue Number: |
Brengun Item No. BRP72001 - Bachem Ba 349 A Natter |
Scale: |
1/72 |
Contents & Media |
One clear and thirty-eight grey styrene parts, one PE fret of six parts, and decals for four colour schemes. |
Price: |
Available from these on-line stockists: Hannants for £8.32, Modelimex for €10.00, & Hobby Link Japan for ¥1840.
Note: Brengun includes their Ba 349 kit in their E-shop catalogue, but pricing is not included. Instead, they redirect buyers to Hauler’s website for this. Brengun is a Hauler brand, which is fine, but unfortunately the Natter is not in the price-list! |
Review Type: |
First Look. |
Advantages: |
Improved accuracy and detail compared to the Heller kit. There is a choice of horizontal stabiliser types and it has good decals. |
Disadvantages: |
It has no plexiglass nosecone and the rocket tubes in the nose are empty. |
Conclusions: |
It is great to have a readily available Natter kit in 1/72-scale. This is Brengun’s first effort at an injection-moulded kit, and it is a good one. It is an improvement over the Heller kit in terms of accuracy, with the added advantages of better detail and decals. The choice of horizontal stabilisers adds interest as well.
It is a pity that there are no rockets for the nose battery as these could easily have been made of resin. There is no plexiglass nosecone for the rocket battery either.
Rocket battery gripes aside, this is a very pleasing kit. I am sure that both regular Luftwaffe fans and those ’46 types will welcome it. I definitely recommend this kit. |
Reviewed by
Mark Davies

HyperScale is proudly supported by
Squadron.com
The Ba 349 Natter was a last ditch attempt by the Germans to challenge the daylight bomber raids that were pulverising their home territory. Two of the harder tasks that a pilot must master are landing and take-off, but Germany lacked time and resources to train pilots as the war neared its end. The attraction of the Natter was that it did away with the need for the pilot to control take-off or indeed land the plane. Armed with a battery of air-to-air rockets, it could take off vertically to attack a bomber formation. An autopilot controlled the Natter’s launch and approach to target, whilst a hastily trained SS pilot controlled the attack phase of the flight.
The Natter used the same liquid fuel rocket engine the Me 163 Komet. It also had four solid fuel boosters used for take-off that were jettisoned after they burned out. The Natter was to launch as a bomber formation neared its base and climb above the enemy, whereupon it would attack in a dive much as the Komet did. It would them engage the bombers with its battery of twenty-four R4M rockets that were fired off in one go. These same 73-mm rockets had proved very effective when used by the Me 262 that carried them on underwing pallets.
Some of the Komet’s operational problems would have applied to the Natter as well. It would have had similar issues with refuelling risks, short fuel supply and high closing speeds. Both planes were point-defence interceptors, but the Natter had the distinct advantage of not needing an airfield. The Allied bombers used flight paths that avoided known Komet airfields. This would be much harder to do with Natters launched vertically from hidden sites.
The Natter then descended rather like a brick with wings to somewhere that was hopefully near to its base. In fact, the Natter proved to be quite controllable during an untethered gliding test flight, albeit with a very steep glide angle. The cockpit and nose would then separate from the fuselage. This process expelled the pilot shortly thereafter, who would land using his parachute. There was to be a parachute recovery of the rocket motor and the remaining airframe as well. However, the impact of landing caused small amounts of unused fuel to explode and so destroy the motor and airframe. The wooden airframe was simple to make and therefore expendable. The rocket motor consumed more resources to build, but its loss had to be accepted too.
Bachem built around thirty to thirty-six Natters, of which unmanned take-offs consumed eighteen. A pilot successfully bailed out during an unpowered test flight when the nose separated from the airframe, which at least proved that the escape system worked. Another Natter crashed following a towed gliding flight (it had a crude fixed tricycle undercarriage). The single attempt at a manned take-off killed the test pilot when the Natter went out of control early in its take-off. Around fourteen finished and thirty incomplete Natters may have existed at the war’s end.
It seems fair to say that the Natter was not exactly a standout success for Jerry then, but bally clever chaps all the same; wouldn’t you say?
Previous 1/72-Scale Natter Kits
I am aware of three previous Natters in the one true scale. The best known and the best of these is by Heller. It comes boxed with the manned version of the Fi 103 V-1 flying bomb. Crisply moulded, with very fine and restrained raised surface detail, the Heller kit is a rare find these days. I am lucky enough to own one, and I once owned a simple and rather crude resin Natter kit by AV Models. Airmodel made a vac-form kit with which I am unfamiliar, but I should imagine it is basic.
The Contents
This is Brengun’s first injected kit. It comes in an end-opening box with computerised artwork on its front. Call me old-fashioned if you will, but I prefer a good painting for box-art; but this matters little. The instructions have a parts map and use a diagrammatic format that is easy to follow. There are no written instructions, but then none are required, so simple is this kit.
Paint colours are in Czech and English, and cross-referenced to RLM codes where applicable. The painting and decal guide consists of colour plans on the rear of the box. The parts come enclosed in a zip-lock bag, with the clear and PE parts are further enclosed in a small bag of their own.
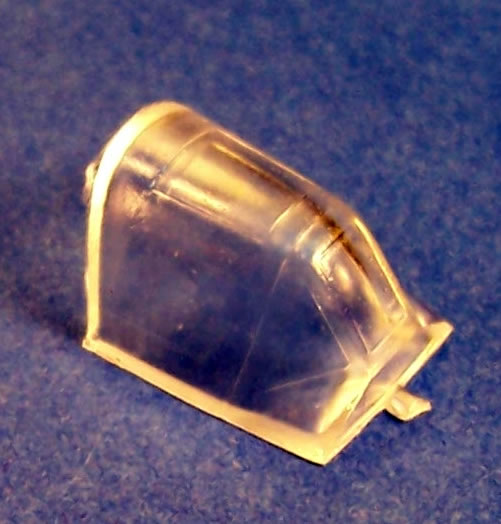
This is a typical Czech limited run kit. To compare it to a better-known brand I would say it is about on par with say Special Hobby. It has cleanly moulded parts with fine surface detail. Parts break down is conventional. The sprue gates are narrow, and there is just a hint of flash in places, but this a minor issue. The clear parts will benefit from a polish and coat of Future. A small good quality PE Fret completes the parts tally.
The Airframe
Assembly of the kit is straightforward. It starts with the cockpit interior that includes seat, PE belts, control column, rudder bar, instrument panel, floor, and rear bulkhead.
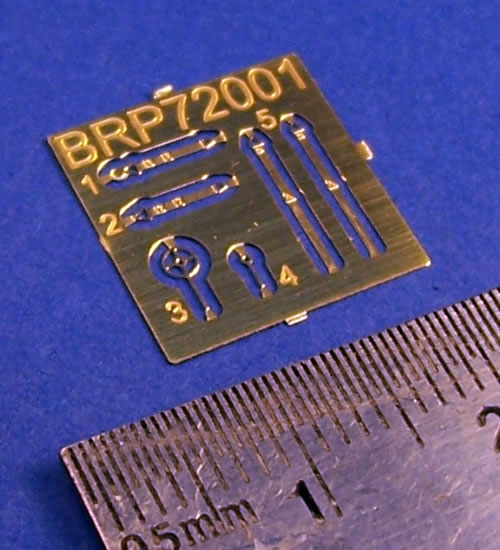
However, not much is visible through the canopy’s has small clear panels.
The exhaust and rocket battery fit within the fuselage before closing the two halves. Describing it as a rocket battery is wrong however, because there are no rockets. Instead, the kit has a plastic disc with indentations to represent the empty rocket tubes. I think that Brengun could have made this disc as PE brass item with holes, rather than as a plastic part with indentations. I think that mould limitations may have prevented the kit from having a plastic disc with rocket heads. Resin would be ideal to use for this, and Brengun have experience with this medium. What a pity it is that they chose not to. The jettisonable nosecone that covered the rocket heads s is also missing from the kit. My references show the Natter often displayed without the nose cap but with a full load of rockets, and less frequently without rockets in the tubes. I think most modellers would prefer to have an armed machine to display.
The tiny wings fit with a simple butt joint to the fuselage. There is a choice of two sizes of horizontal stabiliser. These fit on top of the base of the fin, after which the remainder of the fin fits in place. The larger of the two stabilisers applies to one test colour scheme.
The four booster rockets come in two pairs with separate exhaust nozzles. The exhaust nozzles are in two parts to enable them to have hollowed out centres. A one-piece canopy and PE ring & bead sight completes the airframe assembly. The kit also provides a wooden trestle to sit the completed model on. This is not a gimmick but based on photos of the real thing.
Overall, I think this should be a simple and enjoyable kit to build.
Colours & Markings
The kit offers four colour scheme options. One is for airframe M52, which was a test machine with bold aircraft attitude markings on the wings in white. This is the machine equipped with the large horizontal stabiliser. Another is for airframe M58 that also appears to have test colours.
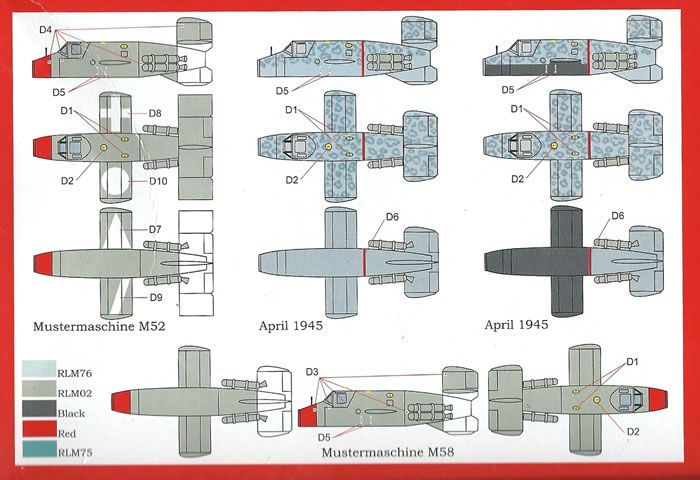
The remaining two schemes are for camouflaged aircraft at the war’s end. The decals include some white shapes for M52’s wings and stencilling for all the scheme choices, but they lack swastikas.
A Quick Comparison to the Heller Natter
I am sure some will be curious as to how Brengun’s new Natter compares to the old Heller kit; so I made a quick comparison since I now had both of them.
The Heller kit is a crisp moulding with delicate raised surface detail. The canopy is two-piece, enabling an open one if you wish. The clear parts are okay, but a polish and coat of Future will benefit them. The kit has just the small style horizontal stabiliser. The rocket battery features small warheads but looks a little undersized. The kit does supply the plexiglass cap as a clear piece. The rocket boosters are two pieces rather than Brengun’s twelve. They do not look quite as detailed as Brengun’s, but drilling out the exhaust nozzles will help a lot. Assembly of Hellers’s airframe differs from Brengun’s in terms of its approach. The fuselage halves enclose the wing whilst the horizontal stabiliser joins either side of the fin. Cockpit detail is not quite as good as Brengun’s, but this hardly matters. Like Brengun’s kit, the Heller one includes a wooden trestle. The Heller kit does not have decals.
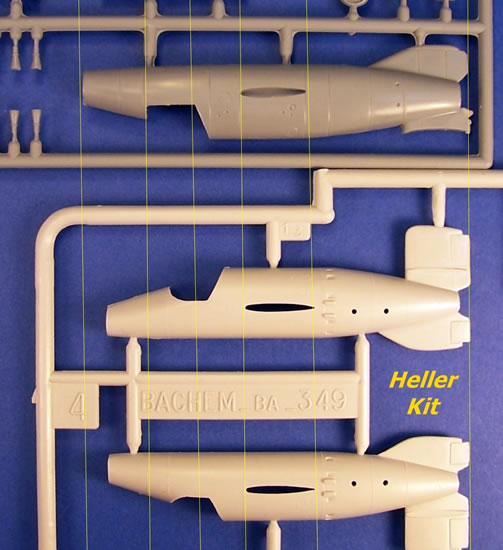
The two kits are very similar in outline, but differ in their forward fuselages from the rear cockpit bulkhead to the nose. The Brengun kit is a little longer and has the cockpit further forward from the wing. The image of the two kits’ fuselages with datum lines illustrates this point. Based on my references, I think that Brengun is more accurate in this respect. I also prefer Brengun’s sizing of the rocket battery‘s tubes, but I still think it is a pity that no rocket heads are depicted. There is a difference to in the forward ends of the booster rockets. Heller’s are rounded whilst Brengun’s are flat. Both appear to be correct judging by images I have seen. There was also a third style with a very slightly rounded end. I think that the rounded type may be more applicable to test machines and the flat type to production examples.
Booster rockets aside, the Heller’s moulding quality is slightly better than Brengun’s, as you expect when a long run kit’s to be. Brengun has better cockpit detail, but wastes this because of the closed canopy, whilst the opposite applies to Heller. Brengun’s PE sights are a benefit however. Brengun’s decals are nice to have, but do not count for that much in this subject’s case. Heller has the plexiglass cone, but I think most modellers would choose to leave this off to expose the rocket battery. Heller’s rocket battery is not very good, and Brengun’s no rockets but is a better size.
Brengun wins due mainly to a more accurate forward fuselage. Better detail helps to extend its edge over Heller. A choice of two horizontal stabilisers is nice to have as well, as are the decals. Above all though, Brengun’s kit is readily available whereas Heller’s is not. This simple fact should see the Brengun Natter sell very well.
It is great to have a readily available Natter kit in the one true scale. This is a very good first effort at an injection-moulded kit. It is an improvement over the Heller kit in terms of accuracy, with the added advantages of better detail and decals. The choice of horizontal stabilisers adds interest as well.
It is a pity that there are no rockets for the nose battery as these could easily have been made of resin. There is no plexiglass nosecone for the rocket battery either.
Rocket battery gripes aside, this is a very pleasing kit. I am sure that both regular Luftwaffe fans and those ’46 types will welcome it.
This is Brengun’s first effort at an injection-moulded kit, and it is a good one. I definitely recommend it.
Thanks to Brengun for the review samples.
Review Text & Blue Background Images Copyright © 2012 by Mark Davies
Page Created 17 July, 2012
Last updated
17 July, 2012
Back to HyperScale Main Page

|
