Building Tamiya's 1/48 scale
Il-2 Shturmovik
by Brett Green
|
|
Ilyushin Il-2 Type 3 |

Tamiya's 1/48 scale Il-2 Shturmovik will be available online from Squadron
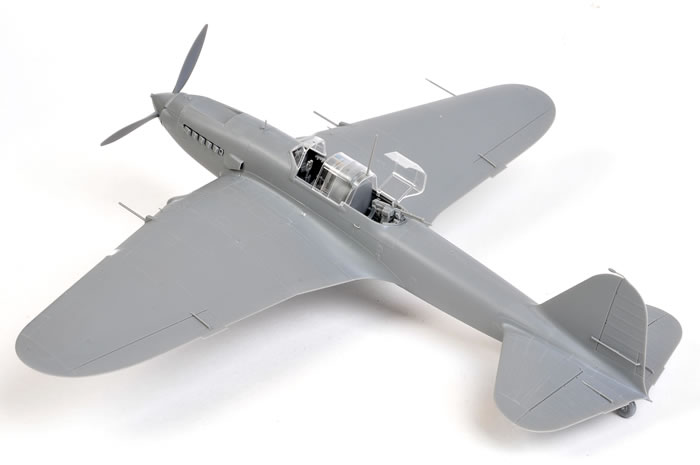
Last week I built the test shot of Tamiya’s 1/48 scale Il-2 Shturmovik, as reviewed earlier on HyperScale .
The model was built straight from the sprues with no additions or modifications.
Sprue attachment points were removed with a sharp hobby knife and sanding sticks, but no other work was done to the plastic parts. Once the parts were glued together, there was no sanding, scraping, filling or any other form of correction or improvement.
Tamiya Extra Thin Liquid Cement was used for the larger assemblies, while smaller pieces were secured with Revell Contacta cement. Tamiya masking tape and/or plastic clamps were used to hold some of the major sub-assemblies while the cement dried.
As always, familiarise yourself thoroughly with the instructions before you start cutting parts from the sprues. The only place that I deviated from the suggested construction sequence was delaying the fitting of the delicate rudder, aileron and elevator actuators until the very last step.
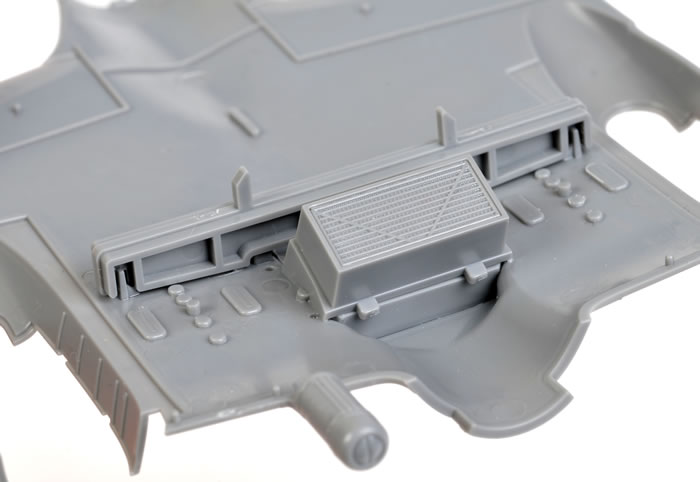
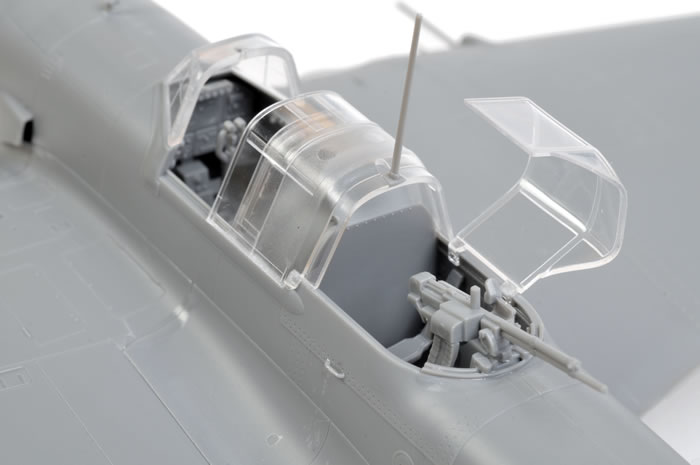
The instrument panel features raised bezels and buttons. The production kit will supply decals for the dials and other details. This decal / plastic combination has looked very effective in previous Tamiya releases. A clear gunsight is offered as an alternative part.
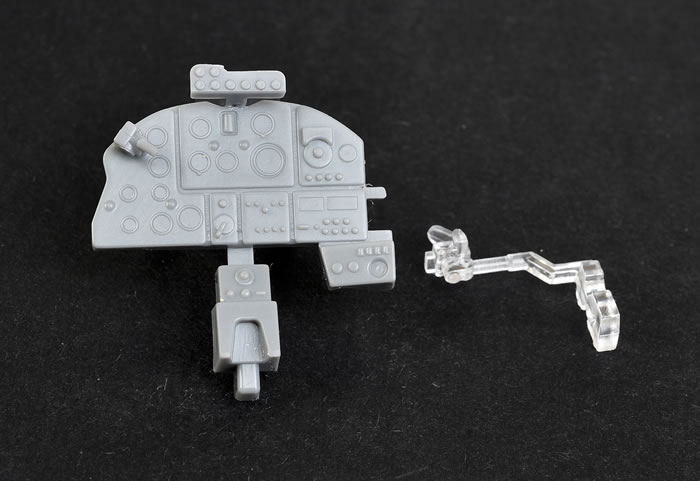
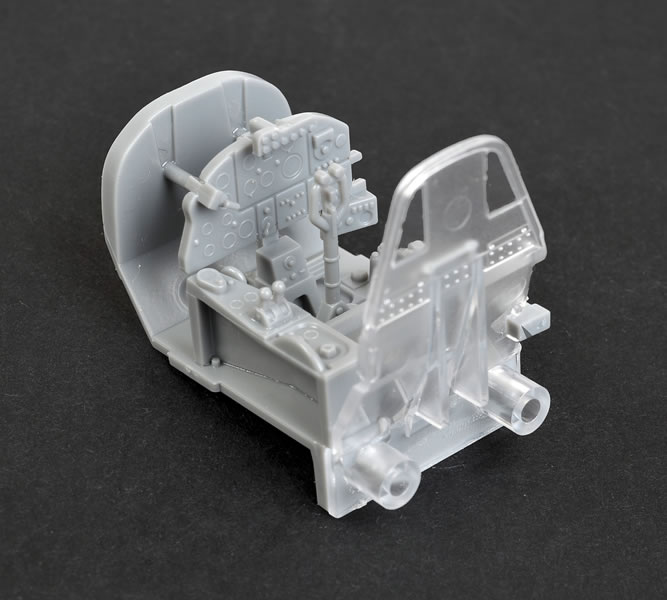
The various cockpit sub-assemblies go together quickly, especially when they aren’t painted! Once again, decals will be provided for the harness straps in the production kit. These may be cut out along with their backing paper to be glued to the seat.
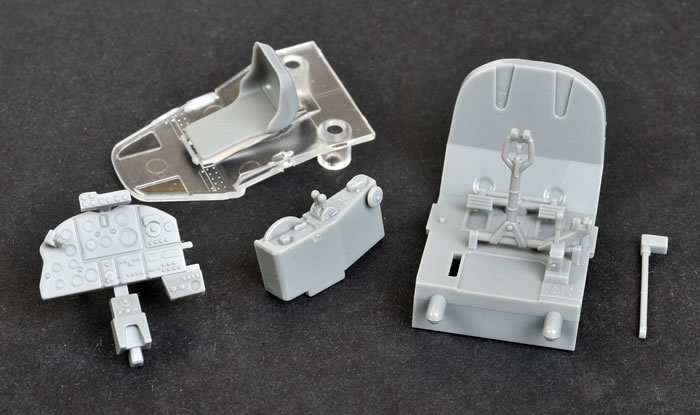
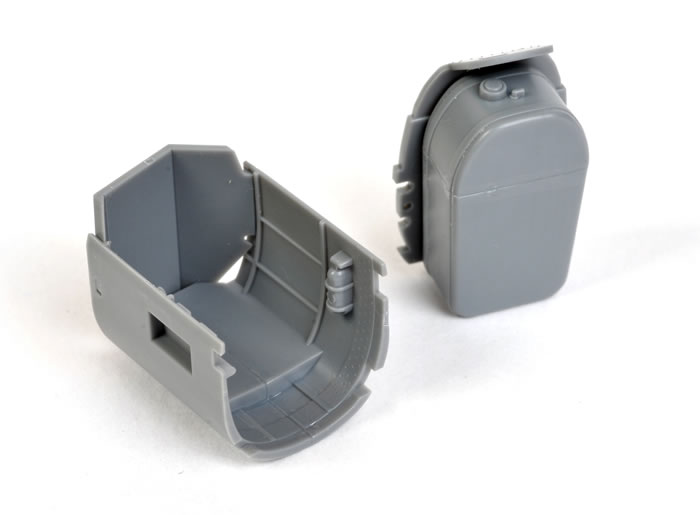
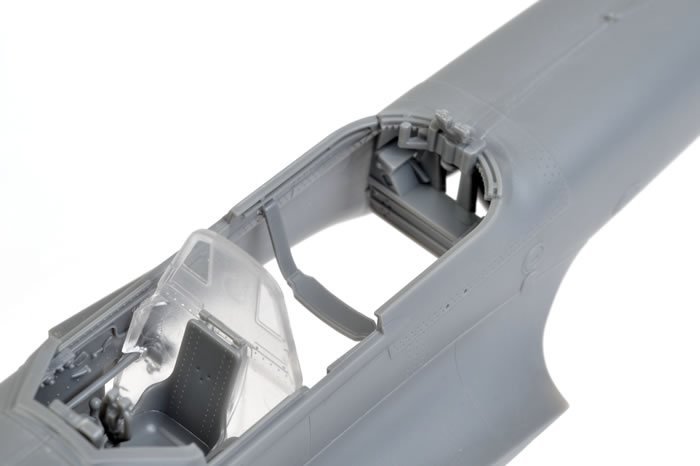
The forward cockpit is suitably busy once it is assembled. Don’t worry about the ejector pin circles on the frosted pilot’s armour – these will be hidden by paint and the fuel tank.
The gunner’s rear cockpit tub is a separate insert. The fuel tank is split horizontally. This join will be completely hidden once the tanks and the cockpit are fitted inside the fuselage.
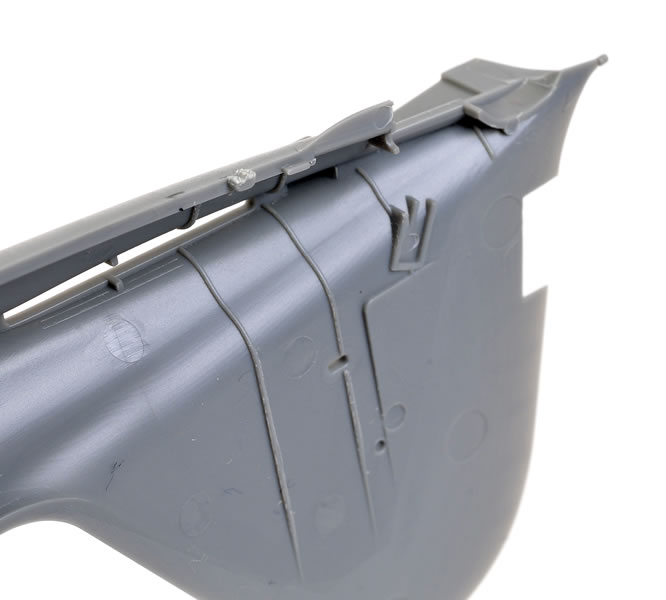
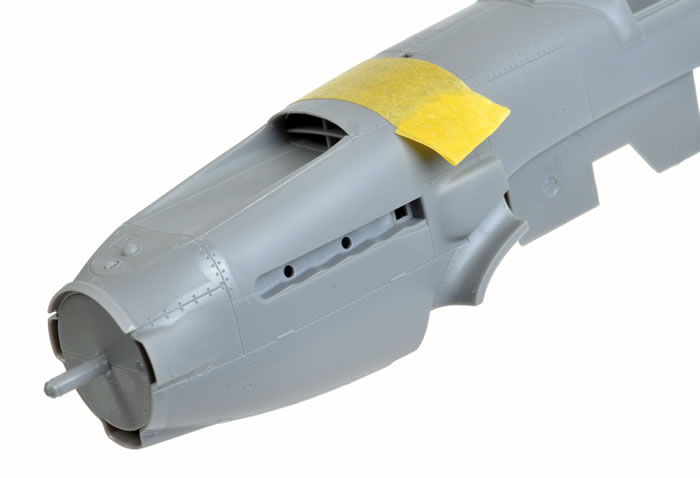
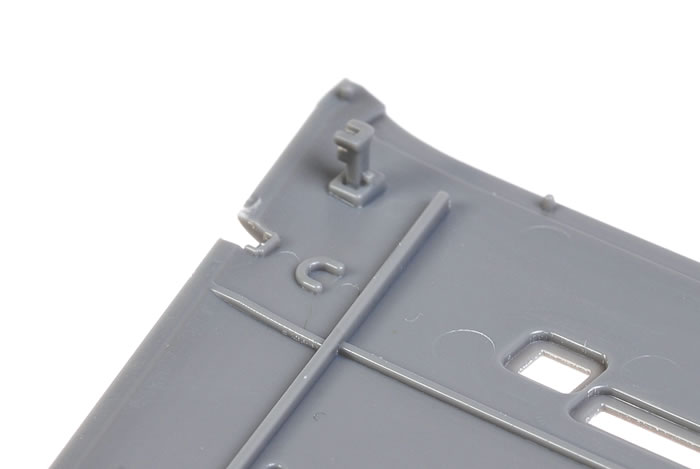
The sprue attachment points for the fuselage and wing parts are moulded to the mating edges of the plastic. This reduces the risk of scarring the outer surface of the parts when cutting them from the sprues. We can see the raised residue from one of these attachment points on the bottom of the fuselage. This was carefully removed with a sharp hobby blade and cleaned up with a sanding stick.
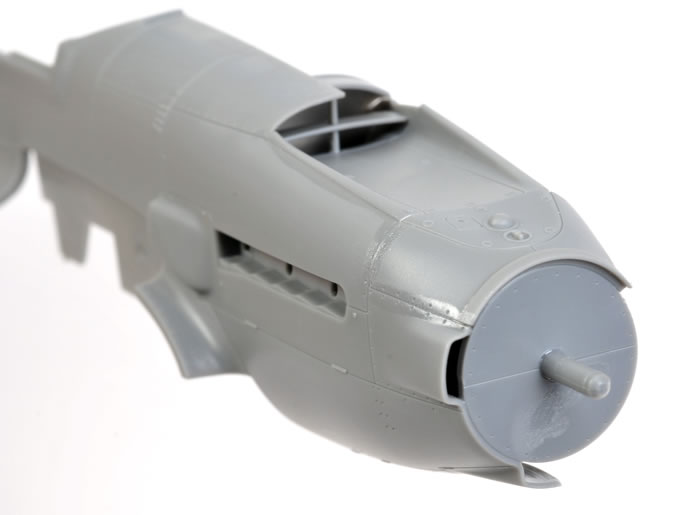
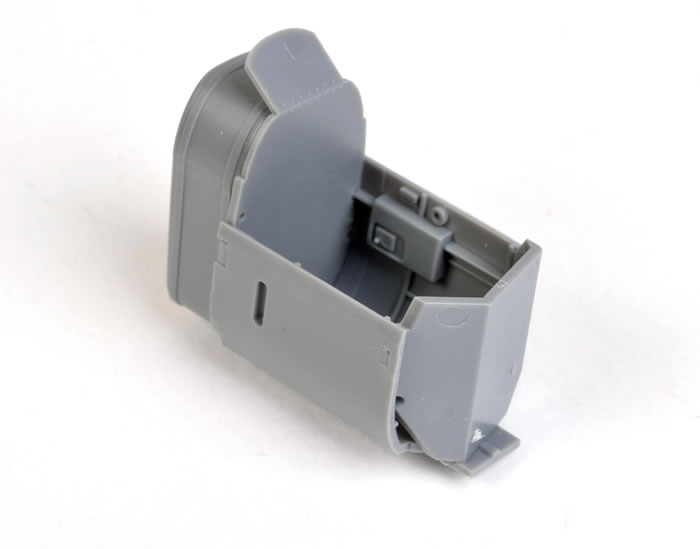
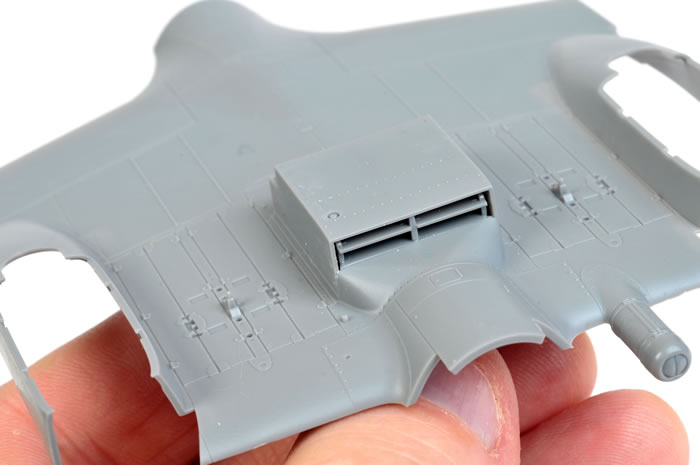
Tamiya’s parts breakdown of the nose, with its complex intake ducting and narrow intakes at the front of the engine cowling, is very clever. The basic engine block adds rigidity to the nose assembly, and also offers a hint of interior detail behind the intakes.
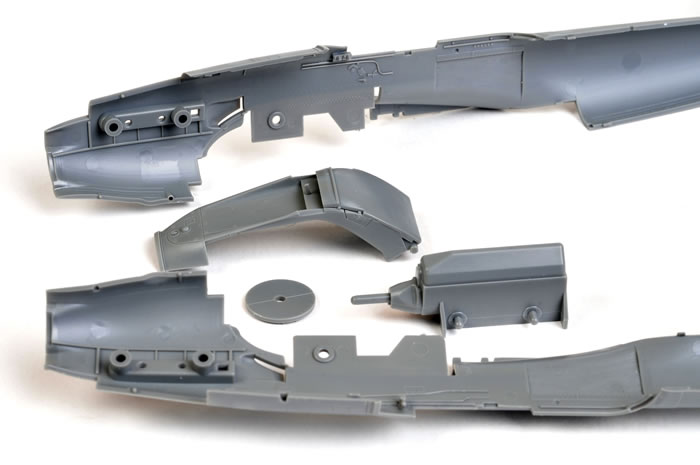
The intake ducting and engine block glued in place on one side of the fuselage. The fit is positive.
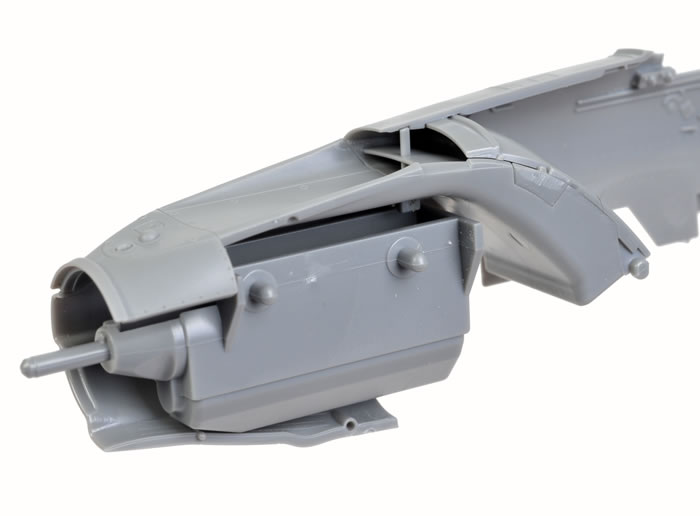
Check out the precision of the fit between the upper forward deck and the fuselage. Also note the scale-thin edges of the nose scoops. The glossy remnants of the liquid cement will disappear completely under a coat of paint.
The fit of the nose parts is equally good on the other side. The fit and ease of assembly of this area stands in stark contrast to the painful memories of building the Accurate Miniatures kit.
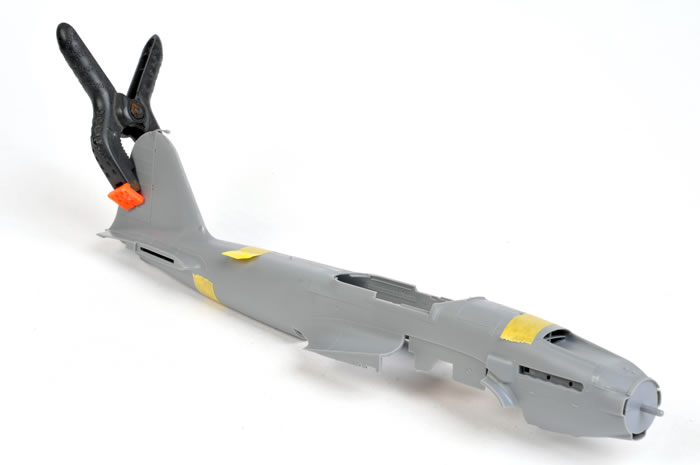
The fuselage halves are clamped while the cement dries.
The front cockpit is fed up through the big gap in the bottom of the fuselage then glued in place. The open back end of the cowl intake ducting may be seen in this view.
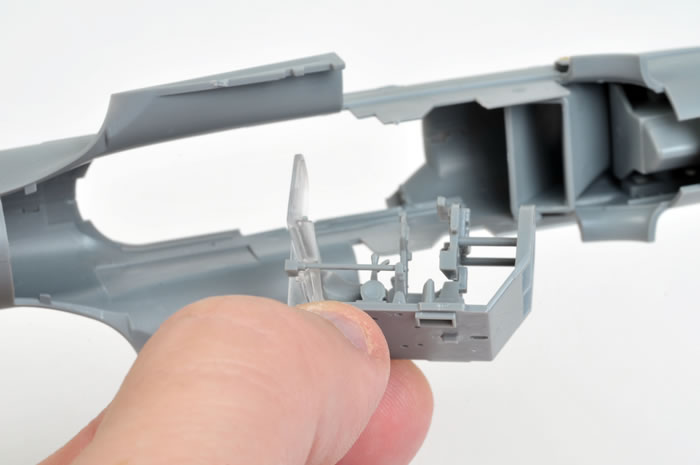
The rear machine gun mount and the gunner’s strap are fitted at this point too. The strap is located via shallow holes on the inside of the fuselage. The instructions advise that the strap should be fitted now, before the rear fuselage tub is installed. I recommend that you follow this advice. A delicate touch is needed for the installation of this part and the extra elbow room (or, more accurately, tweezer room) is helpful for manoeuvring the strap before the tub is fitted.
The rear cockpit tub and fuel tank sub-assembly ready for installation.
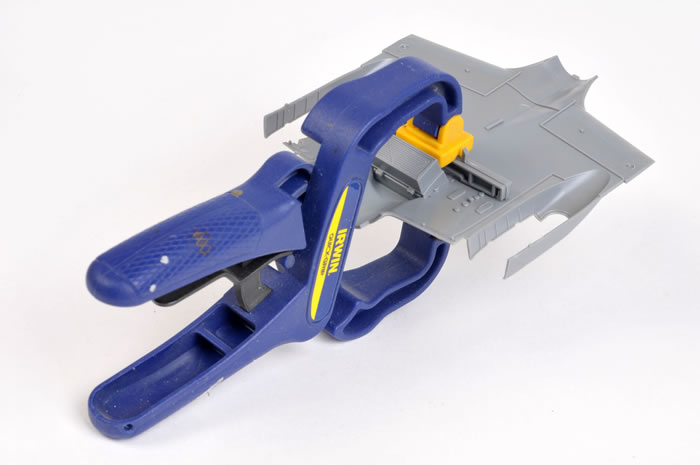
A plastic Irwin clamp was used to firmly hold the wing spar in place on the lower centre wing section until the glue dried.
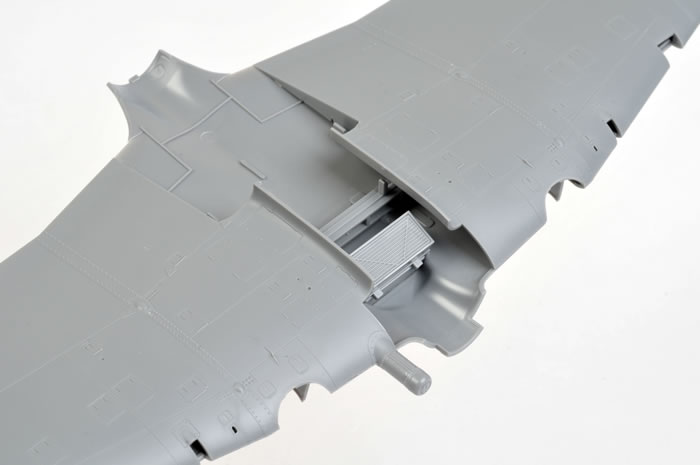
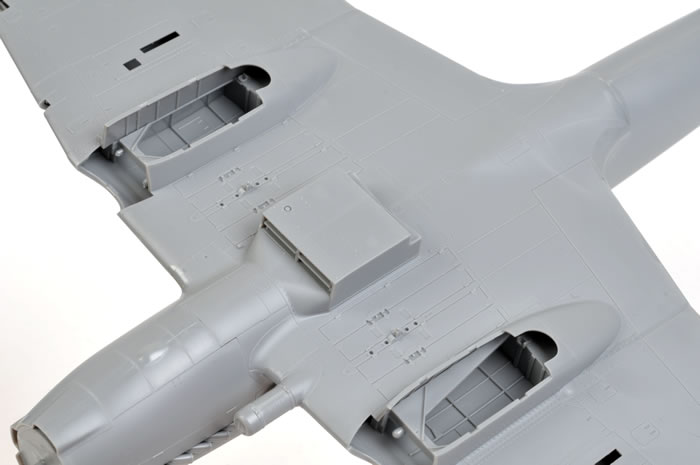
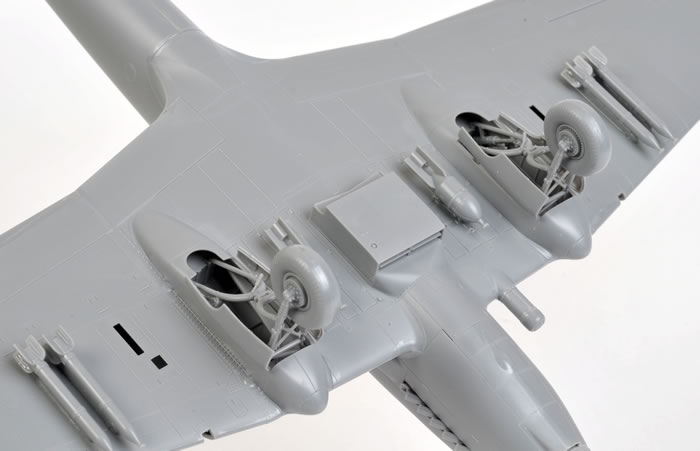
The wheel wells are simple but effective, with separate “boxes” and raised structural detail moulded to the inside of the top wing. Also note that before you glue the upper and lower wing halves together, you need to drill out the holes for your choice of bombs and rockets. I neglected to do this on my fast build, so I had to cut the locating pins off the ordnance and glue them directly to the bottom of the wings.
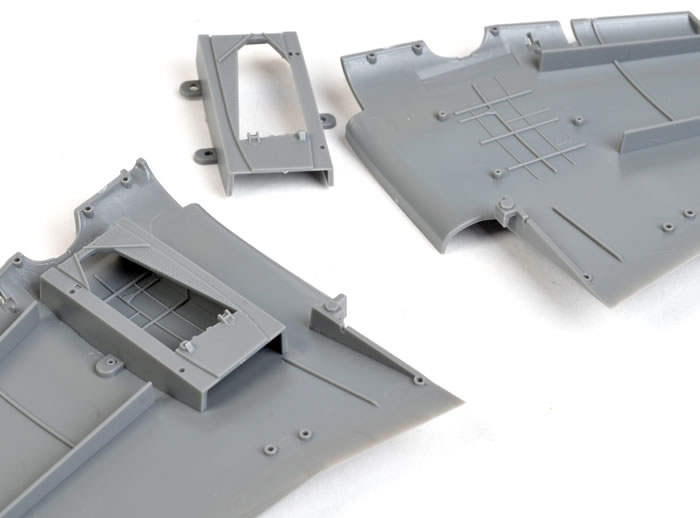
The lower centre wing section. The radiator mates up with the open end of the cowl ducting once the wing and fuselage are assembled.
Radiator intake splitter detail looks good at the front and the rear.
Tamiya supplies spacing pegs for the front corners of the upper wing halves to ensure the precise thickness of the assembled wing.
Here are the three wing sub-assemblies before they were glued together. Note that the tops of the outer sections overlap the centre wing section, ensuring perfect dihedral and a robust fit.
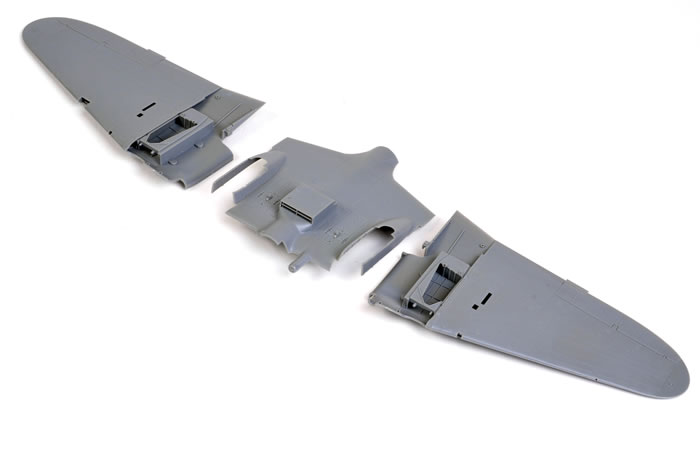
I suppose we should not be surprised to see extraordinarily good fit on a Tamiya kit, but the Il-2 once again had me shaking my head in admiration. The fit of the wing sub-assemblies is perfect. Note that the wheel well nacelles are moulded to the lower wings.

The upper wing. The irregular mating surfaces between the wing and the fuselage look complex, but they work like a charm.
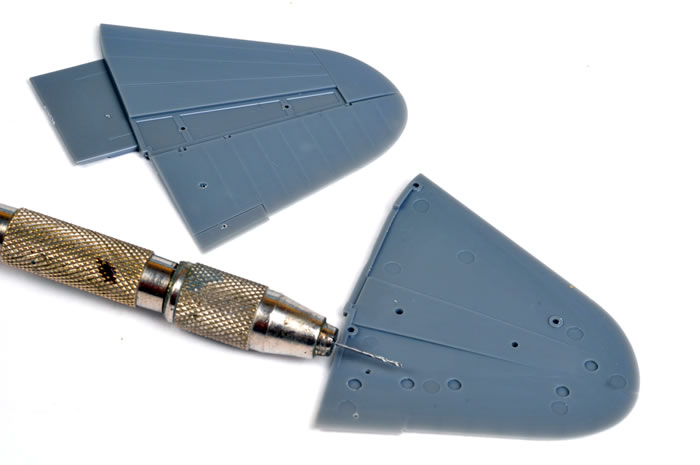
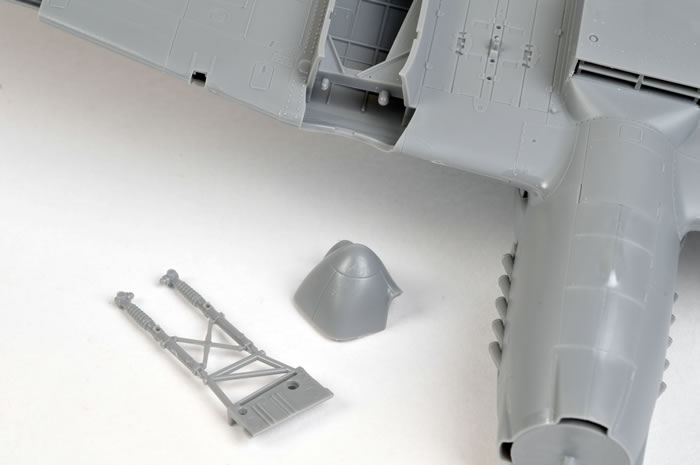
Don’t forget to drill out the locating holes for the elevator actuators.
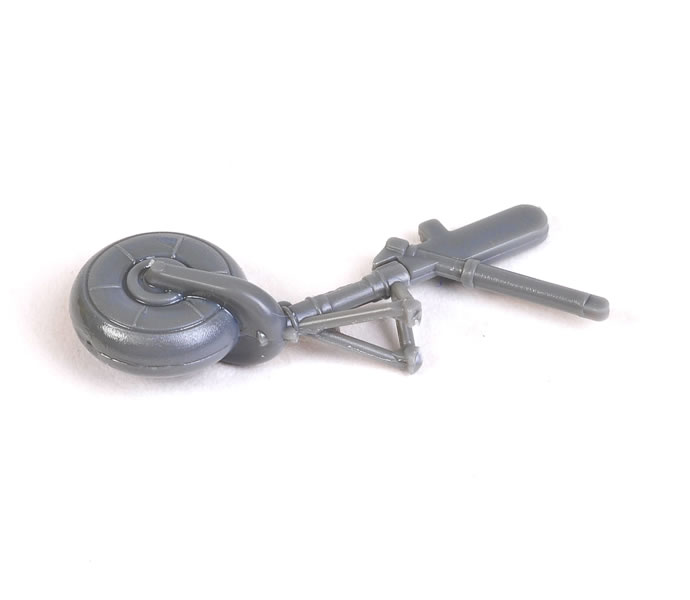
The two-part tail wheel assembly looks great with its large open oleo scissor.
Can you pick the wing root join? Perfect. The wing virtually clicked into place and needed nothing more than a line of Tamiya Extra Thin Liquid Cement brushed along the joins to draw the parts together permanently.
The joins at the bottom of the fuselage were just as good.
The main undercarriage is cleverly designed to fit over large, handed locating pins at the front of the wheel wells. This ensures the correct rake and solid fit.
The leading edge cap is glued in place after the main undercarriage leg is installed. The diagonal brace, retraction gear and wheel may be fitted now.
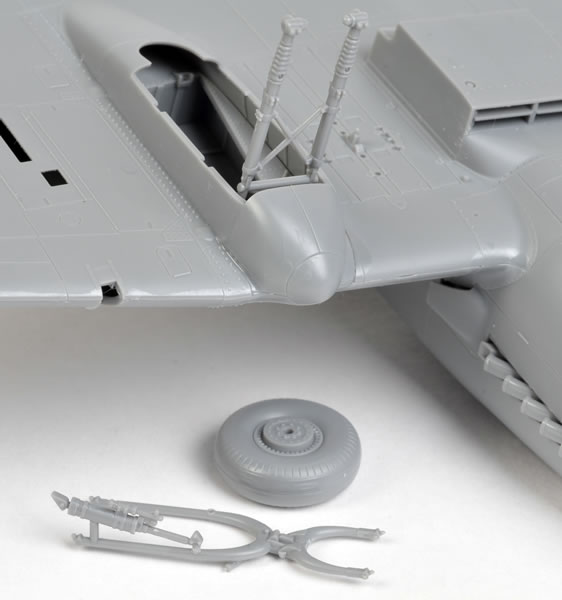
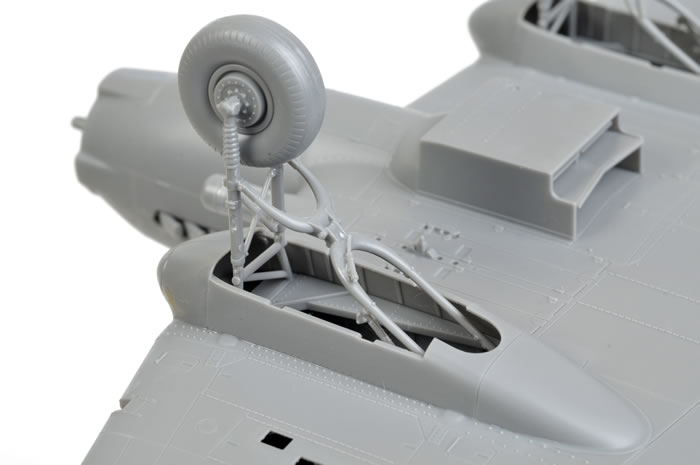
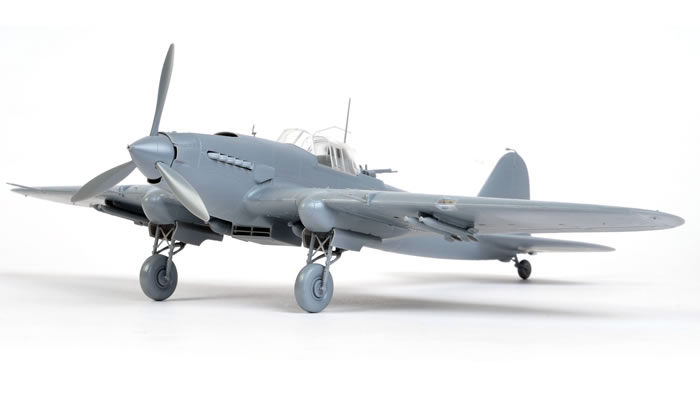
All the undercarriage parts are fitted in this view, although the doors are yet to be added.
A selection of the weapons included with Tamiya’s kit.
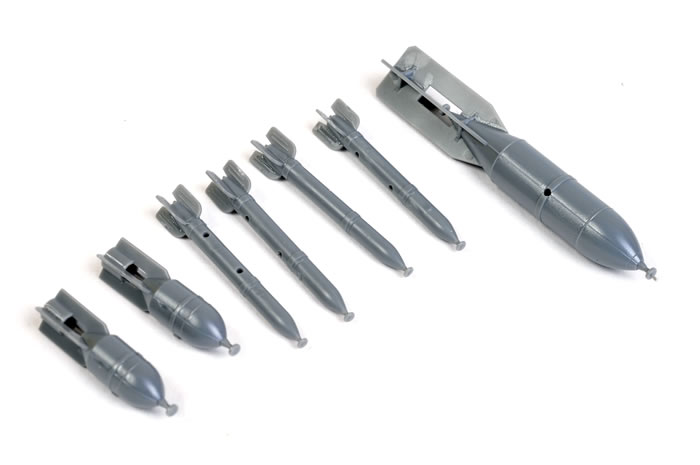
Rockets and bombs installed on the bottom of the wings.
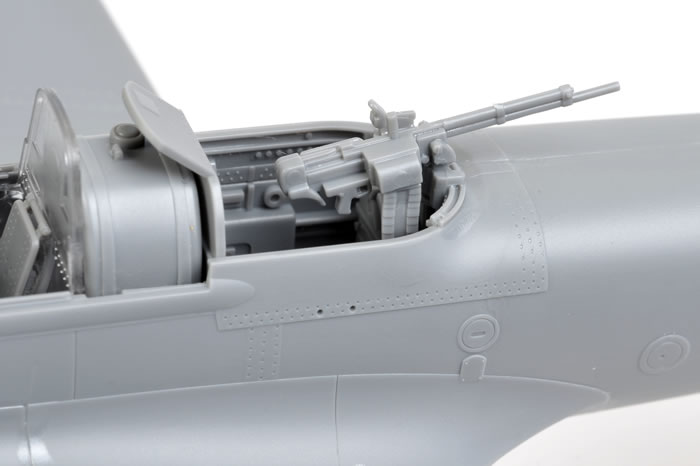
The rear machine gun may be installed after painting. Once again, fit is excellent.
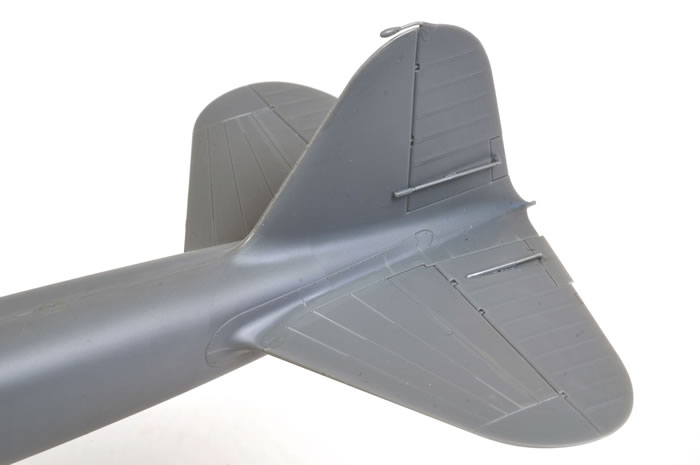
Tail planes and actuators in place. The rudder mass balance is delicately moulded to one of the rudder halves, so care is required when handling the fuselage during construction.
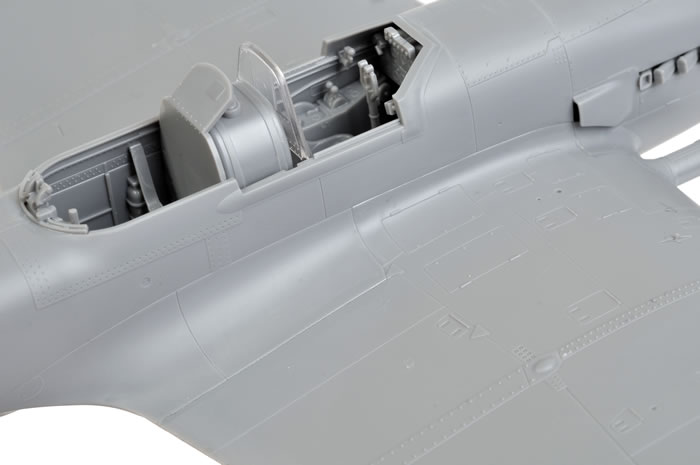
I chose the open canopy option. The illusion of the front section slid over the centre section is perfect. Once again, don’t be concerned about the ejector pin circles on the clear parts. They are on the inside and will be completely hidden by a coat of paint on the outside. The open gunner’s canopy was held at the appropriate angle with a narrow strip of Tamiya tape while the glue dried.
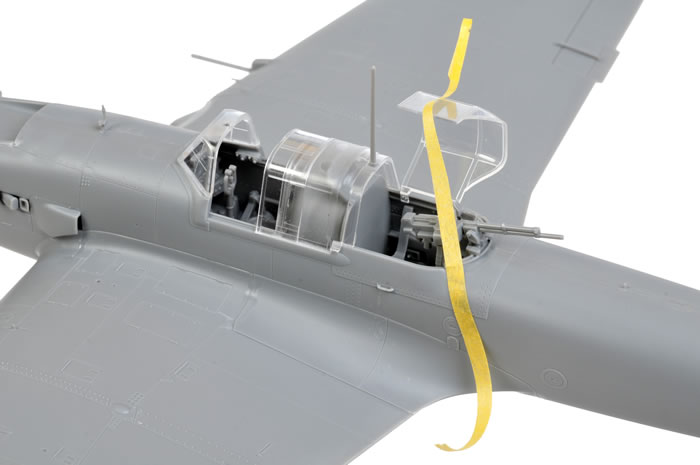
The armour plate at the front of the gunner’s cockpit is (correctly) blank, but plenty of detail is on display in the front cockpit.
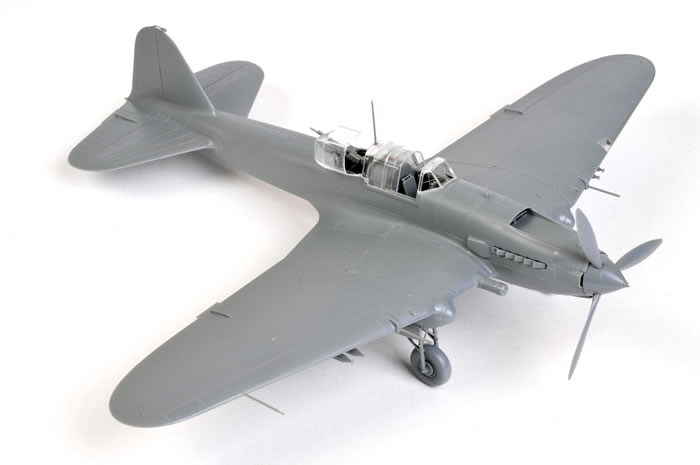
The finesse and precision of Tamiya’s kit design may be appreciated from this angle. Note the crisp thin edges and subtle shapes, all beautifully reproduced. I particularly like the ducting splitters, the intakes at the front of the nose and the splined starter coupling at the front of the spinner.

Tamiya has also captured the shape of the spinner and propeller assembly perfectly. This makes a big difference to the sleek lines of the nose.
Tamiya’s 1:48 scale Il-2 was a pleasure to build. Next time I build one, I’ll paint it too!
|
 Home
| What's New | Features | Gallery | Reviews | Reference | Resource Guides | Forum |
Home
| What's New | Features | Gallery | Reviews | Reference | Resource Guides | Forum |