|
Anigrand 1/72 scale
Hughes XF-11
by John Meyer
|
|
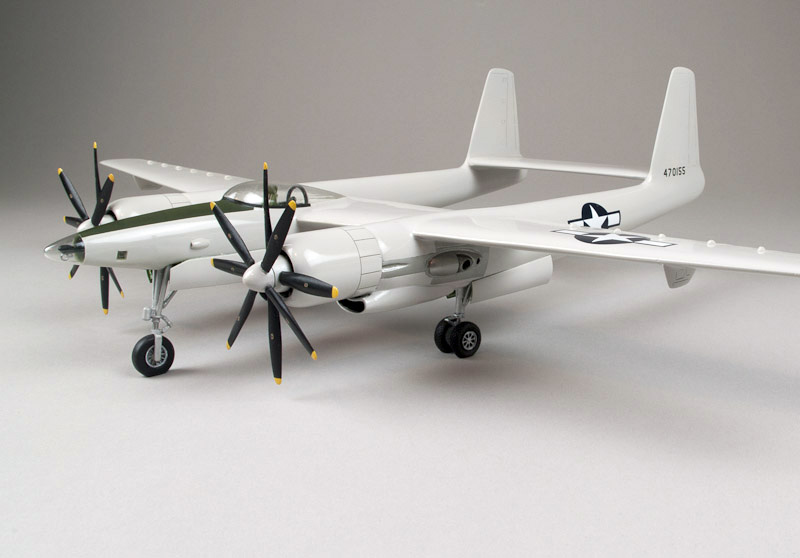
Hughes XF-11 |

Kinetic's 1/32 scale F-86F-40 Sabre is available online from Squadron
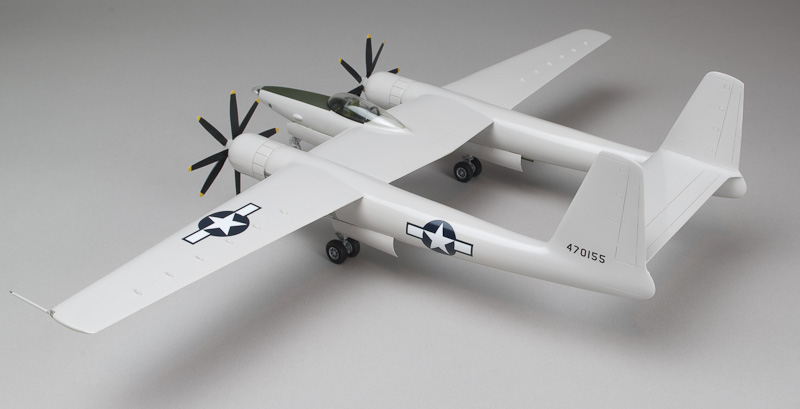
The Hughes XF-11 was designed and built in response to an Air Corps specification for a fast, high-altitude photo reconnaissance aircraft. (Republic Aviation responded to this specification with the XF-12 Rainbow.)
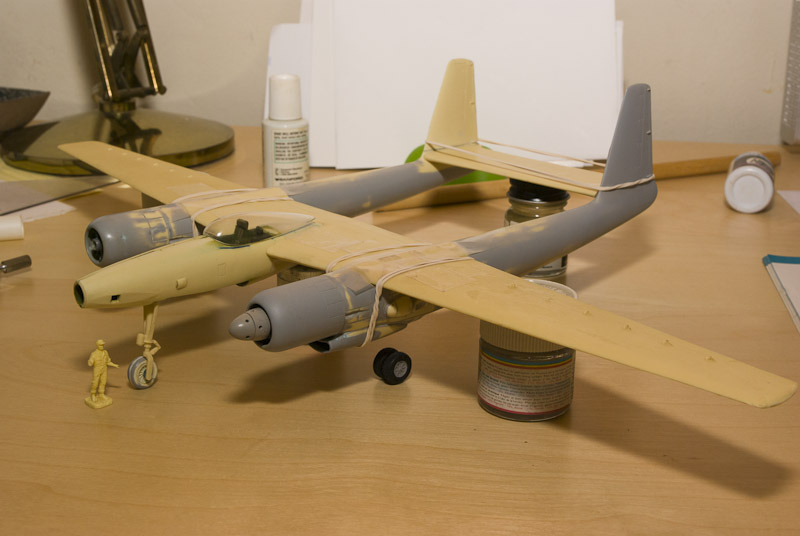
The design was an outgrowth of the mysterious D-2 twin-engine heavy fighter project. Two prototypes were built. This model represents the first, in which Howard Hughes nearly lost his life after a horrific crash in 1947. The second protype was tested for a few years and ended up as a firefighting practice article at Eglin AFB in Florida.
This airplane has fascinated me for many years, largely because of the wonderful photo showing Hughes in the cockpit, in shirtsleaves and fedora, warming up the R-4360s prior to his near-fatal flight. Like the other Hughes designs, the XF-11 was an exceptionally elegant and beautiful airplane. For more information and photographs, see: http://digital.library.unlv.edu/hughes/xf11.php
I was very excited when I heard Anigrand was to release a 1/72 kit of the XF-11. The Anigrand kit appears to be based almost entirely on a 3-view drawing which can be seen in the May 2007 issue of the German magazine, Klassiker der Luftfahrt, and which shows up on the web. The overall shape is not too bad, but there are also some serious and difficult-to-correct errors that throw off the entire look of the model. The reality of this kit was far short of my hopes, but since this airplane is an absolute must-have for me, I stuck with it (my first all-resin model) and I am fairly pleased with the outcome.
Air Intakes
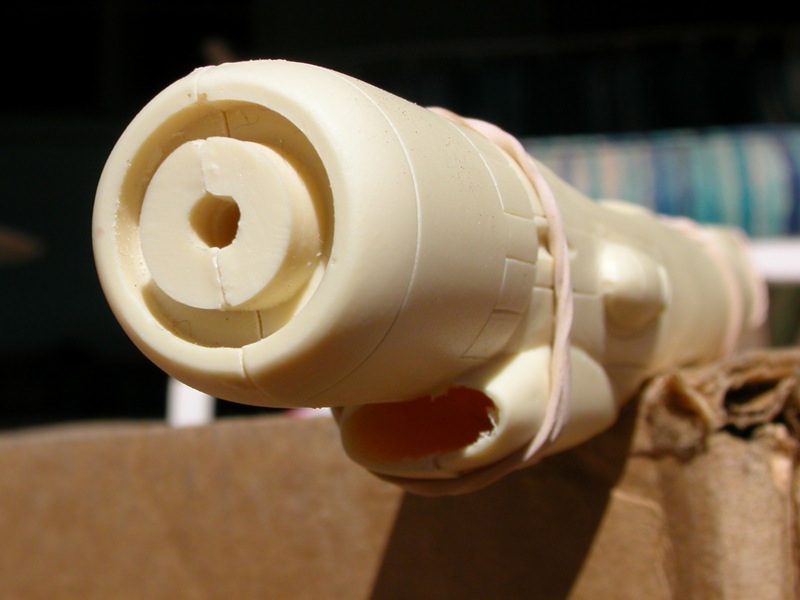
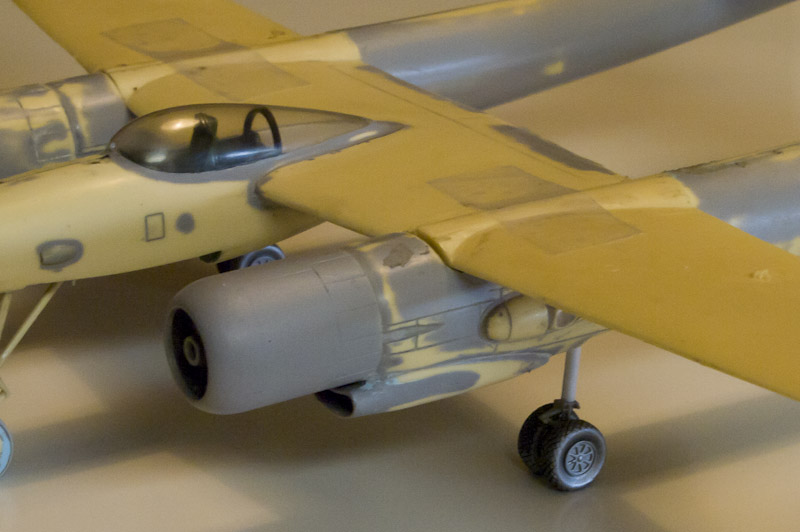
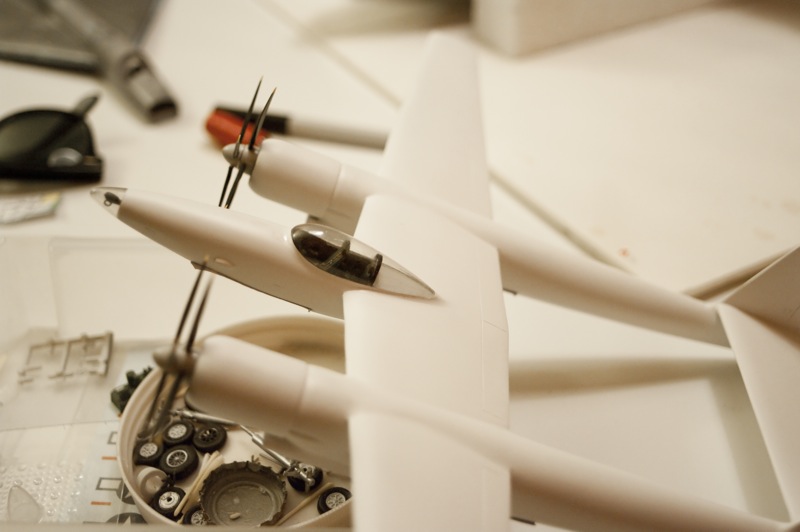
The Anigrand kit has these molded in a way that is completely incorrect, something similar to a P-40 intake. So, from a head-on photo, I traced the shape of the “mouth” in Adobe Illustrator. The idea was to print the shape and tack that on to a chunk of styrene and carve out two intakes. I got one I was happy with but I could not make another that matched. So with the help of a friend, the good one was used as a mold to cast a pair of resin parts.
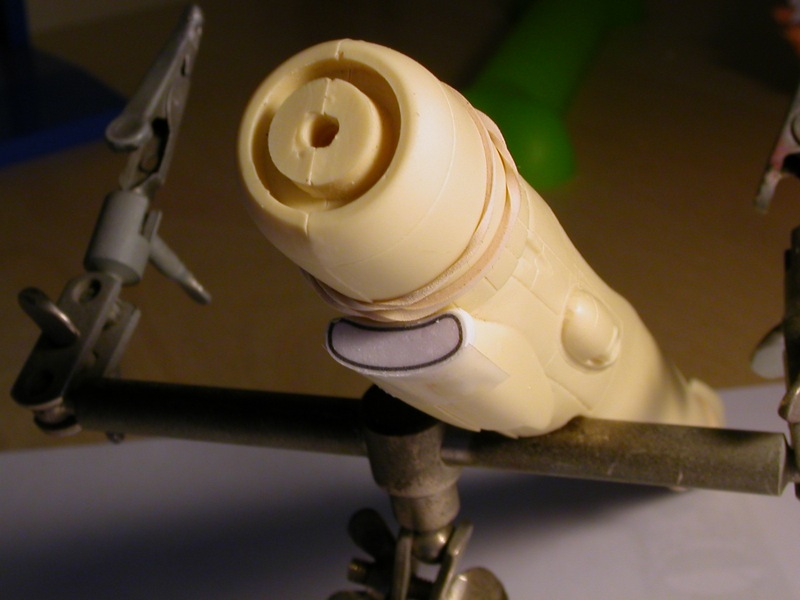
Backing plates of styrene sheet were attached to these, then the kit intakes were then sawed off and the resin parts attached, puttied and sanded. It was a lot of work but the intakes are a real focal point on the XF-11 so it was worth the effort.
Cowlings
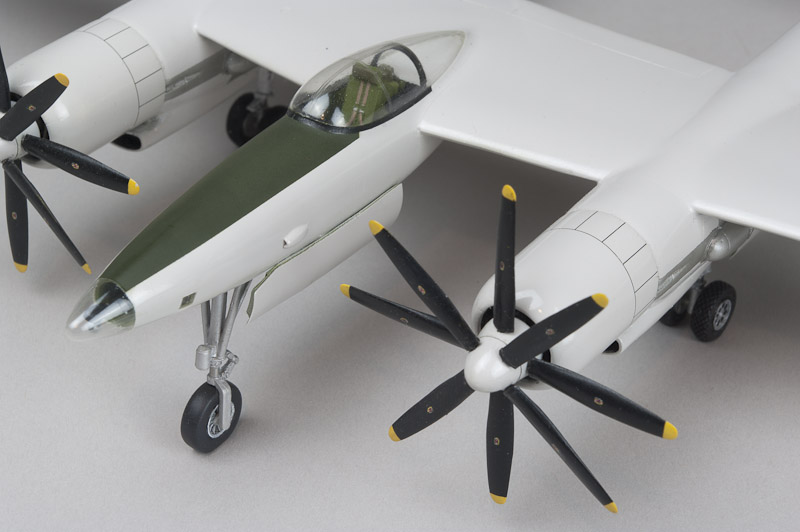
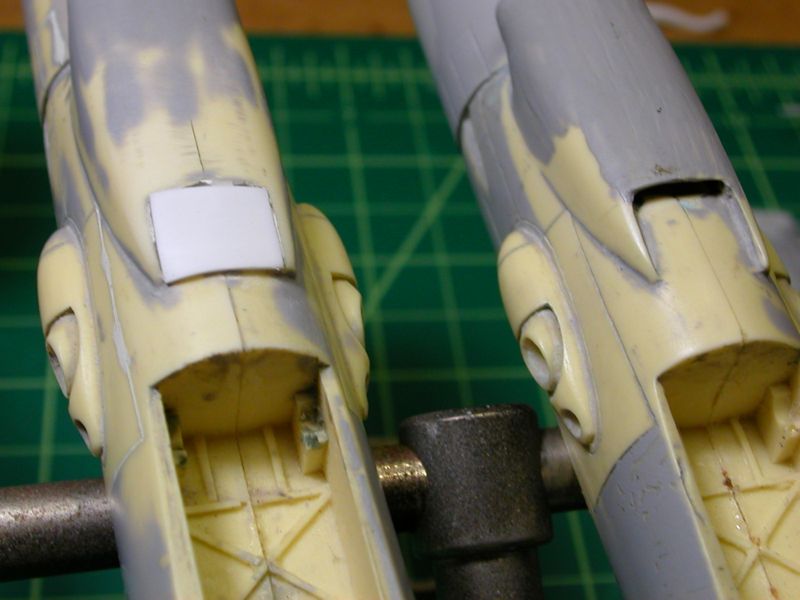
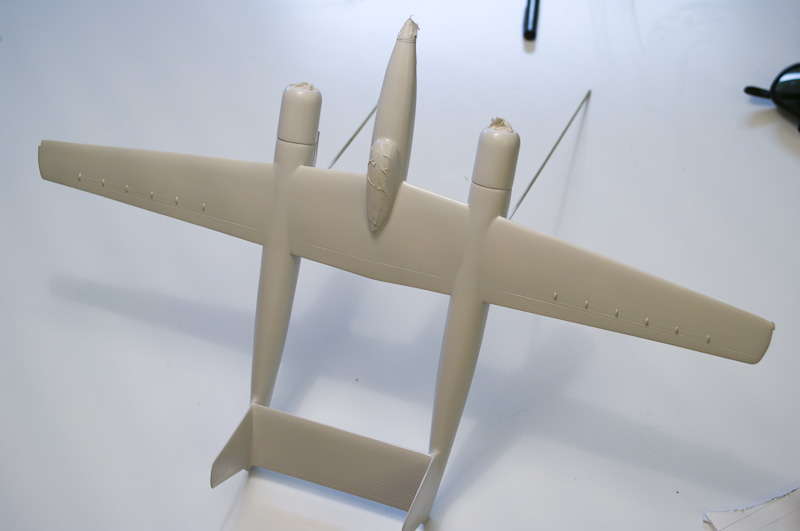
The cowlings are molded as straight cylinders when they should taper from the rear to the front. I didn’t try to fix that (in retrospect I wish I had), but I did modify the cowling fronts. There should be a much more narrow space between the propeller spinner and the cowling opening. To fix this I used the front 1/4” or so from leftover Academy Stratocruiser cowlings. The fronts of the kit cowlings were sawed off and the Academy parts attached and sanded down to match. I filled in the scribed lines representing the cowl flaps and used home-made decals for them instead.
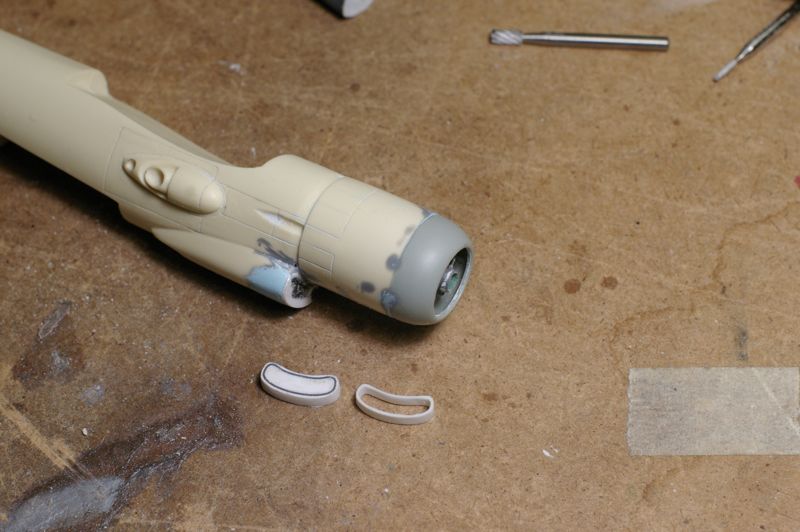
In retrospect I wish I had gone to the extra trouble of doing the cowl flaps in the open position; every photo I’ve seen of the XF-11 on the ground show them open.
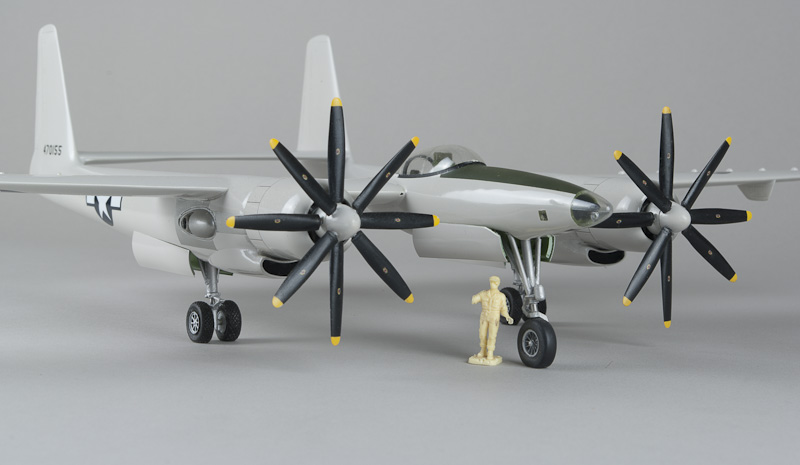
Propellers & Spinners
The kit props are fairly crude. The XF-11 apparently used the same Hamilton Standard Super-Hydromatic propellers as the Northrop XB-35. I obtained a set of these from a friend’s AMT kit which are a perfect match. The Hamilton-Standard logos are from Draw Decals.
The Anigrand spinners are molded in two pieces, but are out of round. So I glued them together and attached them to my rotary tool and puttied & sanded them round. Each blade is attached using a bit of brass rod.
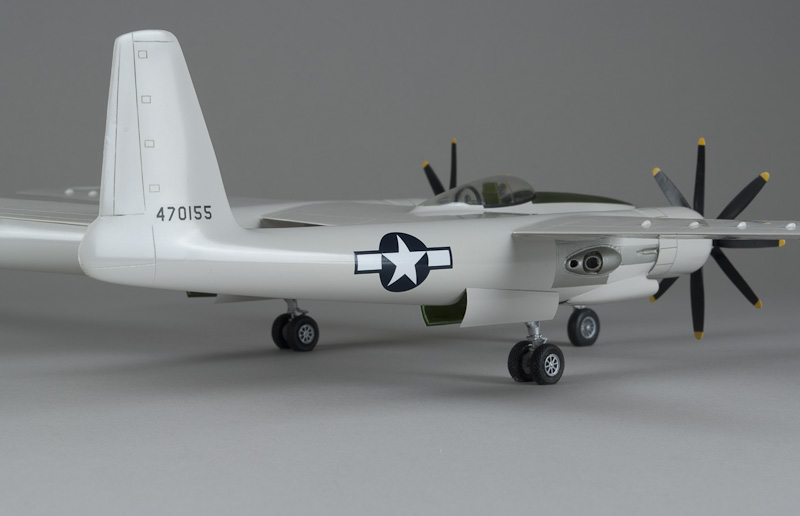
Landing Gear
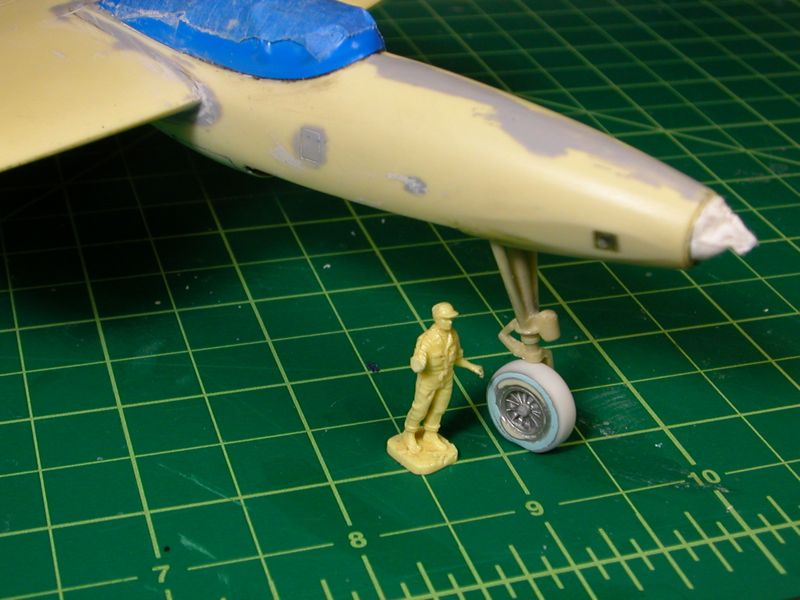
The kit’s nose wheel and main wheels are unuseable. The nosewheel was replaced with a modified True Details 1/48 F-86 nose wheel. I cut this wheel in half and increased the width with plastic card. I increased the diameter with a section of styrene tube glued around the outside, then puttied & sanded.
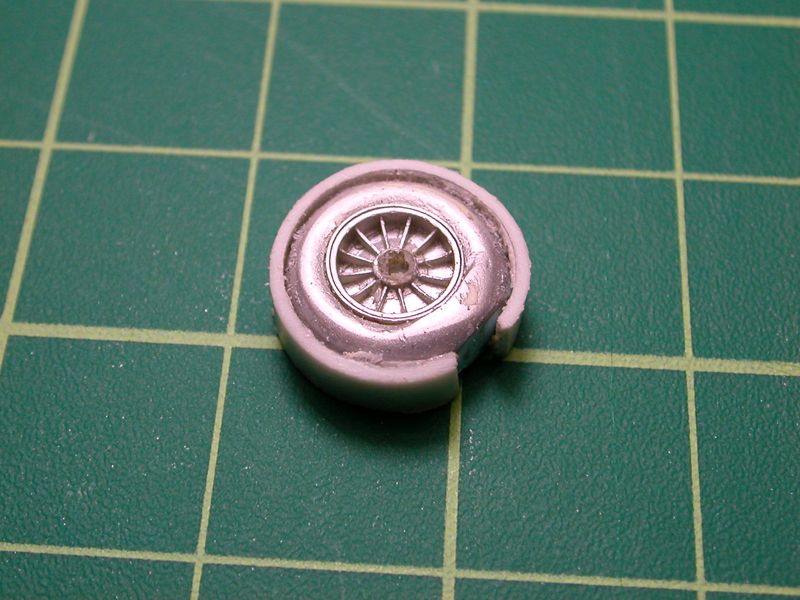
The main wheels were a big problem. I searched a long time to find wheels from another kit or aftermarket that resembled the XF-11 units. Almost by accident I discovered that the Eduard 1/48 X-1 in my stash had wheels with a nice diamond tread, spoke pattern close enough, and about the right size. I asked Eduard if I could purchase four of these and they kindly sent me a complete set of the resin parts from the X-1, but I still needed two more wheels. These were cast in resin. It took many tries before I came up with any that were not ruined by air bubbles.
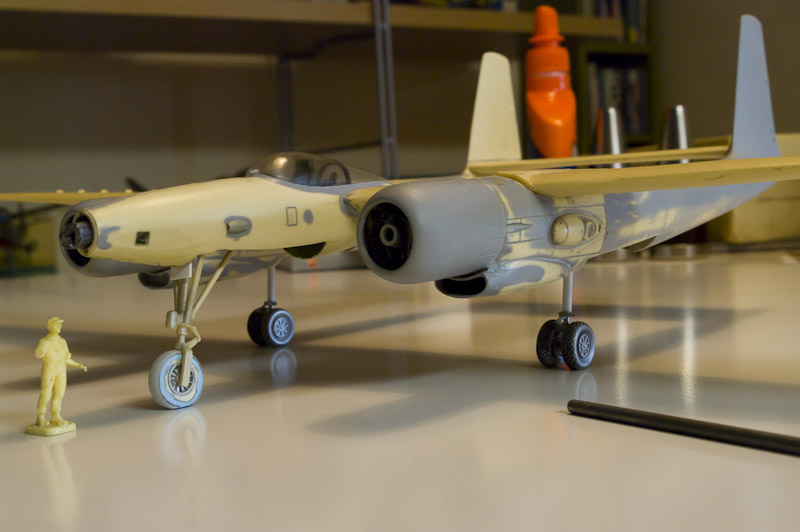
I felt the parts for the main landing gear struts would be too weak to support this heavy model. I scratch built replacements from stainless steel rod sheathed with styrene tube. I drilled holes in the wheel wells and made the stainless rod long enough to pass all the way through to the top of the boom where the wing attaches. The torque links are from a 1/48 Monogram P-51. Braces are stainless and brass rod.
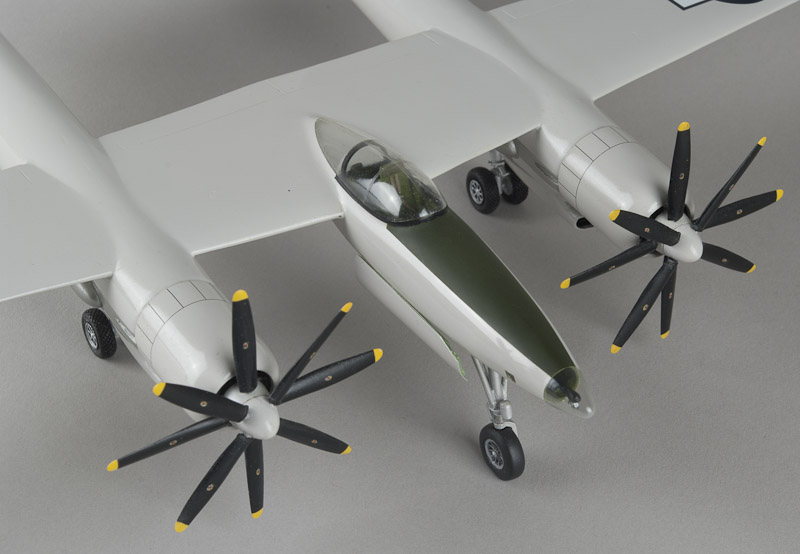
Fuselage/Cockpit/Wings
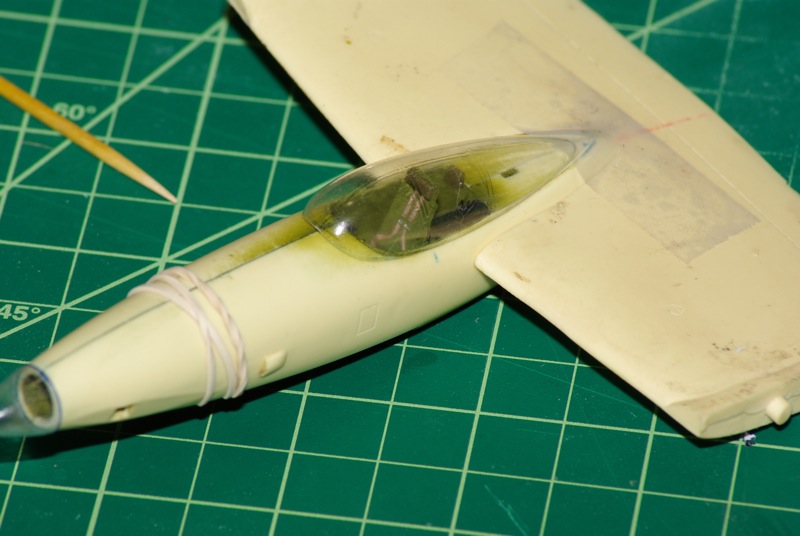
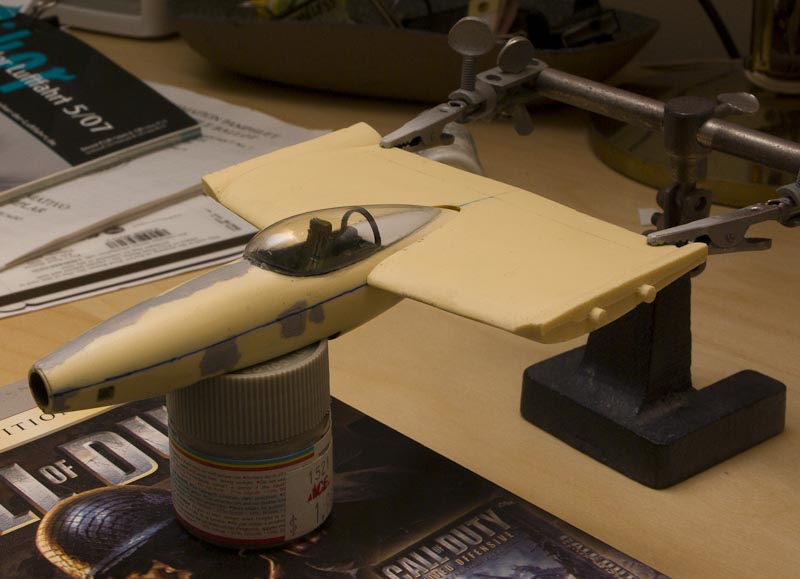
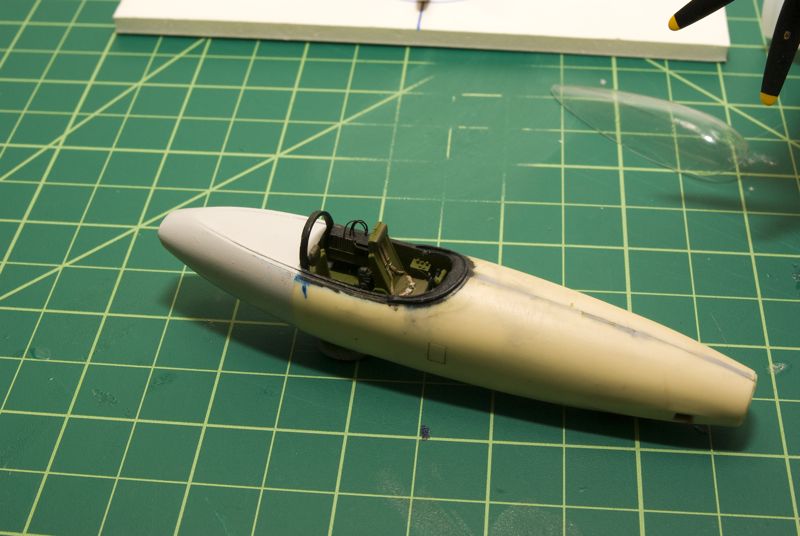
I really don’t like doing cockpits, so the detail I added is pretty basic. Seats are from a Monogram B-36 and the control yoke is from an Italeri C-47. The instrument panel and consoles are scrap with leftover instrument decals applied. In photos there are some prominent wires visible on the equipment in the rear cockpit so made those from stretched sprue. The rollover structure is a section of styrene tube.
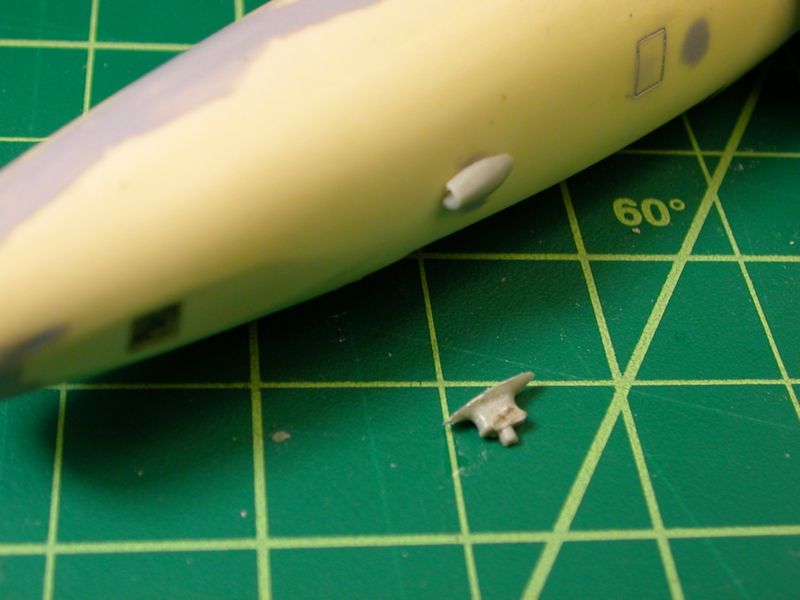
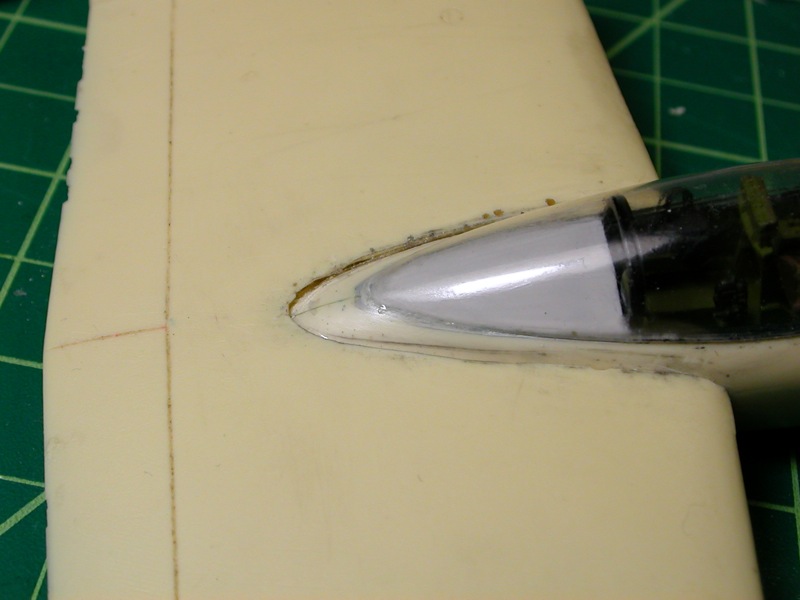
There’s a small air scoop on the port side of the fuselage which Anigrand has represented as a large square bump. I sanded that off and fashioned a new one from a leftover ADF “football” from the spares box. It’s an improvement but still too big if you compare to photos.
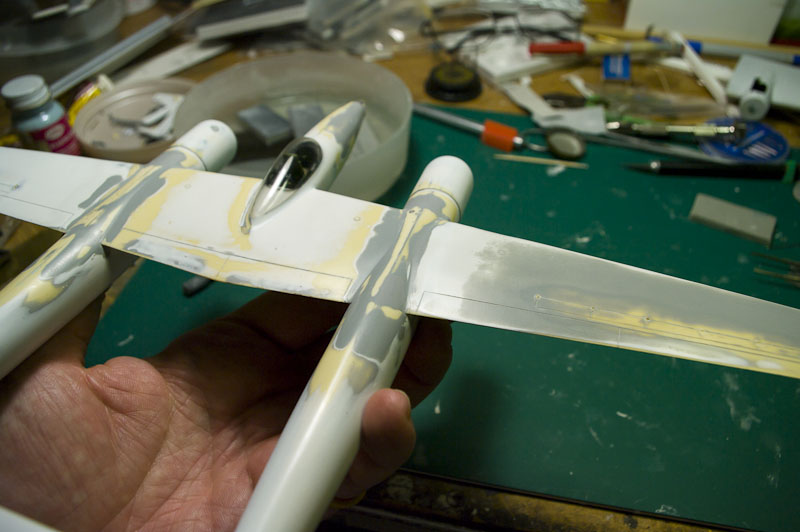
I felt that the vacuformed kit canopy sat too far back, so I moved it forward a few millimeters. This solved another problem: the lack of any coaming over the instrument panel. The resulting step at the rear of the canopy was filled with CA and faired in. I used clear decal film cut into strips to represent the semi-clear stiffeners visible in the canopy and nose cone.
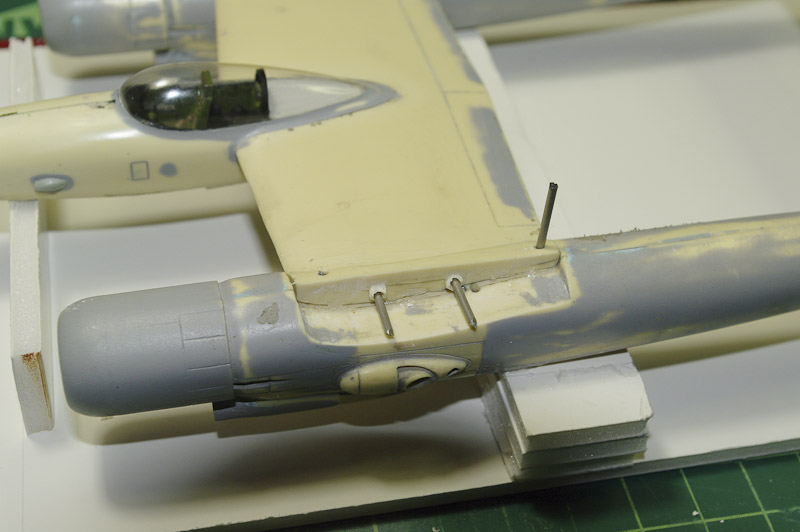
Out of the box, the fuselage did fit nicely into the wing center section, but it sits too high, which I felt threw off the entire look of the airplane. The rear of canopy should be almost flush with wing. So I epoxied the fuselage in a little lower. Of course this created big gap to fill and a big step underneath!
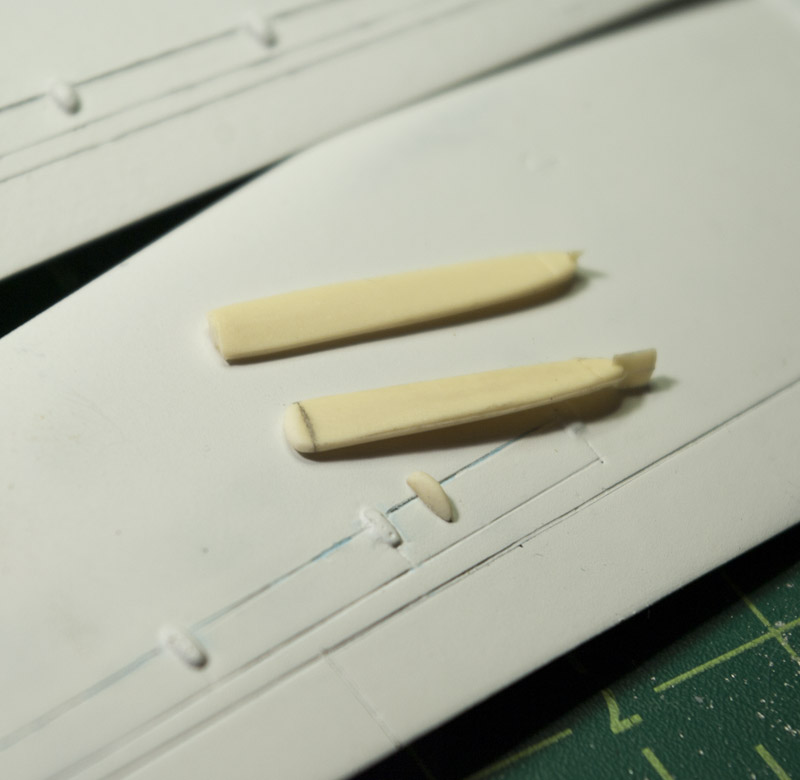
There are six actuator fairings for the spoilers on each wing. Some of these had air bubbles, and I was having a hard time cleaning up the scribed lines between them. So I sanded off the fairings, cleaned up the spoiler lines as best I could, and used bits of the unused kit propeller blades to make new actuator fairings.
Compared to photos, the main landing gear door should taper more, becoming wider from the front to the rear. I cut new “skins” from a beer can to a more correct shape (I didn’t worry about fixing the shape of the wheel wells themselves), and cut some holes in the kit doors to represent some structure. I cut the aluminum slightly larger than the resin doors to create a small lip around the edge.
The nose gear doors got the same treatment.
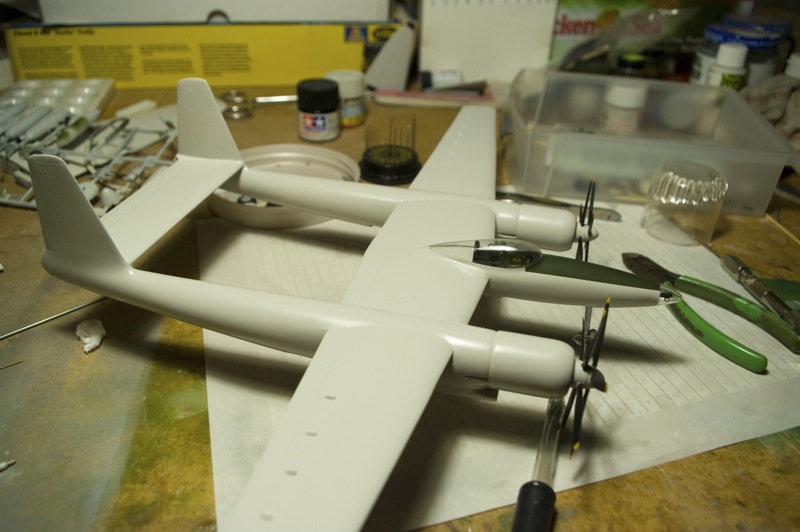
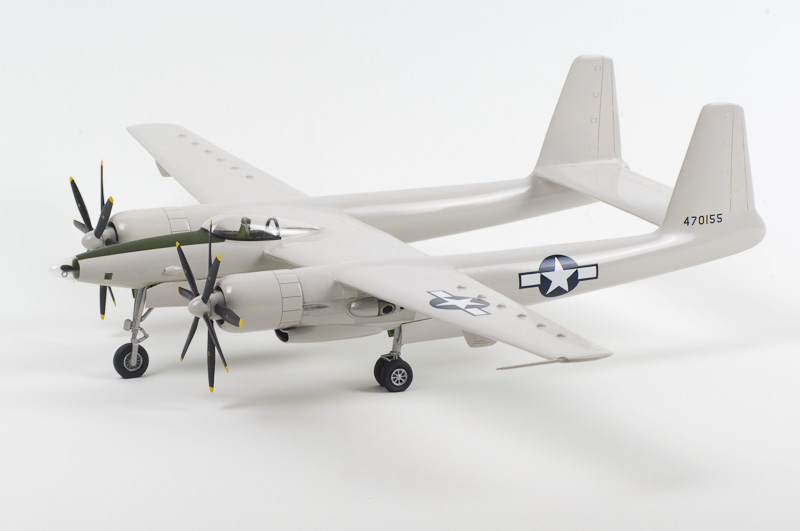
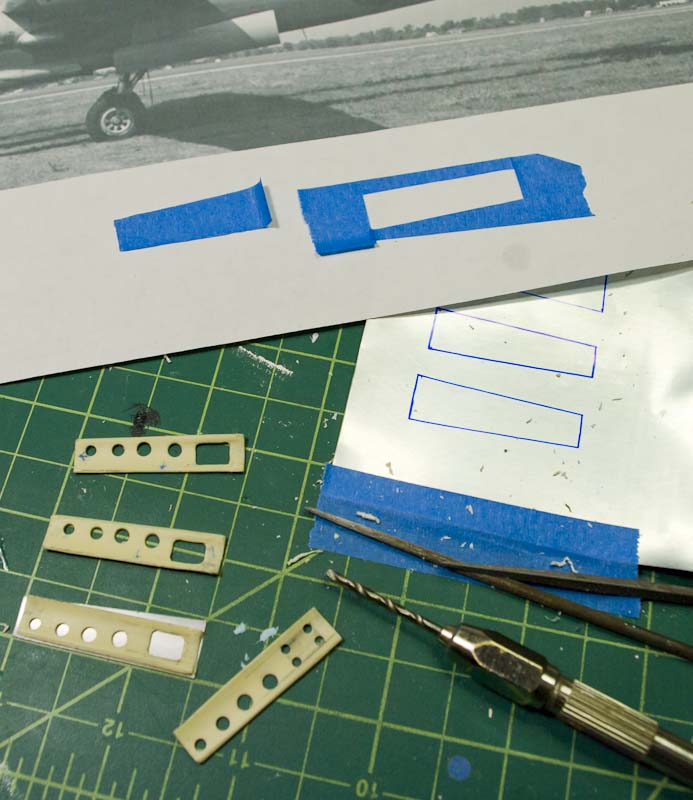
The model is finished with a mixture of two shades of Gunze greys and Tamiya gloss white acrylic. Close study of photos show a very smooth and glossy finish on the XF-11, and the same obsessively flawless workmanship typical of the other Hughes airplanes. So I spent some hours wet sanding and polishing my finish to a high gloss. Anigrand provides insignias and serial numbers that are the wrong size (exactly the same sheet as the Republic XF-12 kit), so I used insignias from the spares box. The serial numbers are home-made, created on my computer using the Amarillo USAF font and laser-printed on Experts Choice clear decal paper (this stuff is great - the carrier is exceedingly thin yet robust enough to handle easily). The cowl flap lines are also decals, as is the black stripe around the base of the canopy. All this was drawn in Adobe Illustrator.
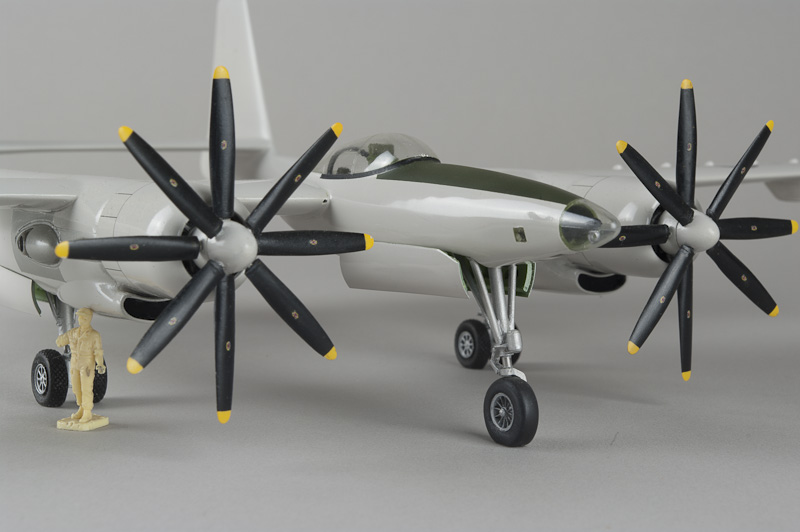
The few XF-11 models I’ve seen show a black anti-glare panel but I’m certain this is incorrect. Photos clearly show a difference in tone between the (presumably) black line around the base of the canopy and the anti-glare. I reasoned that this was likely olive green and so that’s what I used.
I worked on this model off-and-on over several years. I’m not very prolific anyway, but this thing took me a ridiculous amount of time. Most of that involved sticking it together with tape and propping it up and posing it next to my 1/72 scale guy and just studying it. I’m glad it’s done!
Special thanks to David Fisher for his help and encouragement. He showed me how to cast resin just for this model, and he fabricated a new nose cone to replace the one I stepped on!
Model, Images and Text Copyright ©
2011 by John Meyer
Page Created 14 March, 2011
Last Updated
14 March, 2011
Back to
HyperScale Main Page

|
 Home
| What's New |
Features |
Gallery |
Reviews |
Reference |
Forum |
Search
Home
| What's New |
Features |
Gallery |
Reviews |
Reference |
Forum |
Search