Revell's 1/72 scale
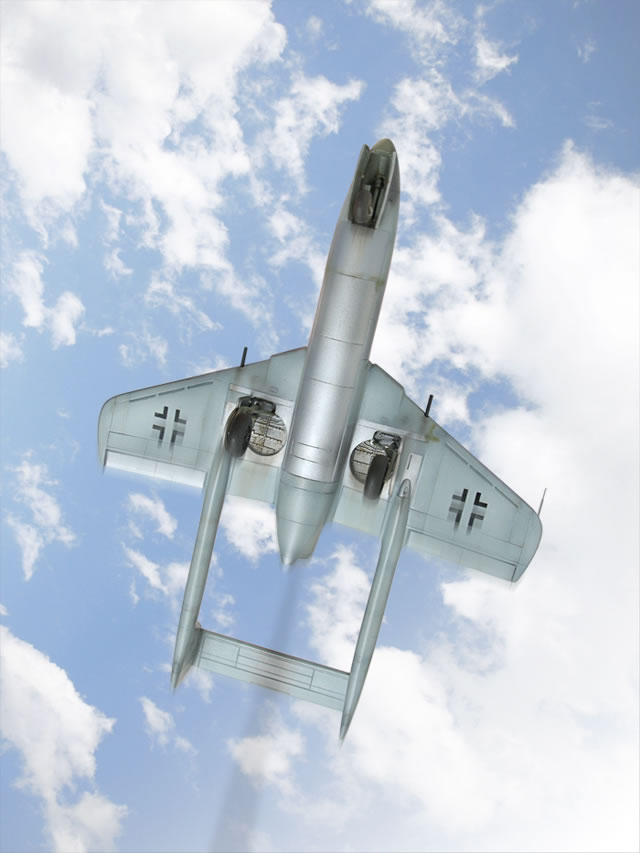
Focke-Wulf Flitzer
by Marcel Meres
|
|
Focke-Wulf Flitzer |

Revell's 1/72 scale Focke-Wulf Flitzer is available online from Squadron.com
First of all I have to say that the Focke Wulf FLITZER is one of the German WW II. projects. So this Revell 1/72 scale model kit is only some kind of a "what if" airplane - which was neither finished nor flewn. Only a 1:1 wooden model was completed in 1944 and tested in the wind tunnel. The brief - but interestng history of German WW II. era jet plane projects development can be found in this kit's Instruction manual. Browsing either the Internet or piles of various publications concerning German jet projects brings more [text] information suitable mainly for historians, but not enough for us - modellers: one would find some more or less similar drawings plus the mentioned wooden model's b/w photographs.
This kit is really one of those "out of the box" kits you would build quickly and easily during one weekend. Some kind of super detailing and/or shifting closer to the reality is practically impossible, cause you are able to compare neither the shape nor the details of this kit with the real plane. You can only imagine how it could be and follow your feelings. And I went this way too.
Here is a listing of some of the mprovements that I have made:
Wing root & air intakes
The first thing which I felt improbable was the shape of the area between air intakes and the fuselage, where the wing leading edge transitions into the fuselage. Revell made this junction practically rectangular here. The whole wing leading edge is round-shaped, so it looked better to me to round the wing root portion too. The new shape can be seen here:
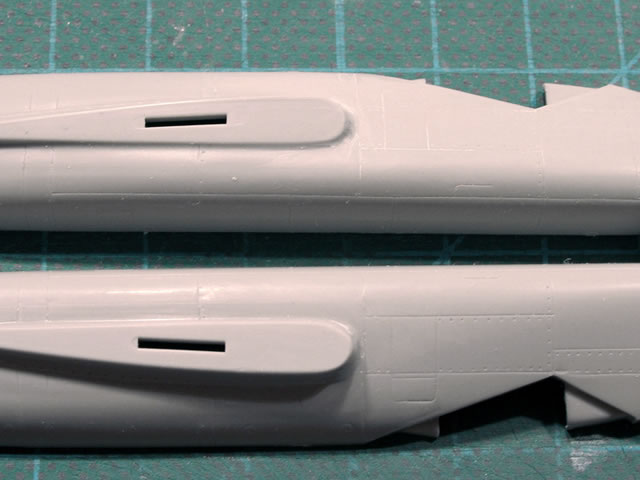
Comparing the air intakes with the original FLITZER wooden model you would also feel like Revell made them a little more boxy. Therefore the intakes on my kit were rounded a bit as well - mainly the inner surfaces.
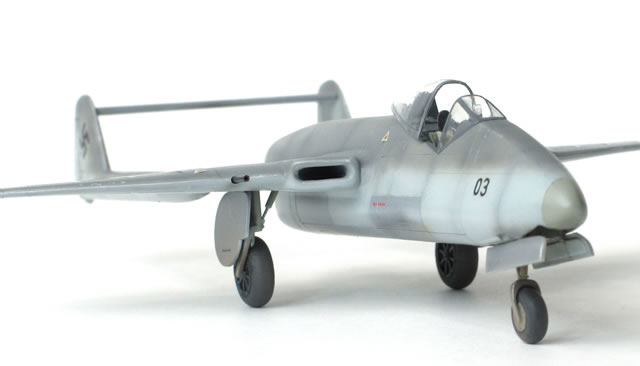
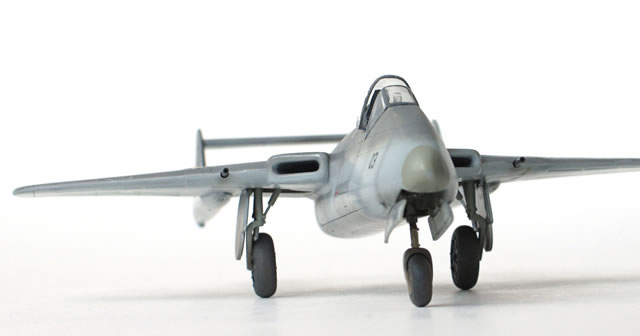
Front undercarriage well
The second place where I felt need of a mild correction is the front landing gear well. When the well is in the proper position inside the fuselage it looks like Revell made its side walls too thick - or the distance between them too small. There is no need to worry though - both side walls can be easily removed and replaced with new ones made of a thin styrene material. The replacement can be seen here:
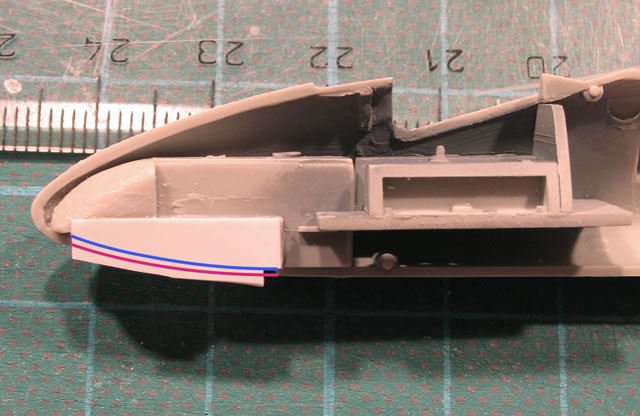
The styrene walls were left protruding outward (beyond the magenta line here). Just after the fuselage assembly they were made into their final shape. The excess styrene was removed with a sharp knife and sanded to be smooth. No putty was needed here, only gluing - the walls fit well.
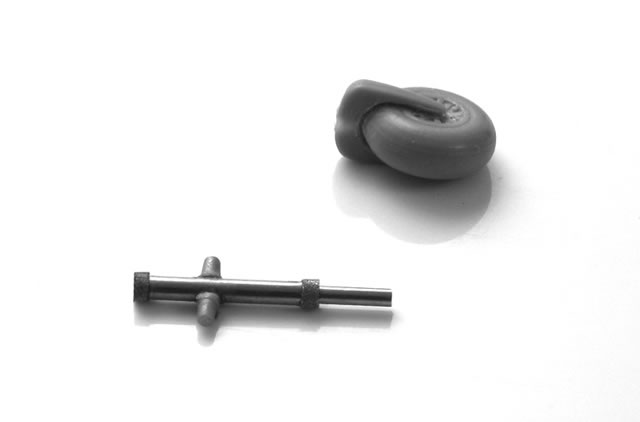
Front undercarriage
Further retouching was done on the front landing gear - it is not necessary though. The front wheel is moulded as one piece with the leg and its actuator. I like these pieces separated if possible. So a brand new upper part of the landing gear was made using metal injection needles and a very thin metal sheet cut into narrow bands. The needles were inserted into one another - the final length of the undercarriage was set as the final step, in order to keep the proper position of the plane - with its tail directed slightly downwards. Similar older jet airplanes like D. H. Vampire and Venom are directed this way (the Revell instruction sheet calls for this posture too).
The front wheel was not fully separated (from the rest of the gear), only a very thin gap was created here using the needle tip as a scriber. Filling this gap with a dark shade of colour enhanced the needed effect. This is a close-up of the front undercarriage parts:
Canopy
When my FLITZER was nearly completed it was clear it needed a new canopy. The canopy coming with the kit was too thick and single-piece, thus nearly nothing inside the cockpit could be seen. The new acetate canopy solved this problem.
You can find the whole process how to make the new acetate canopy in a few main steps here. I believe it could serve as the basic process of how to make it cheap and quick - and easy too.
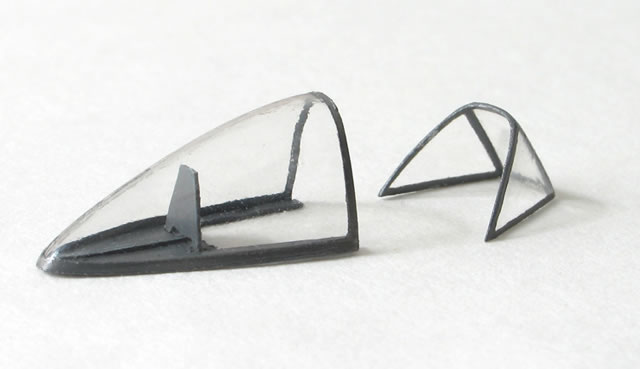
The finished canopy was divided into (two) separate pieces. Both were masked and airbrushed to create framing and dipped into the Future wax for higher shine and durability for further handling. The rear canopy piece was attached onto the sliding base plate. It was fitted with an armour plate (which would shelter the pilot's head eventually), but of course - all of this is only a speculation.
Pilot's Seat
You can also see my attempt to improve the pilot's seat here. The original Revell seat was used and upgraded a bit to evoke the ejector seat.
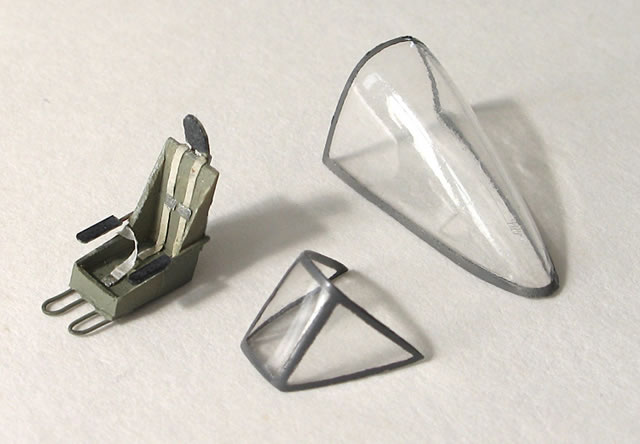
This is another speculation whether or not was the real FLITZER equipped with an ejector seat at all. If yes, it could most probably be the type which was used for instance within the Dornier Do-335 or similar.
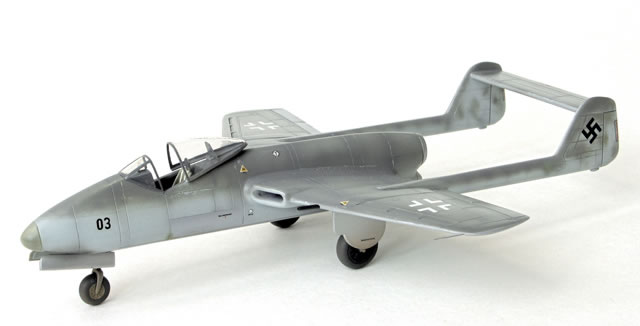
The Revell is offering two "what if" camouflages in the kit - both for the P VII - probably the follower of P VI Flitzer project (or testing platform). The first camo is "White 5", JG1, Leck, 1946. The second possibility is "Red 3", JG1, Finow 1946. You can find one of these proposals on the box cover too. I decided not to use any of these camouflages. I tried to make something like a third (prior to production) prototype.
All the kit surfaces were airbrushed with ALCLAD II aluminium 101 at first - to allow the possibility of making the real way for camo color chipping. Then the camouflage colours were applied: Mr. Color No. 37 RLM 75 Gray Violet for upper surfaces and Mr. Color No. 117 RLM 76 Light Blue for lower surfaces. Undercarriage, the wells and the nose tip were airbrushed with Mr. Color No. 60 RLM 02 Gray color.
Several areas remained bare metal - this is another what if to make the otherwise simple kit more eye-catching. Both camouflage colors were lightened by adding drops of white (delicately) and unevenly airbrushed. The chipping was applied mainly around the canopy and nose using a sharp knife. Very faint scratches were made by needle tip on the wing leading edges.
Decals
The Mr. Color Super Clear gloss coat was used in order to set the decals well. The original decals were not used except stenciling. The Aero Master AN72230 decal sheet was used for Luftwaffe crosses (available from Squadron Products). The 03 prototype numbers and the swastikas were from left-over box.
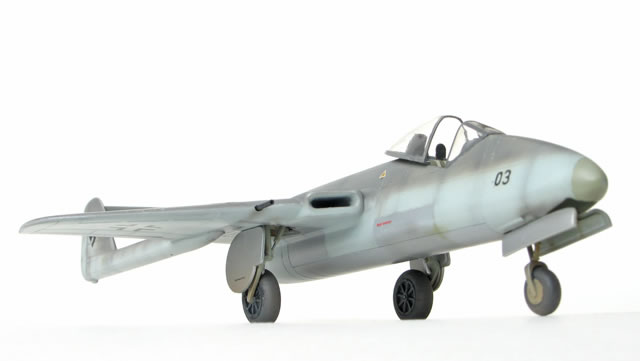
Weathering and Patina
Keeping in mind that this kit represents the prototype plane, possible patina and/or weathering can be used very finely (or merely visible). The mix of brown and black oil colors diluted in MiGs's Thinner for washes was used as mud stains (as from airfield) beneath the wings and fuselage - both behind undercarriage. The lower mid portion of the tail wing was airbrushed with Dk. Gray simulating dirt such as engine soot deposits. The Mud and Earth dry pigments were used on wheels and fixated by overspraying.
The kit photographs emphasize the weathering effect a bit, as usual. The kit looks less outworn in real. The Mr. Color Super Clear Flat overcoat came in the final - this also helped to "calm down" the bare metal areas, scratches and chipping - not to be too dominant.
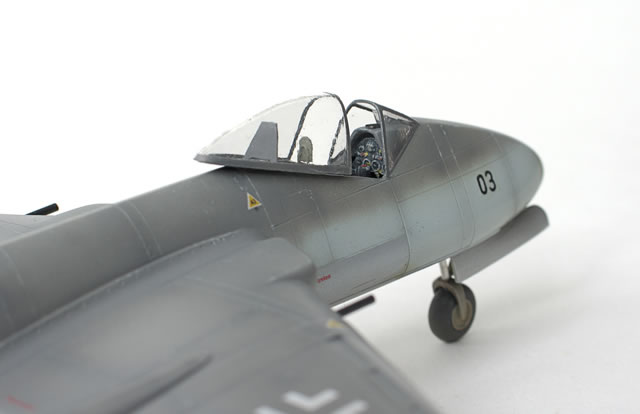
This is the close-up of the canopy area. The main instrument panel is from the Revell kit as it was, only painted and drybrushed.
Pros:
-
Fine surface with delicate recessed panel lines
-
Precise injected parts (minimum of sanding and filling needed), no molding flash, no deformations
-
Comprehensible instructions + simplicity of building
-
Relatively high overall quality / low price
Cons:
-
Canopy plastic is clear and smooth, but too thick and in one piece - so you cannot see the interior
-
Two unpleasant sink marks on wings from below
My special thanks to:
-
Mr. Peter Jankovi? for the in-scale swastika decals
-
Mr. Juraj Bojkovský for valuable help with acetate canopy forming process and herewith linked encouragement
-
Mr. Ivan Višváder for a trick with the front wheel separation effect.
For more details and photographs please visit my Modeltalking blog.
Model, Images and Text Copyright ©
2011 by Marcel Meres
Page Created 16 November, 2011
Last Updated
17 November, 2011
Back to
HyperScale Main Page

|
 Home
| What's New |
Features |
Gallery |
Reviews |
Reference |
Forum |
Search
Home
| What's New |
Features |
Gallery |
Reviews |
Reference |
Forum |
Search