Sopwith Camel F1
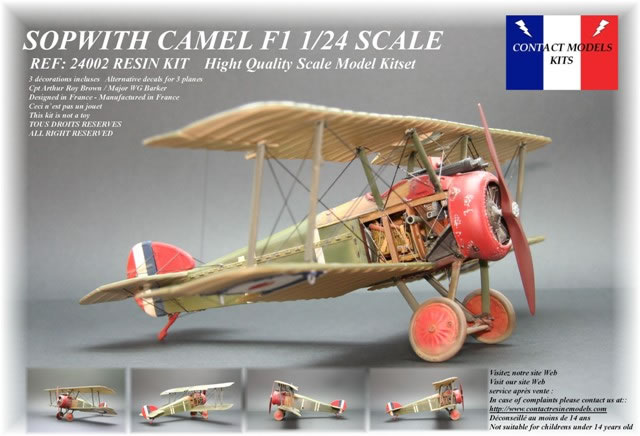
Contact Model Kits, 1/24 scale
S
u m m a r y |
| Catalogue Number: |
Contact Model Kits Item No. 24002- Sopwith Camel F1 |
| Scale: |
1/24 |
| Contents and Media: |
More than 100 parts in cream coloured resin; markings for three aircraft. |
| Price: |
130 € + 15 € tracked shipping . Available online from Contact Resine |
| Review Type: |
FirstLook |
| Advantages: |
Impressive number of parts; nicely detailed interior to incorporate a “cutaway” display; comprehensive assembly instructions; steel reinforced struts and landing gear; decals in perfect register with thin carrier film. |
| Disadvantages: |
A few surface features will need reducing and/or modifying. |
| Recommendation: |
This is an ambitious kit that provides plenty of detail for the modeller to work with. The parts on my example were well cast with no surface blemishes or deformities. Some will choose to diminish the visual impact of both the lacing and rib tapes, and others will alter the outline of the “hump”. Whatever you choose to do, all of the essential parts are here for the experienced modeller to carry out these tasks. The result will then go a long way to producing a model that matches the enthusiasm put into the kit by the manufacturers. |
Reviewed by
Rob Baumgartner

Eduard's 1/48 scale Fokker D.VII MAG Dual Combo is available online from Squadron.com
Background
The Sopwith Camel is one of the iconic aircraft of WWI.
It’s a contentious aircraft that evokes wildly contrasting views from the airmen that flew her. To some it was a severely unforgiving brute that seemed to have a mind of its own. For others it was a highly manoeuvrable and exhilarating machine that did all that was asked of her...and more.
For the pilot with little more than a dozen hours of flying experience, the former was closer to the truth and many students were killed in flying accidents. But those that mastered the aircraft soon took a heavy toll of their opposition.
Contents
Any resin kit of a WWI subject is a major undertaking, especially if it is in 1:24 scale.
Contact Models Kits have taken up the challenge by releasing a model of the Sopwith F1 Camel, which is ambitious to say the least. It comes in a sturdy box with the major components surrounded by “bubble-wrap” and the other items contained in a number of zip-loc bags.
The parts count is extremely high with over 100 pieces of resin to assemble. The casting is good and the the odd air bubble that made itself visible did not manage to break the surface. There are the inevitable casting plugs to remove and these can be found in “modeller friendly” places.
A transfer sheet completes the package and here we find the markings for 3 famous aircraft.
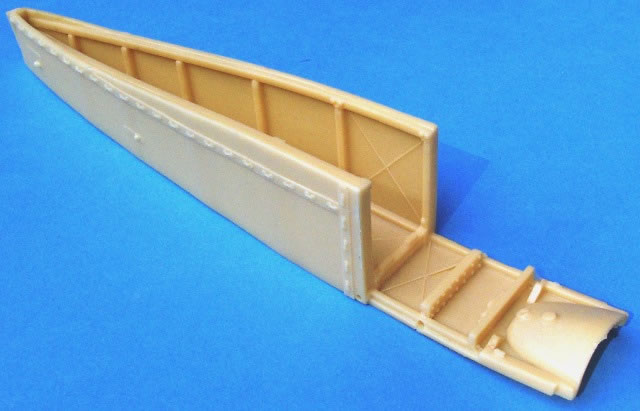
Fuselage
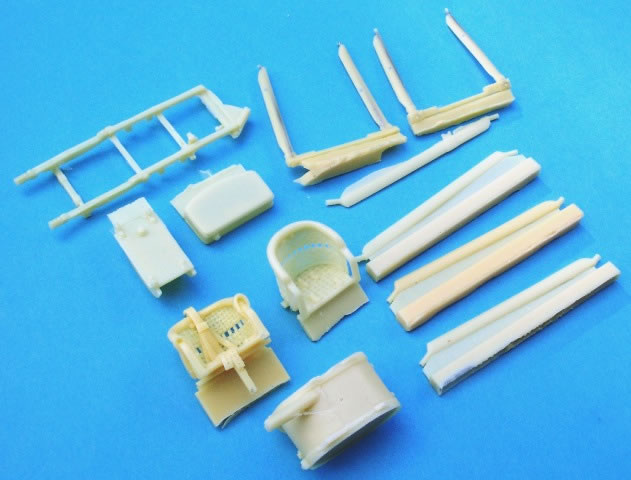
The fuselage is a clever piece of engineering which sees the bottom and both sides pre-assembled to form a single piece of resin. Much of the interior structure is already in place and this includes a lot of the framework and even the wire bracing. The kit is designed to show off the inner workings of the aircraft so naturally the bulk of the parts are presented here.
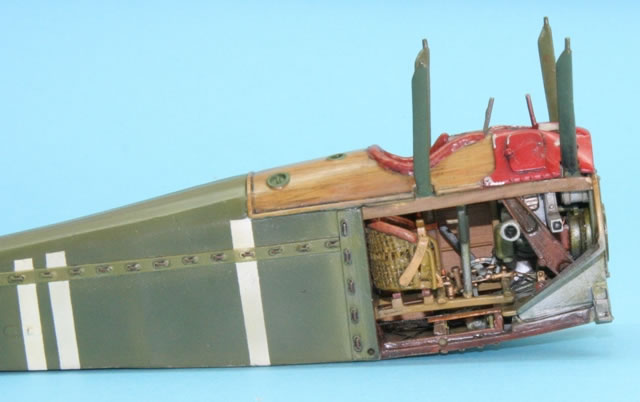
There is plenty to make the cockpit look “busy” and an excellent assortment of interior details takes care of this. Assembly starts when the throttle lever and associated quadrant are added to the lower wooden framework. Further items for inclusion are the fuel filter, tank selector switch, mixture control, and fuel cock which are then connected via the appropriate piping.
A separate instrument panel is supplied and this matches the illustration found in Albatros Productions Datafile on the subject. It includes the pulsometer, magneto switches, and the usual assortment of dials, which all have their faces represented by decals.
Firewall, rear engine detail, carburettor intakes, control column, rudder bar, and ammunition bins are all par for the course. Oil and fuel tanks are not forgotten and nor is the wicker seat. This is a masterpiece and comes with and without seatbelts.
A characteristic of Sopwith products is the “ducktail” at the end of the turtledeck where it meets the tailplane. Thankfully this trademark feature has been replicated here which is a credit to the manufacturers.
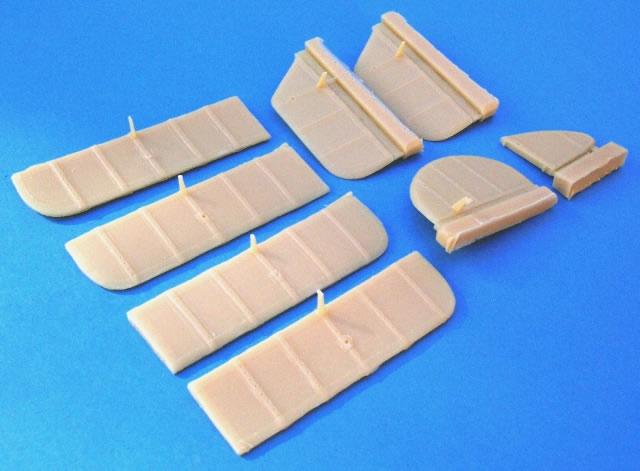
Wings
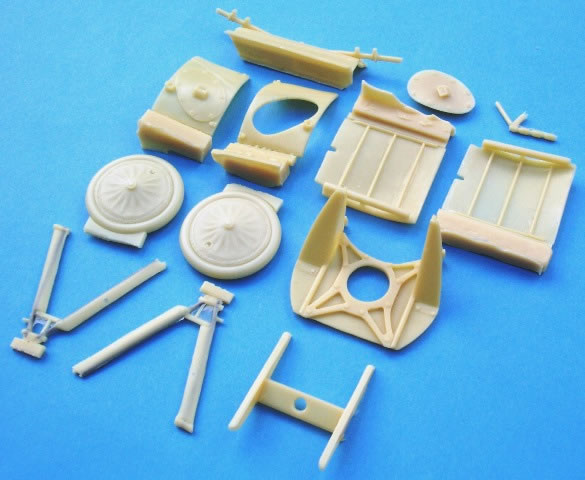
As per the original, the upper wings come in three sections with the lower components being all single piece affairs. My examples showed no signs of distortion and the moderate trailing edges were all of uniform thickness.
One thing that does stand out is the ribs tapes. They are clearly too pronounced and most modellers will take the opportunity to sand these back a bit. The representation of these items on the elevators is more subdued and it’s a pity this subtlety wasn’t translated to the main flying surfaces.
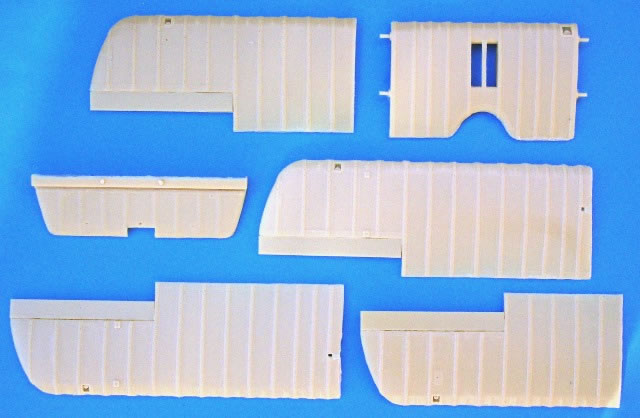
Speaking of the elevators, these are inclusive of their control horns, which will happily ease the construction process. The same holds true for the ailerons.
To ensure some rigidity when assembling the top wings, one finds pins that have been cast into the respective mating surfaces. They also have spacers to guarantee a consistent gap which is a nice touch. Pulleys are included as part of the detail and these merely need a clear covering to complete the effect.
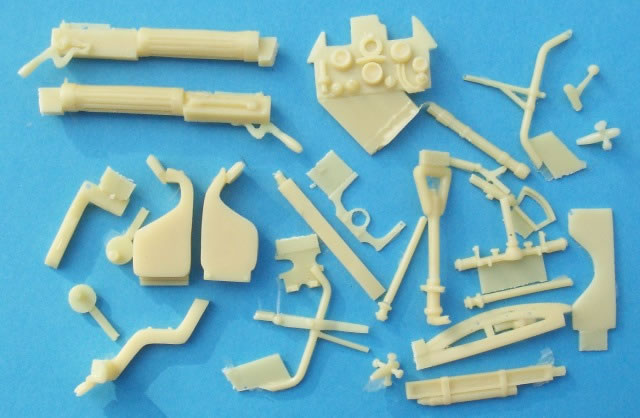
To hold up all this weight, the struts will have to be strong, likewise the undercarriage legs. The manufacturers have allowed for this by inserting steel rods into these parts. Interestingly it has been deemed unnecessary to impart this strength into the outer wing struts.
The split axle of the original has not gone unnoticed by the designer. It is portrayed in what looks like a position of maximum load so make sure your model has a full tank of gas, and plenty of ammo. Various published photos show just how extreme this splay can be. A clear example can be found in Osprey’s book “Sopwith Camel vs. Fokker Dr I by Jon Guttman. Donald MacLaren’s Camel is highlighted on page 44 and his 46 Sqn. machine shows this trait to perfection.
The single piece decking provided in this kit is of the later “open-cut” type. Earlier examples saw the right-hand-fed Vickers’ having enclosed breaches. The problem with this is that any stoppages with the starboard gun were extremely hard for the pilot to clear during combat.
The part is well cast but the modeller can improve its accuracy with a couple of changes. Fortunately they are not too difficult to carry out. The outline above the ejector chute should be horizontal and not part of the sloping “hump”. The same applies to the corresponding area above the starboard access panel. This will also correct the angle of the slope as it heads towards the cowling, and while you’re at it, a slight change of shape to the metal plates will do wonders.
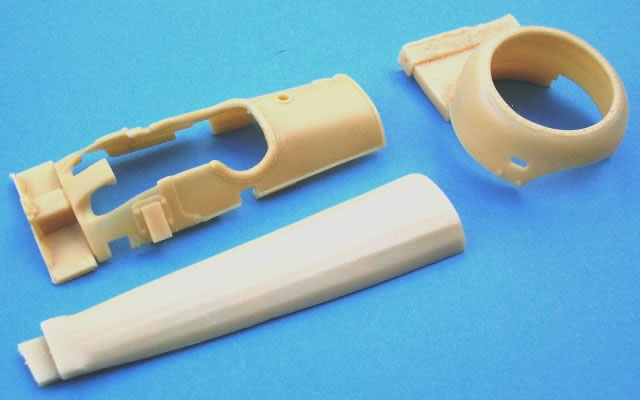
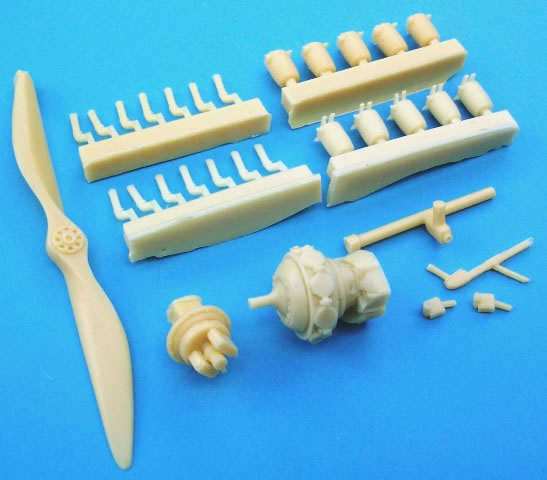
Engine
The engine is a lovely piece of casting with sharp detail and nicely rendered fins. It’s presented in 1:24 scale so that it can be displayed as a kit in its own right. Of course this does not allow for the thickness of the Camel’s cowling and some sanding of the inside of this item will be required for the assembly to fit.
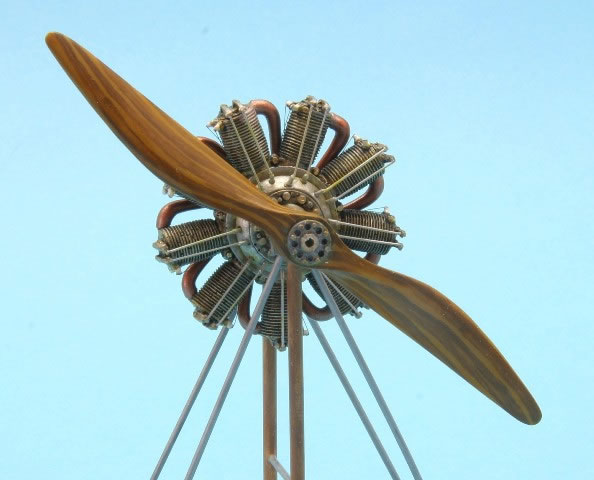
The instruction’s make mention of this and suggest shortening the length of the cylinders as well.
These same instructions suggest that the engine is a Clerget, with the modeller supplying the necessary pushrods. Curiously the included inlet pipes enter the cylinders from the side instead of from the rear. The former is more akin to a Bentley and it appears a bit of a mix-up has occurred between types. Not an insurmountable problem to fix but one to be aware of nonetheless. It does however open the door to modelling a Bentley engined Camel if so desired.
The CD
The instructions are contained on a CD in the form of a .pdf file. There are 47 pages of colour images that guide you through every step of construction. These are photographs from an actual build of the product and clearly show the sequence used to finish the example as presented on the box top.
A full rigging guide leaves nothing to be desired and markings are illustrated for three aircraft. One thing to note is that the built up model is incorrect with regards to the flying wires. Not the sort of faux pa you want to replicate on your own model so follow the diagrammed instructions...not the photos.
Marking Options
Capt Roy Brown’s Camel “B7270” is one of the options on the decal sheet, along with Major William Barker’s “B6313”. The latter is seen in two guises, with the stripes being the responsibility of the modeller. Check your references carefully to ensure you add the right features pertaining to each aircraft.
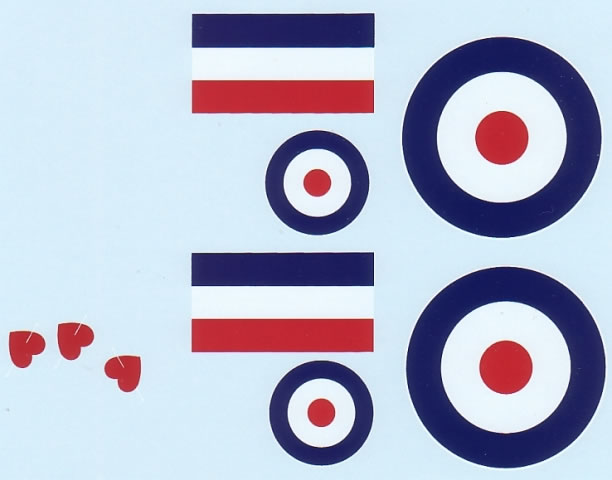
The decals themselves were found to have perfect colour registration and minimal carrier film.
The passion behind this kit is undeniable.
There’s a wealth of parts to assemble and none of them suffered from any deformities. The excess flash is easy enough to clean up and the casting plugs shouldn’t cause a problem either.
Some of the exterior detail will need reducing and this is particularly noticeable on the wings.
One may even choose to alter a few of the finer details to give the Camel a more representative look.
Although this is nothing an experienced modeller can’t handle, it’s not the type of work a builder expects to have to do.
There is still plenty to like about this product however and with a little bit of work, it will result in a fine replica that scales well with the original. The concept of the “cutaway” model is inspiring and one can only hope that this trend will continue.
Thanks to Contact Resine for the sample
Review Text and Images Copyright © 2010 by Rob Baumgartner
Page Created 9 June, 2010
Last updated
9 June, 2010
Back to HyperScale Main Page
Back to Reviews Page

|
 Home
| What's New |
Features |
Gallery |
Reviews |
Reference |
Forum |
Home
| What's New |
Features |
Gallery |
Reviews |
Reference |
Forum |