|
Revell 1950s "Box" Scale
Martin XP6M-1 SeaMaster
by Bill Dye
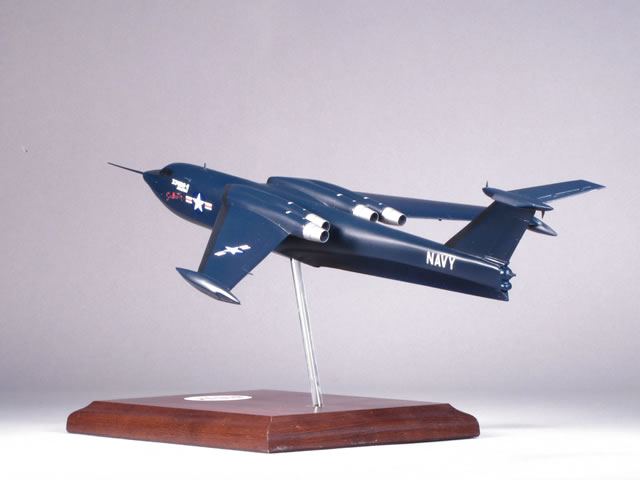
|
Martin XP6M-1 SeaMaster |

HyperScale is proudly supported by Squadron.com
Lately I got on a nostalgia kick and built a Revell Tradewind, a Revell Snark missile, a Glencoe TWA Mars Liner thing and now the Revell SeaMaster. I know, I know, it’s not 1/72nd, 1/48th, or even 1/144th scale but I had a ball building it.
The first time I bought this kit was in the 1950s. I was around eight years old. We had sticks, cap guns and maybe a sling shot (but no Daisy BB gun – the ‘You’ll put you eye out, kid’ thing). No cell phones, no nothing; just a black and white 12” TV that got three channels. But if I turned the TV tuner knob just right I could hear the Greater Pittsburgh Airport control tower granting takeoff and landing clearances to DC-6s, DC-7s, Connies and Capital Airlines Vickers Viscounts; 707s came a few years later.
This is a fairly recent nostalgia theme for me. And I can tell you that it’s been quite a while since I’ve had this much fun modeling. I don’t mean to detract at all from the ‘serious’ modeling, but this is like a 50,000 lb weight has been lifted from my shoulders. Why? Well I think it’s because I realized that I’m building these nostalgia beasts strictly for me (and maybe to share in an article). It seems that building an odd scale gives one a license to ‘build for fun’. Don’t get me wrong I still like building standard scales and I will take these box scale models to contests; but mostly just to hear, “WOW I haven’t seen one of those kits built up in years . . since I was around eight years old.”
These old Revell box scale kits really aren’t that bad once you get past the rivets and the raised NAVY letters; well, at least the ones I mentioned. The lines appear to be quite accurate; no, I didn’t measure anything with a micrometer, but comparing it to my reference photos revealed a striking accuracy.
Yes, I’m still building my serious stuff – well, for me anyway – and I will get back to research, landing gear wells, seatbelts and natural metal finishes. But it took building these old box scale models to realize just how caught up I was not building for myself. I feel like I want to build now just for the sake of building models which is what I thought I was doing; a tremendous feeling of freedom.
History
The XP6M-1 SeaMaster prototype was quite different from the YP6M (semi) production model. The later version canted the engines several degrees outward, new bubble type canopy, revised T-tail center pod and perhaps a few other minor changes.
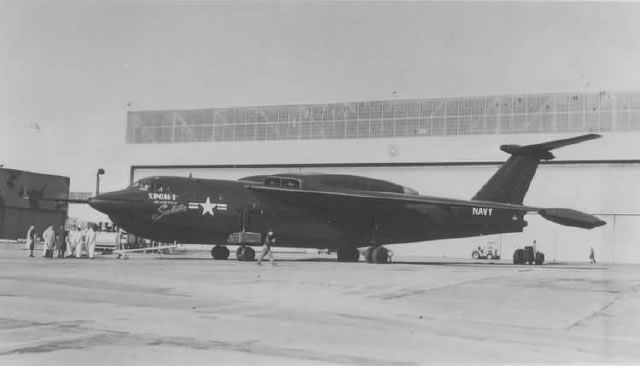
This from Wikipedia:
The Martin P6M SeaMaster, built by the Glenn L. Martin Company, was a 1950s strategic bomber flying boat for the United States Navy that almost entered service; production aircraft had been built and Navy crews were undergoing operational conversion, with a service entry about six months off, when the program was cancelled on August 21, 1959. Envisioned as a way to give the Navy a strategic nuclear force, the SeaMaster was eclipsed by the Polaris submarine launched ballistic missile. Due to the political situation at the Pentagon, the Navy promoted the P6M primarily as a high speed minelayer.
First flight of the XP6M-1 came on 14 July 1955, but early tests showed that the engines were mounted too closely to the fuselage and scorched it when afterburners were used, leading to pointing the engines a little outward in subsequent aircraft. Flight testing was initially successful but on 7 December 1955 a control system fault destroyed the first prototype with the loss of all aboard. The first prototype, BuNo 138821, c/n XP-1, disintegrated in flight at 5,000 feet due to horizontal tail going to full up in control malfunction, subjecting airframe to 9 G stress as it began an outside loop, crashing into Potomac River near junction of St. Mary's River, killing four crew, pilot Navy Lieutenant Commander Utgoff, and Martin employees, Morris Bernhard, assistant pilot, Herbert Scudder, flight engineer, and H.B. Coulon, flight test engineer.
Eleven months later, on 9 November 1956, the second prototype, BuNo 138822, c/n XP-2, first flown May 18, 1956, was also destroyed, due to Martin's making a change in the horizontal stabilizer control system design without adequate evaluation before test flying the "fix," crashing at 1536 hrs. near Odessa, Delaware due to a faulty elevator jack. As seaplane nosed up at ~21,000 feet and failed to respond to control inputs, crew of 4 ejected, pilot Robert S. Turner, co-pilot William Cunningham, and two crew all getting good chutes. Airframe broke up after falling to 6,000 feet before impact.
The P6M-1 test program was mostly successful, however the J71 engines proved far less reliable than required. The P6M-1 also had spray ingestion problems at gross weight which would preclude takeoffs except under ideal conditions. The P6M-1 also had a serious control deficiency due to porpoising under some trim settings. These deficiencies resulted in the P6M-1 program being cut as it was no longer considered possible for it to be a successful asset. The P6M-1 had been generally successful, the airplane was designed to meet an incredibly demanding set of specifications and had mostly achieved them.
Although the technology of the P6M was phenomenal, in the age of the ICBM and SLBM, the manned bomber was considered an expensive, unreliable way to deliver nuclear weapons. When that manned bomber was also a troubled system only supported by a small part of the greater Navy, it was a doomed system. The P6M program had already cost $400 million (about $2.5 billion in 2004 dollars) and could not be justified without the strategic mission.
All of the aircraft were scrapped. Some tail sections were retained for testing, and one of these is now in the Glenn L. Martin museum, along with some wingtip floats re-used by a Martin employee to build a catamaran.
The Kit
It is a Revell XP6M-1 SeaMaster in 1/266th scale (I think). Actually it’s quite small and, to be honest, I was a little disappointed with that. But after awhile it grows on you. The kit was originally released in the late fifties with a few reissues after that. My kit was an H series Revell box.
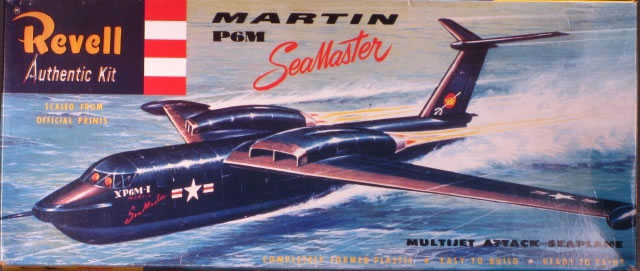
The parts are molded in dark sea blue and assembly is pretty straight forward. Included is the old Revell classic clear plastic stand and ball mount. The major parts have lots of raised rivets and raised stars and bars with all major control surfaces engraved. But the moldings are crisp with just a tad of flash. The clear parts were the stand and the windshield (which I lost). The decals in my kit were pretty yellow but they included the SeaMaster logo for the fuselage as well a ‘meatball’ logo that is designed to go on the Revell stand. I was hoping I could salvage those.
In a few words: fairly simple. With no landing gear or cockpit (Wu hoo!) this was to have been a ‘Sunday build’. But, I think we all know that never happens anymore.
First I sanded the rivets off of the major parts (I did this in a hotel room in DC). I delayed attaching the wing to the fuselage since both required some modifications and I thought it would be easier to do those mods leaving the wing detached. Not to mention that it would be easier to transport back home in a suitcase.
The XP6M-1 had a pitot probe sticking from the nose. There was none in the kit even though it’s on the box art, so I knew this would have to be a modification. Also, I think I dropped the clear windshield part on the hotel room floor and it got sucked up by the Marriott vacuum (Effffffffffffffffff sup . . rattle. . rattle . . gulp).
I tried the ‘make clear plastic panes’ trick but after two attempts on one of about six panes I decided to go to Plan B. I basically stuffed a stack of plastic into the cockpit area and then cut it to shape.
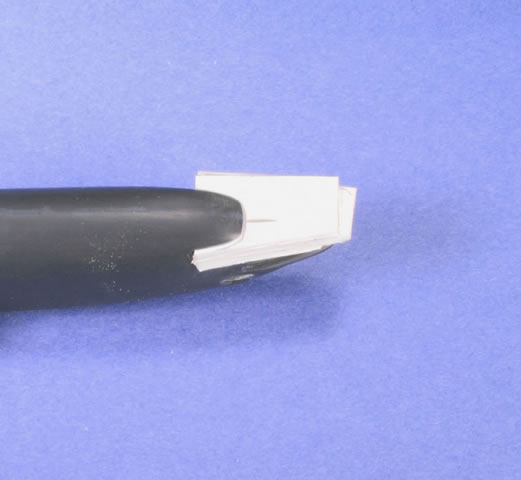
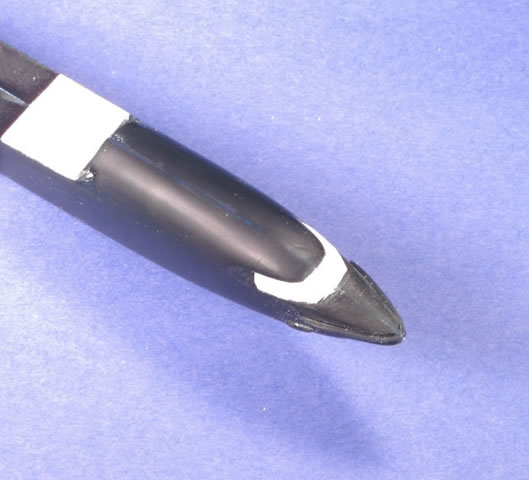
Oh, yes, I almost forgot, the windscreen part isn’t correct anyway. It’s way too small, especially at the front. I opened this area up with a file and then proceeded with the plastic fill part (see photo). This was really about the only thing I saw wrong with the model, at least from examining photographs of the real SeaMaster.
After a few hours fiddling with the windshield insert, it was close enough to glue in place and fix any dings with Tamiya putty and Mr. Surfacer.
Next the pitot probe. Now usually a pitot probe is round so you chuck up a brass rod in the ol’ Dremmel and have at it. Well, not this time. No. Martin decided that a diamond shaped cross section pitot probe would be just the ticket. . . . . sigh. I just happened to be all out of diamond cross-section brass stock. So to make this I cut a length of brass rod (about .040” dia) and secured it in a small parts vice sporting a handle. This vice (from my Dad’s old tools) made it easy to judge the rotational angle as I filed away at the rod. I made the first flat surface in the rod by setting the rod in a slot carved into my particleboard workbench. This allowed me to push rather hard on the file and hence the rod without it bending. After several swipes I rotated the tool and filed another side, etc. it took about a half hour but I ended up with a tapered diamond (sort of) cross section pitot probe.
After some polishing and fine tuning, I super glued it into a hole drilled into the nose of the fuselage. Now it was a “thigh-dart”.
The kit wing had a strange blunt ledge on the trailing edge like a ‘C’ channel. It looked like it was supposed to be there (that’s how good it looked). But after reviewing my references (see References), alas the trailing edge was sharp. I glued in a very narrow strip of Evergreen plastic (0.015”) and when dry I filed it sharp and re-scribed the control surfaces.
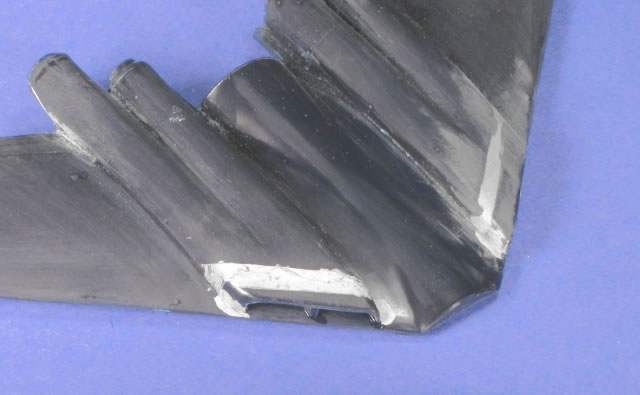
The photos of the first prototype show three small tubes sticking out of the trailing edge of the right wing and one tube, same location, on the left wing. There was no mention of these in the references so I have no idea what they were for but they are prominent – even in this scale. So I carved out a few slots in the lower wing surface and super glued 0.020” brass rod pieces into each slot and then puttied and sanded the wing lower surface smooth.
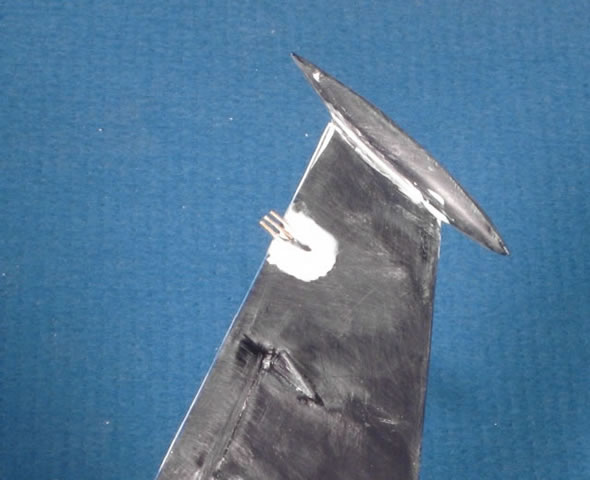
The wing/fuselage fit is significantly less than stellar. The leading edge of the wing root had to be raised to make the top surface flush with the top fuselage, but this was pretty easy to fix. Since the wing just sets on a slot in the top fuselage, it was just a matter of placing the right size shims to compensate. These turned out to be 0.030” near the leading edge and 0.020” and 0.010” going aft. With a little sanding here and there on the shim, it was ready for primetime.
After the wing was attached it was just a matter of, shimming, filling, filing, sanding, sigh, repeat, sigh, repeat until the sighing stopped.
The T-tail was cleaned up (flash) and the T-tail aft cone was attached. I reshaped the cone just a little to better match the contour in the reference photos.
With the T-tail glued onto the tail, Mr. Surface’d, and cleaned up, I drilled holes for the two pitot probes on the top side of the forward fuselage, a top center blade antenna and two strange tooth shaped antennas on the T-tail.
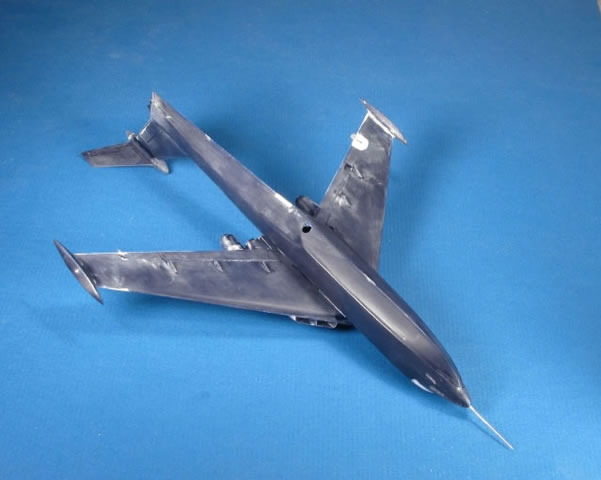
I sprayed on some white primer, Duplicolor (rattle can) which I really like (even though it’s in a can). It’s thin, not pebbly and doesn’t sand off easily so it provides a good base.
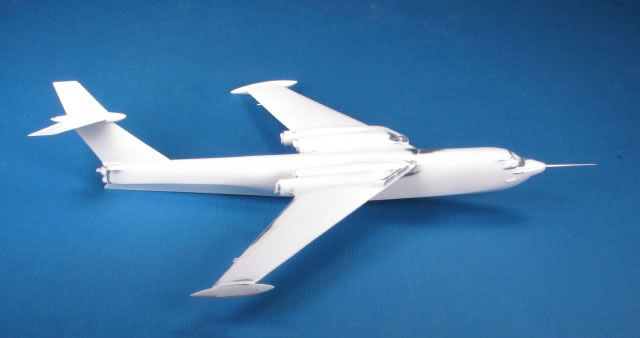
I sanded it with old 600.
Paint
 One of the things I really liked about this kit (besides no cockpit and no wheel wells) was that this was AOC: all one color; well mostly anyway. The second prototype was the one with the white on the wings and horizontal stabilizer. The very first one was all dark sea blue except for the black leading edges -- and that’s the version I wanted to replicate. One of the things I really liked about this kit (besides no cockpit and no wheel wells) was that this was AOC: all one color; well mostly anyway. The second prototype was the one with the white on the wings and horizontal stabilizer. The very first one was all dark sea blue except for the black leading edges -- and that’s the version I wanted to replicate.
When I built the Revell Trade Wind, I discovered that the Model Master Dark Sea Blue was way too dark. A friend, Rogério Marczak, AKA Rato, told me that he enhanced the dark blue with insignia blue. So I added lots of insignia blue to give it a little more “purpley” look. To do this I mixed Model Master Dark Sea Blue (25%) with Insignia Blue (75%) and then thinned that solution for the airbrush (about 40% thinner). Note that the Dark Sea Blue is very dark, hence why it takes so much insignia blue (75%) to change the color just a little bit. The insignia blue gave it just the shade, for my eyes anyway; thanks Rato.
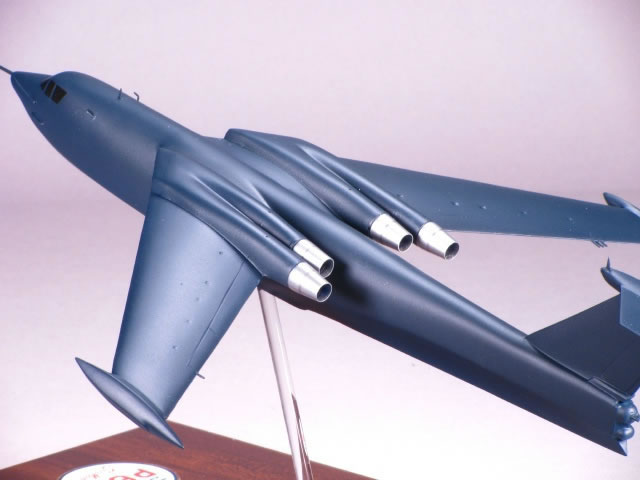
The leading edges of the wings, engine intakes, horizontal and vertical tail were black. This was done with a Model Master flat black and flat white mix (I ran out of weathered or interior black). In hind sight, I should have done the black leading edges first, masked them then painted the airplane dark blue; it would have been a whole lot easier to mask.
After dry (at least a week) I lightly wet sanded with the Micro polishing kit 8000 paper then sprayed on the clear gloss coat. I used Model Master Acryl clear gloss and frankly didn’t like it. So I sanded everything with the Micro polishing kit papers and sprayed the model with my good ol’ reliable water based Varathane. What a difference (see photo below).
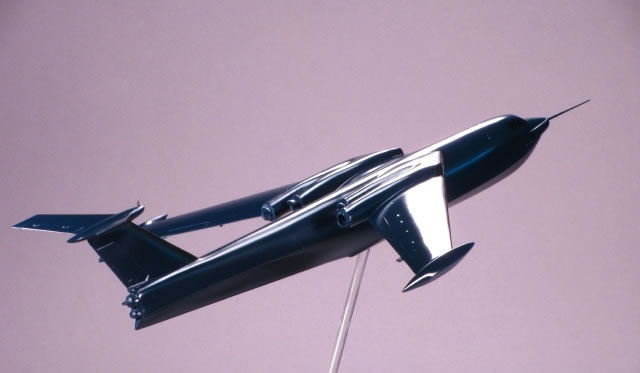
Gloss water based Varathane is very thin, thinner than Future I believe, and dries rock hard in a few hours. But, it does take practice to get the consistency and application down. I thin it with 5% distilled water. First a very light mist coat, wait 10 minutes then put on a slightly wetter coat. If it runs just swipe with a Q-tip and re-spray. If you didn’t see the run until after it’s dry, it takes only a few moments to sand it out with 2000 and re-spray. It’s not for everyone but it’s great for those of us that just don’t have luck with Future.
Decals
I applied the decals after 24 hours drying. The only decals I used from the kit were the ‘XP6M-1 SeaMaster’ logos on both sides of the forward fuselage. Those decals had to be painstakingly cut free from the surrounding emulsion that had yellowed. I rubbed off all of the milky white goo from the decals but the yellowing still was a problem on the clear sections. The model is dark blue so I thought I might be able to get away with a little yellowing on the clear sections of the ‘SeaMaster’ decal. Didn’t work; after the ‘SeaMaster’ decals were dry on the model I had to do some surgery to clean away more of the ‘clear’ areas that were yellowed until it looked OK to me. The rest of the decals came from the decal folder.
I coated the decals with a few coats of gloss Varathane.
The pitot on the 2nd prototype, the one with the engines canted outward, was red, this one, the first prototype, was dark sea blue.
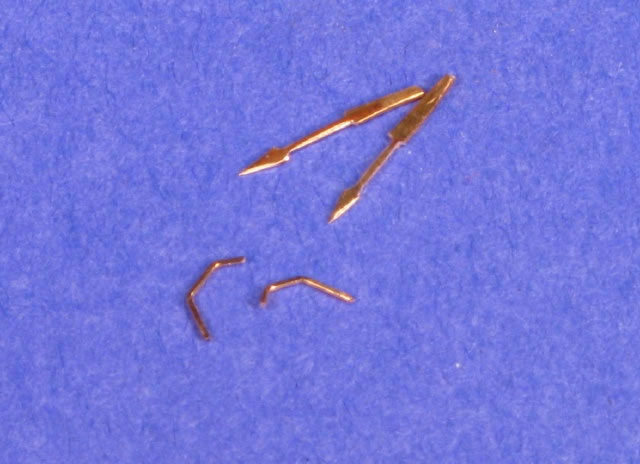
A few antenna thingies, made from pounded brass rod (see photo), were attached as well as the small pitot probes on the fuselage (small brass rod).
The model was finished by applying a semi-gloss Varathane overcoat, a flat black anti-glare panel, attaching the engine nozzles painted with SnJ, and mounting it on an acrylic stick. And this one was history.
If you feel in a rut and want to do something different, try one of these old kits; you don’t have to tell anyone and, hey, you just might have a ball building it – even though it may take you longer than a Sunday build.
Wait, I see a Revell Regulus II box over there.
Bury me with sandpaper.
References:
Nicolaou, Stephane; “Master of the Seas, The Martin P6M Flying Boat”, WINGS Magazine, Vol. 16, No. 6; Dec., 1986 p. 12
Rogério Marczak (suggested adding Insignia Blue to Dark Sea Blue).
Models, Text and Images Copyright © 2010 by Bill Dye
Page Created 19 March, 2010
Last Updated
19 March, 2010
Back to HyperScale
Main Page

|
Home
| What's New |
Features |
Gallery |
Reviews |
Reference |
Forum |
Search