|
Trumpter + Fisher + Scratch 1/32 scale
TF-8A "Twosader"
by
Frank Mitchell
|
TF-8A "Twosader" |

Trumpeter's 1/32 scale F-8E Crusader is available online from Squadron.com
When the 1/32 Trumpeter Crusader came out, I knew I had to tackle a two-seater if for no other reason than to give the TA-7C (http://hsfeatures.com/features04/ta7cfm_1.htm) a companion on the shelf. Therefore, I carried out the usual information search on the one and only TF-8A.
Among other things, I found that a number of references still state that Vought had lengthened the fuselage (the usual number stated is 19”) to build the 2-seater. However, the Twosader was, in fact, the same length as the single-seater, at the express wish of the Navy. That led me to believe that the job would be fairly easy, since all one had to do was cut a longer cockpit opening, whip up a new canopy, and you are done. Well, yes and no.
Before I go any further, I want to thank Paul Fisher for his help on this project; he certainly made the task easier.
As usual, the pictures will help to make sense of the following diatribe (I hope).
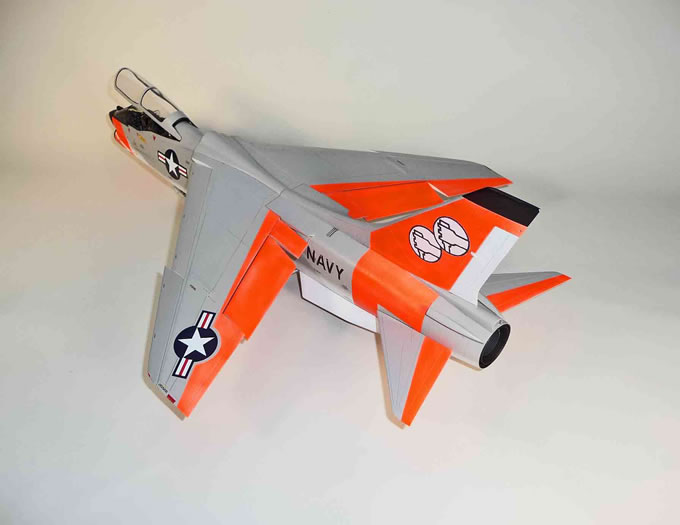
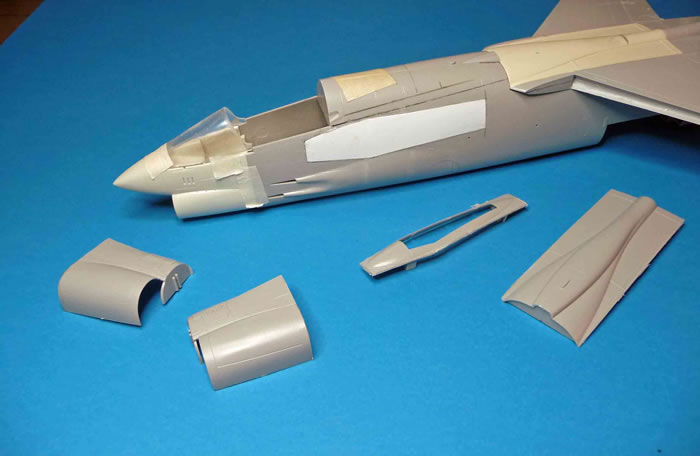
The first step was to install the Fisher wing center section, which fits well and is a very useful piece.
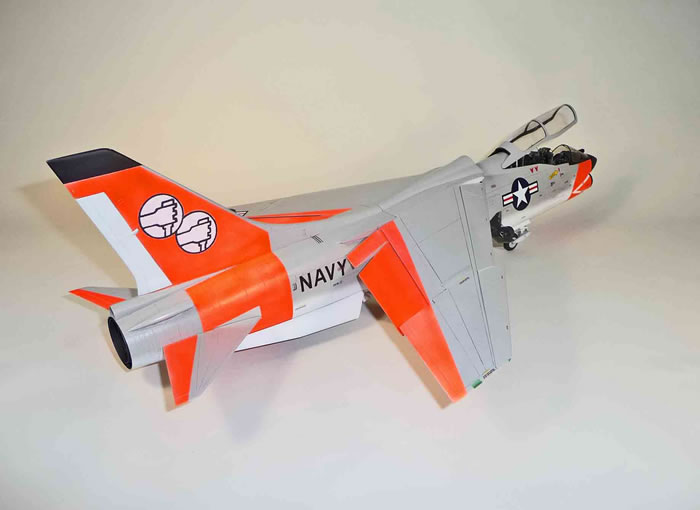
The next was to remove and fill in the refueling probe housing, since that is not used on the TF.
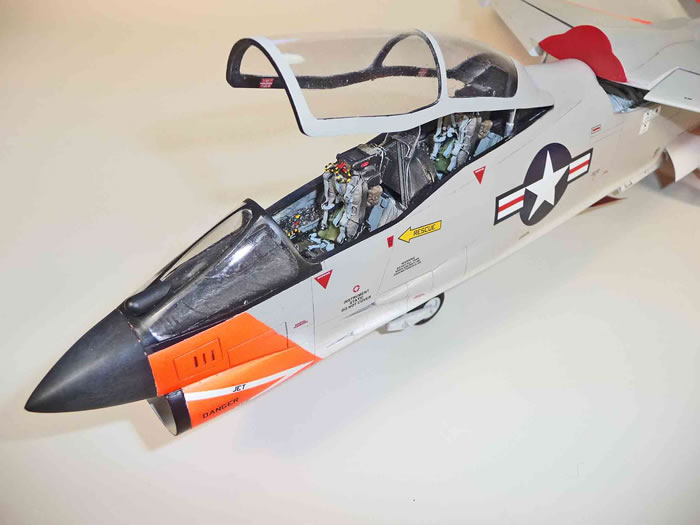
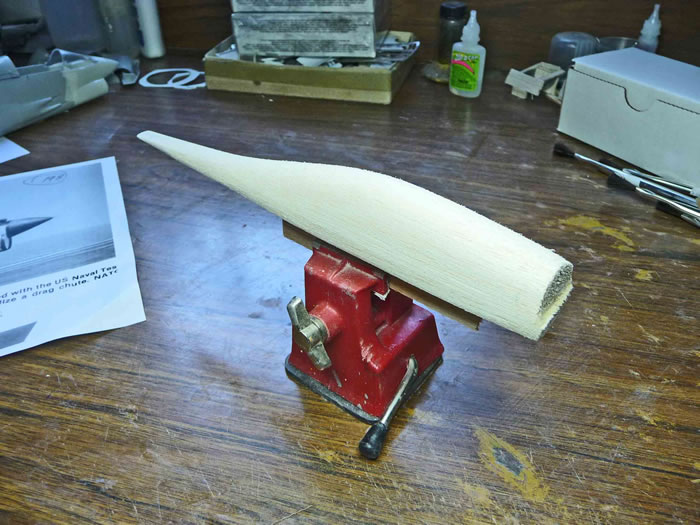
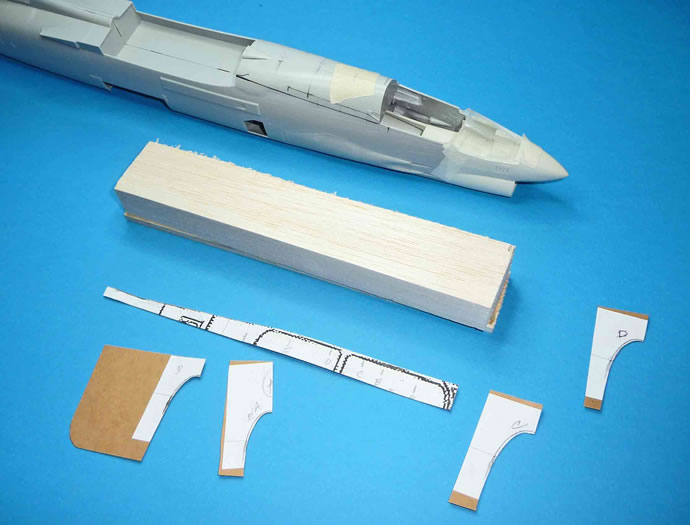
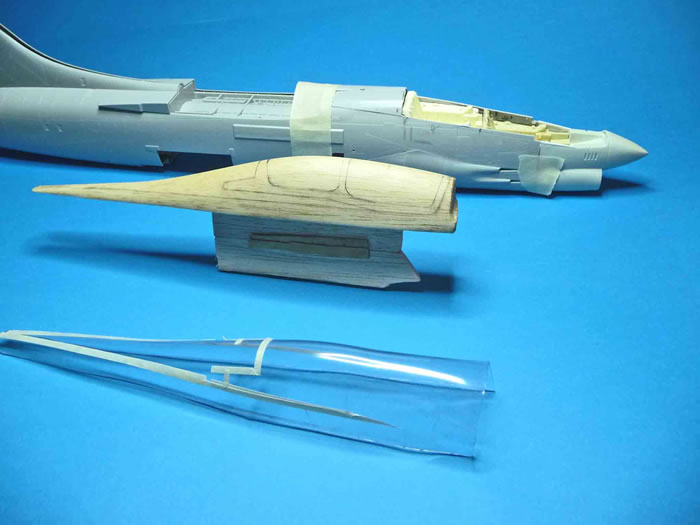
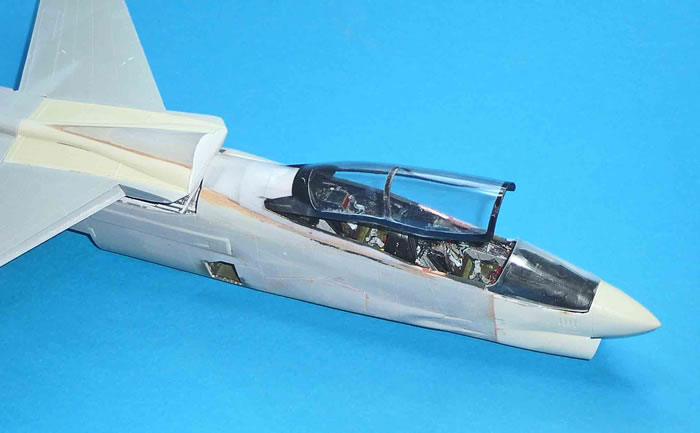
Now I had to find some decent drawings of the two-seater, which was not an easy task. After staring at every available photo of this aircraft, I decided that none of the drawings showed the right canopy shape. I became convinced that all of the two-seat drawings one finds in publications came from the same set of Vought drawings that were done when the airplane was new. Therefore, I pulled out an old trick that many deplore, but I find very useful in the right circumstances: I found a picture that was centered on the canopy and enlarged it to 32nd scale. That gave me the correct shape for the canopy itself, but I also had to do it again to get the shape of the fairing from the canopy into the wing. With these, I was able to do a set of drawings that looked right to me, so down to the basement I went and began carving a mold from balsa. This one mold took in the entire canopy/fairing area so I would be sure that they looked right together.
A couple of .030 clear vinyl copies were made; one concentrated on the canopy itself, and one on the rear fairing, which really overlaps a lot because of the “up-turn” of the canopy base. In addition, a “canopy” was made from black .030 styrene from which an inner framing was cut. This makes a much more realistic appearance and also makes painting easier.
The kit fuselage halves were measured and played with until I was satisfied that I knew where the “new” parts were needed, and those areas were removed.

The trickiest part of this conversion was not only getting the shapes right, but also making everything fit. Dealing with the way the bottom of the canopy curves upward more-or-less-between the seats and trying to make sure that the widths were correct got a little frustrating.
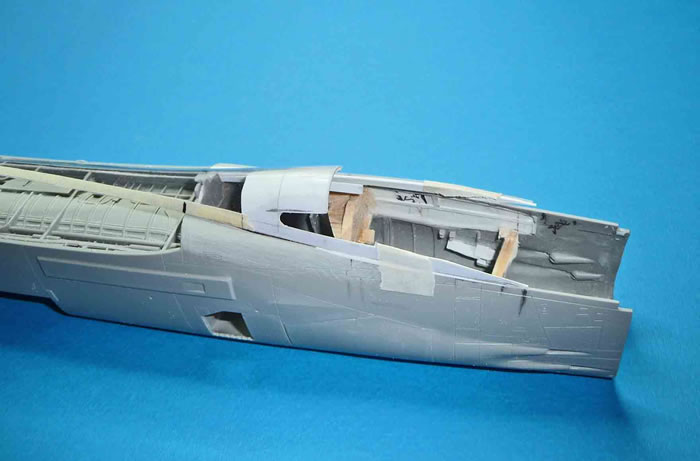
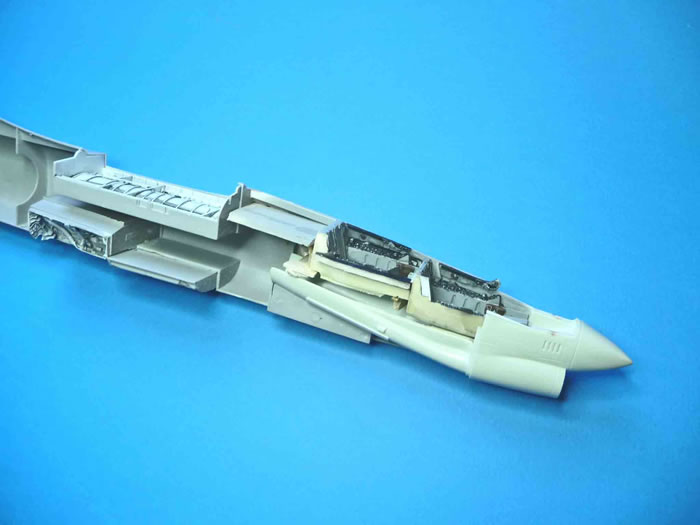
I used two Avionix cockpit sets and two Paul Fisher seats. Also, of course, all of the rear cockpit instrument panel and associated structure between the seats had to be built while hoping that all this would fit together and look halfway accurate.
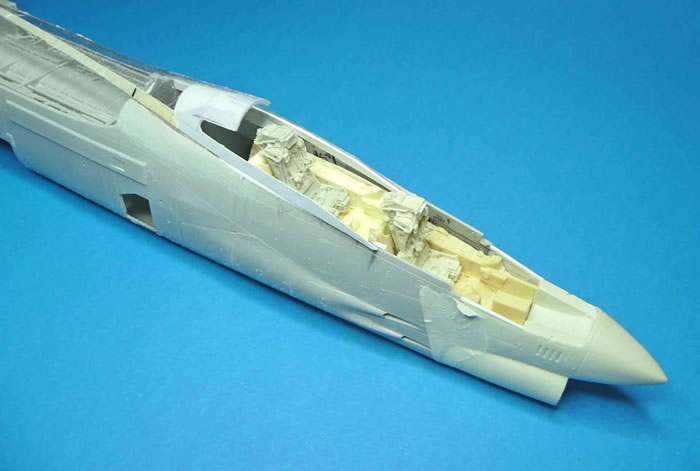
In addition, the intake and nose had be considered and the use of the Fisher nose/intake made that much simpler. It fits beautifully and I was able to use it as an anchor to support the cockpit tubs and the balsa support structure from balsa.
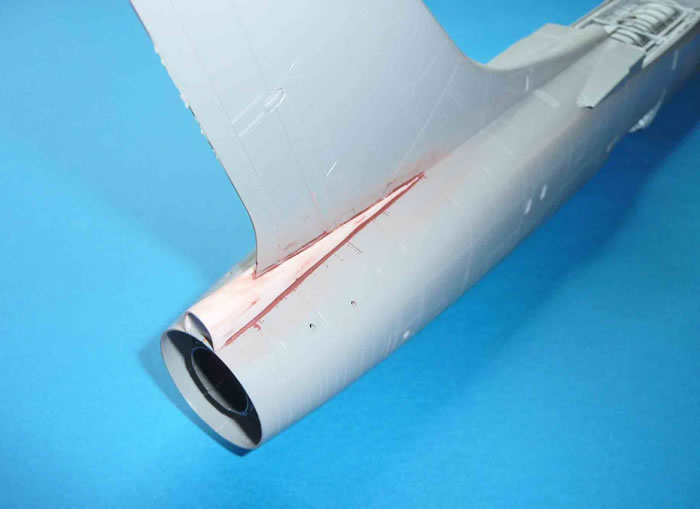
All-in-all, it was tedious work, but everything finally seemed to fit. The other fuselage additions were an Aires tail pipe and wheel well set which also fitted well. The kit landing gear was used.
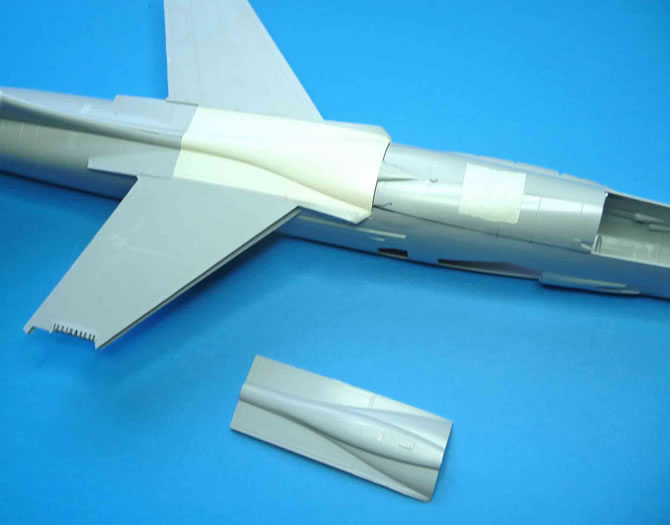
One final modification was the addition of the drag chute housing, which was unique to this aircraft.
From here on, the rest of the kit was assembled as per the instructions, but, because of all the modifications, there was a good deal of scribing, sanding, etc. necessary.
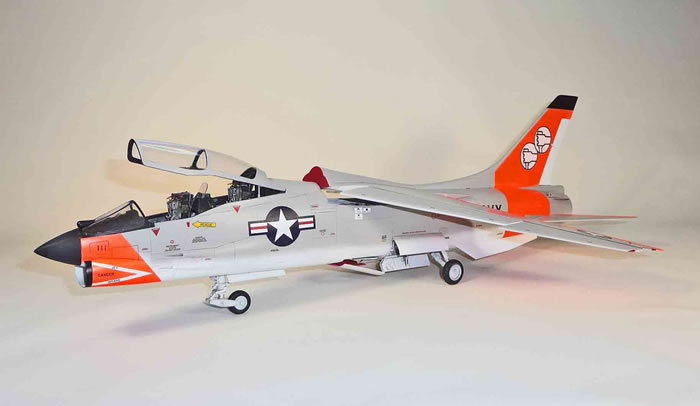
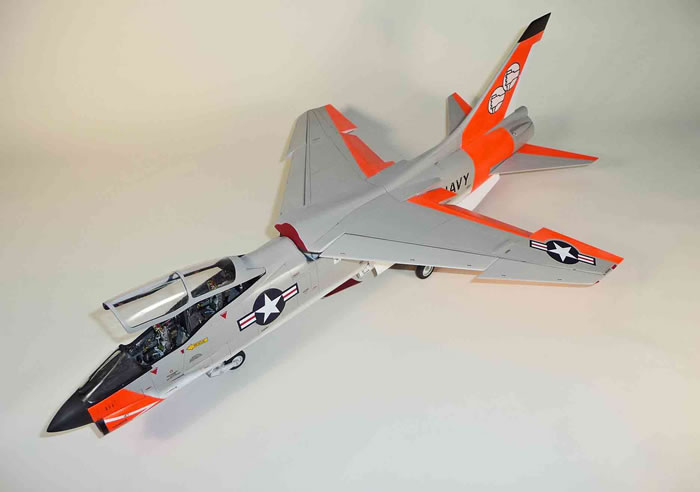
 It turned out that there were a number of paint schemes used on this aircraft during its life, but I went with what was, I think, the original. It turned out that there were a number of paint schemes used on this aircraft during its life, but I went with what was, I think, the original.
Love all that bright paint.
The design on the tail was taken from the aforementioned Vought drawings and enlarged and printed on white decal sheet. They contain an error (small) which I did not fix, but won’t point out since I am sure someone else will...
All-in-all, it was an interesting build, but one that got very involved around the cockpit. However, it turned out to look somewhere within a standard deviation of the aircraft it is supposed to represent, so I am happy.

Model and
Text and Images Copyright © 2010 by Frank Mitchell
Page Created 1 March, 2010
Last Updated
1 March, 2010
Back to HyperScale
Main Page |
 Home
| What's New |
Features |
Gallery |
Reviews |
Reference |
Forum |
Search
Home
| What's New |
Features |
Gallery |
Reviews |
Reference |
Forum |
Search