|
Tamiya's 1/48 scale
P-51D Mustang
by Bill Cook

|
North American P-51D Mustang |

Tamiya's 1/48 scale P-51D Mustang is available online from Squadron.com
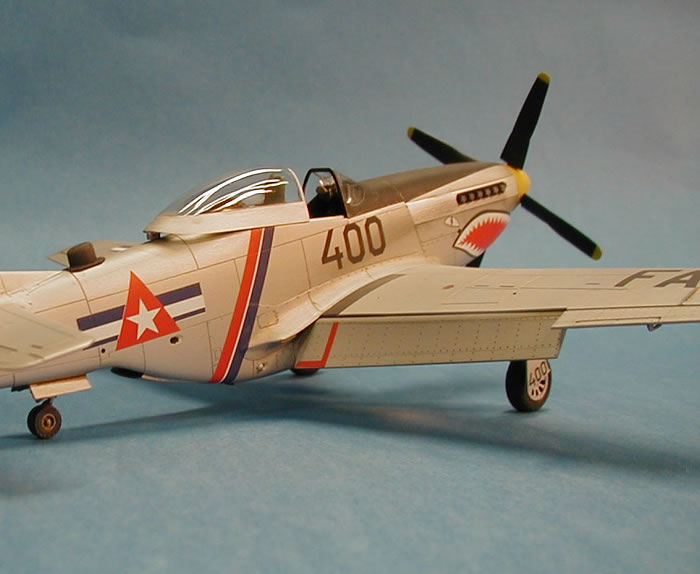
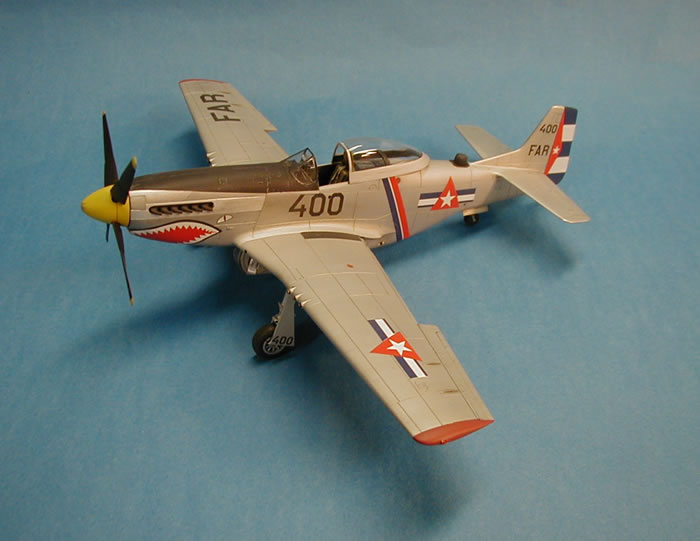
This 1/48 scale P-51 Mustang by Tamiya is still an outstanding kit. It was built basically out of the box with a few added extra bits and a fair amount of time spent on the finish. I really wanted to try something completely different. I already have enough shiny silver P-51s in the display case.
Somewhere along the line I purchased the older 1/48 scale Hobbycraft P-51 Shark Mouth kit from Ebay. All I was after were the decals. It had the Cuban Mustang on the sheet. Started building the Tamiya kit with the idea of using the Hobbycraft decals on it. Found a couple of reference photos of the actual plane in Cuba and it showed that the Hobbycraft decals were just a little out of proportion. So I searched the web and found the beautiful Macho Mustang II decal sheet from Aldo at Aztec Models.

One of my areas of focus on a model are getting the basics right. I have seen too many well finished models with a part out of alignment or a seam where it did not belong. On the Tamiya kit the sprue attachment on the windscreen and canopy do require some attention. I carefully cut from the tree with a razor saw and then trimmed with the ol’ #11. I glued both into place with Tamiya liquid cement and filled the gap with a little grey putty. Sanded with 600 wet, 1000 wet, and 1200 wet to sand the seam and blend the parts together. Polished both with fine and coarse Tamiya polishing compound. Masked with the Squadron canopy mask set.
 The model was then painted using the Testor's Model Mater aluminum non-buffing metalizer paint. After the paint had dried, I used a light wash of brown watercolor in the panel lines to replicate the dirt that would have accumulated during its limited service. For the exhaust panels I used the Bare Metal matte aluminum foil. The model was then painted using the Testor's Model Mater aluminum non-buffing metalizer paint. After the paint had dried, I used a light wash of brown watercolor in the panel lines to replicate the dirt that would have accumulated during its limited service. For the exhaust panels I used the Bare Metal matte aluminum foil.
Black decal film was used for the wing walks. Sprayed a couple of coats of Future floor wax. Applied the beautiful Aztec decals using Solvaset to get the decals to snuggle down. Sprayed another couple of coats of Future. Now time to fade the aluminum so it doesn’t look like a factory fresh Mustang.
Started applying a slightly wet coat of Acryl flat. I let it flash off, and then held the model about 18 to 24 inches away and dusted on the final flat coat. It looked faded and weathered.
After doing the final assembly I very happy with the way the finish came out. The unique markings of this plane makes it a very nice addition to the stable.
Models, Description and Images Copyright © 2010 by Bill Cook
Page Created 10 March, 2010
Last Updated
10 March, 2010
Back to HyperScale
Main Page

|
Home
| What's New |
Features |
Gallery |
Reviews |
Reference |
Forum |
Search