Scratch Built 1/32 scale
Nikitin-Chevchenko IS-2
by Frank Mitchell

HyperScale is proudly supported by Squadron
I am not quite sure why I enjoy building obscure prototype aircraft. Maybe it is the challenge of taking limited information and trying to make something that looks at least semi-accurate, or maybe it has to do with building something unique. I cannot deny, however, that the fact that such subjects decrease the potential for nit-picking is also a nice benefit. Whatever the deep-seated reasons may be, I do actively leaf through books and magazines looking for subjects like this one.
In brief, the one-and-only Nikitin-Chevchenko IS-2 was a small (24-foot wingspan) fighter aircraft that was built in January, 1941 to investigate the question of whether an aircraft having a retractable lower wing could provide the speed and maneuverability of a monoplane with the low-speed handling of a biplane. As that name implies, it was the second aircraft to investigate this possibility and contained a number of improvements from the previous IS-1.
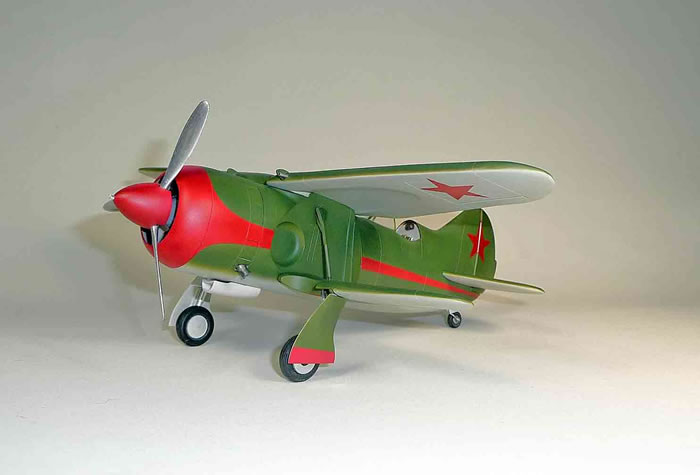
The lower wing of the IS-2 folded and retracted into the side of the fuselage and bottom of the top wing by a jack operating from the upper fuselage. The landing gear followed the lower wing into wells in the fuselage sides. According to the few references I could find, it flew only four times, testing being halted by the war in April, 1941. Although it flew well and the wing operated as designed, the weight and complexity of the wing-retraction system cancelled out the increased low-speed maneuverability.
Although it is a small and rather simple-appearing aircraft, this little beast turned out to be a bit more complex than I had anticipated, primarily due to dealing with the relationship between parts. Trying to make the lower wing/landing gear look like it would really fold into the large well in the fuselage caused a few blue words at various times, and occasionally led to the feeling that everything has to be done before everything else. I therefore made great use of the building jig and just worked on one thing at a time hoping that all the pieces would eventually fit together at the end. I should also note that it was returned to a box a couple of times until the “Problem Of The Moment” could be worked out.
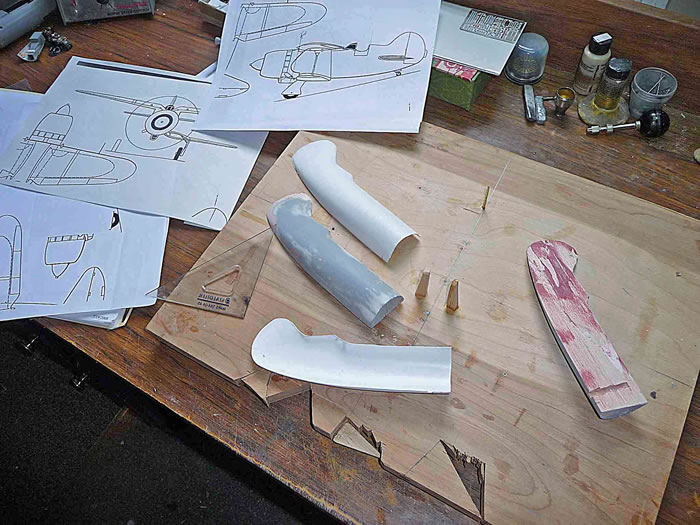
As usual with me, the photos tell the real story; hopefully the words will fill in some other details.
As with most of my scratch-builts, things began by carving balsa molds for the wings, fuselage, tail, and cowling.
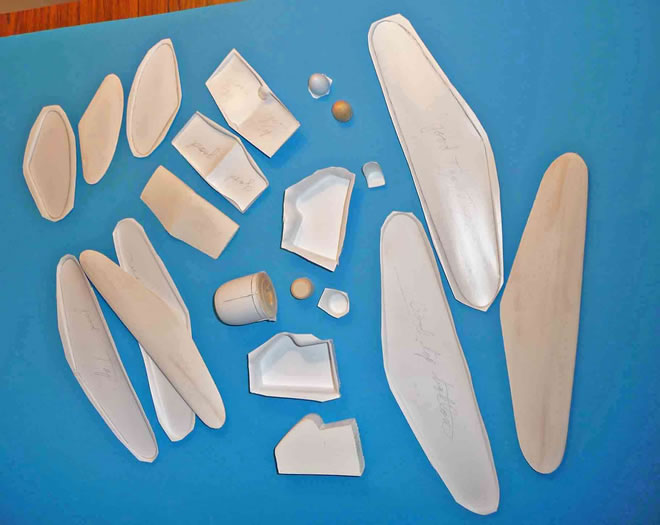
These were filled and primed to a smooth surface after which they were vacuum-formed in the kitchen using my wife’s oven and a shop-vac (she loves all of this, of course).
In case I haven’t ever made it clear, I epoxy the wing skins to the balsa for maximum strength and ease of attaching wings, tail, landing gear, struts, engines, etc. That means I have to under-carve the molds by a bit, but that is not really a problem. As a result of all that, my models tend to be rather strong in their basic components. I do not believe in building internal structure that can’t be seen---
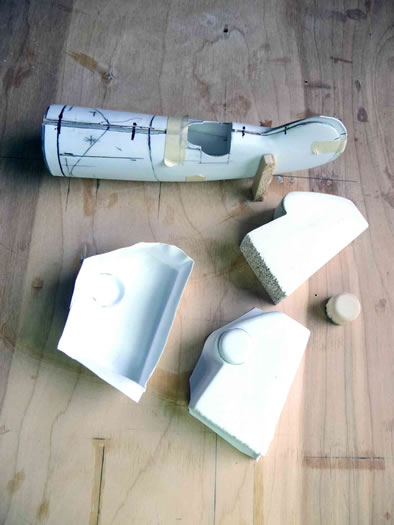
A fair amount of time was spent on the lower wing center section since it contains the gear and gear wells and is curved top and bottom to fit the fuselage and the outer wings, which were made as separate pieces.
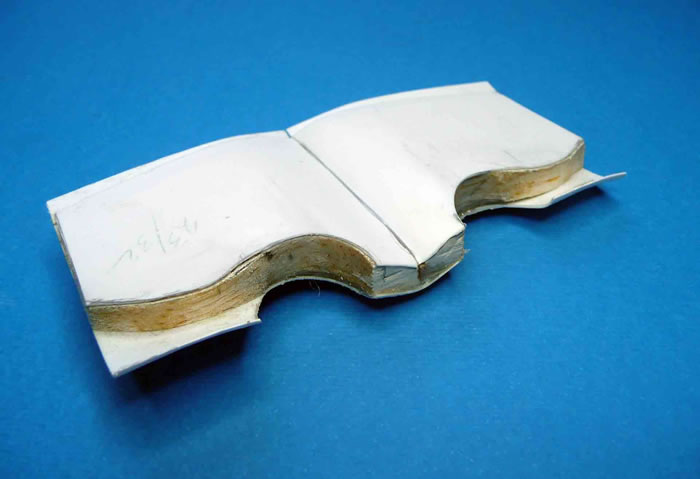
The wheel wells were then fitted, but not glued into place until the cockpit interior was built and painted.
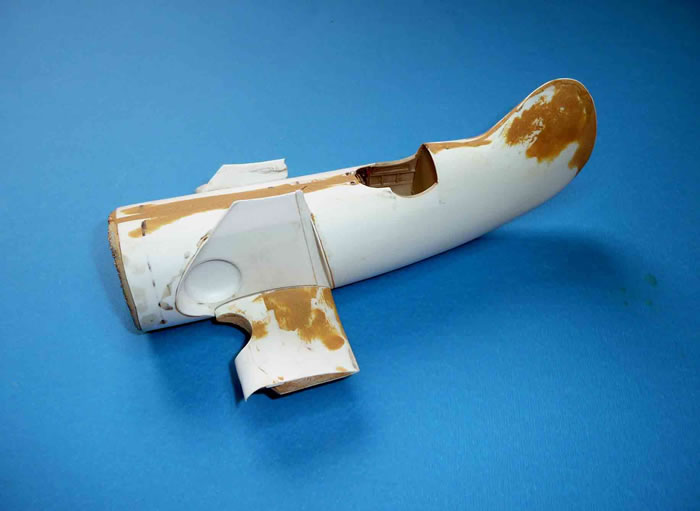
The lower wings were fitted on the jig (I don’t think you could build this model without a jig), which, because of the curvature, meant that the fuselage had to be raised a bit off the base of the jig.
The top wing was finished to the extent possible before being cut in half. There isn’t a lot holding that top wing in place, so some brass tubing was used to sink into the skin/epoxy/balsa of the fuselage. Ultimately, the wings were epoxied in place and they have held up so far.
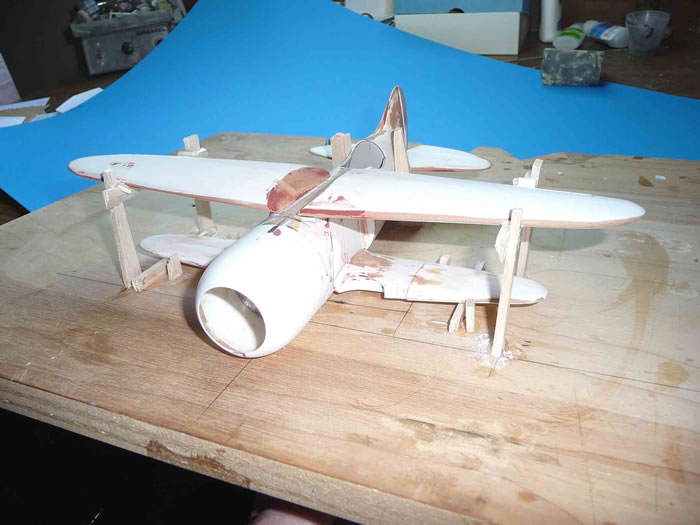
From here on, it was a matter of details. The tail surfaces were covered and cut apart as necessary. The cowling was fitted and an engine from (I think) a long-deceased Revell Wildcat was added. Not much of the engine can really be seen; it mainly serves to hold the prop, which, by the way, was found in the scrap box.
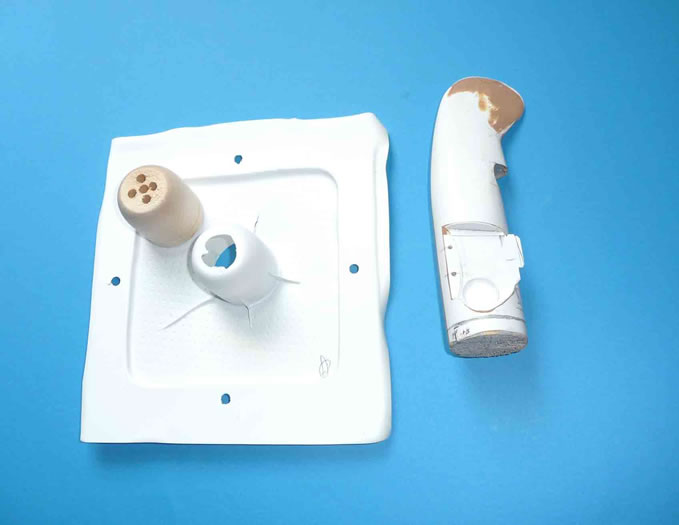
Exhausts were made from aluminum tubing.
The landing gear was soldered together from brass tubing, with brass and aluminum tubing added for detail purposes. The wheels came form the scrap box.
The wing retraction struts were made up from brass and aluminum. They are not structural.
 One nice thing about this model was that I was able to paint it while it was completely disassembled. Sure made masking easier. One nice thing about this model was that I was able to paint it while it was completely disassembled. Sure made masking easier.
The paints were Gunze Russian Green and some gray that looked right with red trim also from Gunze. The stars were painted on using Frisket masks made by a friend. While the colors are an educated guess, but based on what little I know of Russian aircraft of the period, it seemed logical. Certainly, the black-and-white photos do show a stripe in the shape depicted, so I am reasonably confidant that they are close.
The final coating was Testor’s Floquil Flat Finish which I use on many of my models as I like the slightly dull finish it provides.
Once painting was finished, final assembly was carried out on the jig.
In all, this was a fun project, if a little fiddly at times, but at least I doubt that I have to worry about Trumpeter doing one. I hope.
Image and Text Copyright ©
2010 by Frank Mitchell
Page Created 19 July, 2010
Last Updated
19 July, 2010
Back to HyperScale Main Page

|
Home
| What's New | Features | Gallery | Reviews | Reference | Resource Guides | Forum |