|
PJ Productions' 1/72 scale
Mirage IIIS/BS
by Thomas Muggli
|
|
Mirage IIIS/BS |

Hobby Boss' 1/48 scale F-111C is available online from Squadron.com
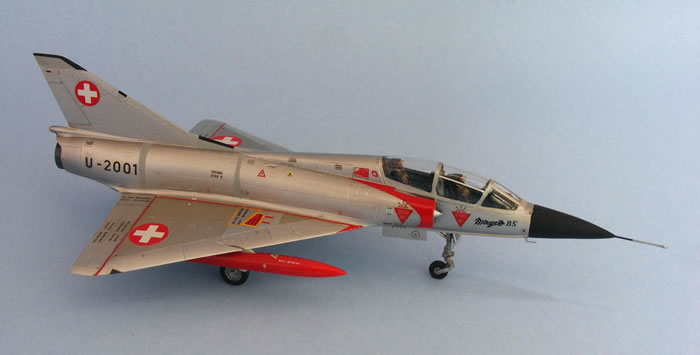
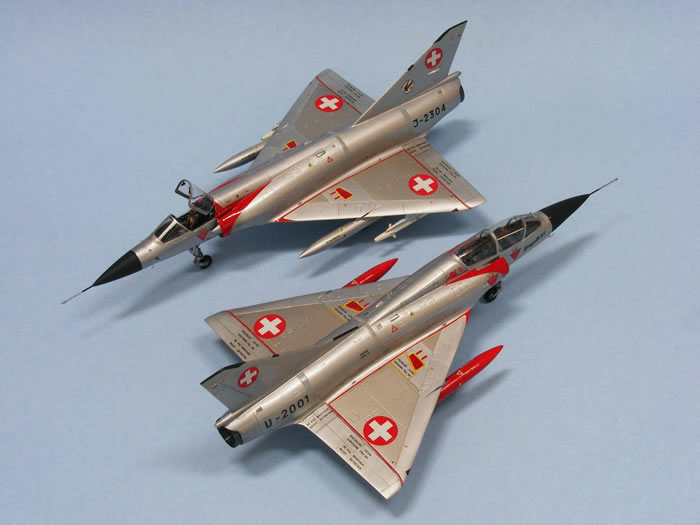
During the Cold War, the threat of Soviet bombers attacking targets in Western Europe was a concern not only to NATO, but also to Switzerland, a neutral country in the center of Europe. Switzerland was just as committed as NATO to defend its airspace against potential Warsaw Pact intruders. Pilots in the Swiss Air Force’s surveillance wing, stood ready to take off at a moment’s notice in their Dassault Mirage III interceptors from fortified based buried deep in the Alps. They would fight off any aircraft violating their homeland’s neutral territory. For more than three decades, the Mirage III was the spearhead of Switzerland’s air defense. Back in 1964, the story of the Mirage III in Switzerland did not have a happy beginning. Because of severe cost overruns the planned purchase of 100 Mirages from France had to be reduced to 56 aircraft. Nevertheless, once they were put in service in 1966, the delta-winged fighters, proved to be a valuable asset until being replaced by F/A-18 Hornets in the early 1990s.
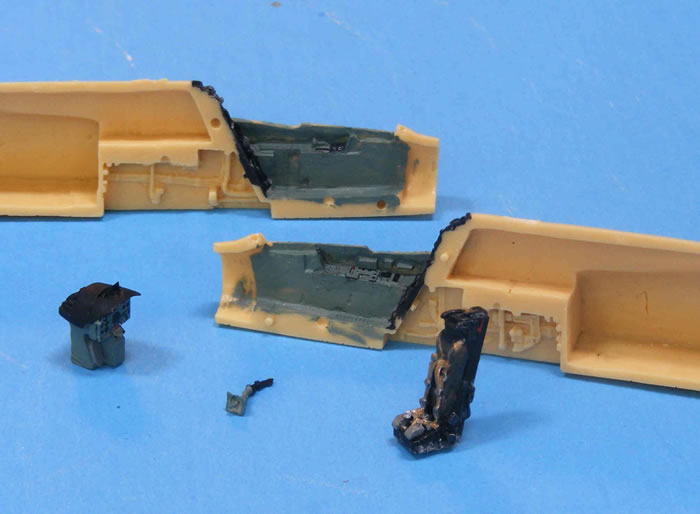
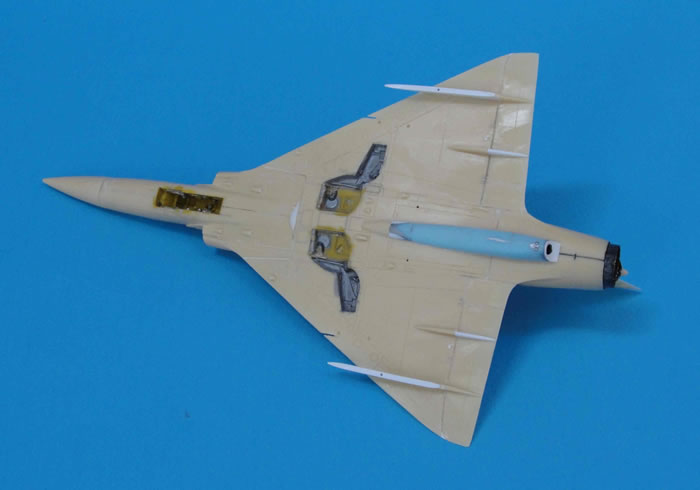
Naturally, I wanted this classic aircraft in my 1/72 scale Swiss Air Force model collection. Despite being one of the most common fighter jets worldwide, kit manufacturers have all but ignored the Mirage. Outdated kits from Heller and Revell can still be found, but they don’t measure up to today’s standards. The resin kits from PJ Productions are probably the best available Mirages in 1/72 scale. Even though the PJ kits are quite expensive, I bought two kits, and tried my luck at building both a Mirage IIIS interceptor and a Mirage IIIBS two-seat trainer at the same time. After opening the two small boxes, I was impressed by the good quality of the resin parts. The panel lines could have been a bit finer, but overall the surface detail was excellent. The only flaws were few holes caused by bubbles in the resin, which were quickly filled with CA glue.
Before I started building, I decided do some research. On the website of the IPMS chapter in Bern, Switzerland I found some excellent detail photos of a Swiss Mirage exhibit in a museum. These photos helped me to add more detail parts to the cockpits, ejection seats, and wheel wells, and to paint them more accurately.
The jet exhausts were made from photo-etched metal parts. These had to be bent into a circle which was accomplished by using a wooden dowel. Gluing the jet exhaust parts to the resin afterburner tube is tricky and requires patience. After painting the assembled parts flat black and dry-brushing silver the whole thing looks quite realistic.
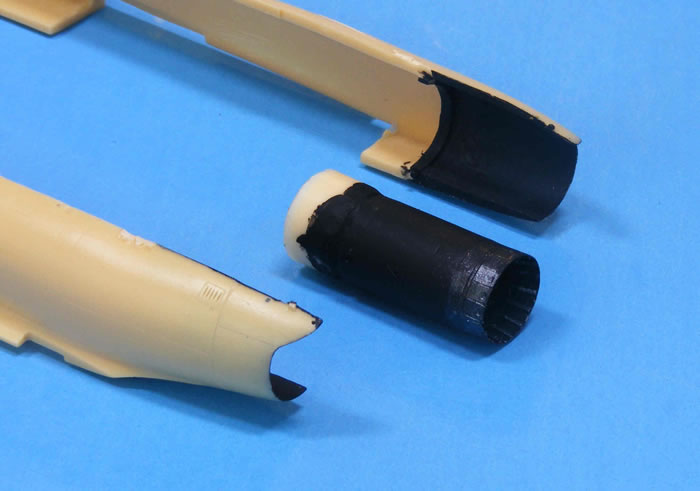
Once the exhaust assembly was installed, the fuselage halves were joined.
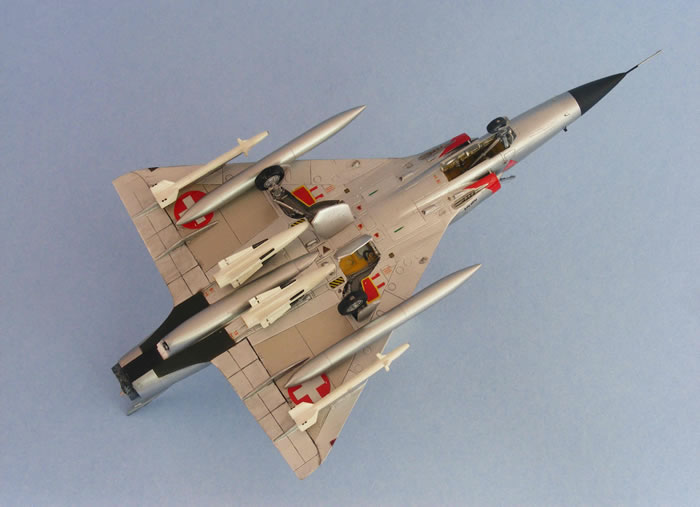
Installing the one-part wing was a challenge. After a bit of cutting and sanding, I achieved an acceptable fit to the underside of the fuselage. But I could not avoid considerable gaps at the upper wing roots. I filled these using plastic strips and putty. The biggest problem with these kits are the wing flaps, which are produced as separate parts for no apparent reason. The flaps are intended to be butt-joined to the wing’s rear edge. Once the flaps are removed from their pour stubs, it’s immediately obvious, that producing a realistic fit would be almost impossible. I considered installing the flaps in a lowered position, but after I couldn’t find any photos of parked Mirages with their flaps lowered, I discarded the idea. All I could do was sand the flaps and wing’s rear edges until a somewhat acceptable fit was achieved. I glued the flaps to the wings and hoped that the shortcomings in this area would be somewhat hidden after painting and decaling.
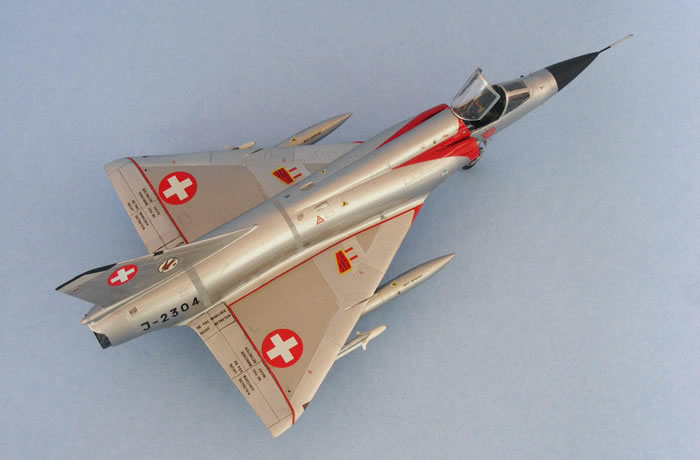
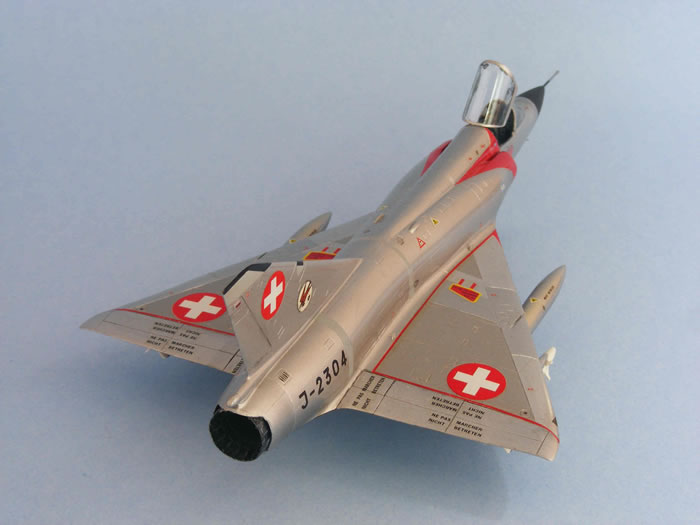
Next, I installed the vertical stabilizer which did not pose any problem, nor did the installation of the radar nose on the Mirage IIIS. The nose of the Mirage IIIBS needed to be modified. The PJ kit contains a camera nose, but the Swiss Mirage IIIBS were equipped with a modified radar nose with an air intake on its underside. I fashioned a new tip for the nose using a missile from my spares box and scratch building the air intake.
The metal landing gear looked fine. After I added brake lines made from copper wire, it was painted and put to the side until final assembly. The vacuum-formed canopies represented another challenge. Patience was the name of the game when cutting and fitting the parts to the fuselage. If the desired fit couldn’t be achieved, posing the canopy open, as I did on my interceptor, was always an option. For a better look, I also added details made from plastic bits and copper wire to the inside of the canopy frames.
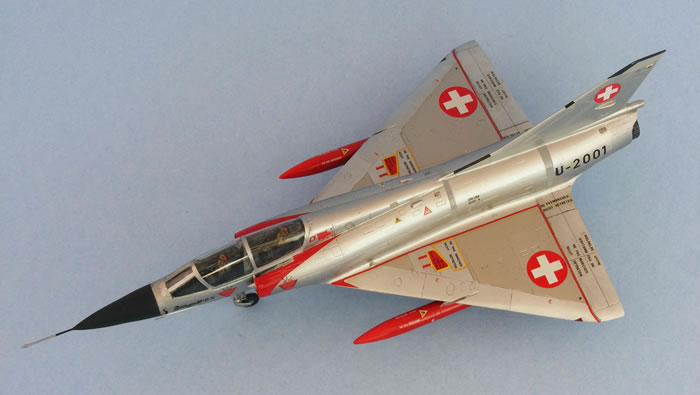
I wanted my Mirage interceptor to sport a full compliment of its weapons, two 30 mm cannons, two Sidewinder, and two Falcon missiles, even though this was rarely seen while the Mirages were in service. The two Sidewinders came from an Italeri F-5E kit. For the Falcons, I used two WWII torpedoes I found in my spares box. With their rears facing forward, their bodies matched the Falcon’s almost perfectly.
The fins were fashioned from sheet styrene. I painted the missiles and installed them during final assembly. Part of the Mirage interceptors’ equipment is the Sepr rocket engine, which provided additional thrust during high altitude missions. It is located on the bottom of the rear fuselage. When the Sepr is not installed, the area is covered by a fairing. In order to represent the installed engine, I shortened and reshaped the fairing, and installed an exhaust nozzle made from styrene tubing.
I prefer to use acrylic paints to finish my models. I started by airbrushing the center wing panels with Tamiya Titanium Silver. After the paint had dried thoroughly, I masked the area and sprayed the rest of the wing and flaps with Tamiya Aluminum Silver. I masked the areas which were to remain Aluminum Silver. Lastly, I airbrushed the fuselage and some wing panels with Hawkeye Talon Aluminum Plate. Hawkeye acrylic paint, made by the manufacturer of SNJ lacquer paints, is the best quality acrylic natural metal paint I have used. It can be polished with aluminum powder, which is what I did with the fuselage panels in front of the cockpit, as well as the rear fuselage cone. After the masks were removed, I was quite pleased with how the natural metal finish had turned out.
The highlight of this project was the decals. I used two decal sheets produced by Matterhorn Circle (www.mc-one.ch). They are of excellent quality, crisply printed and not translucent. Even though they are made for the Swiss Air Force’s single Mirage IIIC, they contained most of the decals I needed for my Mirages. I used the registration number from the decal sheet in the PJ kit for the Mirage IIIS. The “U” and “BS” lettering for the two-seater were the only decals I needed to produce on my computer. I sprayed a thin coat of Future floor cleaner to seal the finish and the decals. Finally I added landing gear, missiles, wing tanks, pitot tubes and antennas. At last, my Mirages were ready for display on my shelf. The PJ kits certainly have their share of shortcomings, but despite the challenges, I enjoyed this project. Nevertheless, as per Murphy’s law, now that I have finished my Mirages, a new high-tech Mirage kit is sure to be released in the near future.
Model and Text Copyright ©
2010 by Thomas Muggli
Page Created 30 December, 2010
Last Updated
30 December, 2010
Back to
HyperScale Main Page

|
 Home
| What's New |
Features |
Gallery |
Reviews |
Reference |
Forum |
Search
Home
| What's New |
Features |
Gallery |
Reviews |
Reference |
Forum |
Search