|
Hasegawa's 1/48 scale
Macchi C.205 Veltro
by David W. Aungst
|
Macchi C.205 Veltro |

Hasegawa's 1/48 scale Macchi C.205 is available online from Squadron.com
I am a deliberate kind of modeler. I think about and pick my model projects, decide exactly how I want to build them, then build the model based on the plan I have figured out. It is structured, and it is the way I like it. However, every so often, I have a model project that picks me instead of the other way around. This Macchi 205 project is one of those projects.
This is the Hasegawa 1/48th scale Macchi 205 kit. I bought it many years ago when Hasegawa first released the kit. I was intrigued by the fact that one wing is longer than the other. I guess it makes for a novel approach to countering propeller torque. I wonder just how effective it really was at doing this.
This Macchi 205 kit has been in my model room closet a long time. I could not move it to the attic because there were resin items in the box (a True Details cockpit set). I do not like risking what the heat of the attic in the summer time will do to resin. Keeping it that close has always kept it sort-of on my mind. When one of my friends started building a Macchi 202 kit, I pulled out my 205 kit and looked it over. Before I knew it, I was working on the model to integrate the True Details cockpit set into the kit. I quick coat of green paint in the cockpit and I was officially working on the project.
My big "go" or "no-go" decision point on any model project is reaching the point where, if I continue, the model will no longer fit into its box. In the case of this Macchi kit, the model still fits into its box even when it is fully assembled, just without the propeller. That took the stress of having another half-built model sitting on the shelf of doom out of the picture. So I pushed on with the project in the comfort of knowing I could box it up anytime and put it away.
This was a very pleasant model to build, very relaxing, very simple.
This is the Hasegawa 1/48th scale Macchi 205 kit. I built one of the original standard release kits, not any of the special edition kits that Hasegawa is so fond of releasing. I know next to nothing about WWII Italian aircraft, so I have no clue about the accuracy of the kit. It has engraved scribing, fits extremely well, and is attractive when done. That is all I cared to know on this project.
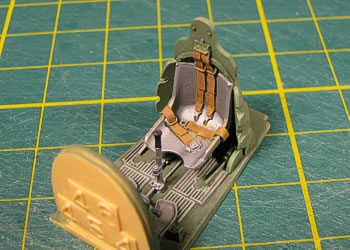
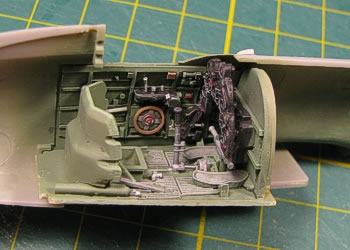
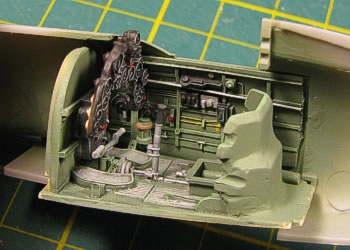
The True Details cockpit set is a simple, yet nicely detailed addition to the basic kit. I picked up this cockpit set simply because I saw it and knew I had a Macchi 205 in my stash. I tossed the set in the box with the kit so I could use it whenever I decide to build the kit. The cockpit set is comprised of a whole five pieces -- a floor "tub", two side walls, a seat, and an instrument panel. Details are nicely molded and are a definite improvement over the kit cockpit, not that the kit cockpit is bad on its own. It is just that I like using resin stuff.
The cockpit set pieces are simply direct replacement pieces for a bunch of the kit pieces that make up the cockpit. I had next to no issues using them. The only point of difficulty was that I had to slice off the uppermost instrument, next to the gun sight, in order to make clearance so the fuselage halves would come together. If I had modified the fuselage halves to clear the instrument, then the cockpit windscreen would not have fit. It is no big deal to be one instrument short (for me on this project). If this was a Phantom or Skyhawk, then I would be upset ...
The Hasegawa kit instructions say the cockpit is Light Green (F.S.34227). Looking at pictures in the Squadron Walk Around book on the Macchi 205, I found that the cockpits in all the restored examples of which they had pictures looked darker and slightly gray. So, I decided to use SAC Bomber Green (F.S.34159) in my cockpit. I liked the way this color looked better than the Light Green. Following what I saw in the book pictures, I painted various details in silver (like the pilot's seat). Other details were picked out in red and black. A black wash and a quick dry-brushing in Light Green and light gray picked out the details quite well.
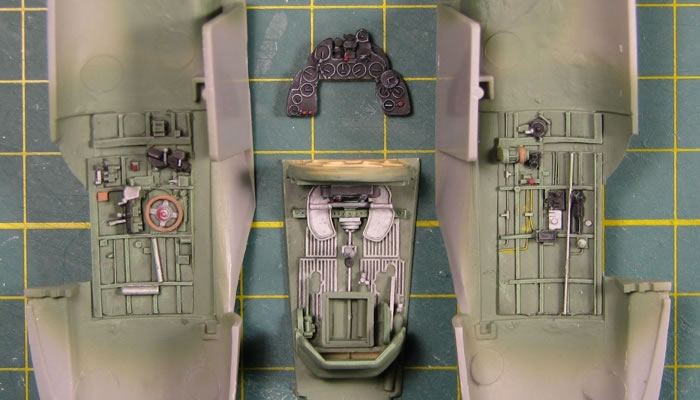
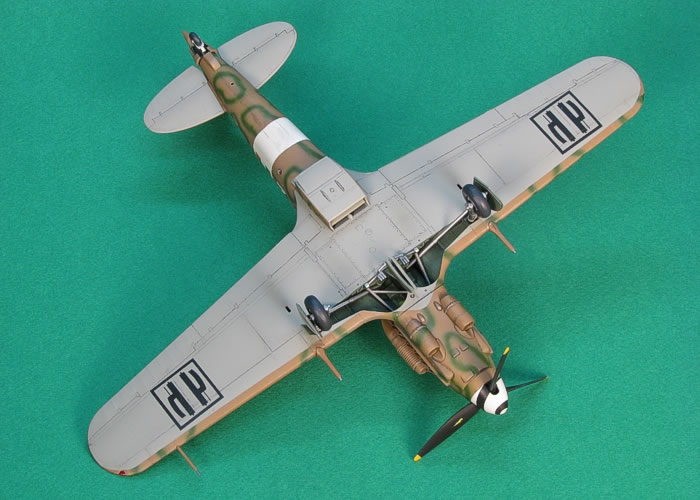
The kit wheel well is more complex than I would have thought, but it builds simply and easily. From postings I have seen for other modelers building this kit, the wheel well is missing a ton of things that are supposed to be in there. Not really knowing what is missing is a wonderful thing. I just built what the kit provided and kept the project moving.
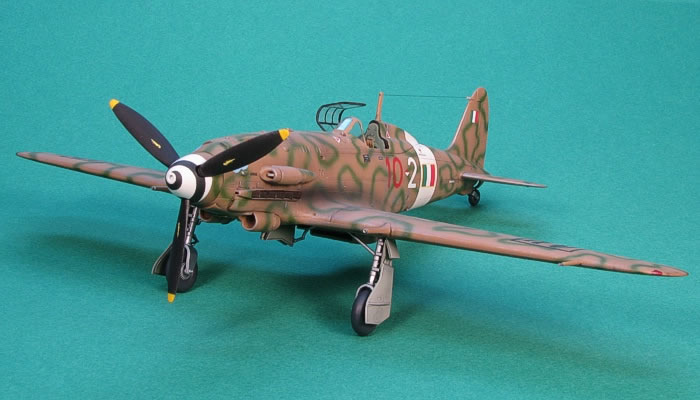
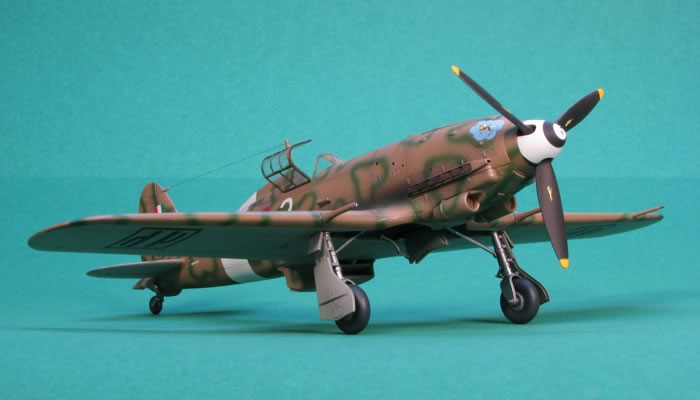
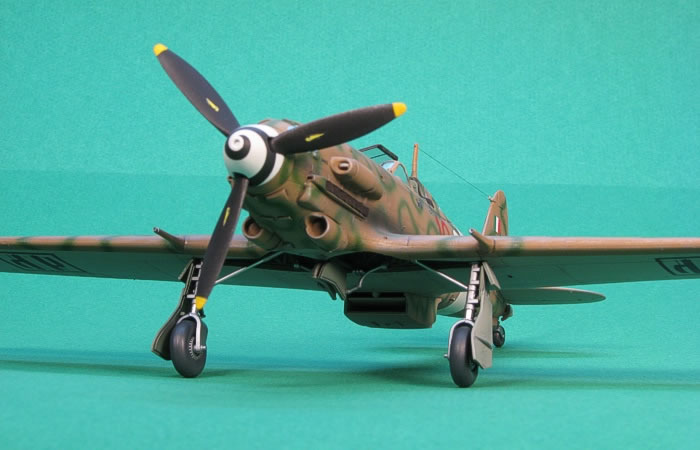
The last "extra" I used on the kit are Moskit engine exhausts. I stumbled across these at a model show. Since I knew I had this Macchi 205 in my stash, I decided to pick up the exhausts. They look wonderful, but they required modifying the fuselage sides to accept them. I think they are also too large (long in length), but I was not going to argue with them. I widened the engine exhaust opening, thinned the section at the front to make clearance for the pipes and kept adjusting the fit of the pipes until I had them where I wanted them. I left the lower cowl piece unattached until after I was done painting. That way I could add the exhausts later and not have to mask them while painting the camouflage. The lower cowl fits perfectly, so I was not concerned about attaching it later after it was fully painted and finished.
With a few hours of painting in the cockpit and wheel well, I was ready to button up the fuselage and add the wings. With one last check to confirm the kit fit into its box with the wings attached, I added glue and made it permanent. The wing seam is non-existent. In fact, I needed no filler on any part of this kit.
I took a few minutes to clean up the glue marks along the seams, and it was time to paint camouflage.
Paint
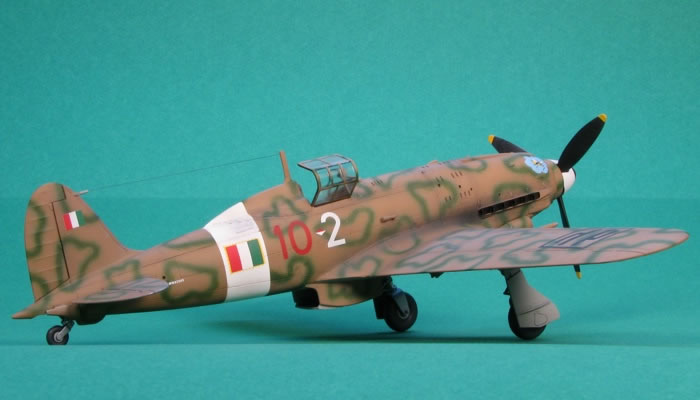
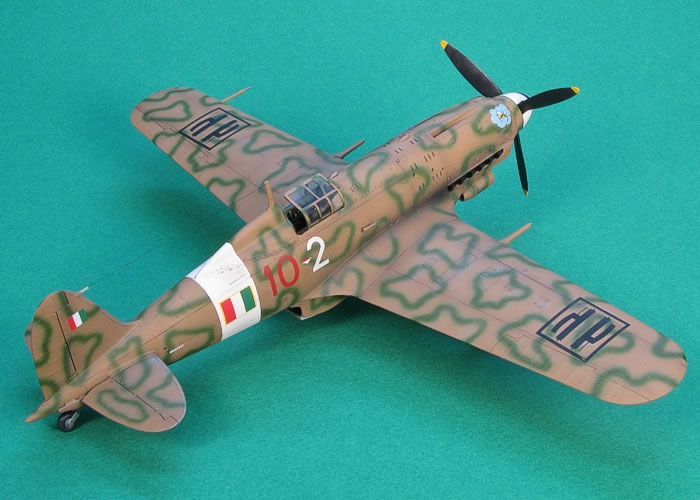
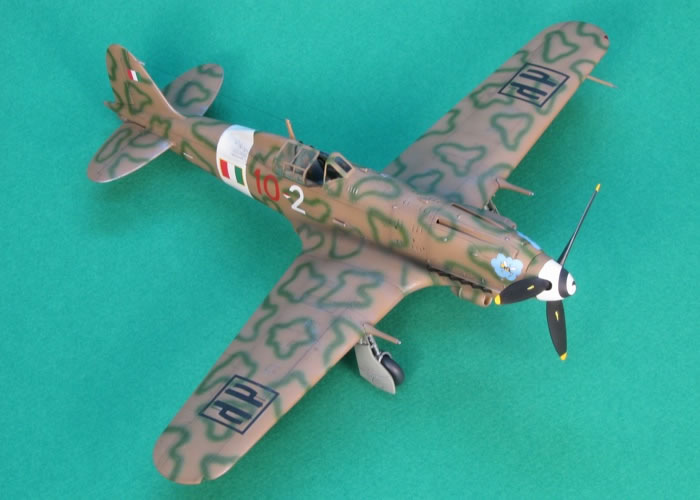
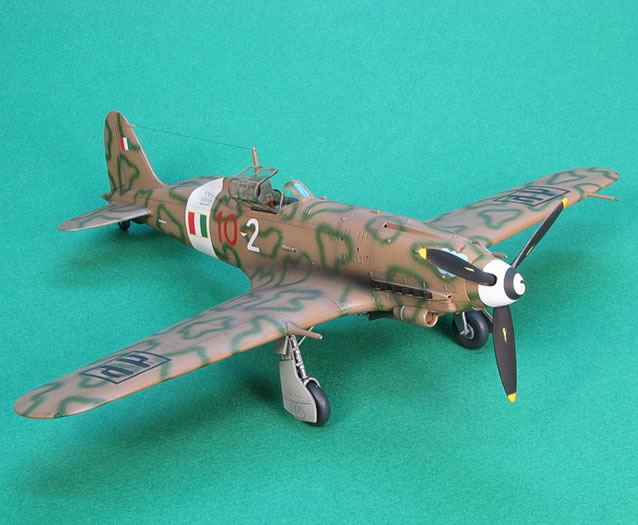
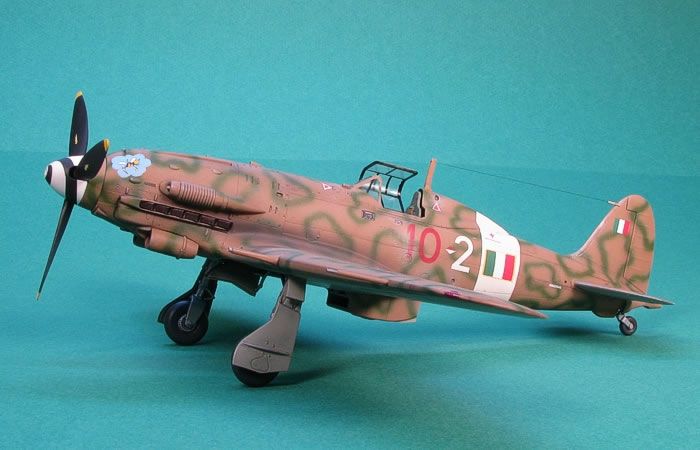
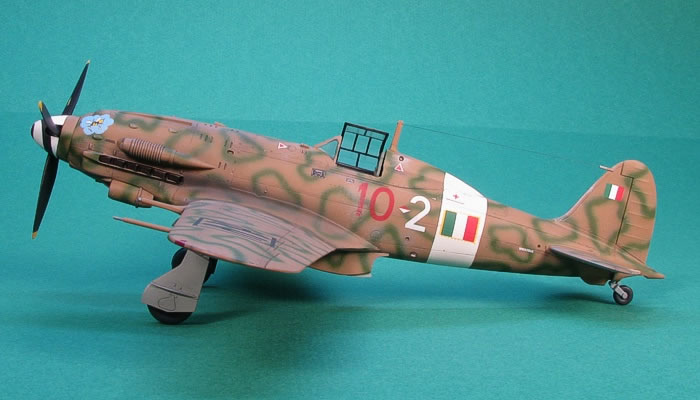
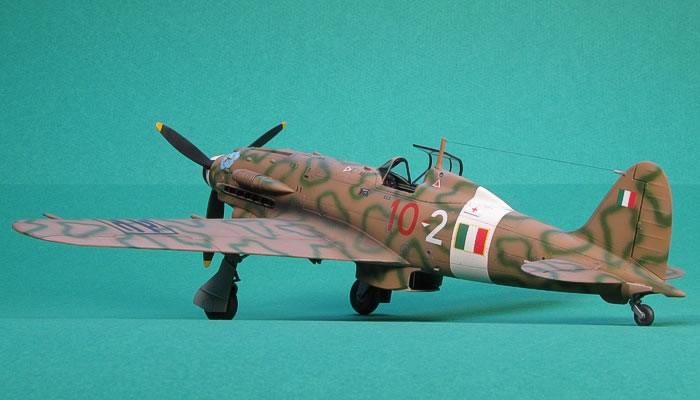
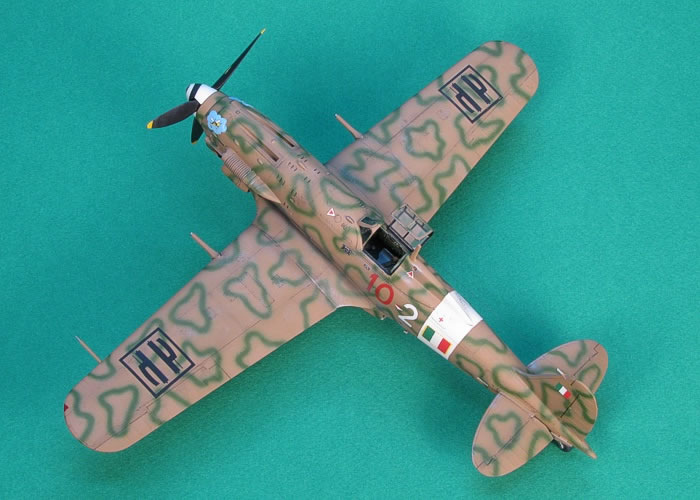
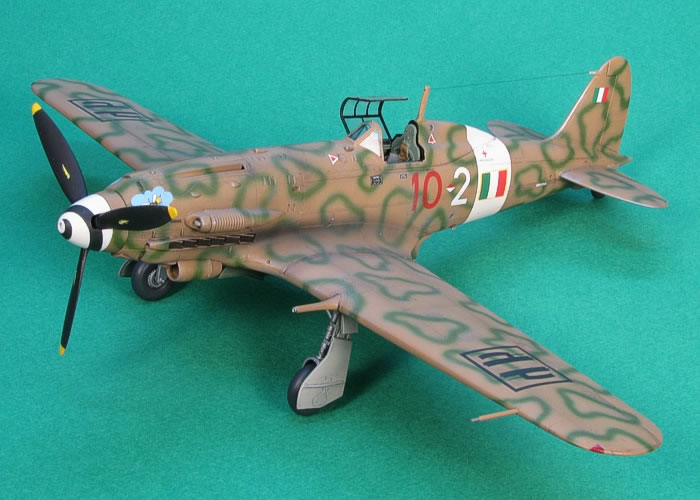
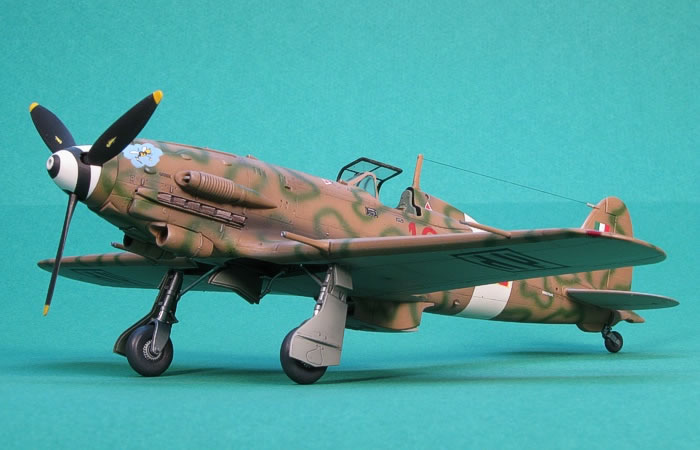
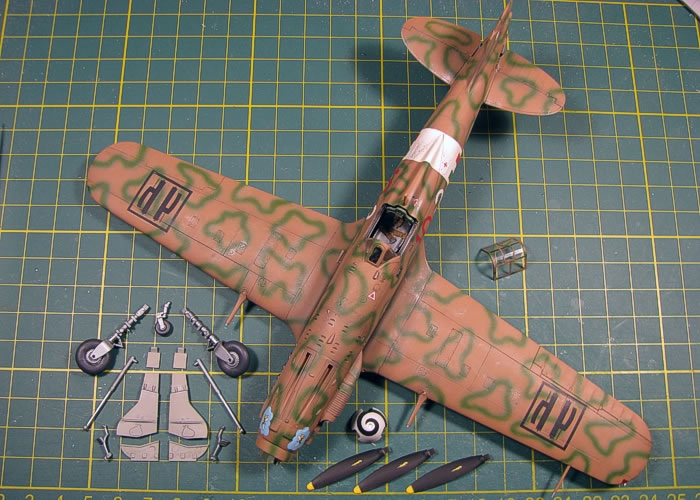
 Two words -- smoke rings! Most Macchi 205 were painted with smoke rings camouflage. There are some other camouflages to choose from, but this is the most common camouflage for the Macchi 205. I was at a model competition many years ago and there was a nicely done Macchi 202/205 on the table. It was painted in a very petite smoke rings camouflage. I remember a couple modelers looking at the model and commenting about the difficulty at doing the smoke rings camouflage. I thought to myself, "Yea, what's so difficult?" I had done JAWS camouflaged A-10s in the past. Surely it can not be more difficult to make a bunch of rings, right? Two words -- smoke rings! Most Macchi 205 were painted with smoke rings camouflage. There are some other camouflages to choose from, but this is the most common camouflage for the Macchi 205. I was at a model competition many years ago and there was a nicely done Macchi 202/205 on the table. It was painted in a very petite smoke rings camouflage. I remember a couple modelers looking at the model and commenting about the difficulty at doing the smoke rings camouflage. I thought to myself, "Yea, what's so difficult?" I had done JAWS camouflaged A-10s in the past. Surely it can not be more difficult to make a bunch of rings, right?
OK, smoke rings are a pain in the butt. It is quite a challenge to make thin lines all over the model. It is much more difficult than making a bunch of irregular spots. I am thankful that a 1/48th scale Macchi 205 is rather small. I would hate to have to do this over a larger airframe.
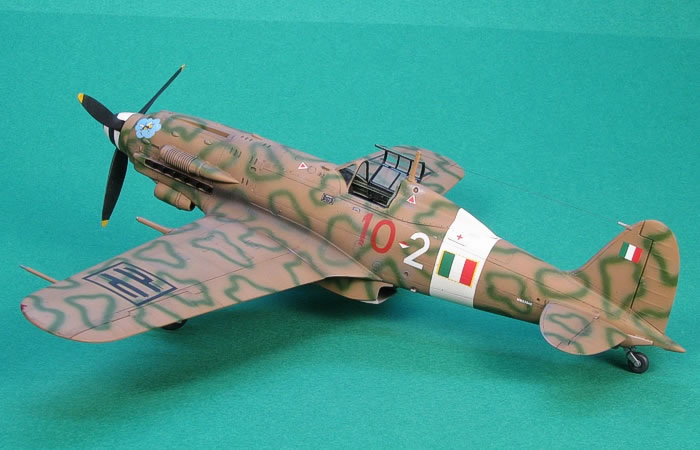
I painted the entire model in Testors Model Master enamels. For the camouflage colors, I used Dark Tan (F.S.30219) and Medium Green (F.S.34102). The bottom side gray is Light Sea Gray (F.S.36307). These are the F.S. matches printed in the after-market decal instructions. The Hasegawa kit claims they are German RLM colors. That did not make sense to me, though. My friend (building the Macchi 202) claims neither of these choices is quite right, but he said the F.S. colors are closer. Since they are what I owned, that was good enough for me.
The actual pattern for the rings is not defined. From what I saw in books, the pattern varied widely. Some Macchi 205s had dense rings that looked more like they had spaghetti, not rings. Others had very sparse rings. I decided to just wing it and paint the rings as I saw fit. The initial application of the rings looked horrible. I returned with the tan color and chased all the over spray from the rings. This toned down and thinned the rings. I liked the effect and almost left it that way, but I decided to do a quick freshening up of the green. What I got in the end is what you see in the pictures.
Markings
Decals are from SuperScale on sheet 48-861. I was originally just going to build the kit markings, but I am fond of the markings that get the Italian flag on the sides of the fuselage. When I saw the SuperScale sheet, I had to get it.
SuperScale messed up a couple things on the markings though. According to their instructions, the numbers on the side of the fuselage are supposed to be between the white fuselage stripe and the tail, but they are printed too large to fit this space, so I moved them to being in front of the stripe. Since wartime photos show the numbers on Macchi 205s to be all over the place, I was not concerned about moving them.
The other problem with the decals is that the wing insignia are supposed to be mirror imaged. SuperScale provided four identical square Fascist markings, not two left and two right sides. For the record, the upper left wing is correct, while the upper right wing should be mirror imaged. From what I was told on the HyperScale forum, having the flags on the fuselage necessitates using the square Fascist markings on the wings. That is OK by me. I like the look of the square insignia better than the round ones. I will just have to ignore the mirror image part of the wing insignia markings.
For weathering, I used my typical style of thinned down enamel paint washes and air brush shading. Wartime photos show rather extensive exhaust stains on the fuselage sides, so I applied a dark stain on the model. I finished the weathering with some dry brushing to pop out the surface details. For a more complete discussion of what I do to weather my models, see my posting on "Weathering Aircraft".
Finishing Touches
Unlike modern aircraft with all their under wing stores and pylons, WWII fighters are quite easy when it comes to the final assembly part of the project. Having next to nothing under the wings, just landing gear, it is a quick matter to have the model mostly done within a day or so of finishing the painting.
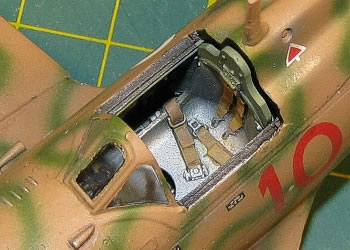
This brought me to the point of popping off the canopy and unmasking the clear parts. I did some minor paint touch-ups around the cockpit opening, then attached the canopy in the open position to complete the project.
Completion Date: |
13 December, 2009 |
Total Building Time: |
22.9 |
Research: |
0.0 |
Construction: |
3.7 |
Painting: |
13.8 |
Decals / Markings: |
3.0 |
Extra Detailing / Conversion: |
2.4 |
This is an easy kit. It is an attractive subject.
I had a lot of fun with this project.
I like the projects that pick me instead of the other way around.
While they are not always my best work, they do tend to be my favorites sitting on the display shelves.
Models, Description and Images Copyright © 2010 by David Aungst
Page Created 18 January, 2010
Last Updated
18 January, 2010
Back to HyperScale
Main Page

|
 Home
| What's New |
Features |
Gallery |
Reviews |
Reference |
Forum |
Search
Home
| What's New |
Features |
Gallery |
Reviews |
Reference |
Forum |
Search