|
Classic Airframes' 1/48 scale
Fiat BR.20 Cicogna
by John C. Valo
|
Fiat BR.20 Cicogna |

Classic Airframes' 1/48 scale Fiat BR.20 will be available online from Squadron.com
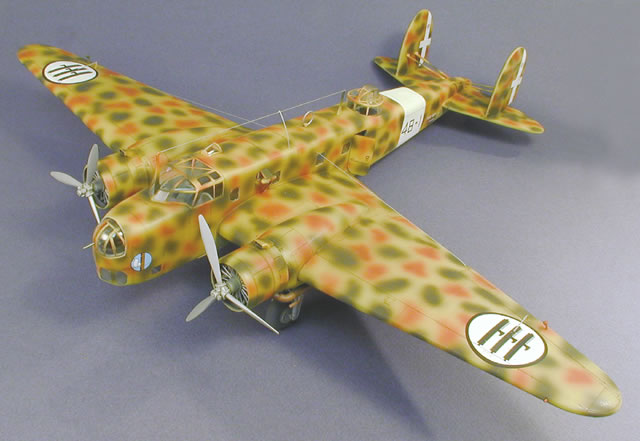
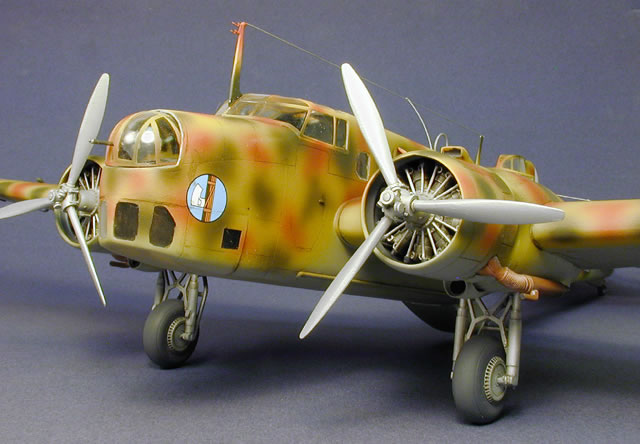
Here is my build of Classic Airframes' most recent release, the Fiat BR.20 in 1/48 scale.
The BR.20 was designed during the transitional period between fabric-covered tubular airframes and fully metal sheathed monocoque designs. The kit captures the fabric covered areas nicely with very subtle indications of underlying structure on the wings, tail surfaces and fuselage.
I was surprised to realize that the BR.20 is a rather large aircraft; the kit spans just over 17". Typically, it is a mix of cleanly molded plastic parts, beautifully cast resin, and a small photo-etch fret. Clear parts are smooth and thin. Decals are well printed by Cartograf, and marking options are provided for two Italian and four Japanese aircraft.
The fuselage has separate nose and tail parts, as well as fuselage inserts to allow different versions to be released in the future. It is well worth the time to carefully dry-fit all these parts before committing to glue. Likewise, the horizontal stabilizers will need to be thinned by careful sanding. I use a piece of medium-grit sandpaper glued to a small sheet of tempered glass which keeps the mating surfaces consistent.
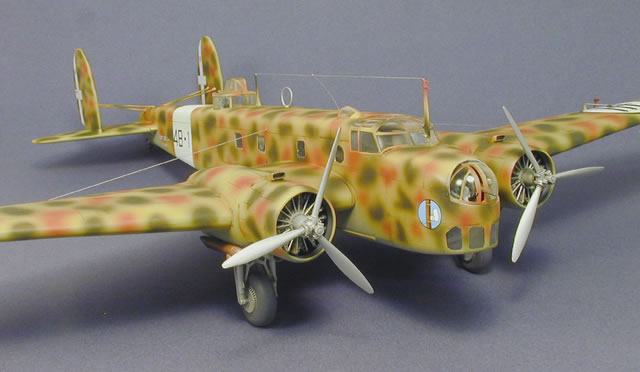
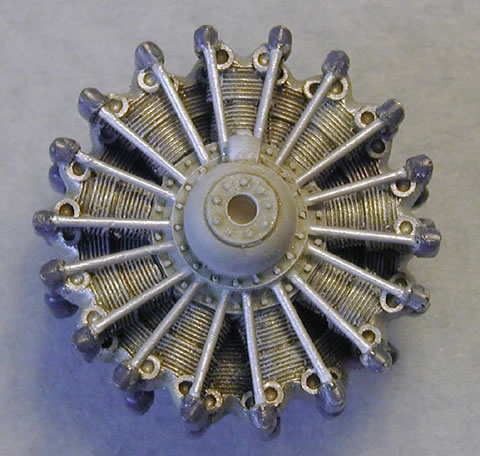
The engines are nicely molded, but you must keep in mind that the cylinders are "handed", with very subtle differences between the front and rear banks. As cast, they alternate front/back on the carrier block. Investing a few minutes sorting them out is well worth it. I added the distinctive pushrods using styrene rod. The engines and cowls fit well together, no need to sand anything.
I made a slight modification to the forward fuselage bulkhead where the nose turret is mounted. I opened up a cutout in the vertical part to allow the clear turret to fit properly.
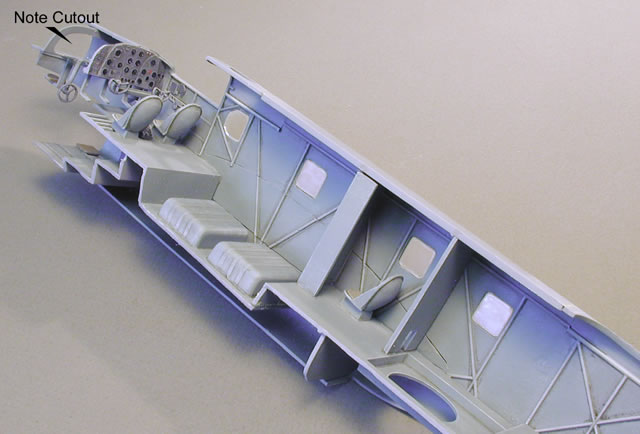
This also allowed me to install the clear part after finishing the model, instead of trapping the turret between the fuselage halves during assembly.
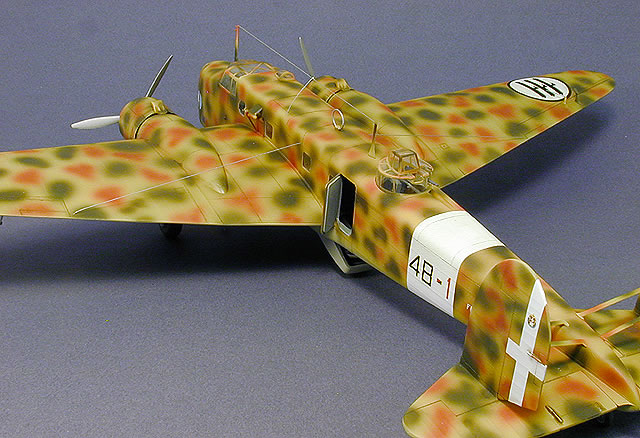
I painted the model in sections (wings, fuselage, tail surfaces) before final assembly, as this made it easier to paint the mottled camouflage. Although the kit color guide shows this aircraft with only two upper surface colors, examination of a photo of the real airplane revealed that it actually carried the more typical three colors on the uppersides. The decals were of the usual excellent quality, and went on with no problems.
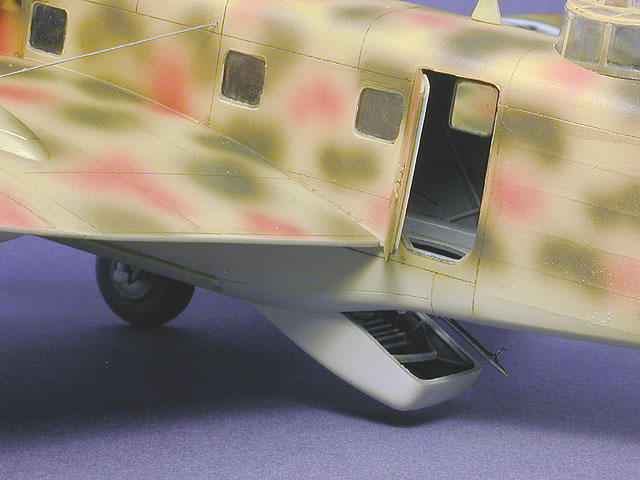
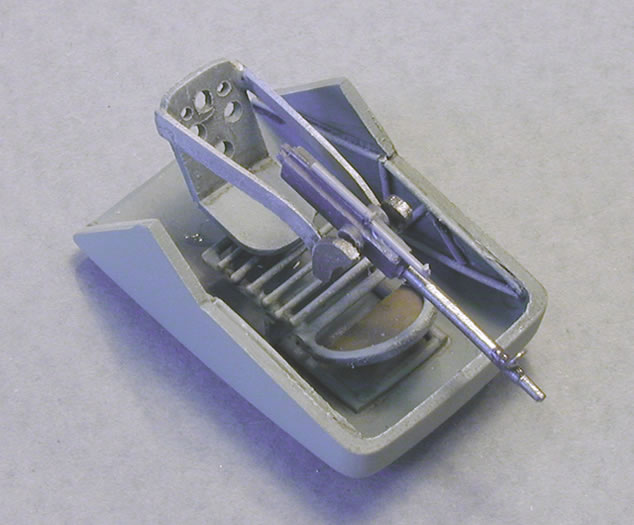
I elected to open the side door, which was scratchbuilt to match the molded detail. Having done this, the empty lower gondola gun position was exposed, so I scratchbuilt the lower gun position. Not museum-perfect accuracy wise, but indicative of what it looked like. Now all I have left to do is build the little boarding ladder!
In summary, this is another excellent release from Classic Airframes that fills an important historical gap in my 1/48 scale collection. Recommended to the experienced modeler.
Models, Description and Images Copyright © 2010 by John C. Valo
Page Created 19 April, 2010
Last Updated
19 April, 2010
Back to HyperScale
Main Page

|
 Home
| What's New |
Features |
Gallery |
Reviews |
Reference |
Forum |
Search
Home
| What's New |
Features |
Gallery |
Reviews |
Reference |
Forum |
Search