|
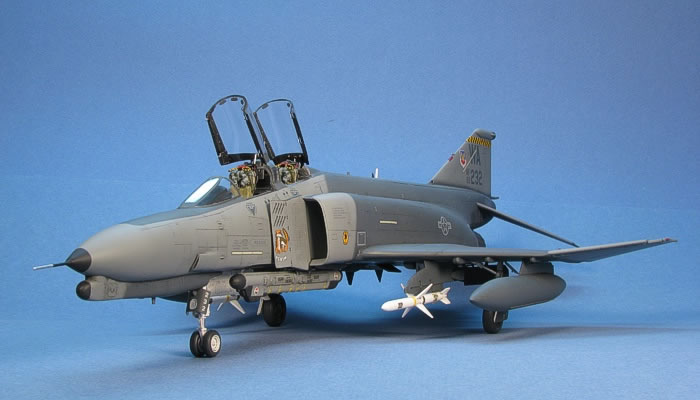
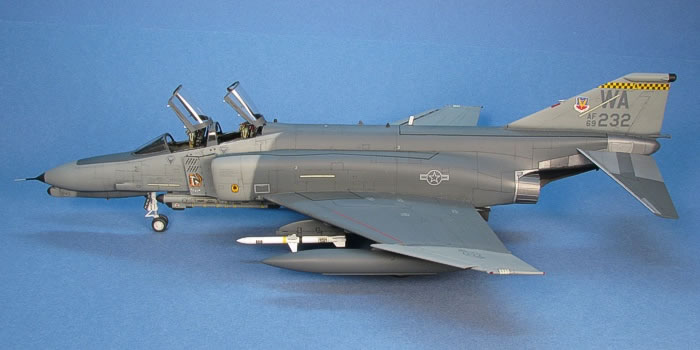
Hasegawa's 1/48 scale Phantom II
F-4G Wild Weasel
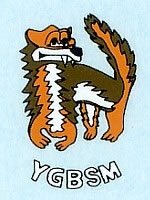
"YGBSM"
by David W. Aungst

|
F-4G Wild Weasel Phantom II |

HyperScale is proudly supported by Squadron.com
"You gotta be kiddin' me!"* This was the first reaction of one of the original pilots when they were initially presented with what the "wild weasel" SAM suppression mission would be. The mission description (paraphrased) was "Go out and purposely try to get shot at so that you can shoot back." I think I would have had a similar reaction.
But the SAM suppression mission proved to be a huge sucess, so much so that the USAF started modifying aircraft to specifically fly the "wild weasel" mission. The first aircraft chosen was the F-100F, but its age and limited performance made it a poor choice. Then was the F-105F, upgraded to the F-105G. While great at the mission, it too was getting long in the tooth. A less aged replacement was needed. The last dedicated "weasel" aircraft was based on the F-4E, upgraded to the F-4G. While the "wild weasel" Phantoms were too late to see action in Vietnam, they did a stellar job in the first Desert Storm conflict in 1991. Many strike aircraft made it in and out of enemy airspace simply because the "weasels" either destroyed or forced the shut-down of the enemy air defence systems.
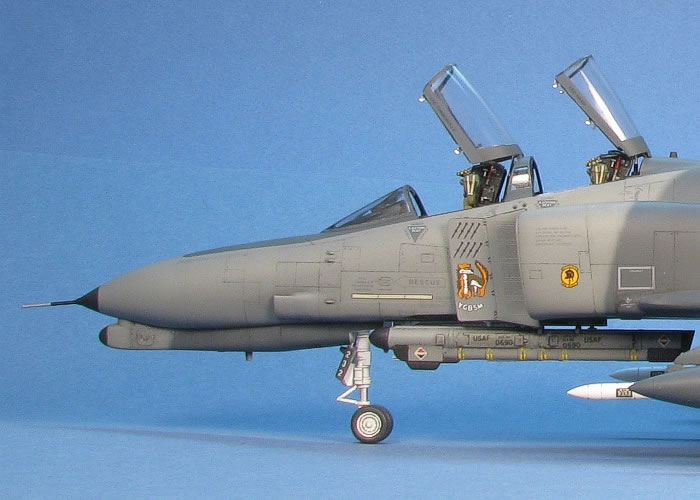
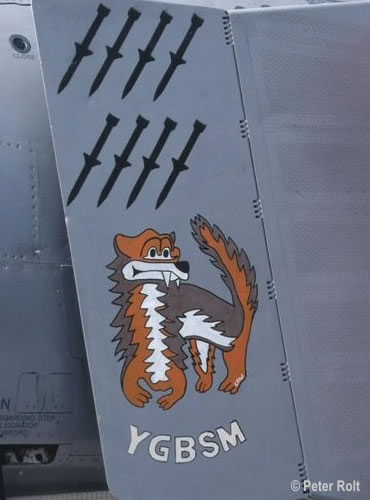
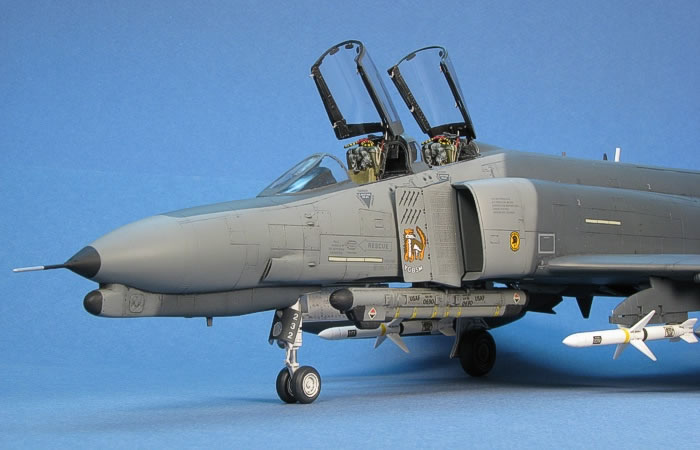
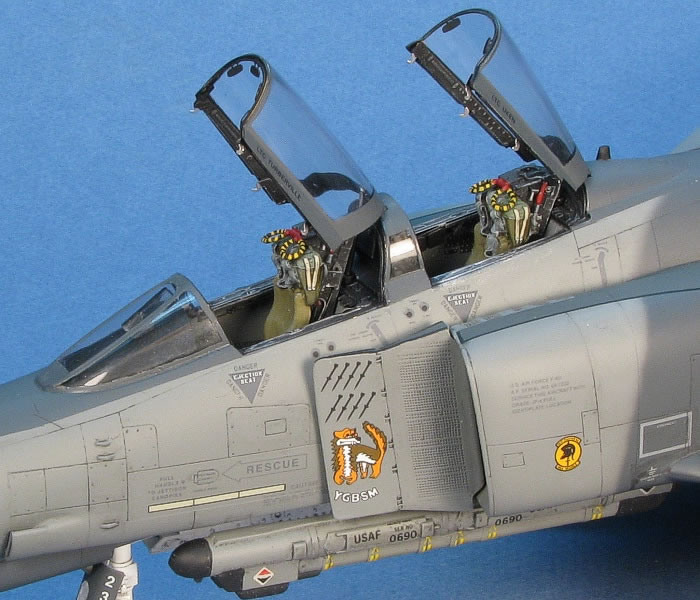
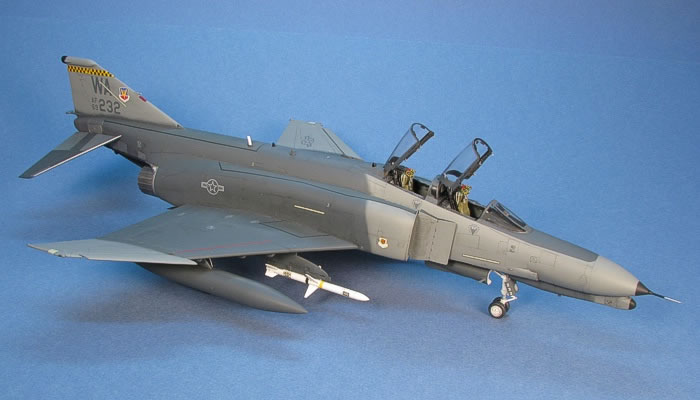
The model in this posting is of one of those Desert Storm veterans showing the way it looked when it retired at the end of its career. Nose art had started to show up on the Weasel Phantoms in their final year of service. The artwork on the left engine intake splitter plate of this aircraft draws back to those original words stated by that anonomous pilot, showing an obviously frazzled weasel with the acronymn "YGBSM" written underneath.
* These were not the exact words supplied by the Author but, hey, this is a family show!
The Kit
I have built enough Hasegawa F-4 kits that I no longer consult the instruction sheets as I progress through the projects. When a member of my model club started looking for volunteers to build some models for the museum he worked in, I decided to help out and build this F-4G Phantom for him.
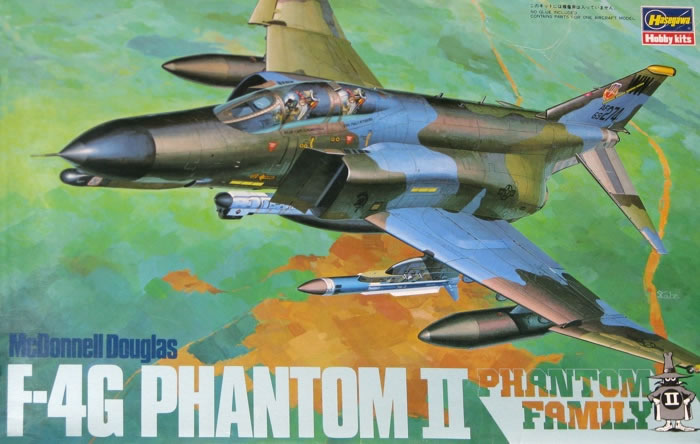
The kit was provided to me -- Hasegawa's 1/48th scale F-4G Phantom (stock #07104 / P004) -- the first release of the kit with the lizard camouflaged aircraft on the cover. The intention was to build it right out of the box with no extras -- yeah, right. I can't build a Phantom under that restiction unless it is an actual requirement of the project. My friend opened the door when he said he wanted the ejection seats upgraded to some resin seats and would pay for any other reasonable upgrades I wished to make. I chose to incorporate a few other updates as the project progressed.
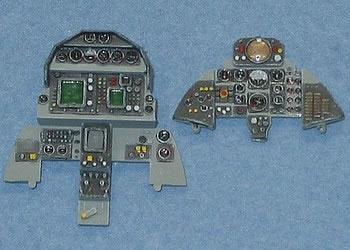
I had some old KMC F-4 Phantom cockpit etchings lying around. While I do not really care for them, I decided they would work well on this project. Adding these definitely helped the look of the cockpit sills.
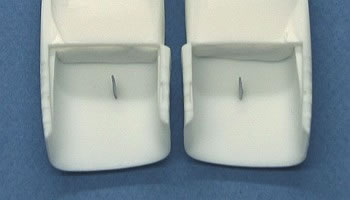
I added some Verlinden ejection seats to the project. I like the ejection seats from TrueDetails better, but I had these Verlinden seats on hand, and it was good to be able to use them on something.
In a fit of insanity, I cut out the fuselage areas and installed Cutting Edge seamless engine intakes. I designed the masters for these to be simple "drop-in" replacements of kit pieces. I wanted to see if they really were.
Since I upgraded the engine intakes, I thought I better upgrade the engine exhausts. I had some Eagle Designs engine exhausts on hand. These were outclassed by the Aires exhausts (IMHO), but they are still quite nice and a big improvement over the kit's engine exhausts.
So much for an out-of-the-box project ...
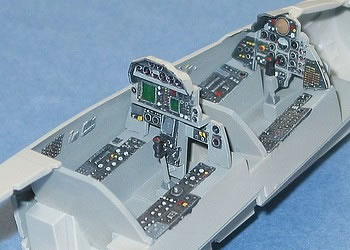
I started the project by painting the cockpit. I bit my lip to keep from getting out a Black Box cockpit set. The kit cockpit really is not that bad right out of the box. The cockpit sills are too narrow, but this can be fixed with some simple etchings. The seats are simplistic, but this can be fixed with some resin after-market seats. These two updates can greatly improve the cockpit without needing to go all the way with a full resin cockpit. I promise, one of my next Phantom projects is going to use a Black Box cockpit, but not this one.
|
|
Painted Cockpit |
Main Instrument Panels |
I fought with myself for a few days on what to do about the engine intakes. I stockpiled a whole bunch of the Cutting Edge seamless engine intakes, and I was chomping at the bit to use some. Eventually, I gave in and cut the fuselage to accept the new intakes. This eliminated the conflict because there could be no going back after the fuselage halves were cut.
|
|
Fuselage Cut |
Pitots Installed |
|
|
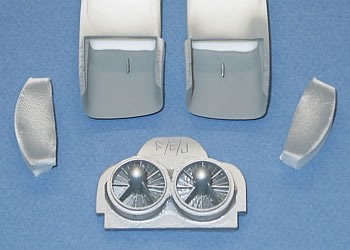
Painted Interiors |
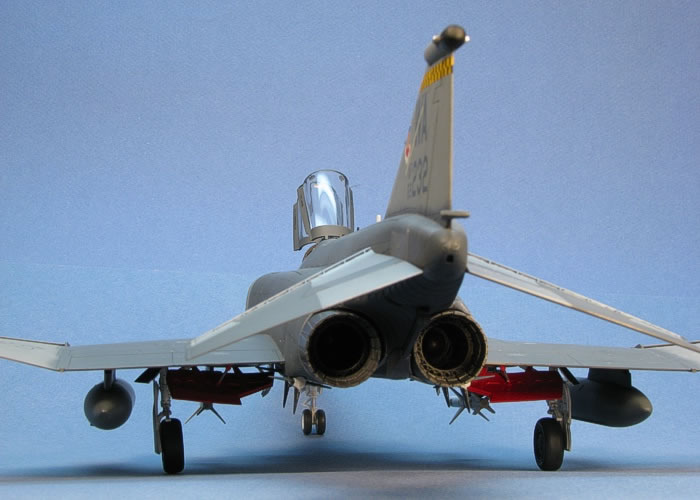
View from the Front |
The intakes are pretty much just "drop-in" pieces. There was some minor adjusting needed to make sure the fuselage edges were thin enough to work with the new intakes. I also needed to do the assembly and painting of the intakes. But, this was not a big deal. In the above images, the view before painting the intakes shows the ducts already masked. The view of the painted intakes shows the masks lying next to the intakes.
These masks are cut pieces of make-up applicators available in the cosmetics section of most any drug store. They come in a bag of ten or so round pieces. They are a very fine, squishy foam rubber. By roughly cutting them to the approximate shape of the intake duct, I could squeeze and insert them into the duct. Using a toothpick, I pushed and pulled at them to make them align where I wanted. They create a paint-proof block so that I could paint the inner ducting ramps without over-spray getting inside the rear ducts.
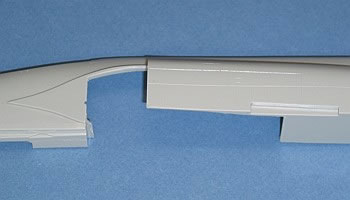
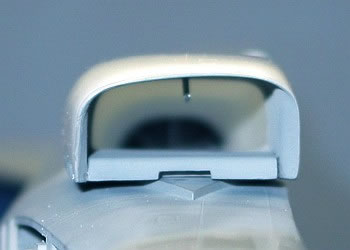
With the intakes ready to install, I noticed an alignment issue that I had previously not seen. Something is not quite right with the intake pieces, although I am hard pressed to know what since I used Hasegawa kit pieces to make the masters for Cutting Edge. The line under the model where the intakes meet the wing does not align with the line where the fuselage meets the wing. All of these should line up with each other, but they do not.
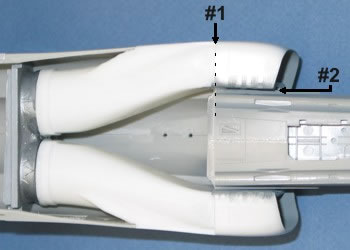
In the image below, I have already fixed the alignment (see arrow #1). I fixed it by carefully slicing away some of the lower intake pieces until the alignment was back to where it should be. This amounted to removing a little over 1/32nd of an inch of resin from the lower intake pieces.
|
|
Alignment Issues |
Intakes Installed |
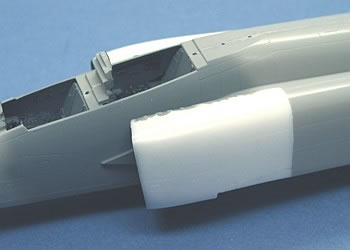
In my zeal to get the new seamless intakes installed, I was not paying enough attention to the exact fit of the intakes. I got the left side attached perfectly. The troubles were with the right side. I did not get a proper alignment of the intake which resulted in a small gap behind the intake next to the fuselage. This gap had the effect of widening the fuselage by the size of the gap. You guessed it, the wings no longer fit on the fuselage.
I knew I had done something wrong, but I did not see what, at first. I got out my Dremel tool and ground away some of the inside edge of the wings to make room for the slightly wider fuselage. I noticed the gap behind the intake only after I had ground down the wings to the point that they again fit the fuselage. The gap is about 1/32nd of an inch. It is on the lower side of the intake, sandwiched between the intake and the fuselage (arrow #2 in the above image).
The thought occured to me to break off the intake piece and fix the problem the right way, but then I would be left with a wing that had gaps at the root. I decided to leave the intake as is (misaligned) and continue building. The error is really quite hard to see on the final model and not worth the risk of messing up other things to fix it.
Note to self -- watch out for this alignment on future Phantom projects...
With the fuselage and wings assembled, the project really took off (pardon the punn). I cleaned up the seams (there are not that many to worry about) and attached the wings to the fuselage. A little diluted white glue filled any gaps in the wing root seam. I then assembled and attached the nose section onto the fuselage. This was followed by attaching the windscreen and canopies. After addressing all the seams, I cleaned up the horizontal tails and loosely stuck them into place without using glue.
Now I had a whole F-4G airframe (mostly) that I could fly around the house. After performing SAM suppression missions against both of my young sons and my wife, I returned to base in my workroom to start painting.
Paint
 When my model club friend asked for this model to be built, he already knew the markings he wanted to have applied to it. He was looking for a "Desert Storm aircraft" and even provided decals for the job. All I had to do was construct the model and paint it accordingly. When my model club friend asked for this model to be built, he already knew the markings he wanted to have applied to it. He was looking for a "Desert Storm aircraft" and even provided decals for the job. All I had to do was construct the model and paint it accordingly.
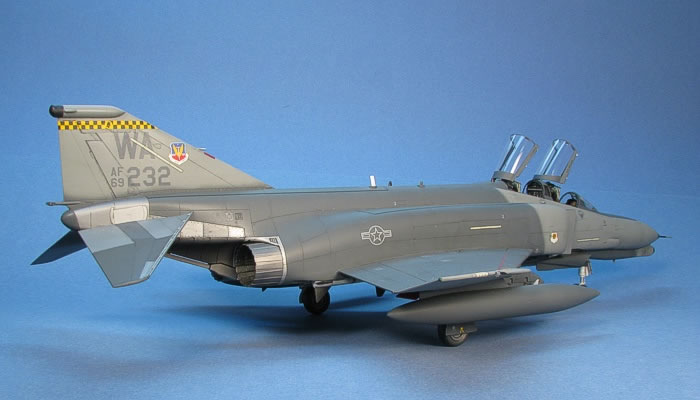
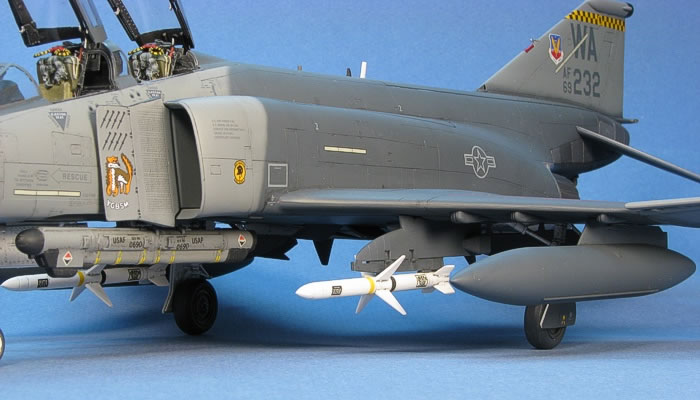
As a side note, while this aircraft did fly in Desert Storm, these markings are not the way it appeared during Desert Storm, but instead they are for the aircraft as it appeared at its retirement in 1996. In 1991, during Desert Storm, this aircraft was a member of the 81st TFS / 52nd TFW, tail coded "SP".
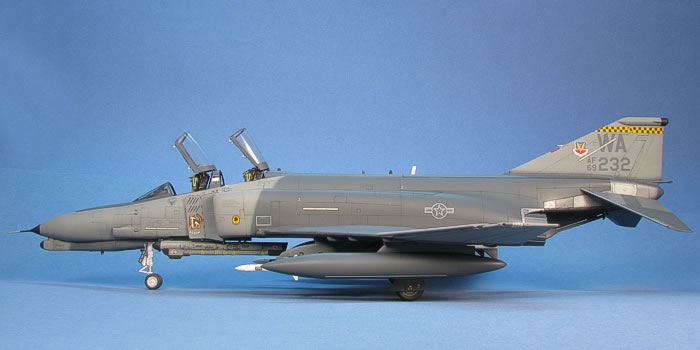
Before I could paint any camouflage, I needed to paint the natural metal tail areas. I used Testor's Model Master metalizer paints for all the natural metal. There are three metalizer shades (Steel, Anodized Aluminum, and Burnt Metal) applied in a patch-work pattern to represent the unpainted metal surfaces.
The model is painted in the final camouflage that F-4 Phantoms wore in USAF service -- known as "Hill Gray" or "Egypt One". To be accurate, "Hill Gray" and "Egypt One" are not the same camouflage. I can never remember which is which, but one of them is two-tone with the dark gray wrapping around to the undersides while the other is three-tone with light colored undersides. I painted the model in the two-tone version using the colors of Neutral Gray (F.S.36270) and Gunship Gray (F.S.36118). I used Testors Model Master enamels for all my painting.
After finishing up the major colors, I gloss coated the entire model in preparation for applying decals.
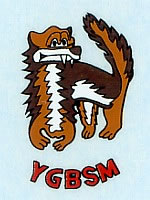
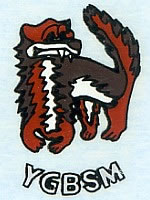
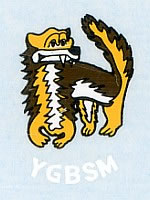
My friend provided two different decal sets -- one from Eagle Strike (48-044) and one from Fox One (48-011). On doing some research on the specific markings, I found I owned two other, different decal sets with the same aircraft on them -- another sheet from Eagle Strike (48-149) and one from AirDOC (M48-06). Interestingly, all these had very different versions of the intake splitter artwork.
The following images are a collection of scans from each of the four decal sheets, placed along side images of the actual aircraft. The images of the actual aircraft are from Peter Rolt at TailSlides. I got permission to include his images here to help document my review of these markings. They were taken at Nellis AFB on the day the aircraft departed for the boneyard.
|
|
|
|
AirDOC M48-06 |
Eagle Strike 48-044 |
|
|
Eagle Strike 48-149 |
Fox One 48-011 |
The variations in the decal images are amazing. You have to wonder what some of these people use for documentation. I found the difference between the two Eagle Strike artworks to be the most surprising. It looks like they got two different artists to do the same aircraft on two different decal sheets using different reference matterials. Note that even the sizes of the markings are different. I scanned all the images at the exact same resolution, so any differences in size seen here are the actual differences in the decals.
As can be see, the decal art that is closest to the actual aircraft is the Fox One version. While the orange of the weasel is a little off, it has the correct writing style and color at the bottom. The AirDOC version has a closer match on the weasel colors, but the writing at the bottom is the wrong color. In defense of AirDOC, I have a black-and-white image from a magazine that shows darker lettering, hence the artwork may have had red writing at some point before its final departure. The Fox One instruction sheet does mention that the artworks on all the Nellis aircraft (and 69-7232 in particular) were constantly changing, so red writing is very possible at some point.
I mixed and matched decals between these sheets to select the best looking versions of each marking. As I have no plans to build this exact aircraft for my own personal collection, I could afford to be selective and use whichever decals looked best to me for this project. For the weasel art on the intake, I used the Fox One version of the marking.
In the end, I used five different decal sheets to complete this model (see the following list). This seems like a lot, but it really was not that difficult to scan the sheets and figure out which ones had the best renditions of the various markings. The SuperScale sheet was a stroke of luck as none of the Phantom sheets had much aircraft data (except the AirDoc sheet, but it was printed in colors that did not match my paint colors).
Fox One 48-011: This sheet provided the nose art and had the best versions of the unit, wing, and command badges.
Eagle Strike 48-044: This sheet had the closest match to the Gunship Gray color I painted, so I used the tail codes, serial numbers, and national insignia from here. While Fox One had the nicest checkered band for the tail, I could not get it to soften and conform on the tail, so I also used the checkered bands from this sheet instead.
AirDOC M48-06: This sheet had the best formation strip lights, hands down, of all the sheets. There was also data specific to gray Phantoms on this sheet. Unfortunately, the color of the data was off quite a bit and could not be used. I did use the red warning stripes for the wing slats off this sheet.
Fox One 48-012: This is a specific sheet that provides nothing but wing and fuselage walkways for USAF Phantoms. I could have masked and painted the walkways, but I felt like cheating.
SuperScale 48-523: This is actually an F-15 Eagle decal sheet, specifically a data sheet for doing MOD-Eagle camouflaged F-15s. What I found is that the decals on my copy of this sheet are printed in colors very close to the grays I used on the model, so I used these data markings on the model.
For weathering, I used my typical style of thinned down enamel paint washes and air brush shading. I finished the weathering with some dry brushing to pop out the surface details. I kept the model rather clean as all the Phantoms were extremely well cared for in their final days. For a more complete discussion of what I do to weather my models, see my posting on "Weathering Aircraft".
With camoulfage painting and most of the airframe weathering done, I turned back to construction tasks. I was painting sub-assemblies as I worked on the airframe, so this was the state of things going into the home stretch:
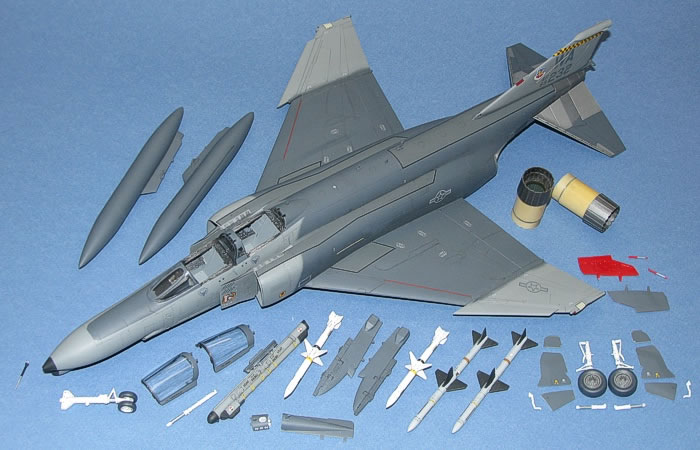
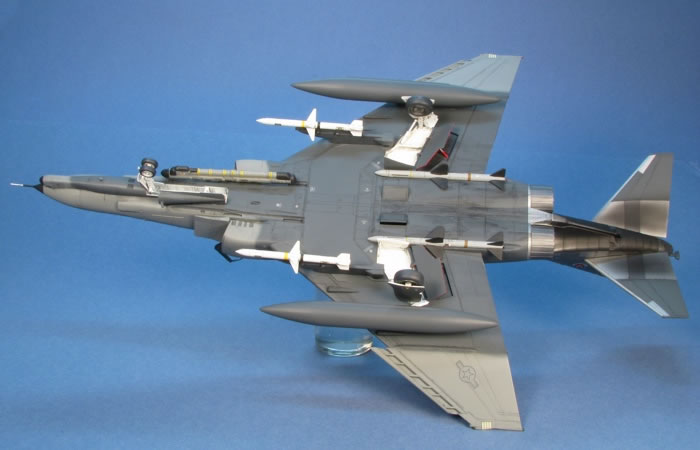
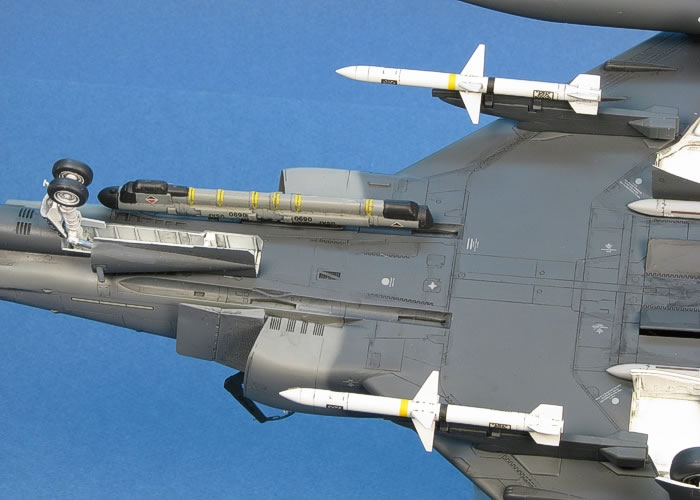
The model needed something hanging under the wings. It was rare to ever see a Phantom with no stores hanging on it. The kit provids all three of the standard Phantom external fuel tanks, but being the early release of the F-4G, it did not contain the F-15 style centerline fuel tank. It is the F-15 style tank that is the only centerline tank used on the USAF Phantoms starting in the late 1970s. Lacking the F-15 style tank, I decided to hang the only outboard wing fuel tanks and leave the ceterline station empty.
The kit incudes weapons, which is way out of character for Hasegawa. Provided are the four AIM-7 Sparrow missiles and four AIM-9 Sidewinder missiles that all the Phantom kits include. Unique to only the F-4G kit are one ALQ-119 ECM pod, one AGM-45 Shrike missile, and one AGM-78 Standard ARM missile. These unique items include the proper mounting hardware used with each item.
The trouble is that none of these stores are accurate for the Desert Storm era "Wild Weasel" Phantom my friend wanted me to build. The AGM-78 Standard ARM missile was only briefly used in the late 1970s on the Phantom. These missiles were long gone by the time of Desert Storm. The AGM-45 Shrike missile was used longer, but did not really see much useage in Desert Storm since it was mostly replaced by the AGM-88 HARM missile. Lastly, the ALQ-119 was replaced by the time of Desert Storm with either the ALQ-131 or the ALQ-184.
This all left me to make some decisions. Since the model was not really for me but for the museum, and since most people would not really know the difference, I decided to use the kit-provided weapons. This would save my limited supply of the correct weapons for when I did build an F-4G for myself. I had an extra Shrike missile from an earlier F-4G kit I had built, so I located it and used it along with the one already in this kit. Using the Shrikes on the inboard weapons pylons eliminated the possiblity of mounting any Sidewinders. I did however include two Sparrow missiles in the rear Sparrow launch wells.
I actually was assembling, painting, and decaling all the underwing stores as I was doing the rest of the model. All I did now was attach them in the correct places.
The landing gear and wheel well doors were attached at the same time and were the same story. I had painted and finished them during the process of building the rest of the model. All I did now was attach them.
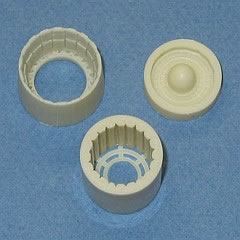
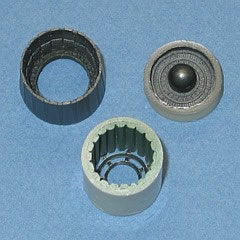
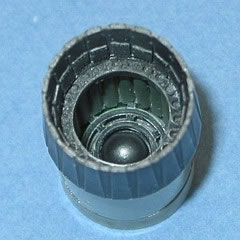
As I had mentioned earlier, I felt that upgrading the engine intakes meant I really should upgrade the engine exhausts, too. I chose to use the Eagle Designs engine exhausts. I spent about fifteen minutes carefully sanding off the casting blocks, then painted the pieces. The results were fantastic and a great improvement over the kit engine exhausts.
|
|
|
Engine Exhaust before Paint |
Engine Exhaust after Paint |
Engine Exhaust Assembled |
Next, I popped off the canopies, which I had "loose mounted" using the same technique I discuss in this posting. I added the etched metal cockpit sills and canopy trim which I had prepainted in Testors Interior Black. A little paint touch-up and some dry-brushing brought up the details nicely. I finished up by unmasking all the clear sections and the cockpit glass.
Before attaching the canopies, I slipped in the already painted ejection seats and fixed them into place with a little Fun Tack squished under them. This would secure them but still allow them to be removed later if need be. I also drilled holes in the rear canopy hinge area and added fine brass wire to the rear canopy. This holds the rear canopy on the model much better than the tiny tabs that Hasegawa molds on the canopy.
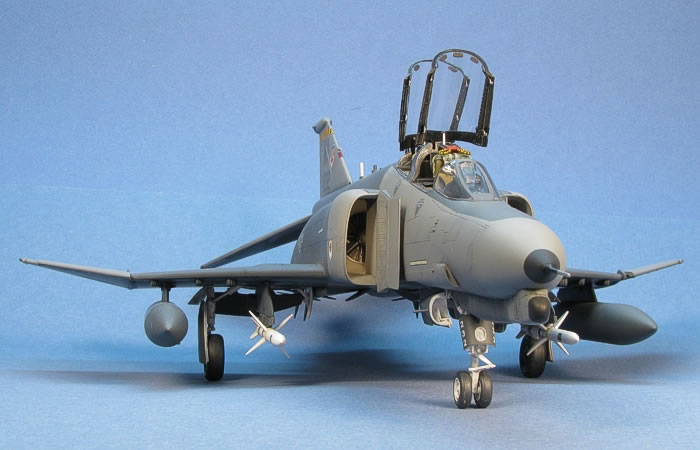
Attaching the canopies ended the project. It was time to post the model on HyperScale...
Completion Date: |
17 December, 2009 |
Total Building Time: |
36.6 |
Research: |
0.0 |
Construction: |
17.9 |
Painting: |
7.9 |
Decals / Markings: |
6.0 |
Extra Detailing / Conversion: |
4.8 |
The Hasegawa F-4G is a great model kit -- easy to build and nicely detailed, even without using too much after-market stuff.
This is the fifth 1/48th scale Hasegawa F-4 Phantom I have built in a row where the model was for someone else.
Now, if only I could build some F-4 Phantom models that would stay on my display shelves...
Models, Description and Images Copyright © 2010 by David Aungst
Page Created 9 March, 2010
Last Updated
9 March, 2010
Back to HyperScale
Main Page

|
 Home
| What's New |
Features |
Gallery |
Reviews |
Reference |
Forum |
Search
Home
| What's New |
Features |
Gallery |
Reviews |
Reference |
Forum |
Search