Hasegawa's 1/72 scale
Kawanishi N1K1 Kyofu
Late Production
by Mark Davies
|

|
Kawanishi N1K1 Kyofu Late Production |

HyperScale is proudly supported by Squadron
The Imperial Japanese Navy had identified a need for floatplane fighters to provide operational flexibility where land or carrier based fighter support was unavailable. It was recognised that floatplane fighters would be at a disadvantage combating the latest land or carrier-based fighters. However by seeking the highest possible performance despite the weight and drag penalty of floats it was considered possible to produce a fighter capable of intercepting and dealing with most other types of aircraft. In fact they were primarily envisaged as having to deal with enemy reconnaissance flying boats and supporting ground operations.
A two-pronged approach was taken to meeting this floatplane fighter requirement. The first was to equip the Mitsubishi A6M2 Reisen (Zeke) with floats. This was built by Nakajima and known as the A6M2-N Suisen 2 (Rufe). The second was to design and build a pure floatplane fighter of higher performance than the A6M2-N. This task was given to Kawanishi, and was to result in the N1K1 Kyofu (Rex).
Kawanishi had previously been associated with large flying boat types and was not a recognised fighter manufacturer. However they were one of few naval aircraft manufacturers who were not too overloaded with work at the time the requirement was formulated. Additionally, Kawanishi was well advanced with the design of the E15K1 Shiun (Norm) high-speed reconnaissance floatplane, and so had some insight to the challenges involved. For example the N1K1 would exploit the knowledge gained through the E15K1’s use of a laminar flow wing.

The designers wanted a powerful engine, and at the time had a choice of two air-cooled radials. These were the Sakae 21 with 1,130 hp, or the Kasei 13 or 14 offering 30% more power. Kawanishi opted for the more powerful Kasei even though it was intended for bomber applications and was larger in diameter than the Sakae, meaning it potentially would give more drag, but compensated for this by using a similar engine installation to the early prototype E15K1 Shiun’s.
The prototype had contra-rotating two-blade props to eliminate torque effects, and first flew in May 1942. This set-up gave problems and was replaced by a conventional three-blade prop on production machines that began to enter service in December 1943. The Kyofu was 30 mph faster at 19,685 feet than the earlier Suisen, being capable of 300 mph.
By the time the Kyofu entered service circumstances had changed considerably for the Japanese. The need for a floatplane fighter to support offensive operations no longer existed, so only 97 Kyofus were built. They mainly operated defensively from Borneo and the Japanese Home Islands. Despite their manoeuvrability reasonable speed they were no match for the allied ship-borne fighters they encountered.
The Kyofu’s story does not end here however. It may have been unusual as a purpose-built floatplane fighter, but it is surely unique in that it was developed into a potent land-based fighter as the N1k1-J Shiden and N1K2-J Shiden Kai (George).
The Kit
The kit is typical of modern Hasegawa products, coming in a good quality top opening box with all parts sealed in cellophane bags. Instructions are clear to follow with colour call-outs cross-referenced to Gunze Sangyo and another paint range I’m unsure of (Mr Colour maybe?)
The parts are all crisply moulded with fine engraved panel lines. The parts breakdown is conventional, although the fuselage is a bit complex because it caters for three different cowls. This is because there are three separate boxings covering the prototype and both early and late production versions.
Cockpit detail is quite basic, but despite the small size of the canopy a fair bit can still be seen. A plastic weight is included for fitment within the front of the main float. This is sufficient to ensure that model will sit on the additional beaching trolley provided. Decals are typical of late Hasegawa kits, with good registration and opacity, but a rather thick carrier film compared to say most Czech decals.
The Build
I had the all of the main airframe parts assembled in one evening, with small applications of filler awaiting sanding the next day. Some care was needed aligning the three cowl parts and two fuselage halves. I seem to recall that when I built the Hasegawa Kyofu prototype some years ago that the cowl parts were a bit easier to align than with this kit.
A nice touch is that the cockpit interior is designed for installation from underneath, enabling the fuselage seams to be addressed before hand. I added seatbelts, a throttle and a few other bits and pieces, along with a Quickboost gun-sight to replace the kit item.
The wing to fuselage fit is good, with no gaps on the upper surfaces, but a slight step where the flaps are. Judicious scraping and sanding took care of this. The horizontal stabiliser fit is simple and perfect.
The main float goes together well, but where it joins the fuselage it covers three parts, being the two fuselage halves and the wing. These form a stepped area where the main float strut attaches. The float has a barbed spring clip on its main strut to engage in a hole in the step. But I chose to remove this and ensure hassle free trial fitting. I debated whether to fit the float before or after painting. Because the fit was not quite perfect I decided to fit it before painting. This made things a bit tricky when I came to paint, but not impossible. I left the wing floats off for ease of painting and to avoid breaking them off. On reflection I would probably fix these prior to painting next time (I want to build the Hasegawa early production Kyofu if I can find one).

The prop blades are individual items, but have a convenient locating lug at their root to engage with the prop’s back-plate before being covered by the spinner. The prop assembly in turn mounts on a two-piece assembly that extends forward from the deeply buried engine, and is retained by a nylon collar.
I replaced the kit pitot with one made from a hypodermic needle and piano wire. The same hypodermic needle provided two cannon barrels to mount within the wings.
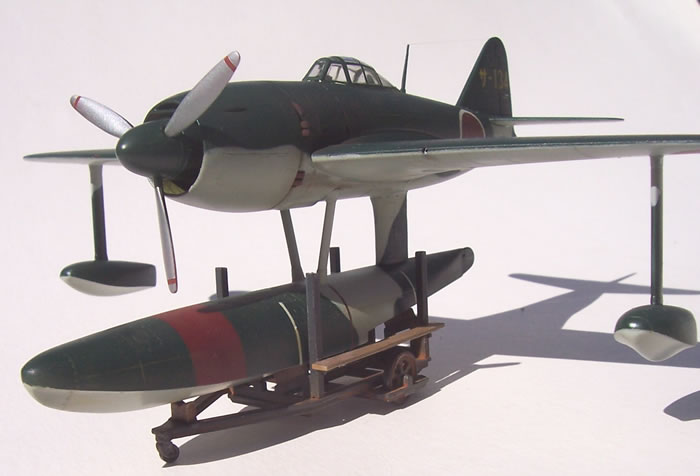
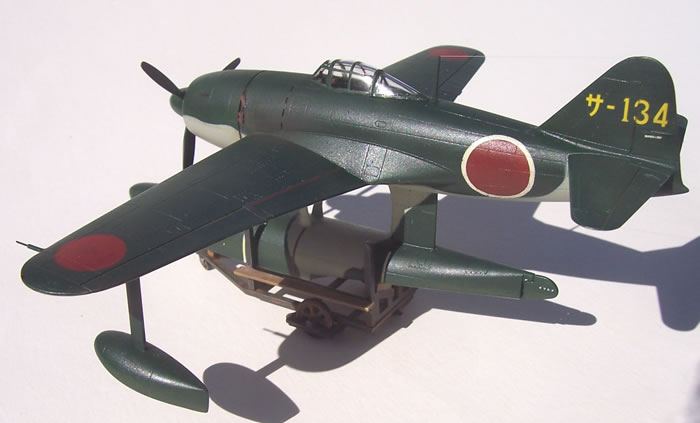
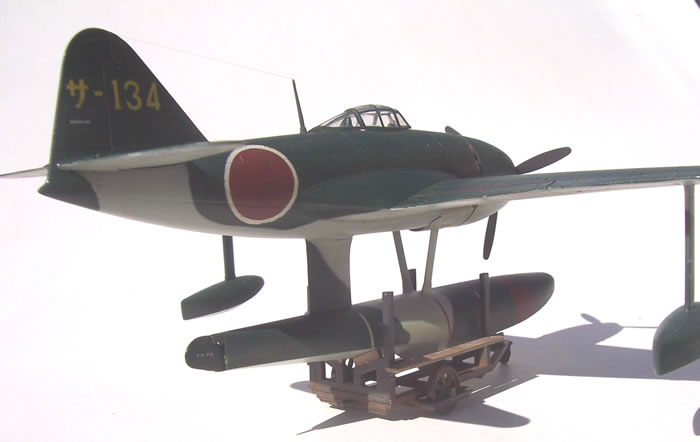
The photos I have seen of many Kyofus, including the one modelled here, indicate paint finishes in generally good condition, so this is how I chose to model mine. National insignia and all stripes were painted on, and the camouflage soft masked. I mainly used Gunze Sangyo acrylics, for no other reason than they were the first paints in my paint draws to offer up the right colours. The shine of this paint was toned down with some polyurethane satin varnish, plus I introduced some tonal variations and weathering using artist’s oils. A wash was run in here and there where some shadow or contrast was warranted. The few kit decals I used went on ok, but were a bit thick.
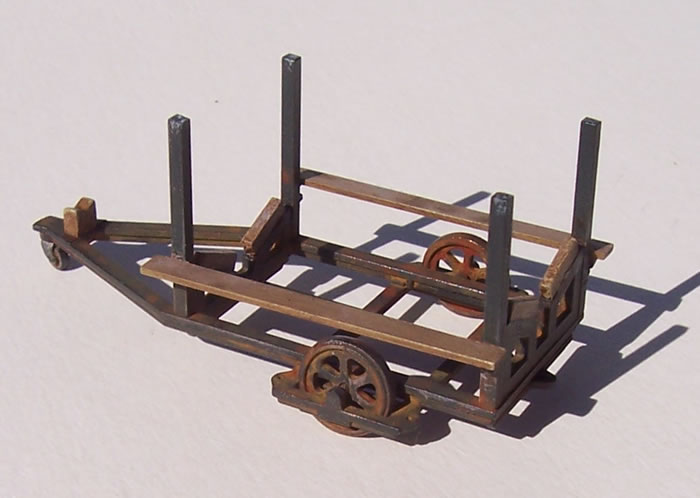
The kit includes a nice little beaching trolley, consisting of several parts. The instructions provide no guideline as to colours however. I did not find period photos to be much help either. Looking at the trolley it seems clear that chassis must be made of steel, as wood of the thickness indicated would not be strong enough to support the aircraft. The walkways are almost certainly wooden planks, for reasons of weight, grip under foot when wet, and cost. I also assumed that the blocks in direct contact with the main float would be wood rather than steel.

These matters decided; I painted the metal parts dark grey, and the wood parts a faded wood colour using artists oils over Tamiya Deck Tan. The trolley was then weathered using ground artist’s pigments and turps washes, along with a bit of dry brushing here and there.
This was a seven-day project as I’m off work recovering from two spinal fusion operations. The duration of my modelling sessions were dictated by how long I could sit for before my back demanded to be straightened again! However this is a simple and straightforward kit, and an enjoyable build. I recall the prototype I built earlier being a bit simpler (certainly the paint scheme was), but I feel confident recommending any of the three Hasegawa Kyofu kits.
I’m now on the hunt for an early production Kyofu, but meanwhile may look at building my Shiden and Shiden kai kits to round the family out.
Mode, Text and Images Copyright © 2009 Mark Davies
Page Created 24 September, 2009
Last Updated
24 September, 2009
Back to
HyperScale Main Page

|
Home
| What's New |
Features |
Gallery |
Reviews |
Reference |
Forum |
Search