|
Collect-Aire 1/48 scale AJ-2P
A Savage Beating
by
"Bondo" Phil Brandt
|
North American AJ-2P Savage |

HyperScale is proudly supported by Squadron.com
Background
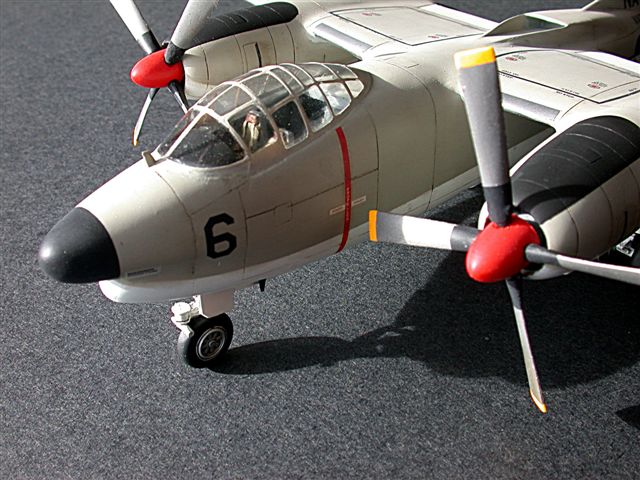
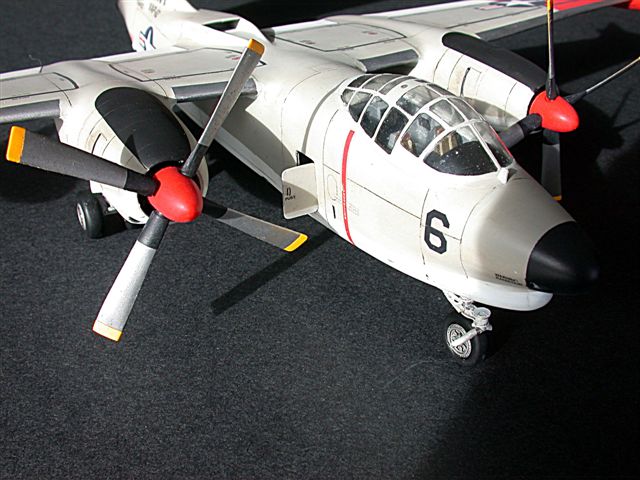
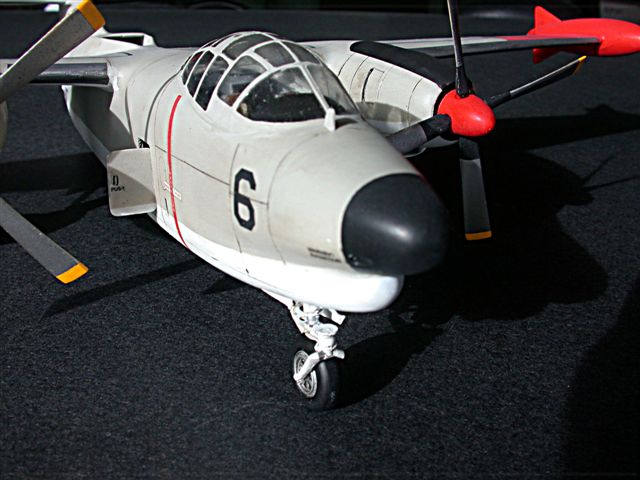
The North American AJ-1/2/2P “Savage” embodied three important firsts: it was the Navy’s first attack bomber; the Navy’s first carrier-based airframe having more than one engine--the Savage had, in addition to two radial piston engines, a J-33 jet engine in the tail; and the Navy’s first aircraft capable of carrying and delivering a nuclear weapon. Savages came into operational service in 1949 and continued until 1959 when replaced by the A-3 all-jet Skywarrior.
Boy Modeler Bondo first became acquainted with the then-exotic Savage circa 1952, when, as a teenager, he spent the munificent sum of $5 for a Berkeley Models balsa-and-tissue controline kit which would be powered by two .049 O.K. Cub motors. Can’t remember if I ever flew it round-and-round, but to me the navy’s first nuclear-carrying airframe sure looked sleek.
Fast forward to 2004 when good friend and fellow retired comrade-in-arms, Rick Clark, culling his stash due to failing eyesight, kindly sent me the Collect-Aire resin kit gratis, under the condition that I would build it! Well, Rick, I can finally report that I may not be good, but I’m slow!
Along the difficult way I received welcome moral support from good friend Fotios Rouch, whose beautiful Savage graces the gallery on the Collect-Aire website. For all I know, Foti and I may have the only two completed C-A AJs extant!
The Kit
As the owner and builder–some might say “investor”--of a fair amount of Collect-Aire kits, you might say that this curmudgeon didn’t just jump off the ‘resin’ truck last night. That said, this release still had more than the usual amount of significant problems. As do most C-A kits, things always look great at a couple of feet from the box, but when reality sets in, it’s the excitement of knowing that the esoteric subject doesn’t (usually) exist in 1/48 injected that drives the project.
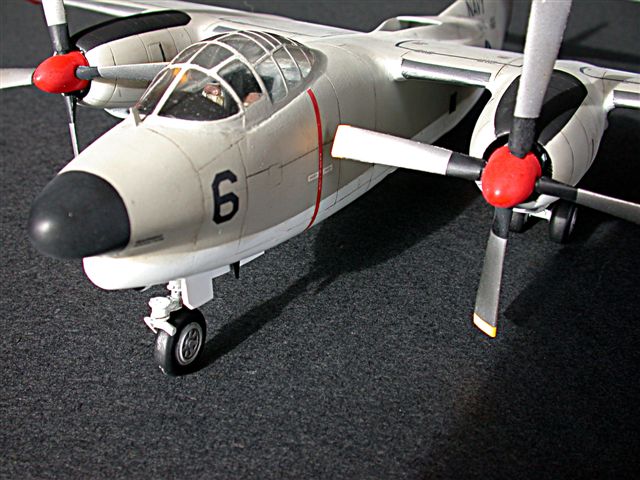
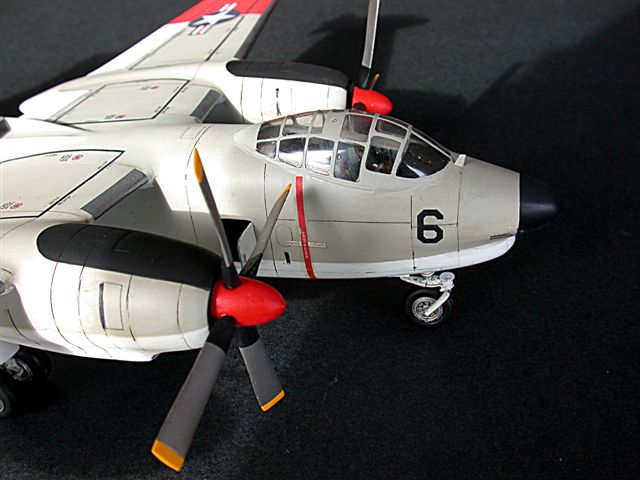
I was pleased that the C-A Savage offered not only both bomber and recce versions, but also alternative parts to do an early AJ-1 or the definitive AJ-2. Retired recce puke that I am, I chose the recce bird, even though Collect-Aire magnanimously allows the modeler to measure, lay out and cut all camera station ports (with one’s own reference material, of course!), scratchbuild camera faces and then fabricate clear plastic camera windows. Nuthin’s too good for the (modeling) troops, I guess!
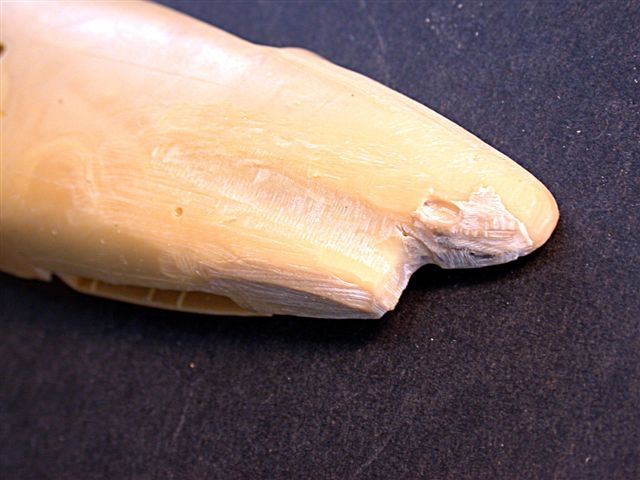
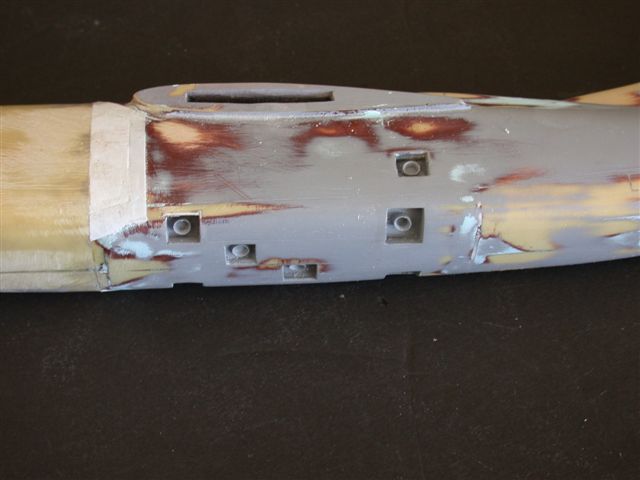
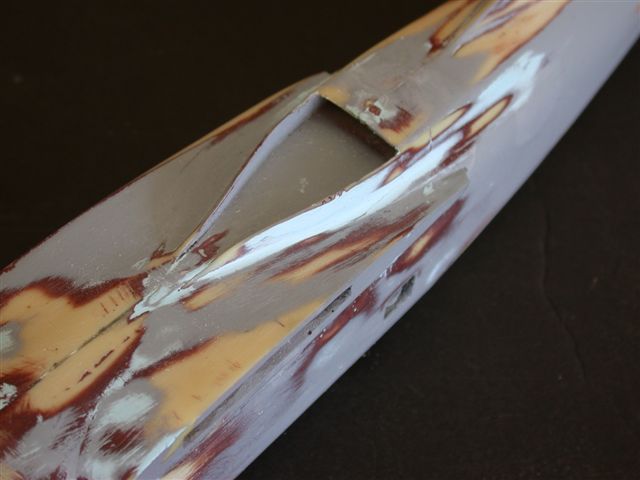
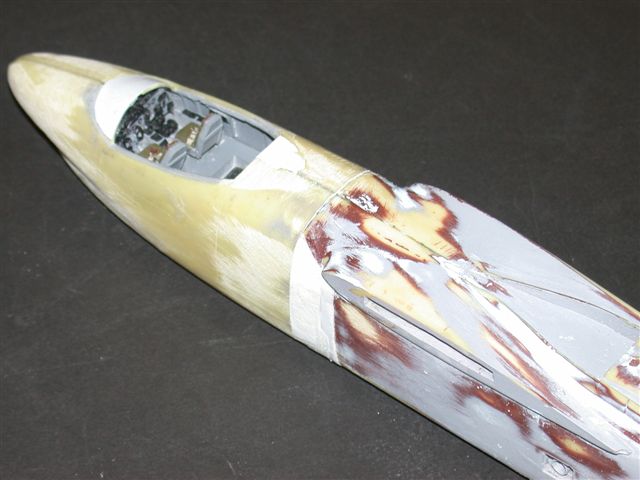
Fit problems–and Bondo Industry technicians don’t consider even the largest Tamiyagawa discrepancies as worth moaning about--plagued all major assemblies. In fact, the gaps in the engine nacelles and fuselage join lines amusingly remind this curmudgeon of misalignments, on a much, much larger scale, experienced by the patient folks laboriously restoring gigantic stone segments of the Acropolis, as seen on a recent PBS Nova program!
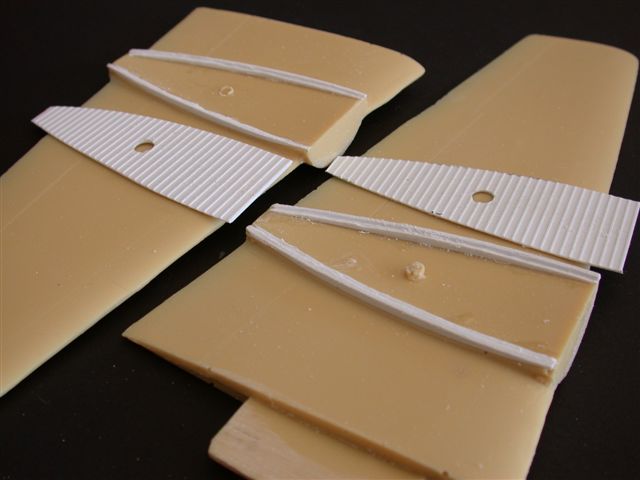
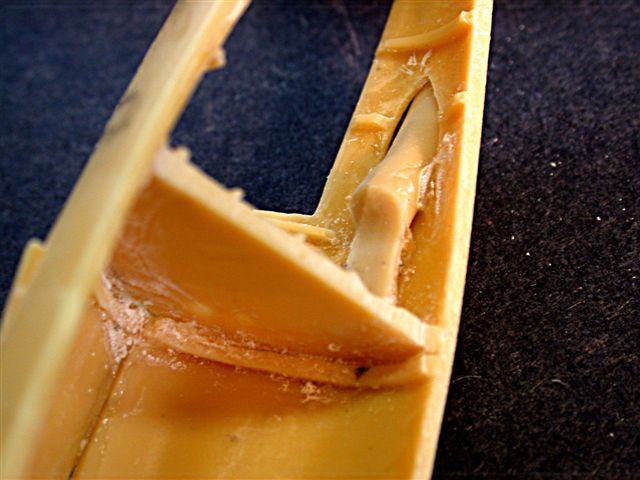
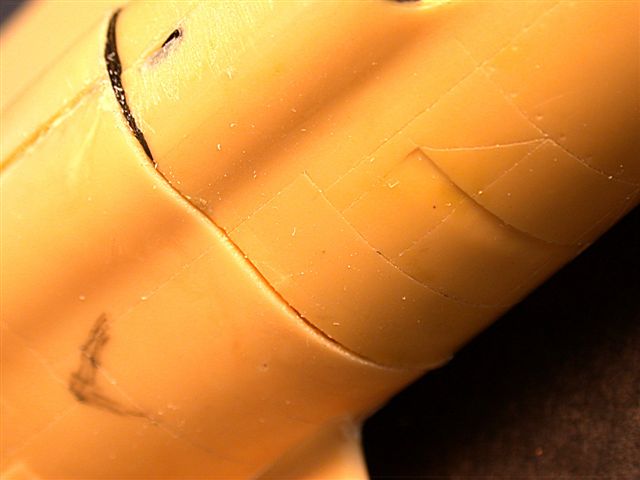
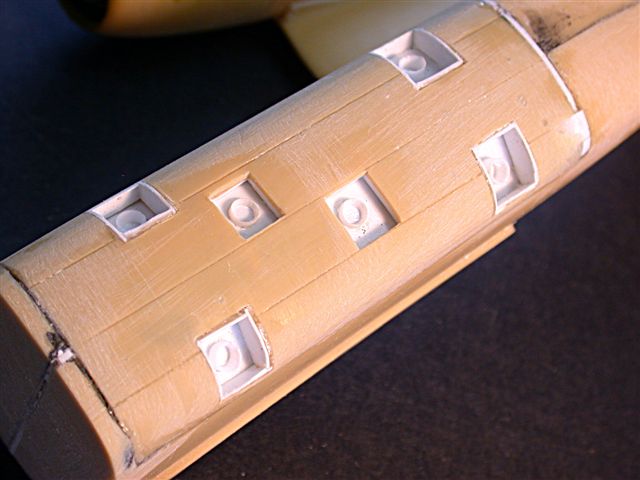
Electing to do the toughest job first, I chose to repair the egregious gap (approximately 3/32") that existed at the center of the engine nacelle-underwing join surfaces (both nacelles). As the pix show, a new join surface was scratchbuilt and a corrugated plastic sheet floor added.
Fuselage gaps were filled with plastic shims and epoxied as per pix.
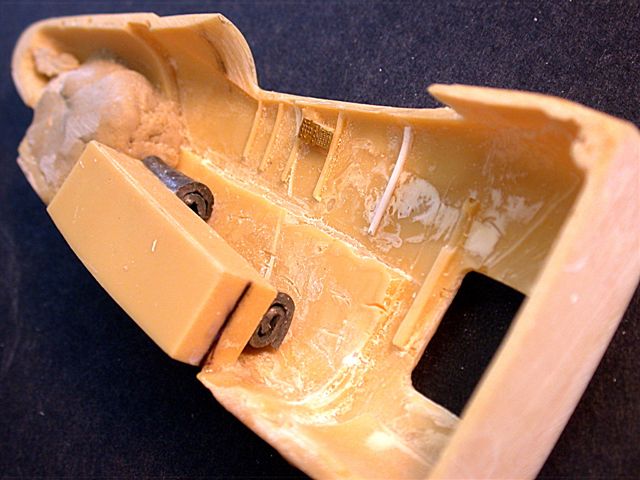
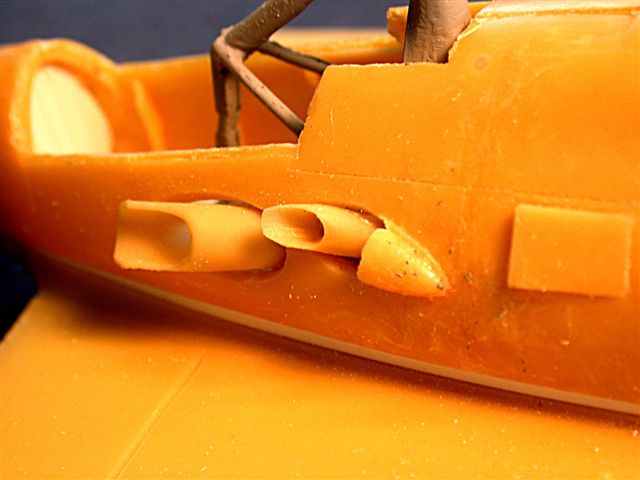
Recce Components

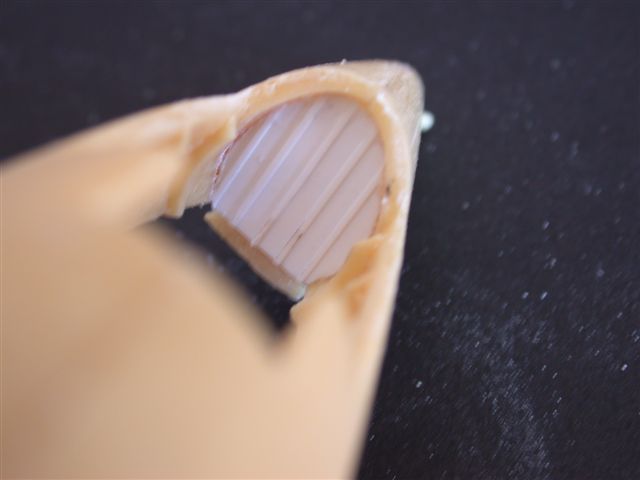
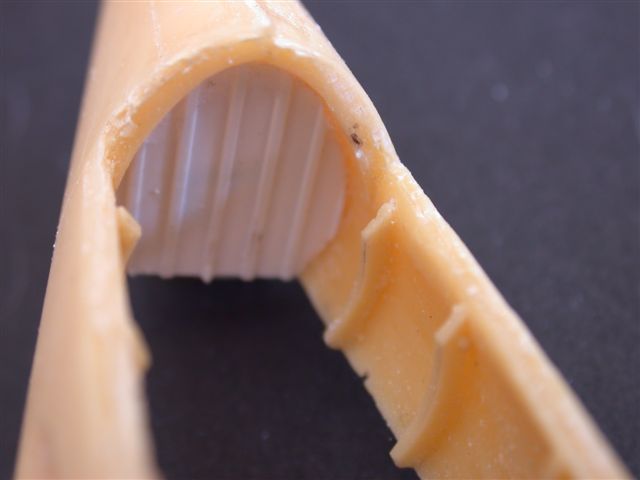
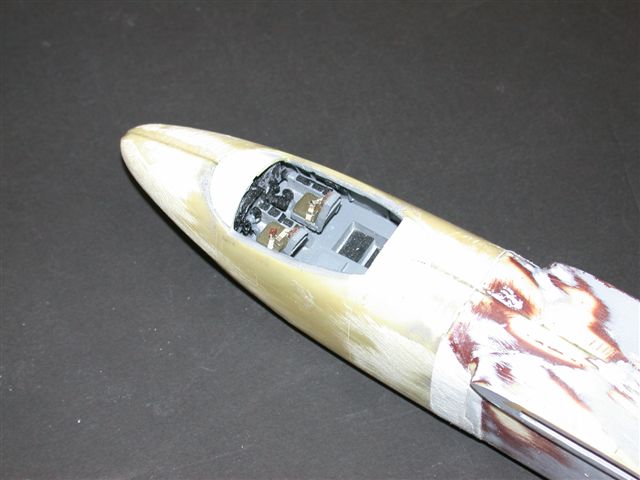
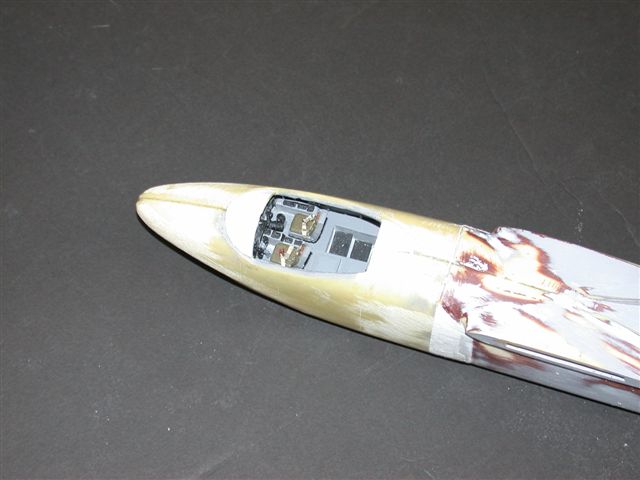
Although the recce nose option was welcome, industrial strength re-profiling weeth ze Dremel, in accordance with drawings and pix in the Ginter book, was mandated. The guy (probably the Central Euro “elf”) doing the mastering here was definitely NOT the talented “Russian”, whose more recent masters for C-A (see the “Big” Banshee kit) are head and shoulders above the others.
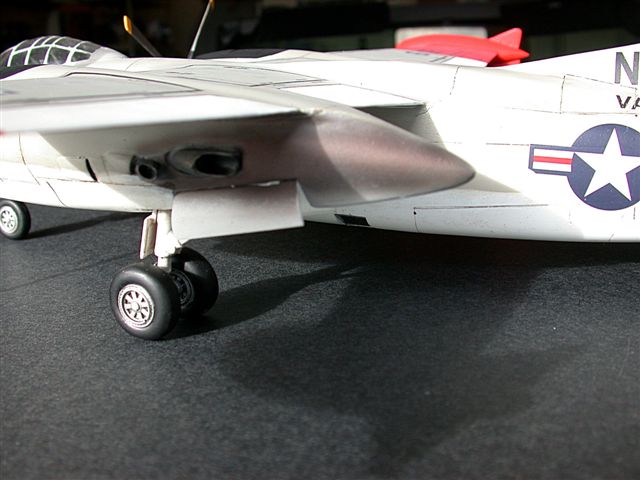
The lack of any reference whatsoever in the instructions re the size or location of the many prominent camera stations on the AJ-2P fuselage bottom and sides is inexcusable in a kit of this scope and price. At a minumum, outlines should’ve been engraved on a separate bomb bay panel. And it wouldn’t’ve required a rocket scientist to scratchbuild, as did I, representations of camera lenses protruding though simple flat panels! If I hadn’t’ve had Steve Ginter’s book, I’d’a been SOL.
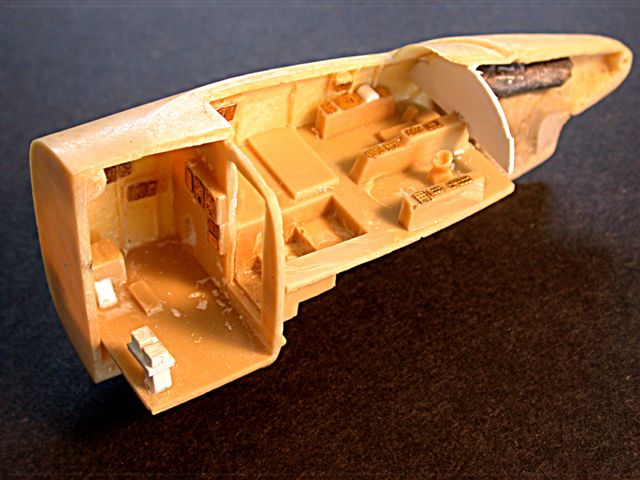
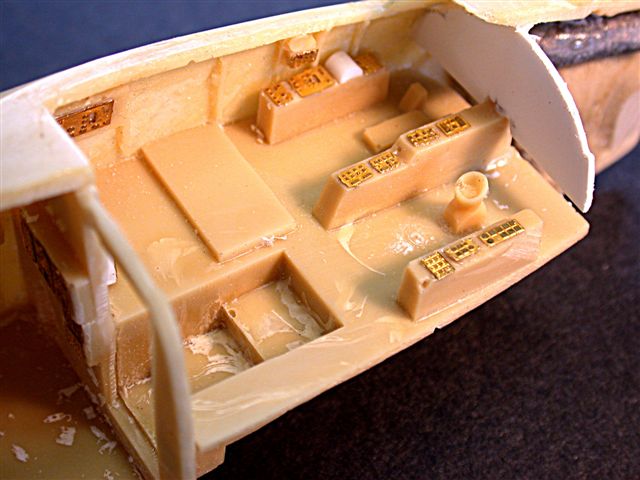
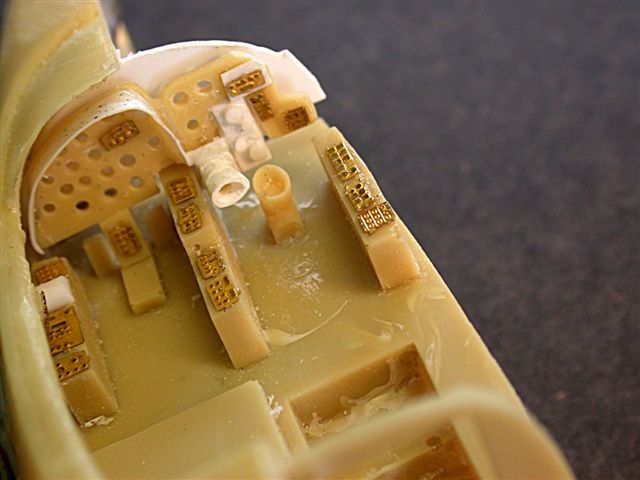
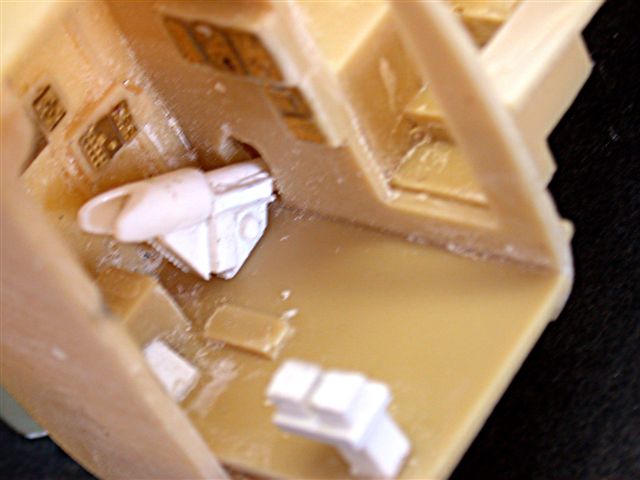
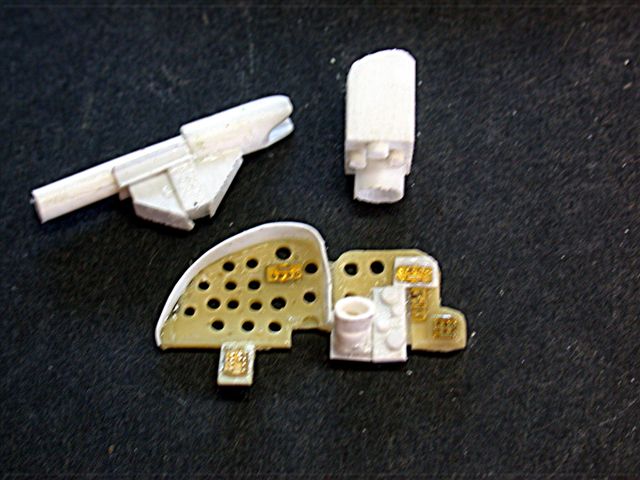
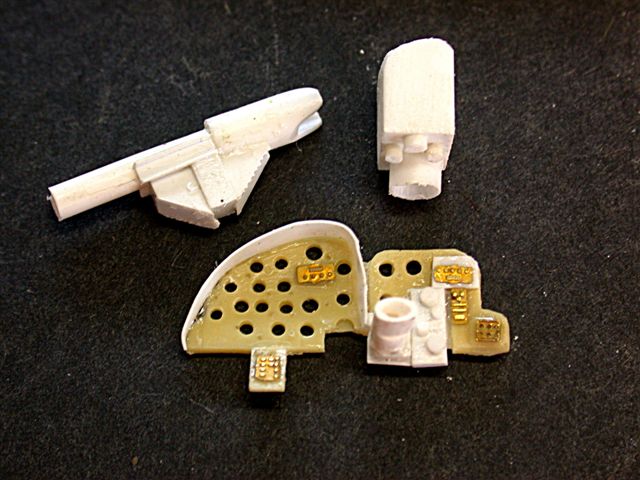
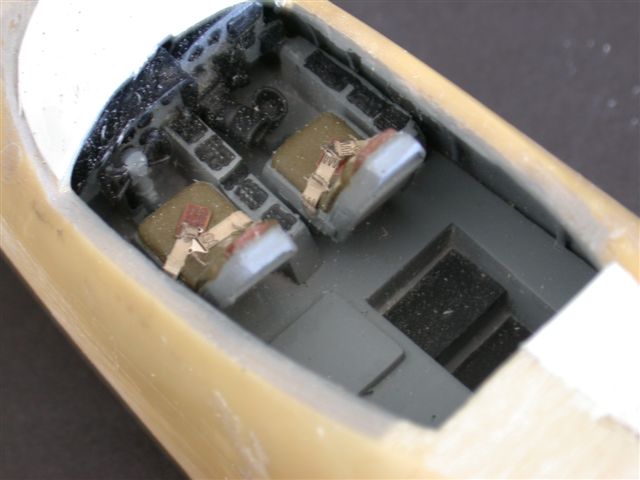
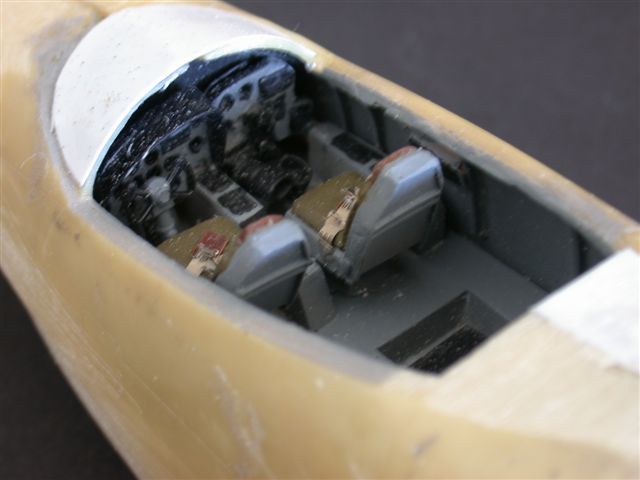
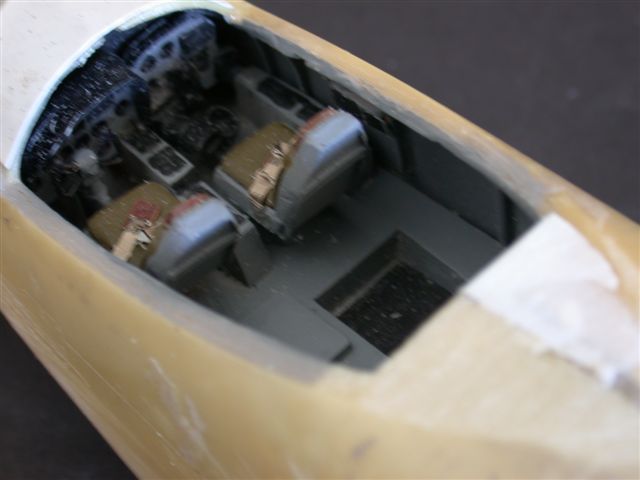
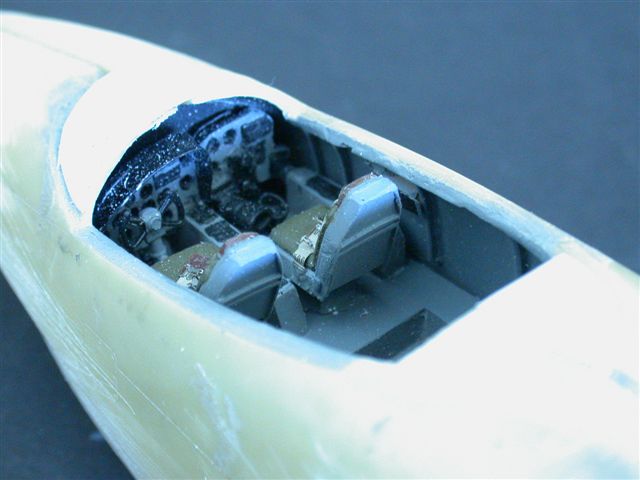
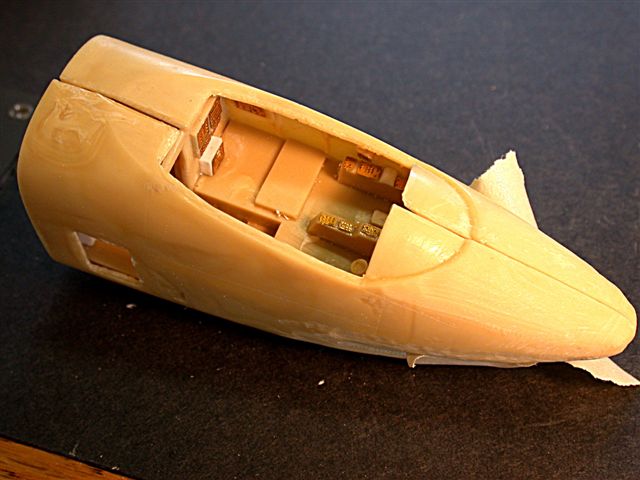
Cockpit
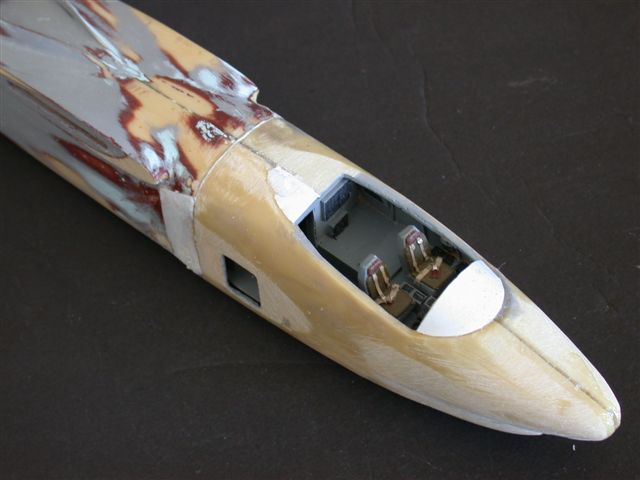
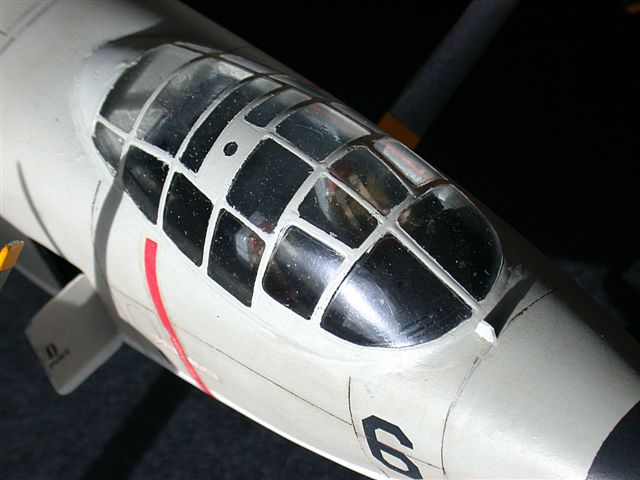
Typically, C-A cockpits are relatively plain, with rudimentary consoles, seats and panels. With as large a greenhouse as the Savage has, this lack of detail would be painfully obvious in the finished product, so I detailed the seats with WWII Eduard color-etch belts and harnesses and added many PE consoles. Additionally, some of the rightseater’s scopes and an instrument panel hood were scratchbuilt. It was at this stage that Steve Ginter’s great Savage book (again!) was a lifesaver; the detailed drawings and pix are IMO a must-have for doing any Fifties/Sixties Navy birds.
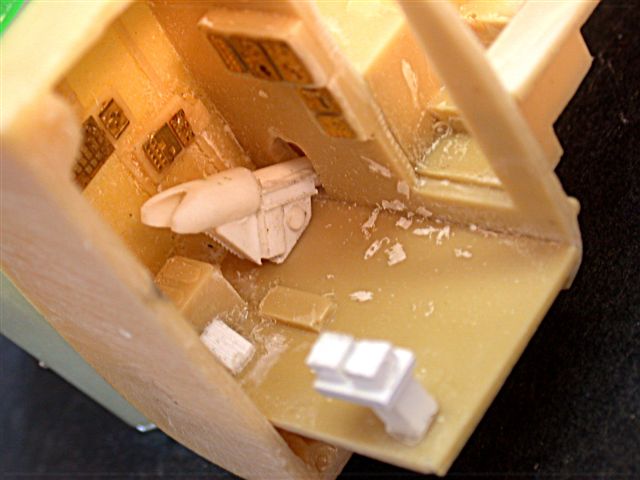
The photo technicians’ station to the rear and a few steps below the flight deck also came in for detailing as shown in the pix.
Miscellaneous Details
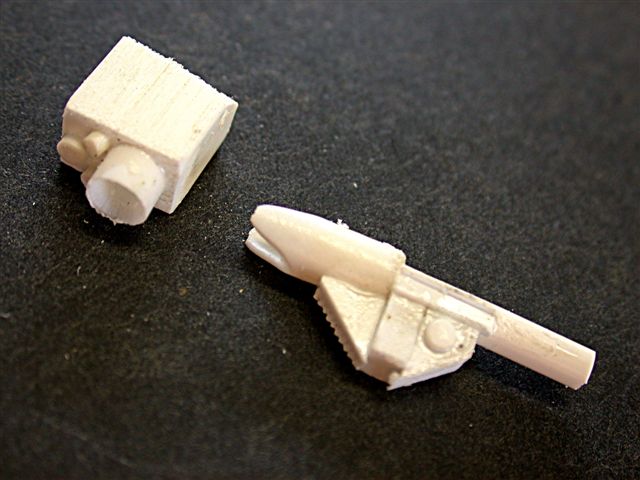
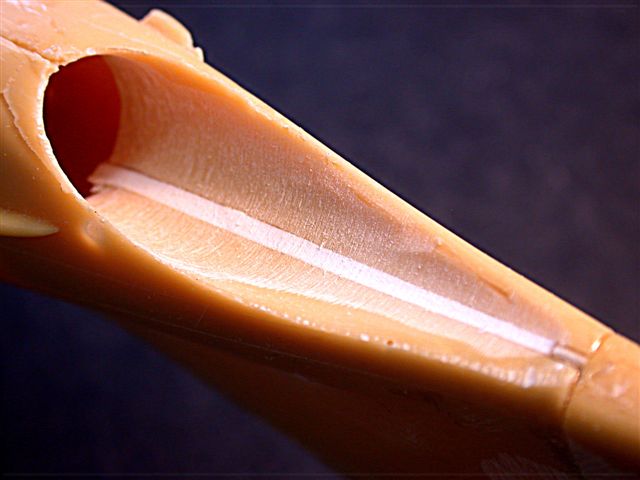
I wasn’t satisfied with the hokey, shallow depth of the included J-33 exhaust tube, so I scratchbuilt a whole new assembly (with ½" dia. plastic tubing) about three inches in length.
The long pitot on the right wing leading edge was fabricated from stainless tubing.
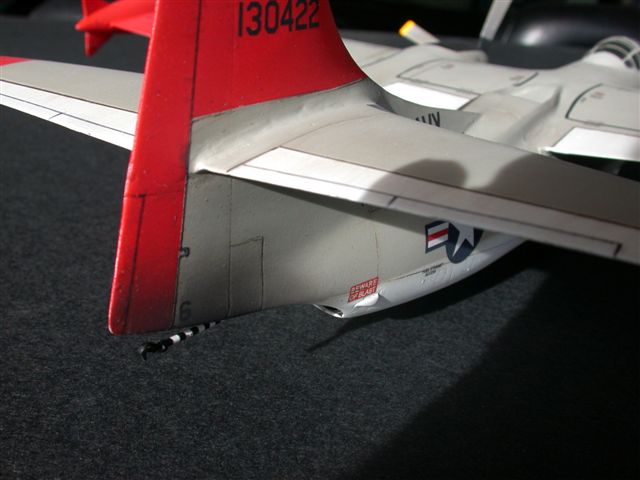
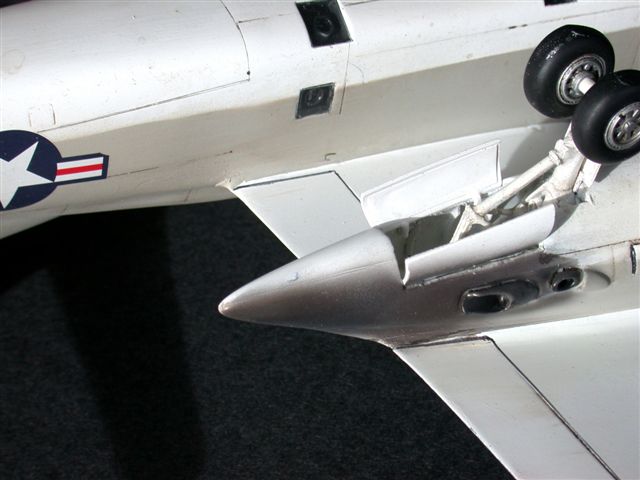
The delicate resin tailhook–Collect-Aire shoulda really done this in metal–as done by the C-A modeler is 180 degrees out of longitudinal rotation with respect to its teardrop hinge fairing. That is, the tailhook shaft had to be cut from the fairing, rotated 180 degrees and then gently CA’ed back onto the fairing. Real fine!
Propellers / Spinners
The Collect-Aire prop spinners are each done in two, somewhat flimsy parts, so I CA’ed ‘em together and packed each assembly with epoxy putty. The props bases are anchored to the four indentations in each spinner with brass wire stubs. These stubs enable the prop pitch to be changed as necessary for display. The lower portions of each prop blade are IMO too narrow, so I mastered and cast new, wider Aeroprop-style blades. Unfortunately, the extra width of the new prop cuffs seriously interferes with the spinner’s position with the opening of the engine nacelle, so I elected to retain the original C-A blades under the “close enough for government work” theory!
Wing Join
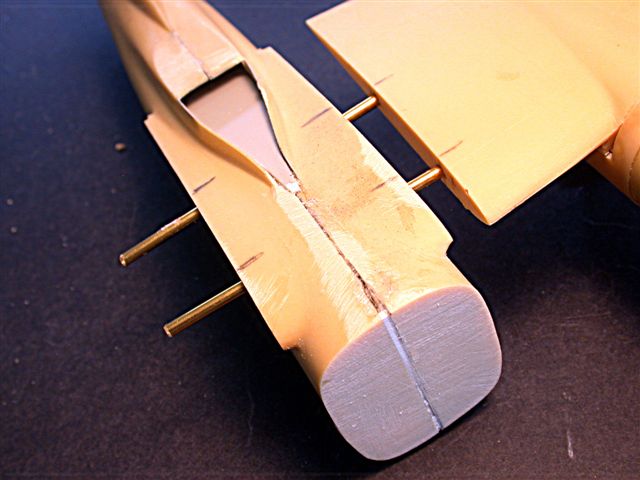
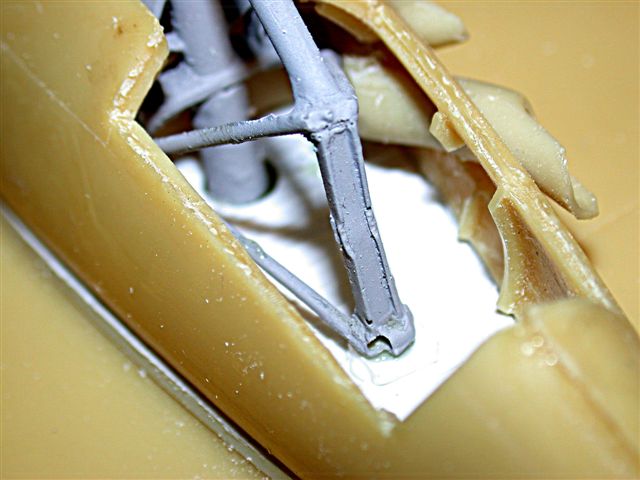
Collect-Aire wings are characteristically monolithic castings, so the tongue-and-slot scheme offered by the manufacturer is IMO sadly lacking in longterm strength. As per the pix, I rigged sturdy brass tubes that carry through the upper fuselage and into deep holes drilled in the wings.
Surface Preparation
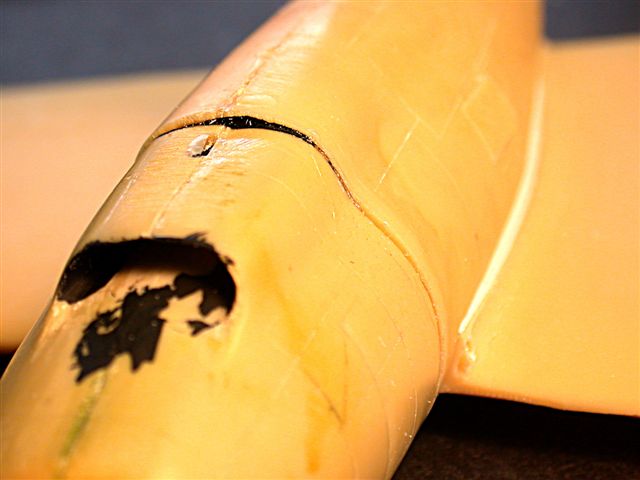
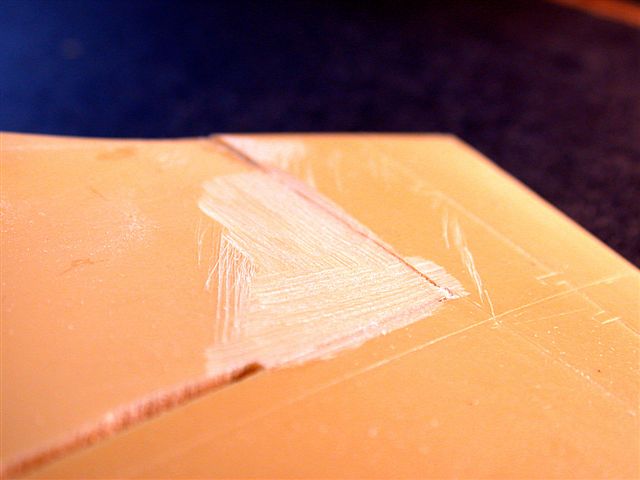
Next to the warped join sufaces mentioned above, fairing-in the intersections of the engine nacelles with the underwings the wing-to-fuselage joints, horizontal tail surfaces and tip tank-to-wing intersections was laborious, requiring repeated iterations of Blue Acryl, then brushing the still-“wet” putty with lacquer thinner to minimize wet sanding.
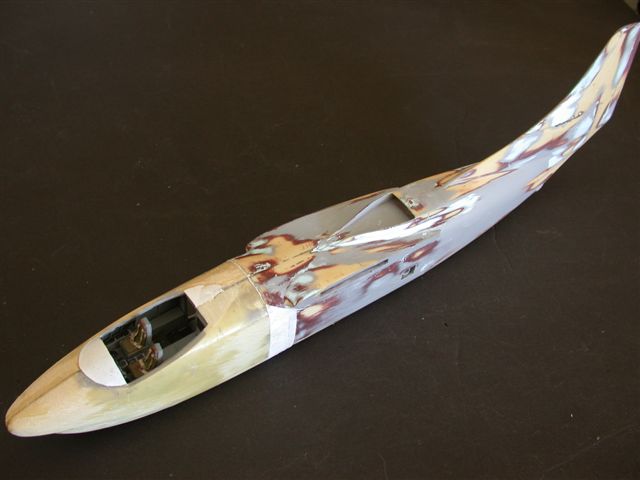
Because of the aggressive filling and sanding operations, the entire airframe had to essentially be rescribed. Hey, what can I tell ya...we’re talkin’ Collect-Aire here!
Painting
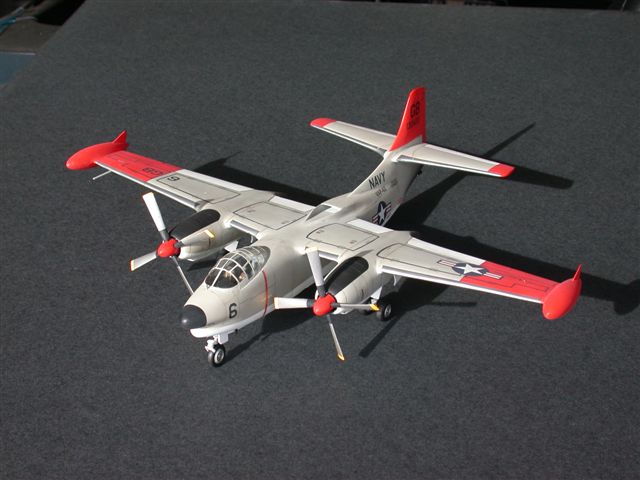
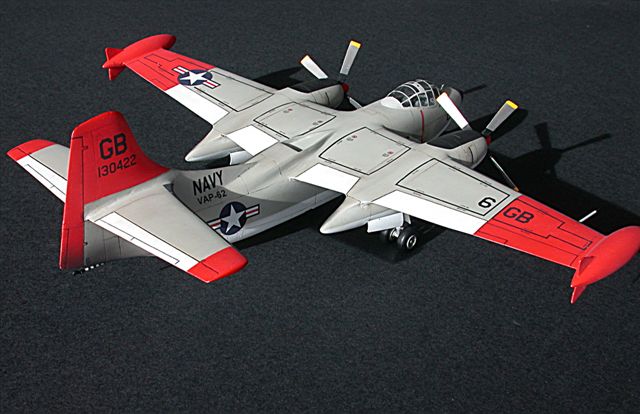
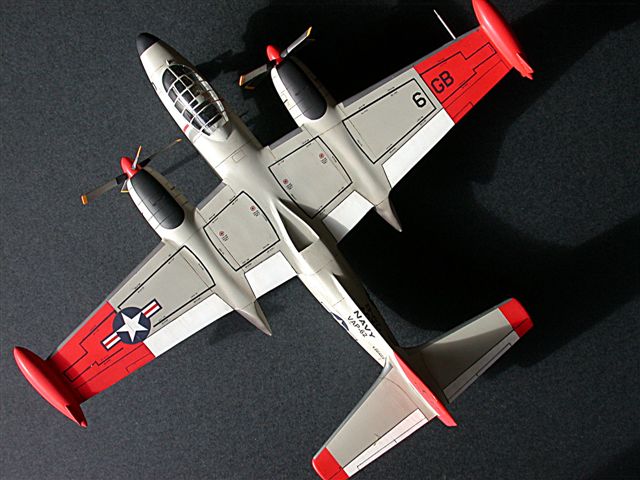
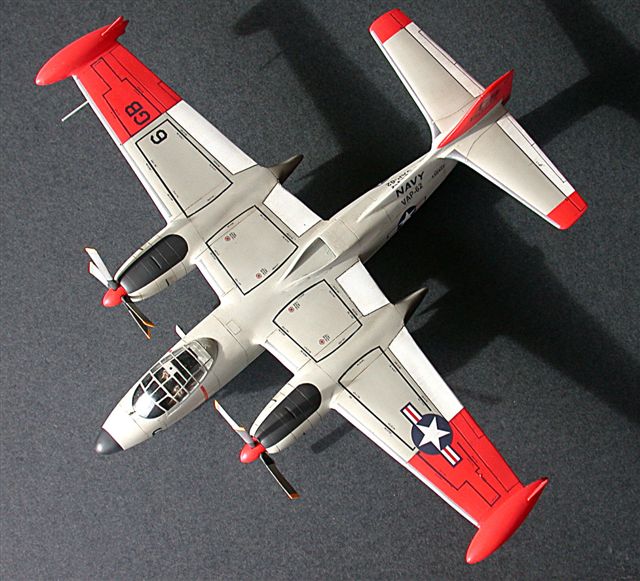
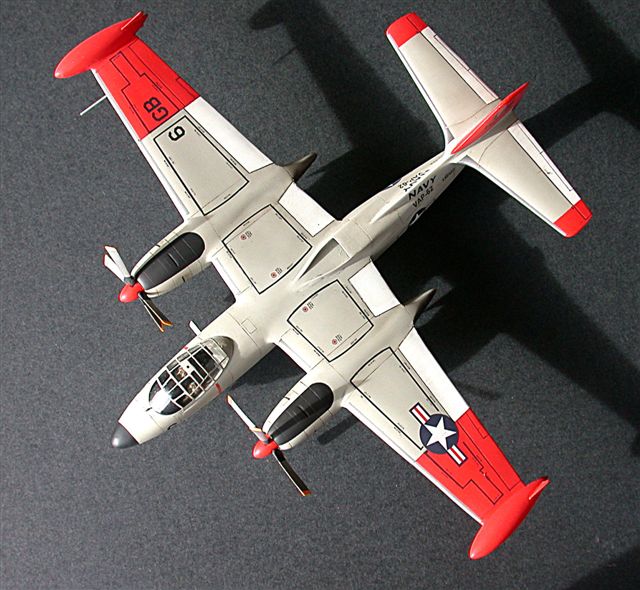
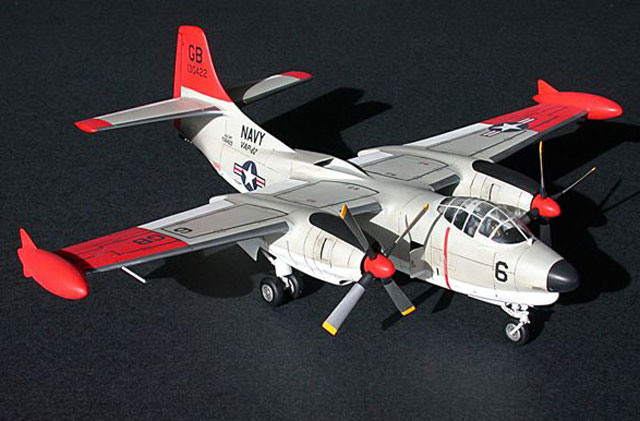
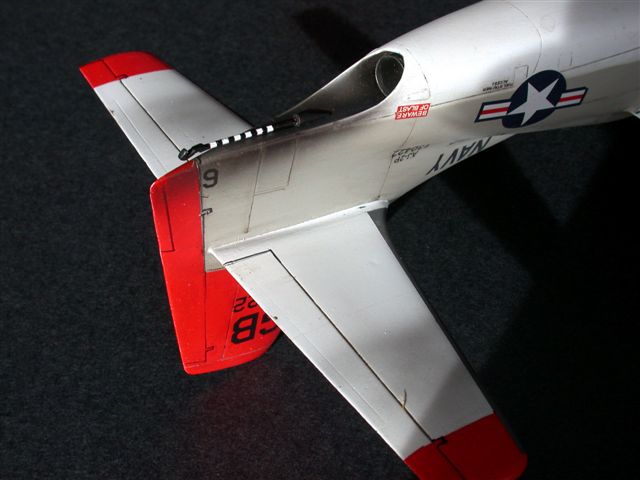
Gray automotive primer-filler from Pep Boys was shot from the spraycan and wetsanded, starting with 400 grit paper, progressively moving up to 8000 grit Micromesh, at which point the flat primer starts to take on a sheen. I chose to do the late Navy Gull Gray-over-White scheme, set off by the bright red wing and tail sections (as seen on page 70 of the Ginter book).
 Primo spraycan Tamiya white lacquer primer (which actually provides more of a semigloss surface than flat) was used as the finish coat for undersurfaces. Before the Testors Gull Gray acrylic was applied topsides, the red panels were masked and shot with Tamiya Bright red lacquer, again, in the spraycan. Wing and tail leading edges were masked and shot with Alclad. Primo spraycan Tamiya white lacquer primer (which actually provides more of a semigloss surface than flat) was used as the finish coat for undersurfaces. Before the Testors Gull Gray acrylic was applied topsides, the red panels were masked and shot with Tamiya Bright red lacquer, again, in the spraycan. Wing and tail leading edges were masked and shot with Alclad.
For larger models, Bondo Industries prefers to mask and airbrush wing-walk lines, rather than fool around with multipart, delicate decals–C-A provided such decals–and the possible silvering of said decals. Walk lines were shot in Testors Flat Black acrylic.
Alclad “Jet Exhaust” shade was airbrushed aft of nacelle exhaust tubes and aft of the
J-33 jet tube.
The entire airframe was “dirtied up” with oil wash as befits a piston-engined bird under heavy service at sea. The engine nacelles are particularly grimy, per the pix on page 70 of the Ginter book.

Lastly, the entire airframe was “dusted” with Testors Clear Flat acrylic, greatly thinned. The clear flat also served to “knock down” the brilliance of the Tamiya red, bringing it more into line with Insignia Red.
Decals
Stencils were composed in 4-pt. font on the computer and printed out on Kalmbach decal paper in the ol’ HP laser printer. National insignia, main squadron codes and serial numbers are from Aeromaster sheets. The only C-A decals used are the prop warning stripes and stencils, and the jet exhaust warning placards.
Balance
Even with cast metal, twin-row radial engines and a large roll of lead sheet in the forward fuselage, this Savage just barely has a forward C/G. I sanded small flats on each of the main tires, hoping that the added resistance to rotation would help; it did, but not much!
Surely glad it’s over! I’ve survived the “beating”, am outta (modeling) Intensive Care and should soon be rehabed enough to go fifteen rounds with the big Collect-Aire RB-57F.
References
“AJ-1/2 Savage” (Naval Fighter Series), Steve Ginter, 1754 Warfield Circle, Simi Valley, CA 93063 ISBN 0-942612-22-1
Model and
Text and Images Copyright © 2008 by "Bondo" Phil Brandt
Page Created 24 March, 2008
Last Updated
24 March, 2008
Back to HyperScale
Main Page |
 Home
| What's New |
Features |
Gallery |
Reviews |
Reference |
Forum |
Search
Home
| What's New |
Features |
Gallery |
Reviews |
Reference |
Forum |
Search