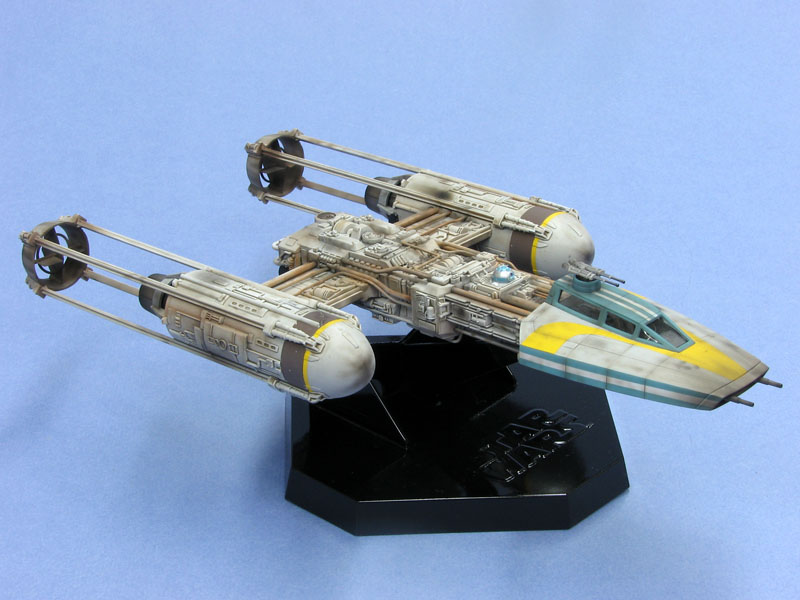
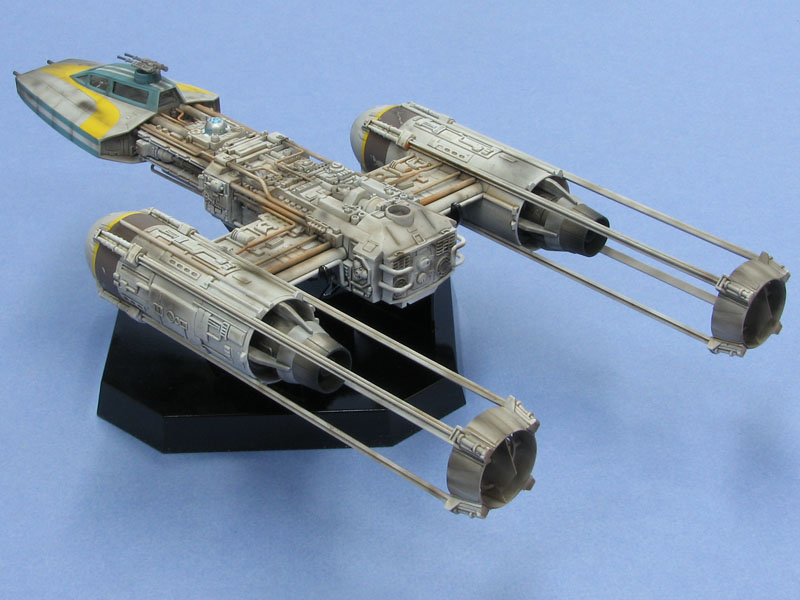
Fine Molds' 1/72 scale
Y-Wing Fighter
by
Tony Bell
|

|
|
Koensayr Y-Wing Attack Starfighter |

HyperScale is proudly supported by
Squadron.com
Background
The summer of 1977 was a good one for me. I was ten years old; old enough to be allowed to explore the streets of midtown Toronto unsupervised. I had a three-speed Raleigh Chopper with a banana seat, a Hurst-style shifter and hockey cards in the spokes. I had a paper route that netted me about $15 a week. But best of all Star Wars was playing in glorious 70mm Dolby air conditioned luxury at the art deco Eglinton Theatre all summer long! Once or twice a week my best friend and I would lock our bikes up in front of the theatre, plunk down our $2 and escape into George Lucas’ galaxy. When we came out, our bikes had turned into X-Wings, Y-Wings and TIE fighters as we blasted home, yelling at each other to “Stay on target!” and “Use the Force, Luke!”
After all these years I am still fascinated with Star Wars, particularly the vision, creativity artistry and craftsmanship that went into the design and production of the movie’s sets, costumes, props and most of all, spaceships. They had an utterly convincing gritty, used, operational look to them that was a marked departure from anything else in SciFi up to then. Back then, before the advent of computer graphics the ships were all hand made using everything from raw materials to bits ‘n pieces of commercially available model kits to “Leggs Eggs” and ice cream containers. This gave a life and depth to the models that seems to be missing today’s somewhat sterile computer renderings.
George Lucas freely admits that he “borrowed” cinematic elements of classic war movies like “The Dambusters”, “633 Squadron” and “The Battle of Britain”. Stretching the BoB analogy a bit further, if the fast, sleek X-Wing was the “Spitfire” of Star Wars, then surely the Y-Wing was the “Hurricane” – underappreciated yet vital, soldiering on, perpetually in the shadow of its more glamorous stablemate.
Fine Molds' 1/72 scale TIE Fighter
I’ve always loved the greeblie-intensive, purposeful, heavy industrial look of the Y-Wing, and when Fine Molds announced that it would be added to their line up of 1/72 Star Wars kits I was thrilled. Released in the summer of 2007, I managed to score my kit at the Anaheim IPMS USA Nationals where they were on sale at the Hobbylink Japan vendor’s table. They were stacked twenty high, but it’s a good thing I scooped mine up early, as the pile had all but disappeared by the end of the second day.
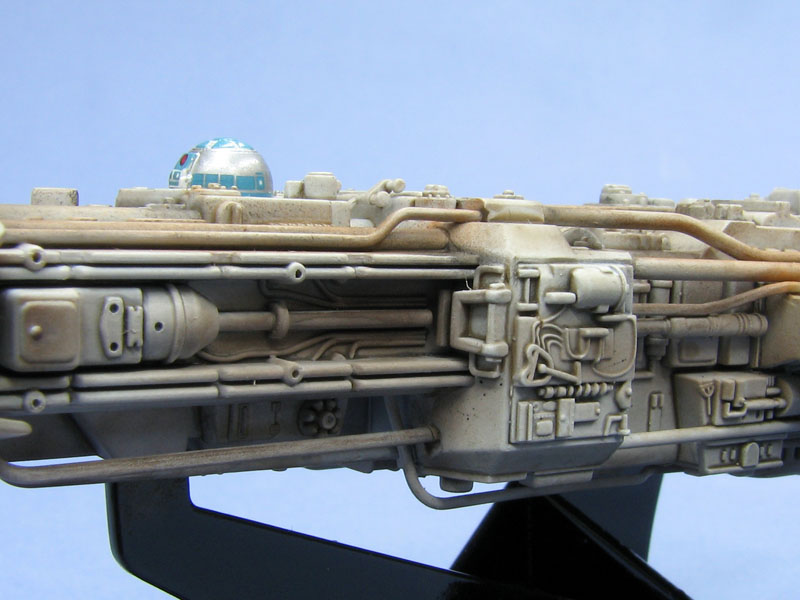
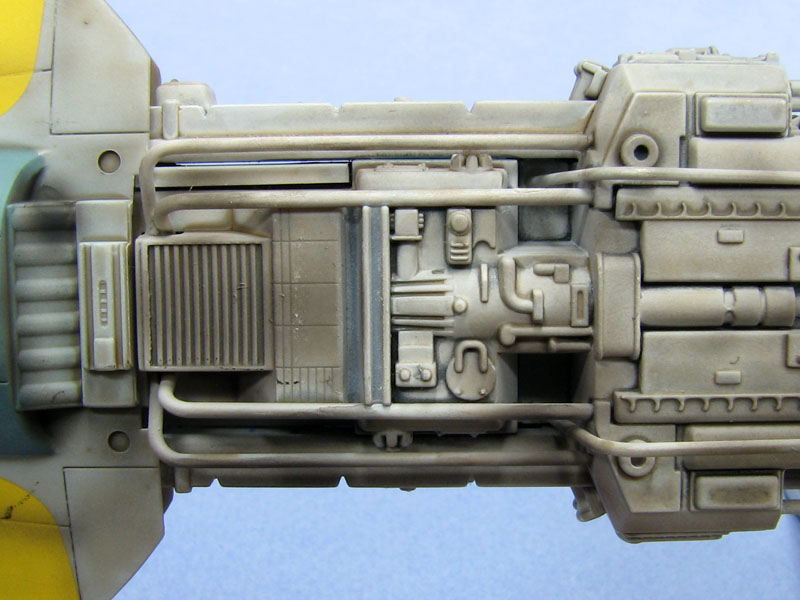
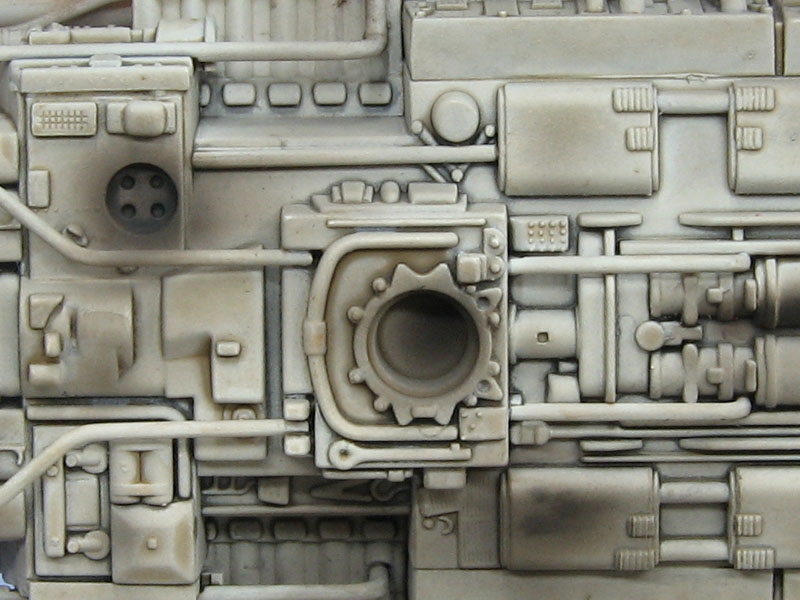
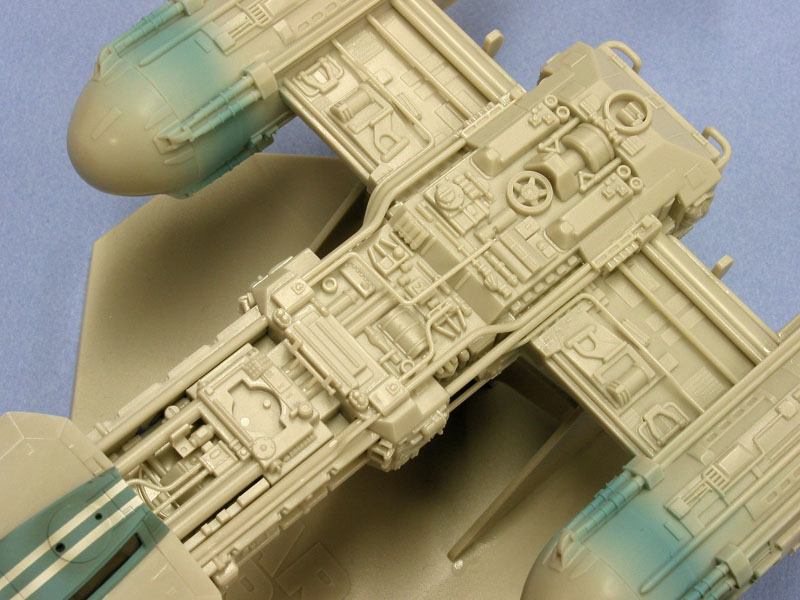
The kit its self consists of 130 light grey parts on four sprues, plus one clear sprue for the canopy glazing. The parts are very finely moulded (no pun intended), with no flash, visible ejector pin marks or sink marks whatsoever. Looking closely at the parts, it is even possible to distinguish the kit parts that the original Industrial Light and Magic model makers used to create the movie miniatures. One can make out panzer jacks, Bf-109 landing gear legs, a Panther engine deck, and various others bits ‘n bobs. Very cool.
The instruction booklet is all in Japanese, but the diagrams are plenty clear enough without any translation. The painting and markings diagram is printed in colour on a separate glossy sheet. The decals provide for three different options (all from Episode IV), and include decals for the appropriate astromech ‘droid (i.e. R2-D2) for each.
Fine Molds has broken the parts of their 1/72 scale Y-Wing down in a very clever fashion, neatly hiding any joins and providing just enough greeblies as separate parts to give the model a convincingly busy look to it yet without it being overly complicated. I paid close attention to the instructions, methodically ticking off the various bits as I attached them. This was particularly useful when it came to adding all the lengths of piping, as many of them were difficult to tell apart.
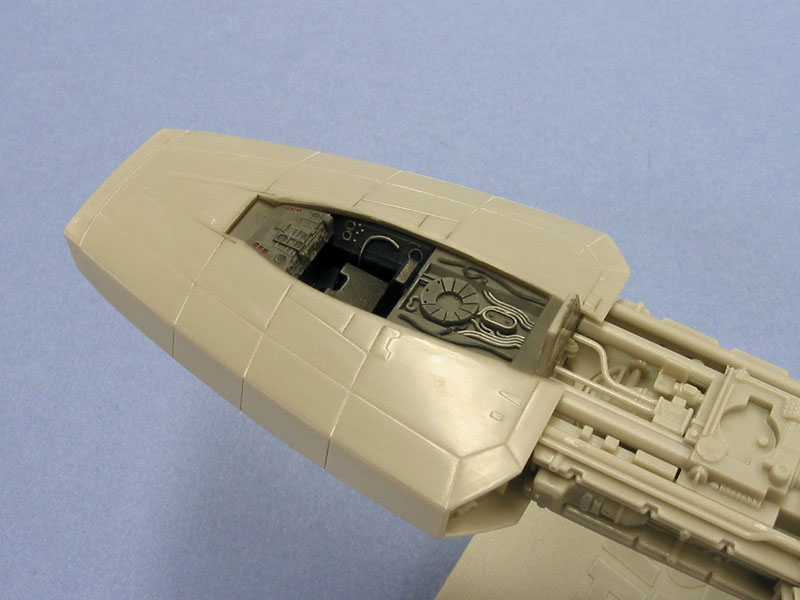
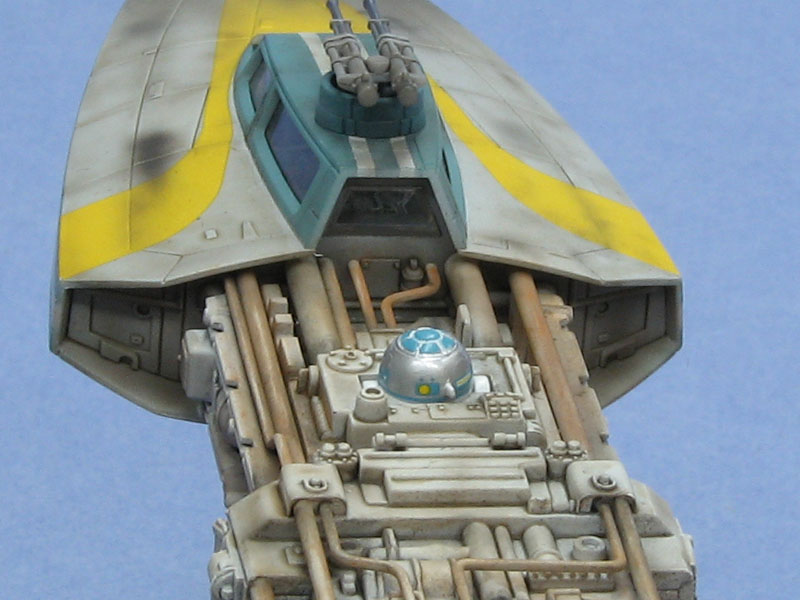
I painted the nicely detailed cockpit with Tamiya XF24 Dark Grey and drybrushed it with a medium grey mixed from artists’ oil paints. I picked out the details with a fine brush and various Citadel acrylic colours. It turns out that none of this was at all visible once I had added the canopy but hey, I know it’s there. I held off attaching the nose section to the fuselage in order to facilitate painting. The fit of this kit is so precise that the nose could be dry fitted and would stay in place without any aid.
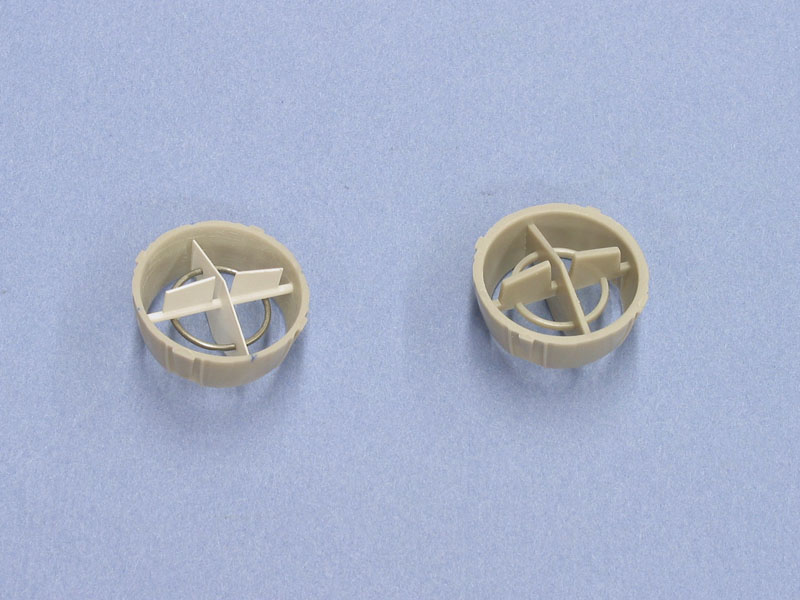
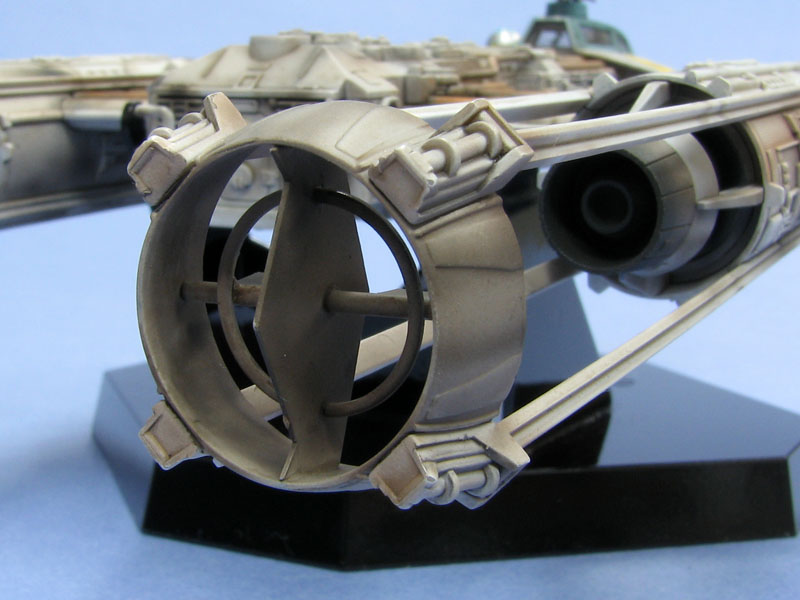
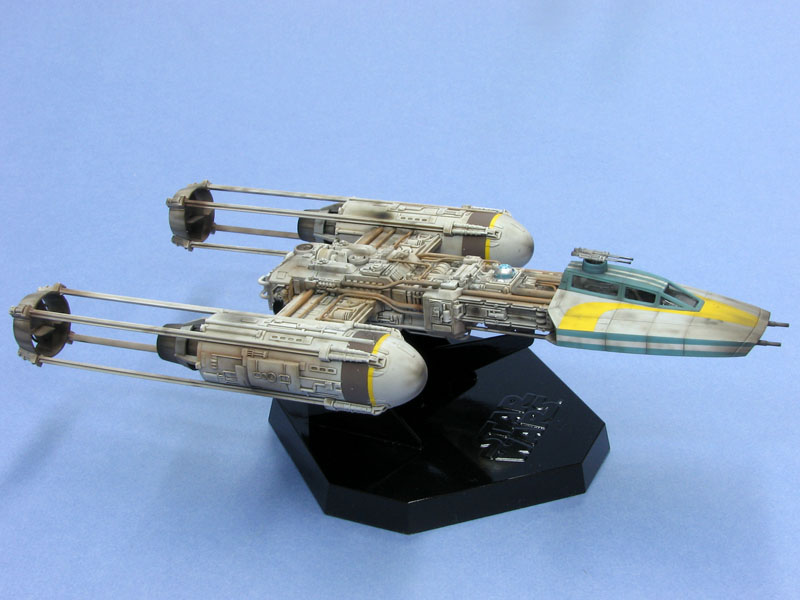
Although I had originally intended to build the kit straight out-of-the-box, I ultimately decided to replace the rather thick and chunky steering vanes with thinner sheet styrene. I removed the vanes from the kit parts with a hot X-Acto knife and thinned the edges of the nozzle with a Dremel tool and sandpaper. Using the cut off vanes for guides, I made templates from thin cardboard, trimming them for an exact fit before transferring them to 0.010” sheet styrene. Evergreen plastic rod and a ring made from solder wrapped around my X-Acto handle finished things off.
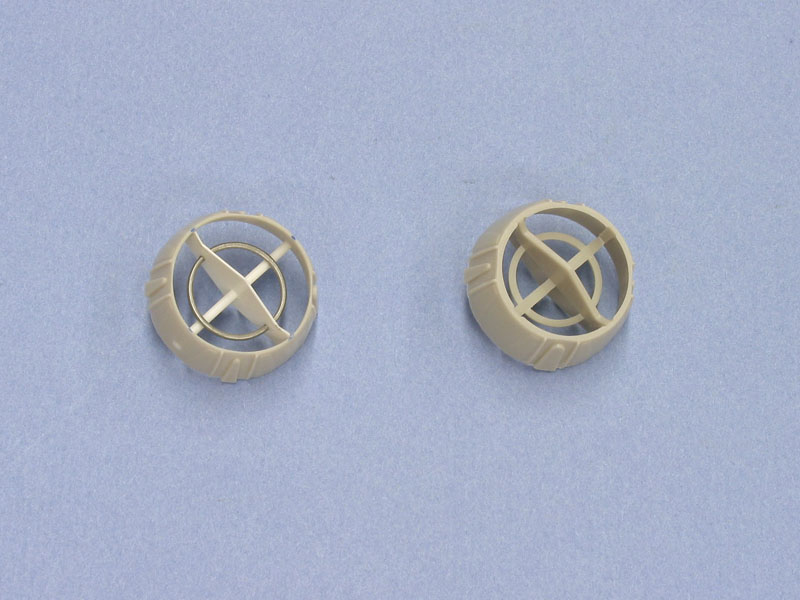
Aside from drilling out the laser canon barrels, this was the only modification I made to the kit.
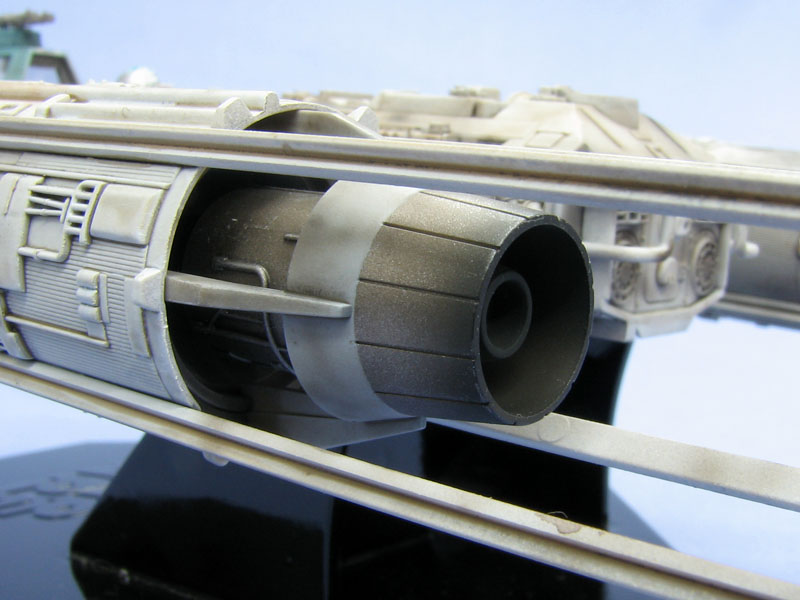
 I started by priming the model with Tamiya Fine White primer, which I decanted from the spray bomb and airbrushed on. After this had dried I airbrushed a coat of Future floor wax, which was allowed to dry whereupon I applied an overall wash of Testor’s gloss black enamel (the stuff in the little square jars) to highlight the details. I then hand brushed a mixture of Future and brown and black inks over everything to further highlight the detail and tint the white. I airbrushed a light coat of light grey, misting it on to tone down the contrast and then applied the brown and yellow decals to the engine pods, bedding them down with Mr. Mark Softer and spot applications of Solvaset. I airbrushed the engine nozzles with Citadel “Gunbolt Metal”. I started by priming the model with Tamiya Fine White primer, which I decanted from the spray bomb and airbrushed on. After this had dried I airbrushed a coat of Future floor wax, which was allowed to dry whereupon I applied an overall wash of Testor’s gloss black enamel (the stuff in the little square jars) to highlight the details. I then hand brushed a mixture of Future and brown and black inks over everything to further highlight the detail and tint the white. I airbrushed a light coat of light grey, misting it on to tone down the contrast and then applied the brown and yellow decals to the engine pods, bedding them down with Mr. Mark Softer and spot applications of Solvaset. I airbrushed the engine nozzles with Citadel “Gunbolt Metal”.
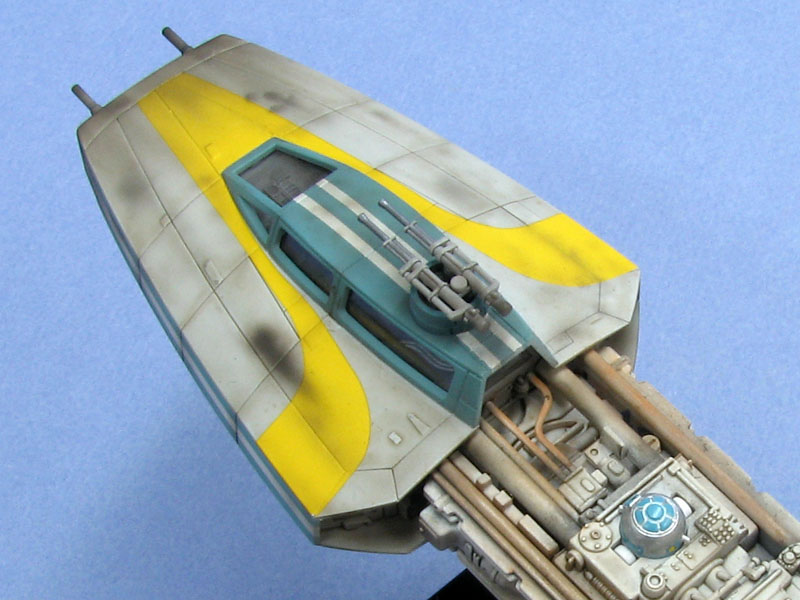
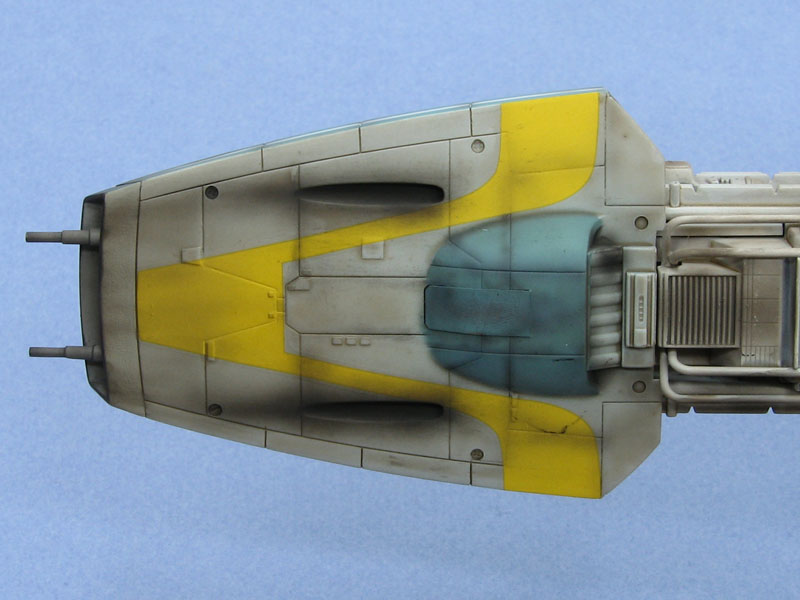
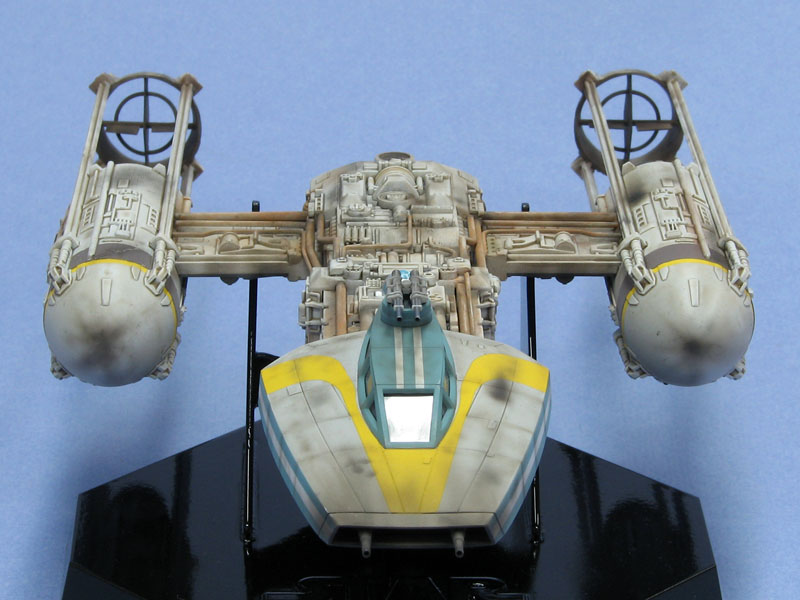
The nose was painted in a similar manner, and after masking the stripes, I painted the sides, canopy and underside bulge with Tamiya XF18 Medium Blue mixed with a bit of XF20 Medium Grey. The yellow decals went on, followed by a coat of Polly Scale clear flat over the entire model.
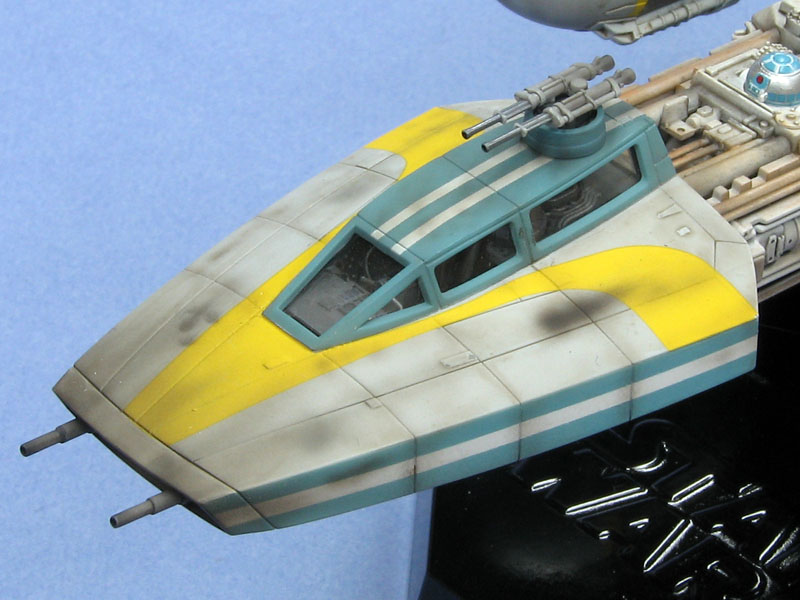
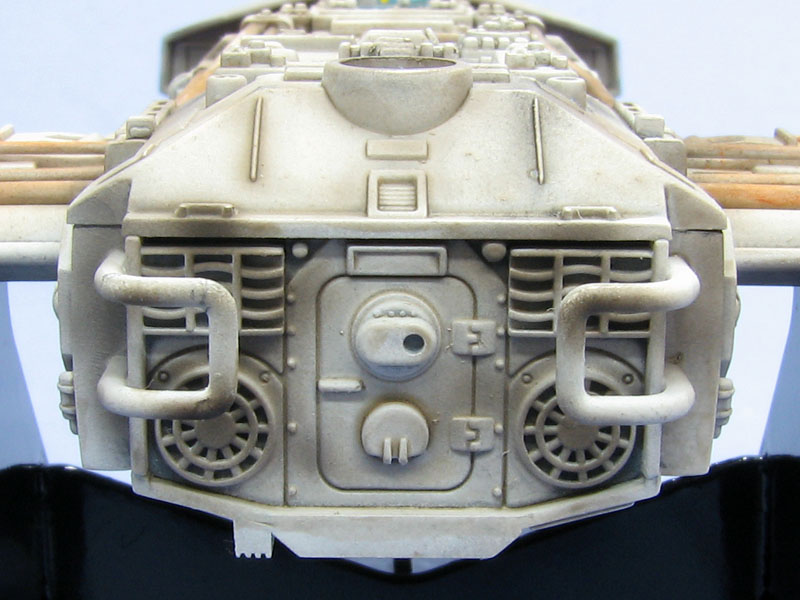
With the basic painting complete, it was time to move on to the fun part: weathering! A review of my Episode IV DVD confirmed that the Y-Wings, like most other Rebel equipment, were very dirty and worn looking. Weathering consisted mainly of MiG pigments and airbrushed dirty patches, scorch marks and general schmutz. To begin with, I filled my airbrush cup about ½ full with rubbing alcohol and then dipped a paintbrush in Tamiya XF69 NATO Black and cleaned it in the airbrush cup, doing the same with XF10 Flat Brown. I airbrushed this mixture in the nooks & crannies, concentrating on the likely areas like the engine exhaust and steering vanes, constantly moving the airbrush to avoid paint runs. I paid particular attention to the leading edge areas of the nose and engine pods, pointing the airbrush in the direction of the “air flow” and moving the brush fairly rapidly back & forth.
Moving on to the MiGs, I used Smoke Black, Dark Mud and African Earth to darken the piping and conduits and add yet more scorching and smudging.
After I was satisfied with the overall look, I attached the nose section with a few dabs of five minute epoxy, assembled the kit-supplied stand and spray painted it gloss black.
So, how to sum this one up? Well, let’s see: we have a detailed, well engineered, high quality and reasonably priced kit of a subject that has fascinated me since childhood. It was fun and easy to build, and I was able to experiment with painting and weathering without any fear of over doing it. What more could I ask for? Well, nothing.
Except maybe a Fine Molds kit of the A-Wing. Now that would be wicked cool.
Model, Images and
Text Copyright © 2008 by Tony Bell
Page Created 20 May, 2008
Last Updated
20 May, 2008
Back to HyperScale
Main Page |
 Home
| What's New |
Features |
Gallery |
Reviews |
Reference |
Forum |
Search
Home
| What's New |
Features |
Gallery |
Reviews |
Reference |
Forum |
Search