|
Scratch built 1/48 scale
resin
X-24C
by
"Bondo" Phil Brandt
|

|
|
X-24C |

AML's
1/72 scale Avia S-199 is available online from
Squadron.com
The X-24C, begun as a NASA/USAF design study in 1974, was slated to
be a Mach 8 “lifting body” follow-on to the
wildly-successful-but-closed-out (1969) X-15 program. Here was to be a
lifting body using not relatively low-output Bell X-1 engines as in the
existing lifting body programs (XC-24A/B; HL-10; M2F2/3); this one would
be driven by the X-15's XLR-99, with the even more powerful Atlas ICBM
engine as a backup.
A second, airbreathing, version was to be produced concurrently.
Design and wind tunnel work continued, and even the Lockheed Skunk Works
got into the act with a larger, even more radical (Mach 12) modification
proposal.
The X-24C was not to be, however. In 1978, NASA, using the reasons of
project overruns, cancelled the program, although some have suspected
that it went “Black.”
In the Beginning...
This curmudgeon’s had the expensive-but-decent ($55!)
1/72 French Sharkit resin release of the X-24C on the shelf for years,
but since its scale clashed with the four 1/48 lifting body offerings by
Collect-Aire, which were already residing at the Weirdness Works
Division of Bondo Industries, it was going to have to be Scratchbuild
City. The Sharkit included decent three-views which were enlarged to
1/48.
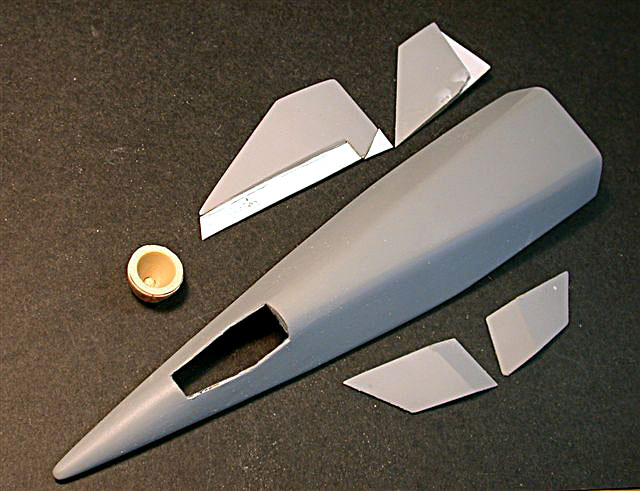
A basswood master of the wedge-shaped fuselage lent itself to
straightforward shaping via bandsaw and large table sander; same, same
for the flying surfaces. The most difficult part of this operation was
getting the join surface angle between the fuselage and wings just
right. The vertical fin and canted minor fins were fairly easy to sand
to overall shape (but more difficult to form a snug join line on the
fuselage).
Dividing the fuselage master into segments for pouring RTV molds was the
same arrangement as with the Sharkit release. Hollowing the fuselage
pieces was easier than I had envisioned, since the Dremel with coarse
sanding drum mounted went through the stuff like a hot knife through
butter.
Click on the thumbnails
below to view larger images:
[../../photogallery/photo00031089/real.htm]
Kitbashing
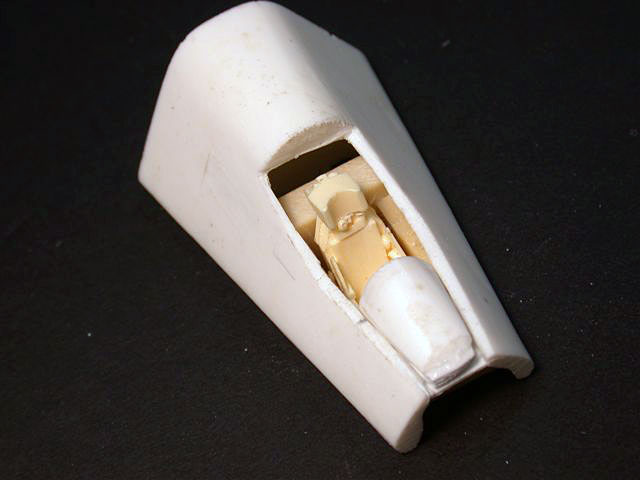
Since the NASA /USAF plan was to reduce costs by maximum use of X-15
and other off-the-shelf components, the Weirdness Works Division
employees went the same route, utilizing the Special Hobbies X-15
cockpit tub (suitably modified to fit the slimmer driver’s area of the
X-24C) and seat, nosegear well and the XLR-99 engine exhaust.
Click on the thumbnails
below to view larger images:
[../../photogallery/photo00003061/real.htm]
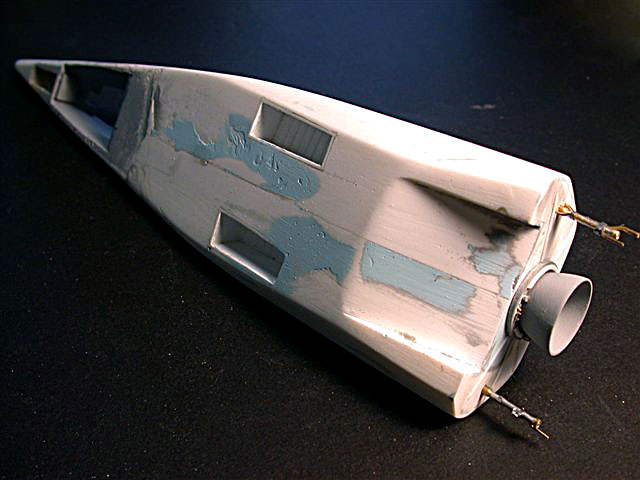
Scratch building continues...
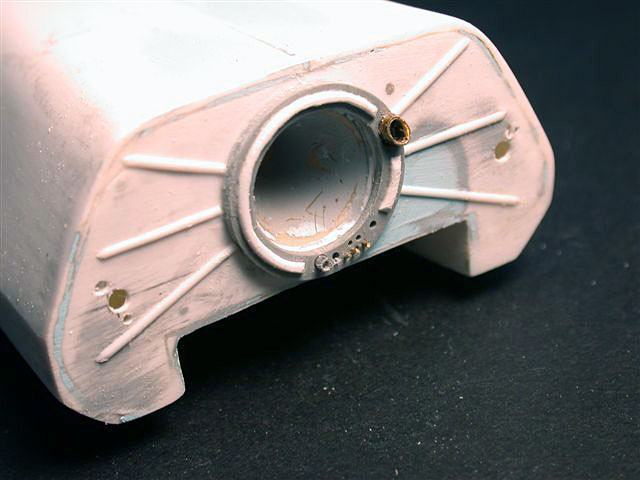
The X-24C was to use a larger, extended exhaust cone, and that of the
model’s came from resources in the Bondo Industries Airframe Reclamation
Area. The aft bulkhead and detailing (through which the exhaust flows)
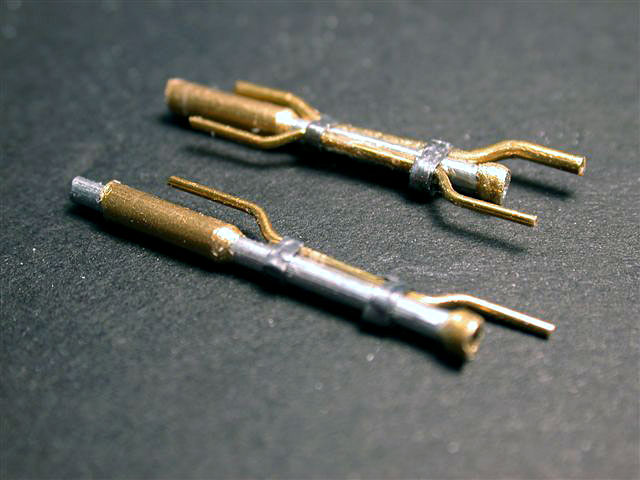
was handmade, as were the jettison/dump tubes ala X-15 (formed from
aluminum and brass tubing) protruding from said bulkhead.
Your correspondent had considered using the resin Special Hobby X-15
dump tubes, but they were much too delicate and, IMO, too small. The
subject’s instrument panel and shroud were built to fit within the
X-24C’s narrower (than the X-15) forward fuselage.
Maingear wells were created from plastic sheet with some corrugated
sheet in the ceiling.
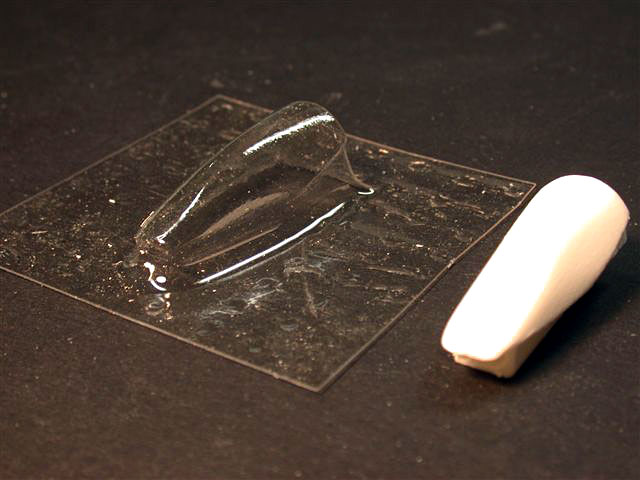
Canopy
A basswood master was carved and cast in resin, to use as a vacuform
mold. I try as much as possible to do open canopy configurations which,
IMO, add materially to any model’s busy-ness and presentation. And, an
open canopy, especially one made of thin, vacuformed plastic, needs
framing of some type to give the appearance of structure, especially in
a subject such as the X-24C which undoubtedly had to withstand even more
forces than that of the hefty X-15 one. Accordingly, I poured an
additional canopy shape and cut away much of the resin to leave only a
frame, which, of course, nests perfectly within the vac outer shell. The
finished canopy mounts to the fuselage spine via a brass pin.
Click on the thumbnails
below to view larger images:
[../../photogallery/photo00016654/real.htm]
Gear Struts / Wheels
Cannibalized–we used to say “cannonballed” in USAF flightline
parlance–from the ol’ Monogram F-5.
The modified nose strut and wheels are from an Evil Empire fighter
item; I can’t remember which.
Detailing the Cockpit
After searching many, many Eduard color-etched cockpit sets at our
own King’s Hobbies, the Mirage III item was selected because it had a
relatively narrow instrument panel and narrow consoles. Seat belts came
from a True Details generic jet belt PE fret. Unfortunately, the canopy
obscures much of the interior cockpit view.
Before the large trapezoidal opening in the fuselage (beneath the
cockpit) was filled with plastic sheet, quite a bit of balancing lead
had to be added, and I feared for the plastic gear struts; so far
they’re hangin’ in.
 Because
so many decals would be used, I elected to go gloss black lacquer in the
spraycan (Testors) over a suitably prepared (read many iterations of
Acryl Blue, wetsanding and automotive lacquer-based primer) surface. Because
so many decals would be used, I elected to go gloss black lacquer in the
spraycan (Testors) over a suitably prepared (read many iterations of
Acryl Blue, wetsanding and automotive lacquer-based primer) surface.
Five color coats did it, and after overnight drying–even lacquer,
when applied in multiple “wet” coats (this wetness is especially needed
for dark colors so that the lacquer will level with zero orangepeel)
needs additional time to harden–the decal drill started.
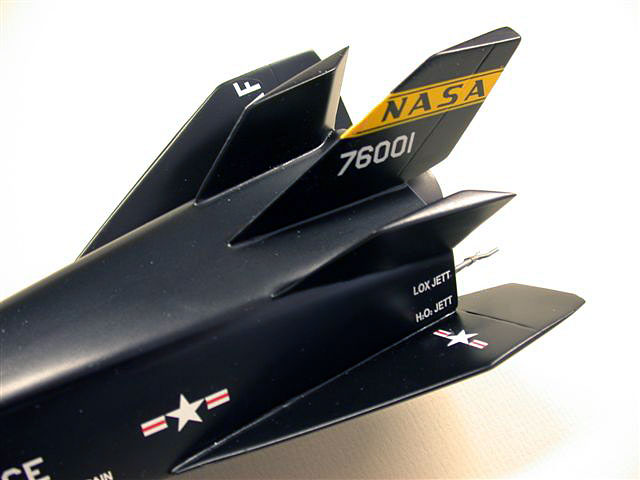
The hardest decal to find was an appropriately-sized yellow/black “NASA”
stripe for the vertical fin. The ancient Revell 1/65 X-15 tail logo fit
the bill almost perfectly, albeit with a bit of additional--I had two of
the sheets--yellow background. All stencils came from the Special
Hobbies sheet, and the tiny NASA logo on the nose from the Cutting Edge
NASA sheet.
To seal the decals and knock down some of the gloss, the bird was
given a “dusting”–and I really mean dusting: the airbrush pressure is
set to almost 30 psi, the gun held more than six inches away, and yours
truly’s hand make swift strokes above the airframe–with greatly thinned
(at least 50%) Testors semi-gloss clear water-based acrylic. The light
dust coat practically dries as it contacts the surface, and the sheen is
quite uniform: no bluish-white puddles which will not dry uniformly.
It works. Try it!
Don’t know why this curmudgeon suddenly put aside straightforward
kits–yeah, Collect-Aire is real “straightforward”--to do something like
this, but hey, somebody in HS Land’s gotta demonstrate that there’s been
a whole lotta aerospace development since 1945. Can I have an Amen on
that?
Click on the thumbnails
below to view larger images:
[../../photogallery/photo00007234/real.htm]
Model, Images and
Text Copyright © 2007 by "Bondo" Phil Brandt
Page Created 31 May, 2007
Last Updated 24 December, 2007
Back to HyperScale
Main Page
|
 Home
| What's New |
Features |
Gallery |
Reviews |
Reference |
Forum |
Home
| What's New |
Features |
Gallery |
Reviews |
Reference |
Forum |