|
Czech Master Resin's 1/72
scale
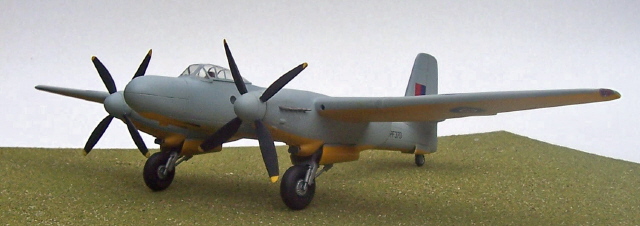
Westland Welkin NF Mk II
by
Mark Davies
|
 |
|
Westland Welkin NF Mk
II |

HyperScale is proudly supported by Squadron.com
Background
At first glance the Westland Welkin looks like Westland’s earlier
Whirlwind on Steroids, being powered by Rolls Royce Merlins rather than
problematical Peregrines. However the two aircraft were developed to
meet quite different requirements and specifications, and so despite
appearances a clear evolutionary development is less apparent than say
the Hawker Typhoon, Tempest and Sea Fury lineage. The Whirlwind met Air
Ministry F.37/35 specification for a cannon armed fighter, whereas the
Welkin was intended to meet F.4/40 for a high altitude fighter (later
revised as F.7/41), although the high altitude requirement diminished as
the Luftwaffe moved away from high altitude missions.
The Welkin suffered from a rather prolonged development linked to a
combination of changing requirements and developmental problems. It
suffered from a slow roll rate which limited its combat effectiveness
(not surprising given its wing-span), and also experienced
compressibility problems at high altitude associated with its rather
thick aerofoil section and long wings. Westland spent a lot of time
ironing out various troubles; refining the cabin pressurisation and
adapting the Welkin, on paper at least, to meet other requirements such
as a fighter bomber carrying two 2,000 lb bombs.
In the end not a single Welkin would fire its guns in anger, and like
many mid-war projects that languished until the war’s end its design and
concept would be overtaken by new developments. Two prototypes and 75 Mk
1’s were produced (26 without engines), one of which would be converted
to the 2-seat night-fighter version known as the Welkin NF II to meet
F.9/43. This last Welkin is the subject of Czech Master Resin’s (CMR)
kit covered here.
The Czech Master Kit
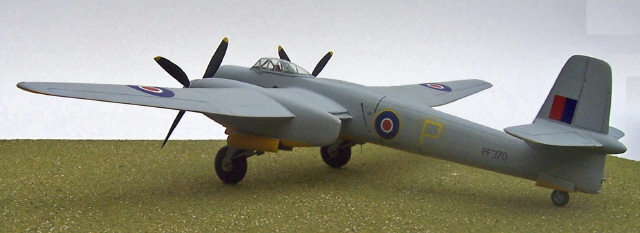
Whatever the merits of the real aircraft, I for one was glad CMR has
produced both versions of the Welkin as I like night fighters, and the
Welkin NF II is quite an imposing looking aircraft given its sleek
lines, long span and imposing undercarriage.
CMR’s Welkin NF II is a very straightforward kit coming in a zip-lock
plastic bag containing the various resin parts in a second bag heat
sealed to form various compartments along with two acetate canopies.
Easily understood instructions with a painting and decaling guide are
provided, and these are accompanied by a very good photographic walk
around which includes cockpit interior shots.
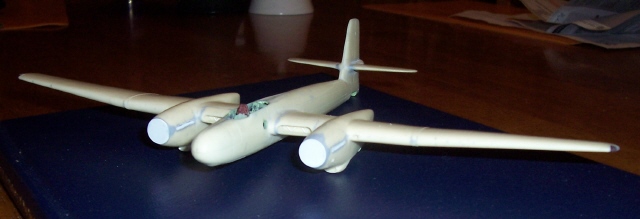
The kit is moulded in CMR’s cream resin with very few pin holes, whilst
the undercarriage legs are moulded in a stronger black resin material.
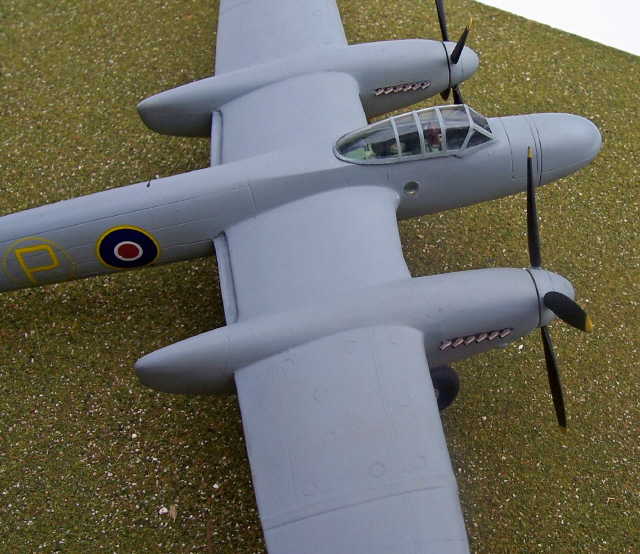
This second type of resin is also used for the exhaust pipes for a
reason I cannot determine. Clear resin parts provide the wing-top lights
and porthole style windows in the fuselage sides adjacent to the radar
operator’s position. The wings are one piece and include the engine
nacelles but with separate radiator inlets, the fuselage is in two
halves including fin and rudder, and the tail-plane is two further
parts. Remaining parts are undercarriage doors, propeller spinners and
blades, tail wheel and a target towing cable fixing that is enclosed at
the very rear of the fuselage. A very nicely detailed cockpit tub, seats
panel and radar/avionics boxes round out the parts package. Decal
options for the prototype markings and later Westland “Hack” aircraft
use are provided.
I examined the parts for any distortions or moulding faults that can
sometimes be found with resin kits due to the method of production and
temperature variations etc. In my case, and unusually for CMR, I did
find a slight out-of round situation with the engine faces where the
spinners were to mount. This was easily overcome by cutting thin
plasticard discs to fix to the nacelle face, followed by a quick dab of
filler to restore the circular profile. I did create one other problem
for myself however…
I had not worked with the stronger black resin used for the
undercarriage and exhausts, so I thought I would get a feel for it by
“playing” with the exhaust stacks. Suffice to say, that having decided
to drill deeper holes in the end of the exhaust I damaged two beyond
repair. This was my fault, not the resin’s. Anyway, I considered scratch
building replacements, but got lazy and grabbed some spare exhausts from
a Hasegawa Lancaster. These were a bit thinner than CMR’s because the
Lancaster’s exhausts are flatter than the Welkin’s which are rounder in
section. As a result I had to line the grooves where the exhausts fit to
make this difference less apparent. I can live with the styrene exhaust,
although strictly speaking they are not quite right.
The cockpit interior went together well, and I was pleasantly surprised
to find how well the clear resin porthole windows worked after just a
little polishing (good to know as I have a CMR Avro York to do which has
numerous clear resin porthole windows!). The fuselage halves were a good
fit after just a little trimming of the cockpit tub, which then left me
with the wings.
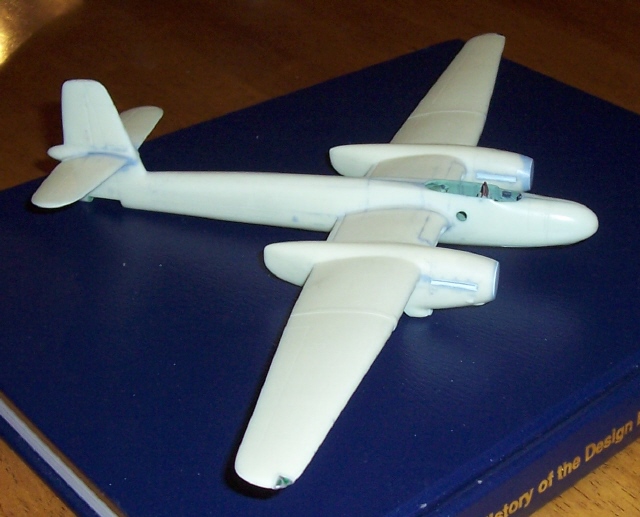
Initially I thought getting the wings to fit and hold might be a
problem. But these were very well moulded, distortion free, and the
instructions clearly show how high the fuselage should be above a level
surface when the engine nacelles are resting on it. I drilled some holes
to take some thick brass rod to reinforce the wing roots, but on
reflection I feel this was un-necessary. Suffice to say that fitting the
long span wings was very easy and presented no problems. Likewise the
tailplane was fine, although I used a bit of filler to blend in the
bullet-shaped fairing.
The Welkin’s undercarriage is a combination of very sturdy main legs
with rather fussy doubled tubular bracing struts running to the rear of
the undercarriage bays in the engine nacelles. The undercarriage itself
has a very characteristic forward-swept stance, which CMR ensures you
achieve by having moulded a substantial block at the base of the main
leg that inserts into a corresponding indentation in the undercarriage
bay. I found that the biggest challenge with the undercarriage was the
patient removal of the unavoidable flash associated with its shape and
the way it must be moulded. The black resin seamed a bit more difficult
to clean up than the cream, but once painted I was pleasantly surprised
with the result. Fitting undercarriage doors and tail were no-fuss
operations, but pay careful attention to the paint demarcation lines on
the doors between the underside yellow and upper surface grey.
The props are handed and I admit to often struggling with resin props. I
was too lazy to prepare a jig to establish pitch and position and did my
props by eye, and as a result I really need to do them again! I do think
that perhaps manufacturers of both resin and styrene kits with separate
prop blades could consider providing a jig like Quickboost do with their
replacement props.
I usually cut my vac-form canopies out towards the end of kit build,
but I learned a good lesson that I will apply to all kits with vac-formed
canopies in future: Cut them out early and check fit before you close
the fuselage halves, and if necessary slim or widen the fuselage for a
good fit (as you cannot do much for fit adjustments with acetate
canopies). When I came to fit the Welkin canopy I found it to be a
little wide. I then recalled having to pare off some cockpit tub resin
to close the fuselage halves, and so concluded I must have over-sanded
the fuselage halves when “dressing” the fuselage edges to be joined on
some wet and dry paper. If I had test fitted the canopy I would have
realised the need for a small plasticard shim to widen the cockpit
opening in compensation for too much sanding.
Painting was simple, and CMR’s decals went on well as usual with no
problems experienced, and no solvent being needed.
Well, all in all, I enjoyed my Welkin NF II build.
I don’t feel I did the kit full justice given my errors with the
exhausts and canopy fit, but even so my Welkin has drawn quite a bit of
approval and attention from friends viewing my model display cabinet.
CMR’s kit definitely captures the presence of the Welkin NF II apparent
in photos, and it stands out when displayed alongside other 1:72 models.
For me and my purposes that is as good a definition of a successful
modelling result as any.
I hope to get around to building the Welkin Mk I at some stage as it
looks quite different with its DH Hornet style single seat canopy, and I
imagine it would be very similar to build as the NF II.
This was my sixth CMR, and seventh resin build. To those who have yet
to build a CMR kit I strongly recommend you do as they are far easier
than might be thought and have always rewarded me with pleasing results.
Click on the thumbnails
below to view larger images:
[../../photogallery/photo00025324/real.htm]
Model, Text and Images Copyright ©
2007 by Mark Davies
Page Created 18 January, 2007
Last Updated 24 December, 2007
Back to HyperScale
Main Page
|
 Home
| What's New |
Features |
Gallery |
Reviews |
Reference |
Forum |
Home
| What's New |
Features |
Gallery |
Reviews |
Reference |
Forum |