|
Tamiya's
1/48 scale
Supermarine Spitfire
Mk.I
by Geoff Abreu
|
 |
|
Supermarine Spitfire Mk.I |

Tamiya's
1/48 scale Spitfire I is available online from
Squadron
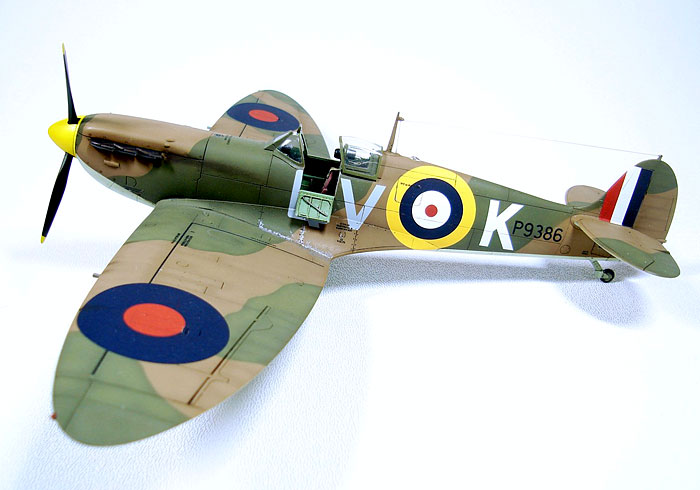
This is my Tamiya 1/48 Spitfire Mk I. It was built in the
markings of QV*K which was one of the airplanes flown by
Squadron Leader Brian Lane of No. 19 Squadron at Fowlemere
during September 1940. It was also reported to have been flown
by Flt. Lt. Walter Lawson.
Between the two of them they were credited with shooting down
2 Bf 110s and 1 He 111 while flying this aircraft during the
month of September 1940.
The aircraft is unique amongst Battle of Britian Spitfires in
that it had a non-standard yellow spinner which was reported to
have been a hold over from the aircrafts brief stint with an OTU
squadron. The aircraft was finally written off in May 1944 while
serving with No. 57 OTU. The aircraft had an amazingly long life
for a Spitfire Mk I.
The 1/48 scale Tamiya Spitfire kit was a joy to build.
I started with the cockpit painting the interior sidewalls, lower
instrument panel and floor with Gunze H-312. The areas between the
internal ribbing on the sidewalls were then sprayed with this color
lightened by a bit of white. Various intruments and wiring were
painted with silver and Gunze H301 Grey. I like using the grey as it
allows me to further highlight dials and switches with a slightly
darker black. The instrument panel was also painted in this manner.
Everything was then sprayed with future and an oil wash using a
mixture of Mig black and brown oils was used. Also at this point
Mike Grant Instrument decals were used for the instrument panel as
the bezels are molded as blank dials with no details. These decals
settled in very well with some Micro Sol and Micro Set. Lastly, the
seat was painted Gunze Red Brown H47, and some Eduard pre painted
seat harnesses were added.
Click on the thumbnails
below to view larger images:
[../../photogallery/photo00022536/real.htm]
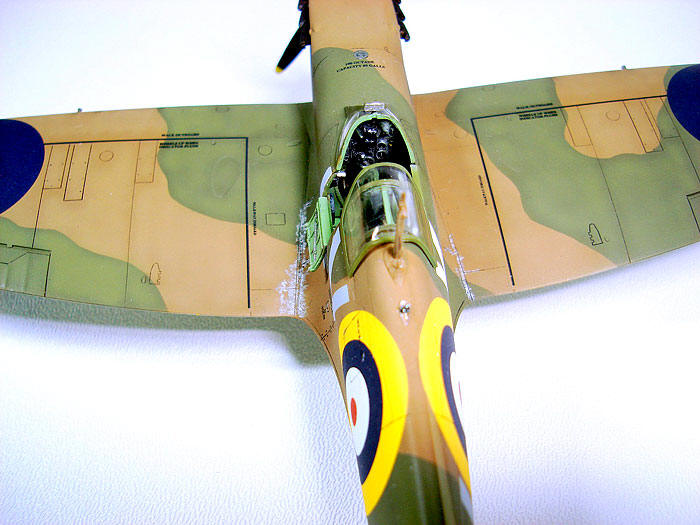
The fuselage halves were joined together and the cockpit assembly
was inserted and later the wings and tail planes were added. Only
the slightest bit of filler was needed at the wing roots, and this
might have been due to my construction rather than the kit. The
lower cowl piece and intakes were added with no problems.
The amount of sanding needed was also minimal which made this
process very enjoyable.
I primered around the seams with Mr. Surfacer 1200
to check for any seams or blemishes at the joins.
I painted the model with Gunze Acryllics Sky H74 on
the lower surfaces. Areas within the panel lines were pained with the
base color lightened with a bit of white the resulting effect being the
panel line areas appearling slightly darker then the centers of the
panels.
The lower surfaces were then masked
with Tamiya Tape and Gunze Dark Earth H72 was then sprayed and the
panels lightened using this same technique.
Click on the thumbnails
below to view larger images:
[../../photogallery/photo00024760/real.htm]
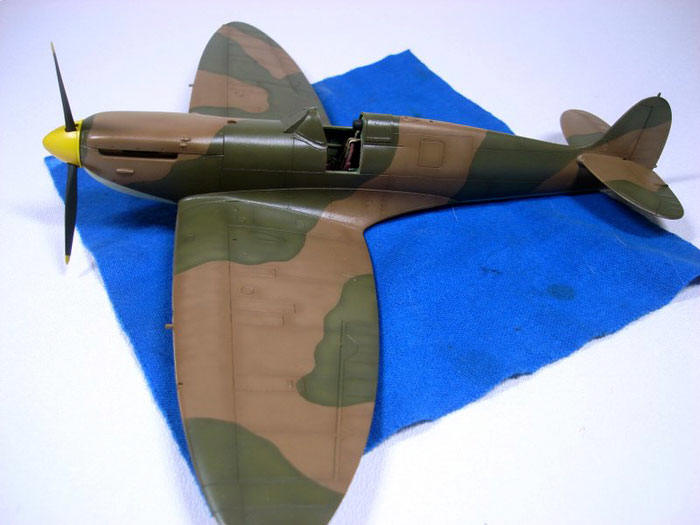
 For
the camouflage pattern which to me looked like a very hard edged pattern
in photos that I had of the aircraft I again used Tamiya tape using the
painting guide that Tamiya supplies with the kit as a guide to cutting
the tape. This was probably the most time consuming and tedious part of
the painting process. I then sprayed the unmasked areas with Gunze H73
Dark Green and lightened this with both a bit of white and a bit of
yellow as well. I used an Aeromaster Battle of Britain sheet for the
decals and they went down generally well with some Micro Sol and Micro
Set. They did need a small bit of coaxing with a scalpel to help them
settle down into some of the panel lines. For
the camouflage pattern which to me looked like a very hard edged pattern
in photos that I had of the aircraft I again used Tamiya tape using the
painting guide that Tamiya supplies with the kit as a guide to cutting
the tape. This was probably the most time consuming and tedious part of
the painting process. I then sprayed the unmasked areas with Gunze H73
Dark Green and lightened this with both a bit of white and a bit of
yellow as well. I used an Aeromaster Battle of Britain sheet for the
decals and they went down generally well with some Micro Sol and Micro
Set. They did need a small bit of coaxing with a scalpel to help them
settle down into some of the panel lines.
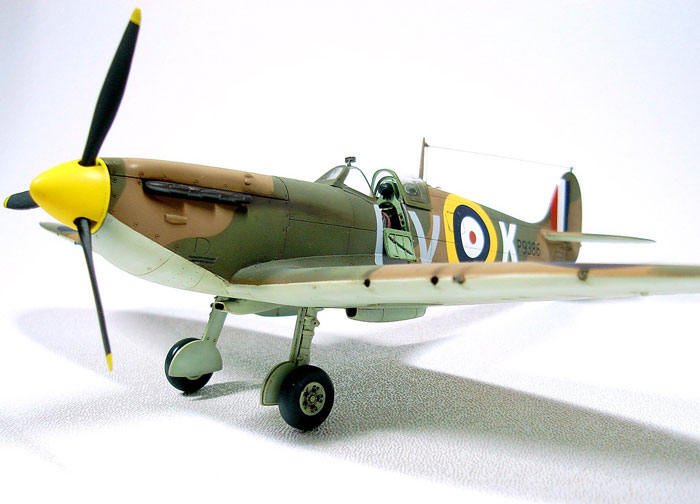
After letting the decals set for a couple of days
the entire model was given a coat of Testor's Dullcote Lacquer.
Weathering in the form of gun staining and exhaust staining was achieved
with pastels applied with a micro brush and paint chipping was done with
a Prismacolor silver pencil. After all of this the undercarriage was
attached and an antenna was made with invisible thread.
Overall this had to be one of the nicest kits I have built to date,
there were really no issues throughout the build making it a very
enjoyable and relaxing build.
The fact that it was a Battle of Britain aircraft which is a thing of
great interest to me, and that the model was being raffled as a prize to
help raise funds for the local Scottish society really made it a
worthwhile project.
Click on the thumbnails
below to view larger images:
[../../photogallery/photo00015919/real.htm]
Model, Images & Text
Copyright © 2007 by Geoff Abreu
Page Created 10 December, 2007
Last Updated
24 December, 2007
Back to
HyperScale Main Page |
 Home
| What's New |
Features |
Gallery |
Reviews |
Reference |
Forum |
Home
| What's New |
Features |
Gallery |
Reviews |
Reference |
Forum |