|
An exercise in the
achievable
“Paddy Bird” in
1/24 scale
by
David Glen
|
 |
|
RAF RE8 |

HyperScale is proudly supported by Squadron.com
There’s one thing I’ve learned about scratch building: It’s not
magic, and more often than not the contemplation of the challenge can be
far worse than its execution. Most kit builders who can handle vac-form
and super-detail their creations are already most of the way there. That
said, a cardinal rule in my book is never attempt to build a model of
anything – not even the broom in the corner of the hangar – without
adequate references. ‘Proper Preparation Prevents **** Poor
Performance’, my old flying instructor used to say.
For a model maker the best possible ‘preparation’ is the real thing,
and that’s why at the turn of the Millenium I chose to attempt an RAF
RE8 in 1/24th scale, simply because there was one undergoing restoration
at the Imperial War Museum at Duxford, just 15 minutes from where I live
in South Cambridgeshire, England. Also, I couldn’t resist the sheer
bulkiness and seriously eccentric lines of this wonderful and venerable
machine.
 |
|
Duxford's
ace restorer, David Upton, with "Paddy Bird" |
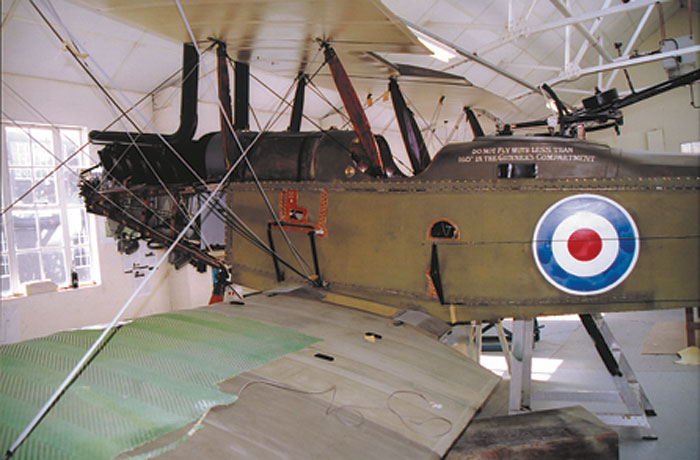
The Duxford restoration of F3566, one of only two surviving RE8s in
existence, was a heaven-sent opportunity. Over several years this almost
unique machine lay in pieces under the Museum’s ace restorer David
Upton, and there’s no better way to photograph an aircraft for model
making than when you can see the inside along with the outside.
The other ‘Godsend’ was Ray Rimel’s indispensable Windsock Datafile
on the RE8, which contains workshop manual sketches and GA drawings on
which you can all but stake your life! You can copy Ray’s drawings to
your intended scale for use in the workshop, but don’t use them for
anything else – he gets cross!
I was weaned on injection-moulded kits, and I’m old enough to remember
Airfix’s two-bob (shillings in proper English) offerings in those little
plastic bags (I used to get more tube glue outside of the joints than
in!). So I got fixed at an early age on the notion that the only way to
build an aeroplane model is by sticking a pair of more or less identical
fuselage halves together.
Much later during my kit-bashing career I graduated to
super-detailing cockpit interiors and then on to vac-form; but at the
end, it still boils down to sticking two fuselage halves together… So
now, wherever I can, that’s how I scratch build.
It’s not hard when aeroplanes are kind enough to be ‘square’, and you
don’t need a vac form machine: Imaging knocking together a three-sided
box made of styrene sheet and adding some nice rectangular styrene
bulkheads (it’s amazing how, with time, the plastic relaxes around these
formers, just like canvass over a wooden frame ¬– very realistic).
Finally, you add the forth side to the box and cut a hole in it where
the pilot sits. Bisect the whole thing lengthwise with a razor saw (and
clean away unwanted material) and you’re left with two fuselage halves.
Back on familiar territory already! The interior detail can then be
installed ‘kit fashion’ and when complete, the fuselage halves reunited.
I built my Bristol Fighter and Fokker EIII that way (but that’s another
story).
For the “Harry Tate” I had to modify the procedure slightly, simply
because of the complication posed by the arching turtle deck. So I built
a three-sided box (the fuselage), then constructed the entire cockpit
interior including the fuselage frame and bracing wires inside another
slightly smaller and open-ended box and dropped the one into the other
Russian doll fashion. In this case the ‘box lid’ comprised a hollowed
out resin moulding (the turtle deck) together with a carved balsa rear
section over which I glued lengths of piano wire to simulate the
stringers. With many repeated filler coats of automotive cellulose
primer you get a very effective scalloped fabric effect.
That is a very brief and slightly blasé description of a long and
painstaking process, but the basic methodology I used was that simple,
and that’s what I’m trying to stress: scratch building is not rocket
science, but it does need patience and a bit of forethought.
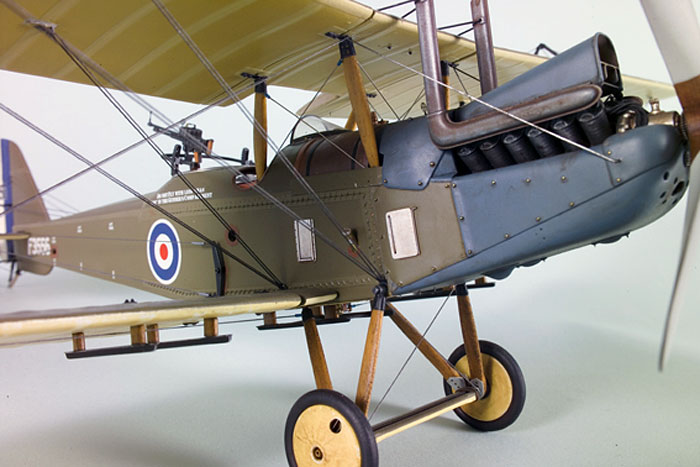
A couple of other tricks I used were: nylon monofilament to replicate
the fabric lacing (works fine but there’s a heck of a lot of holes to
drill); pewter sheet over carved balsa for the tightly compound curved
engine cowlings and a combination of thin walled brass tube, brass sheet
and styrene to mock-up the prominent exhausts. The cowling fasteners
were just brass wire with the ends squashed flat in the vice. The
engine’s cylinders were resin cast from a single master turned on the
lathe. The airscrew was hand carved in two pieces lapped together at
right angles. I used a beautiful (but unknown) species of wood salvaged
from an old trinket box belonging to my grandfather. He had used it for
his lathe tools, but black grime and the odd woodworm notwithstanding,
it carved like a dream, so long as you could avoid the worm-holes!!
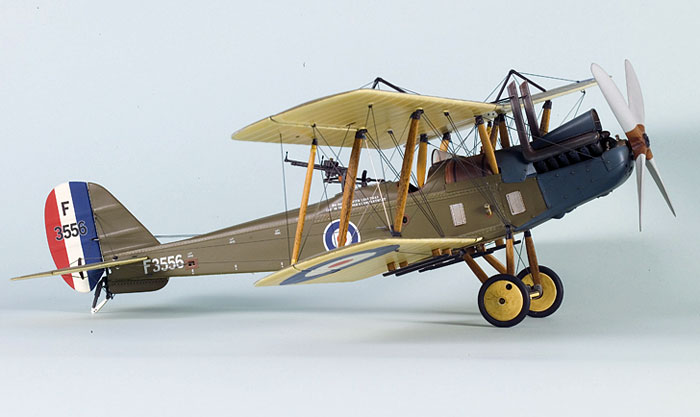
The wheels are lathe turned, and also detailed with fine wire encased
under repeated cellulose spray coats (to represent spokes under
canvass). Rubber O-rings worked a treat for the tyres, but I’ve now
discovered they tend to crack long-term, so I’m back to the drawing
board on that one!
The fin/rudder assembly of WWI aircraft tend to be quite flat and are
easy to create from styrene sheet; the tail-plane needs more work but is
not challenging; the main-planes are another matter…
It is likely I would have embarked on scratch WWI aircraft sooner had it
not been for the wings. The prospect appalled me. But the method I hit
upon seems to work tolerably well, and again it’s not difficult. For a
full description of the technique, you can see the model described in
Scale Aircraft Modelling June and July 2006. Very briefly, I start with
two styrene sheet blanks, each about 1/8th inch thick, which I shape in
hot (almost boiling) water over a carved wood former whose convex
surfaces represents the concave under-camber of the wing. Once that
contour is fixed and the two halves glued together with a pair of
tubular brass ‘spars’ snugly sandwiched in between, it’s then an easy
matter to sand the top profile of the wing to shape. The wing ribs are
catered for using the well-proven scored skin method and rib tapes by
nice thin Tamia masking tape. You only need to skin the top surface of
the wing because the under-camber of most if not all WWI aircraft shows
no discernable scalloping (If you don’t believe me, go look!) The spars
keep the entire wing rigid and their telescoping inners provide the
means to join the wing centre section and main planes together with the
correct dihedral incorporated. There are a few bells and whistles to my
‘way with wings’, but that is basically all there is to it.
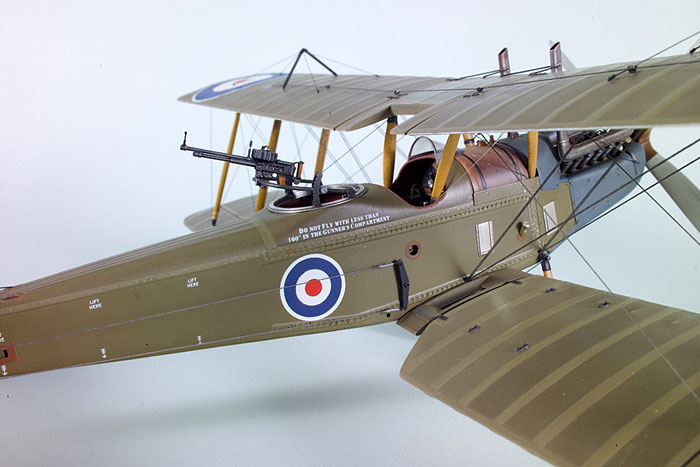
All the inter-plane woodwork was carved in boxwood with lead foil to
represent the ironwork at both ends. Rigging is rewarding and great fun,
but it teaches a hard lesson. If you don’t plan ahead and drill little
holes or create anchor points for flying wires in advance, you’ll never
do it once the assembly goes together. I know that from experience!
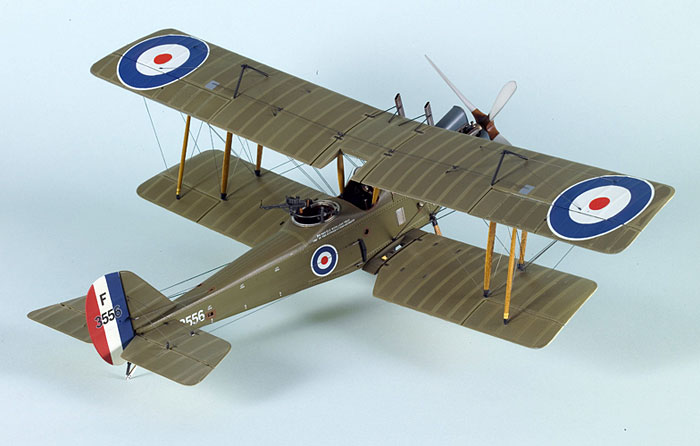
The RE8 like many British Great War aircraft was painted with a
green-brown dope designated PC10. The colour exists in some model
makers’ paint ranges, but I chose to mix my own from Humbrol shades.
Even a brief glance at the real thing at Duxford (which only ever flew
for about 30 minutes) shows that it is now a subtle patchwork of colour
with a distinctly faded look. Something else that’s very apparent is
that the rib tapes show up as a distinctly lighter shade, which involved
a lot of simple but repetitive masking operations top and bottom. The
national insignia (again faded) were made of sprayed Clearfilm and all
other markings from custom dry transfers produced from artwork knocked
upon my Apple Mac.
The machine is finished to represent the curiously-named Duxford
Original, ‘A Paddy Bird from Ceylon’.
On a final note, I’m very suspect of weathering techniques: Weathering
in some form or another is usually required but in my humble opinion far
too often overdone. What I’ve got to say now might make some ‘purists’
cry, but I’ve found that I can get a very convincing weathered fabric
patina (the same goes for metal) by very lightly ‘stressing’ my paint
surface with the very finest grades of steel wool. Similarly a mat paint
coast ‘polished’ with natural skin grease can give a far better effect
than satin or satin varnish. Like all things the trick is to know when
to stop!
A note about ‘Paddy Bird’:
Built by Daimler, F3556 is reported to have been flown only once in
October 1918 by one Lt. Halstead, who put 30-minutes on the airframe
during the test flight. Then it was crated and delivered to France,
conveniently on Armistice Day. The aircraft remained in its crate until
its transfer to the Imperial War Museum, and it went on display at
Crystal Palace during 1920. In 1974, F3556 was moved the 40 or so miles
from the museum’s London headquarters to Duxford for its first
thoroughgoing restoration, which occupied most of the latter half of the
70s, prior to permanent display at the Cambridgeshire airfield.
Following the second restoration completed in 2006, the aircraft is now
on display at Duxford’s recently opened Airspace feature.
Apart from a modified Belgian example preserved in Brussels, ‘Paddy
Bird’ is believed to be the only complete RE8 in existence.
David Glen
Whaddon, Cambridge
Click on the thumbnails
below to view larger images:
[../../photogallery/photo00012202/real.htm]
Model, Images and Text Copyright ©
2007 by David Glen
Page Created 12 February, 2007
Last Updated 24 December, 2007
Back to HyperScale
Main Page
|
 Home
| What's New |
Features |
Gallery |
Reviews |
Reference |
Forum |
Home
| What's New |
Features |
Gallery |
Reviews |
Reference |
Forum |