|
Tamiya's 1/72 scale Razorback
P-47D Thunderbolt
by Jamie Haggo
|
 |
|
Republic P-47D
Thunderbolt "Bubbletop" |

Tamiya's 1/72 scale P-47D Thunderbolt
is available online from
Squadron
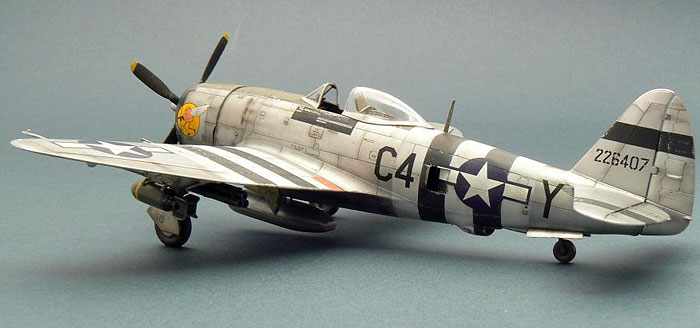
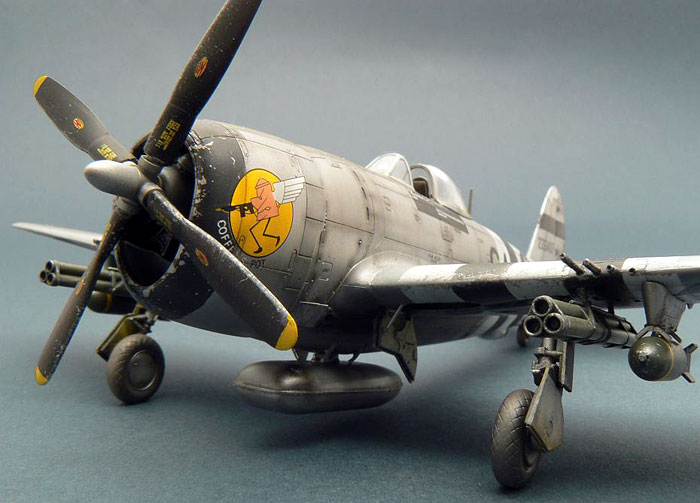
This is the superb Tamiya P-47 in 72nd scale. If ever there was a
shake ‘n’ bake this is it.
I built her straight from the box, to be honest all that needs to be
added is an etched seat harness but I decided to use the kit decals as I
wanted to stick to the OOB rules just to see what I could do with the
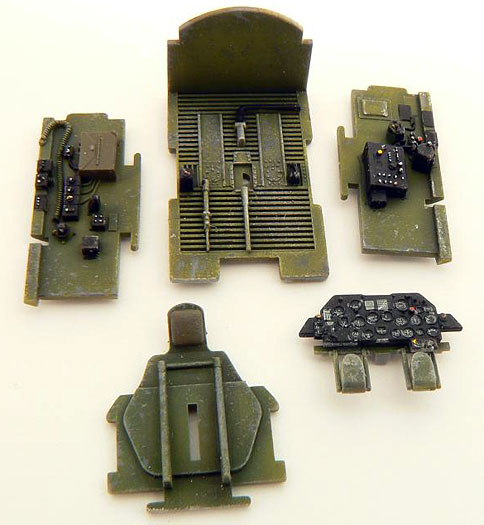
kit. The cockpit is superbly detailed and is the same as the 48th kit.
The cockpit parts were given a pre shade with matt black then a mix of
Gunze lacquer was sprayed on to approximate the green of the original.
Paint chipping was done using a random grey dabbed on with a sponge. The
bits were post shaded with the ubiquitous Red Brown/Black mix and given
a dry brush. The detail bits were picked out with the relevant colours
and the whole ensemble was matted down with Xtracrylics.
Click the
thumbnails below to view larger images:
[../../photogallery/photo00009917/real.htm]
Next up were the wheel wells and gear doors. They were treated the
same way as the cockpit. I feel that the sponge technique worked well,
it’s the first time I used it and will definitely be doing so in the
future.
Now it was time to build. All the bits went together with no fuss, the
rear fuselage decking is separate, something which I am not a fan of but
it was no bother really. I added the relevant bits to the fuselage
halves to make it like a regular kit. I had trouble with the seams; I
kept getting a ghost seam which was a bit disconcerting as I had a NMF
in mind. Superglue, Mr Surfacer and Tippex were used in the end. I have
heard that using liquid cement can cause the seams to shrink, hence the
gap appearing, next time I might use superglue from the off.
Now for the best bit. I had picked up some Alclad shades and primer
from Robin Carpenter (Cammett) at Telford and was keen to give it a go.
The primer spayed beautifully and when dry it was knocked back with
Master Caster’s excellent sanding sticks, in this case the grey half
moon miracle shiner. After that the first layers of Alclad Aluminium
were misted on, after each coat the surface was buffed with the Master
Casters buffer. I felt the Aluminium shade was a tad grainy, but some
panels were masked off for Polished Aluminium and Duralumin panels. When
done the whole surface got a good polish with the polishing sticks, this
smoothes out the surface and all those bits of dried paint which hit the
surface are buffed away.
The Maskol came out to mask the paint chips next and so did the Tamiya
tape for the stripes and anti glare panel. These were sprayed on using
Gunze acrylics and were shaded during application to add to the
weathering look. When the tape was removed and the Maskol rubbed of a
plain but nice looking model was revealed. The model then had a few
coats of future, again smoothed out with the sanding sticks.
Next up were the excellent decals from Sky Models, the only concession
to the after market. They went on superbly with MicroSol and Set. I had
to use the kit under wing markings as they are not included with the Sky
Models sheet, I was a bit worried using these as they are on the thick
side but I was very impressed how they reacted to the setting solutions.
There were quite a few wrinkles and bubbles but they were easily dealt
with a scalpel and more MicrolSol. When dry all the decals were lightly
sanded with the grey half moon sanding stick to kill the shine and
reduce their thickness.
To get a weathered natural metal finish Xtracrylics matt was sprayed on
and knocked back with the buffing sanding sticks (an awesome product as
you can tell). Natural metal aeroplanes weather just like painted
aircraft in that the shiny aluminium oxidises to a dull finish. More
weathering came next as I chipped the paint on the cowl ring and OD bits
with a scalpel and then post shaded the whole model with the black/red
brown mix.
With the airframe complete the other bits were tacked, the engine was
painted up and glued to the fuselage quickly followed by the cowling.
The undercarriage had been painted on the sprue and this was stuck
together and added. The weapons were built, painted, weathered and
shaded and added, this was tricky as I had forgotten to open up the
holes in the wing, oops. With the last few dangly bits stuck on she was
finished.
What a lovely kit. It just fell together and is Tamiya at it’s best,
it was quite cheap too as I got it from HLJ and it worked out at about
£9 including P&P, bargain. I think the painting took at least twice as
long as the building, for me this is ideal as that is my favourite bit!
Click the
thumbnails below to view larger images:
[../../photogallery/photo00025933/real.htm]
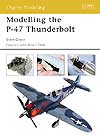
Modelling the P-47
Thunderbolt
Osprey Modelling 11 |
|
|
|
|
Author: Brett Green
US Price: $17.95
UK Price: £12.99
Publisher:
Osprey Publishing
Publish Date:
July 25, 2004
Details: 80 pages; ISBN: 1841767956 |
|
|
Model, Images and Text Copyright © 2007
by Jamie Haggo
Page Created 02 February, 2007
Last Updated
24 December, 2007
Back to
HyperScale Main Page |
 Home
| What's New |
Features |
Gallery |
Reviews |
Reference |
Forum |
Home
| What's New |
Features |
Gallery |
Reviews |
Reference |
Forum |